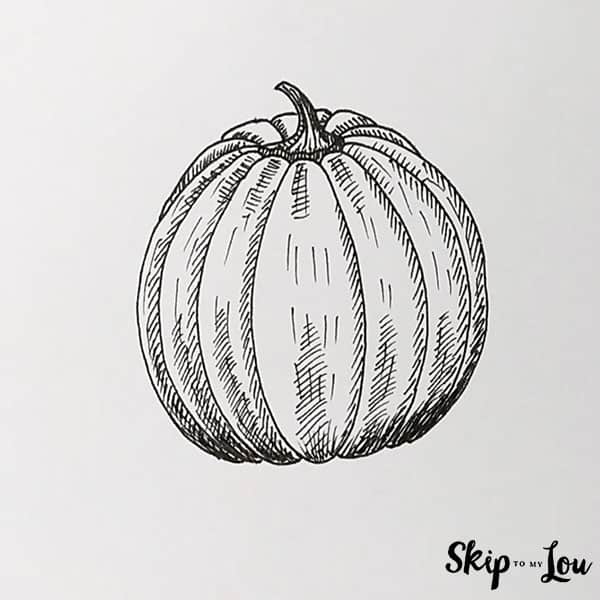
Learn how to draw a pumpkin with this cool stem and lots of details. Drawing a realistic pumpkin like this is really easy with our step by step tutorial.
Skip to My Lou has lots of pumpkin-themed activities like Pumpkin Coloring Pages, and pumpkin crafts, and even Thanksgiving jokes for the whole family!
Supplies For Drawing a Pumpkin
Here are a few art supplies to keep on hand for drawing.
- Sketching Pencils
- Kneaded Rubber Eraser
- Sketch Pad
- Erasable Colored Pencils
- Fine markers
- Sketch and Drawing Art Pencil Set
- Artist drawing set (This is great for new and experienced artists. It’s also something I give as a gift.)
How to Draw a Pumpkin Step-by-Step Tutorial
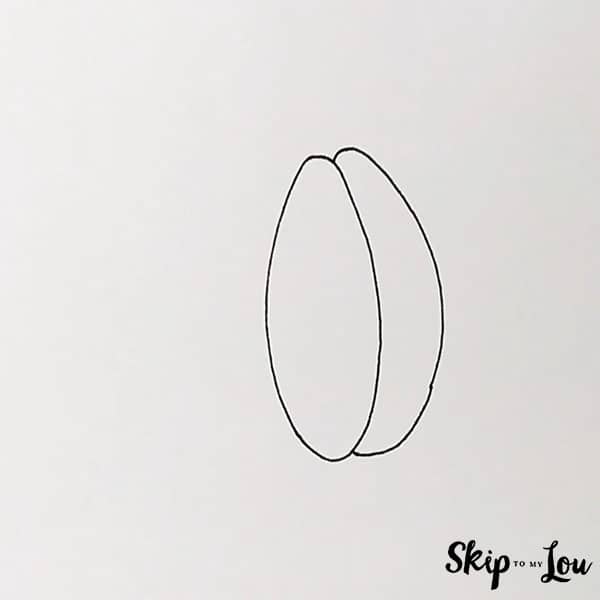
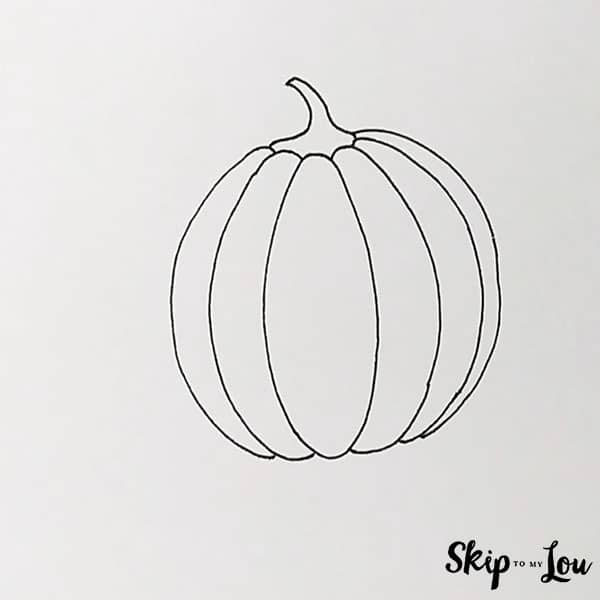
- First find the center of the paper. This is where the first segment goes. With your pencil, draw a long oval that is narrower at the top than the bottom.

- With your pencil at the top on the right side of the segment, draw a long oval out, down, and curving back into the first segment. This segment is tucked behind the first oval segment. These segments create the pumpkin ridges.
- Repeat with a long oval on the left side now. You have completed the front 3 segments.
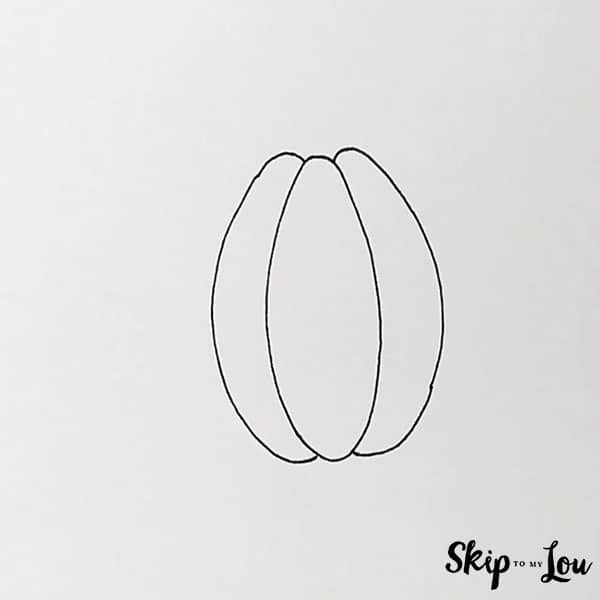
- Add a thinner oval to the right side. This segment is still curved, but it is tucked behind the other, so it appears smaller.
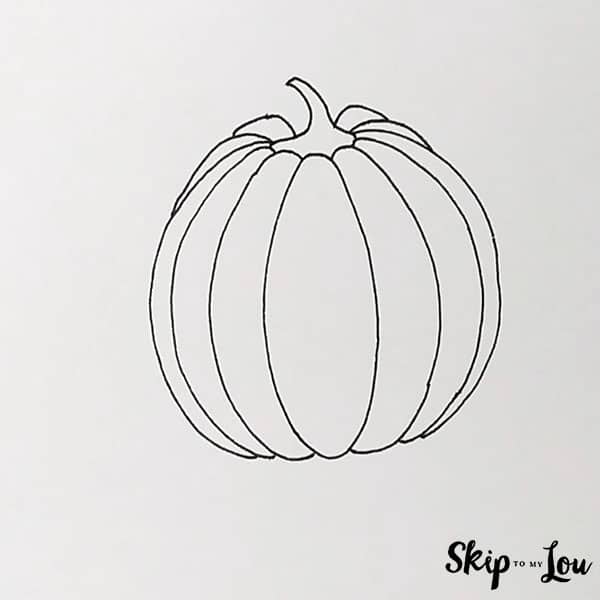
- This step has 3 parts: first, add a thinner oval to the left side to match the right side, second add a skinny oval to the right side and third, add a Hershey’s Kiss shaped stem to the top of your pumpkin.
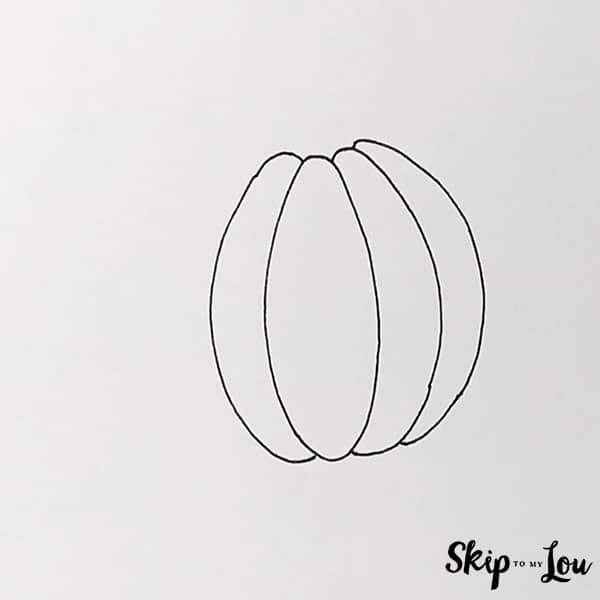
- Sixth, add a skinny oval to the left side.
- Draw four short curving lines from the stem down the back of the pumpkin.
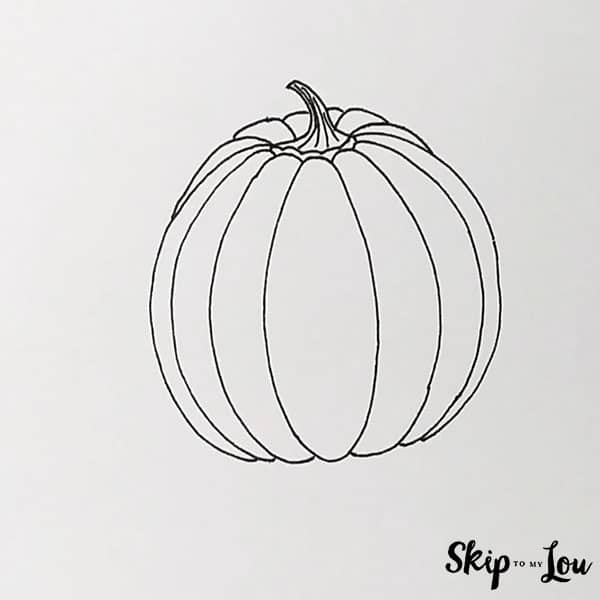
- Add the final 2 lines that make the back of the pumpkin and add curved lines on the stem to show texture. Where the stem connects to the pumpkin, use curved lines to draw the edge of the stem.
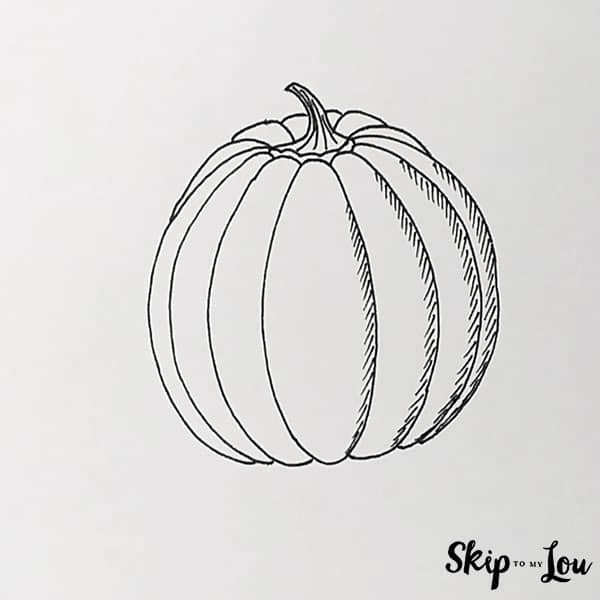
- Draw short angled downward strokes on the 4 right hand segments.
- Finally, the center segment gets 5 bursts of downward strokes for texture. The remaining segments get short angled strokes. Notice how the segments on the back get texture lines at the top. Then add long texture lines curving up from the bottom of the pumpkin to make it look round. Grab your markers if you want to give your pumpkin orange color.


There is so much more you could do with your pumpkin sketch. How about adding leaves and vines?
Easy Pumpkin Step By Step Drawing Video
For More Fun and Easy Drawing Projects and crafts
I would love to keep you fully stocked with creative ideas, yummy recipes, fun crafts, and loads of free printables. Subscribe to Skip to my Lou to get new ideas delivered to your inbox. Follow me on Facebook, Pinterest, Twitter, and Instagram for all my latest updates.