Moon drawing is an easy step by step drawing tutorial with simple steps so you will end up with this fun moon and stars drawing! With a few supplies and 15 minutes, you will have your own night sky drawing!
I love to draw and have curated these things to draw on Skip to my Lou! If you enjoy drawing circle shaped things, try Orange Drawing.
Moon Drawing Easy Supplies
Gather a few supplies you probably already have and you’re good to get started on this simple moon drawing.
- paper
- pencil
- eraser
- a circle shape to trace like a large can or lid from a can of nuts
- small star shapes to trace, if needed
- colored pencils or fine tipped markers
- ruler
Learn How to Draw a Moon Easy!
The instructions and illustrated images will show you how to draw this moon and stars picture from start to finish. All you need to do is follow the easy steps.
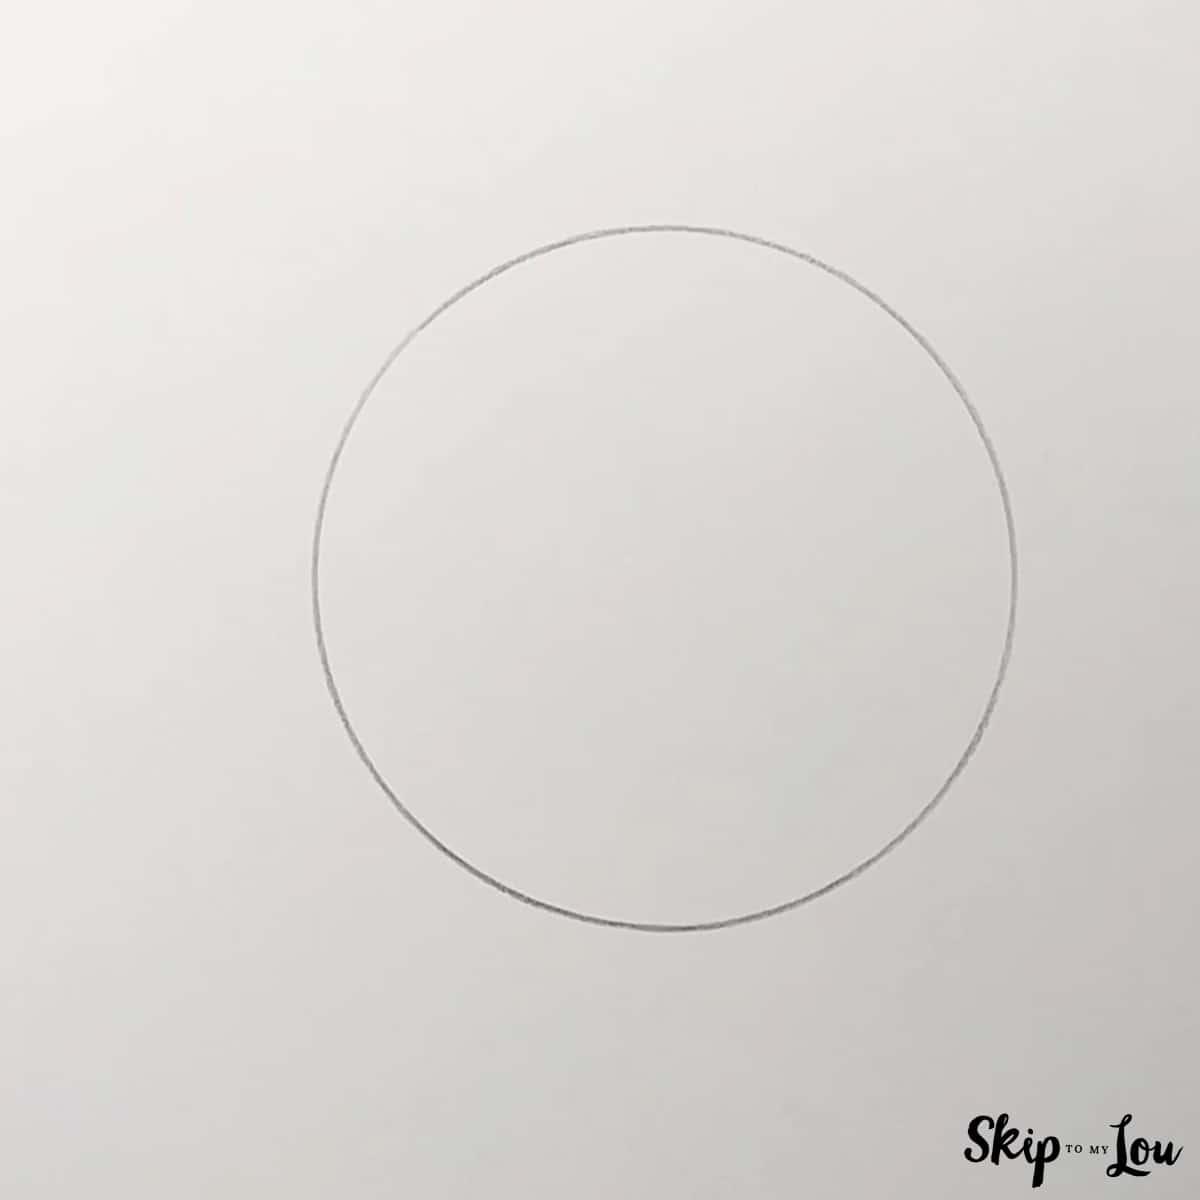
- Start drawing by lightly tracing a large circle on your paper. Notice how there is more blank space on the left side of the paper than the right side.

- In this step you will change the moon shape from a full moon to a waning crescent moon. Move your circle to the right and let the edges rest on the moon you drew until you see the crescent moon shape. Lightly trace around the circle to create a crescent moon.
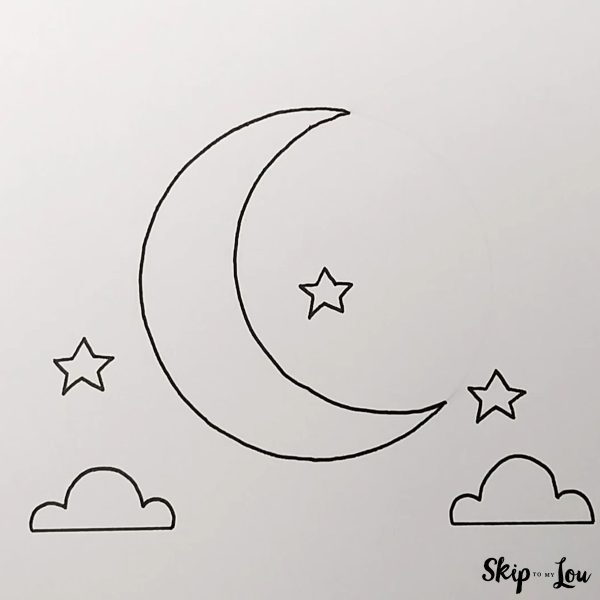
- Erase the areas of the moon you don’t need for this picture and trace over the crescent moon with a fine tipped marker.
- In this step you will add 3 stars. If you have a star shape to trace, use that to draw one star on the lower left side of the moon and the other two stars on the right side of the moon. If you do not have a star shape to trace, Draw 5 point stars by drawing a small triangle, turning the paper and drawing another small triangle and continuing around with three more small triangles that touch. Erase the base of each triangle to reveal a 5 point star.
- In this final step, you will draw irregular shapes to make 2 clouds at the bottom of the moon. These clouds have a straight line at the bottom and the tops are formed by making 3 curved lines in the short, tall, short pattern. (If you want to make this moon and stars picture kind of spooky, you could draw the clouds in front of the moon! Be sure to erase any background lines so the clouds appear in front.)


my favorite drawing supplies
- Sketching Pencils
- Kneaded Rubber Eraser
- Sketch Pad
- Erasable Colored Pencils
- Fine markers
- Sketch and Drawing Art Pencil Set
- Artist drawing set (This is great for new and experienced artists. It’s also something I give as a gift.)
Stars Around the Moon Drawing Video
More Crafts and Activities
Now that you have completed this easy drawing tutorial of the moon and stars, try one of these crafts. They are easy to make and fun to do.
- Moon crafts– The most fun DIY Moon Sand to make at home!
- Craft Sticks Bracelets by Over the Big Moon
- 3D Paper Owl from mmmcrafts
- Crafts and Activities
- Paper Plate Magnet Maze
- Crown Drawing
- Witch Drawing
I would love to keep you fully stocked with creative ideas, yummy recipes, fun crafts, and loads of free printables. Subscribe to Skip to my Lou to get new ideas delivered to your inbox. Follow me on Facebook, Pinterest, Twitter, and Instagram for all my latest updates.


thanks