Here is my quick and easy step by step orange drawing tutorial that will get you craving nature’s perfect source of vitamin C! In the time it takes to peel a real orange or three, you will be able to draw an orange, let’s do this!
At Skip to My Lou, I want to provide you with lots of things to draw with easy drawing lessons and guidlines. Let me know in the comments what else you would like to learn to draw!

Orange drawIng Supplies
Just a few supplies you probably already have and you’re good to get started on this easy, quick orange drawing.
- paper
- pencil
- eraser
- black pen
- circle to trace- jar lid, top of mug or cup
- markers
- ruler
How to Draw an Orange Easy!
The instructions and illustrated images will show you how to draw an orange drawing step by step from start to finish. All you need to do is follow the easy steps.
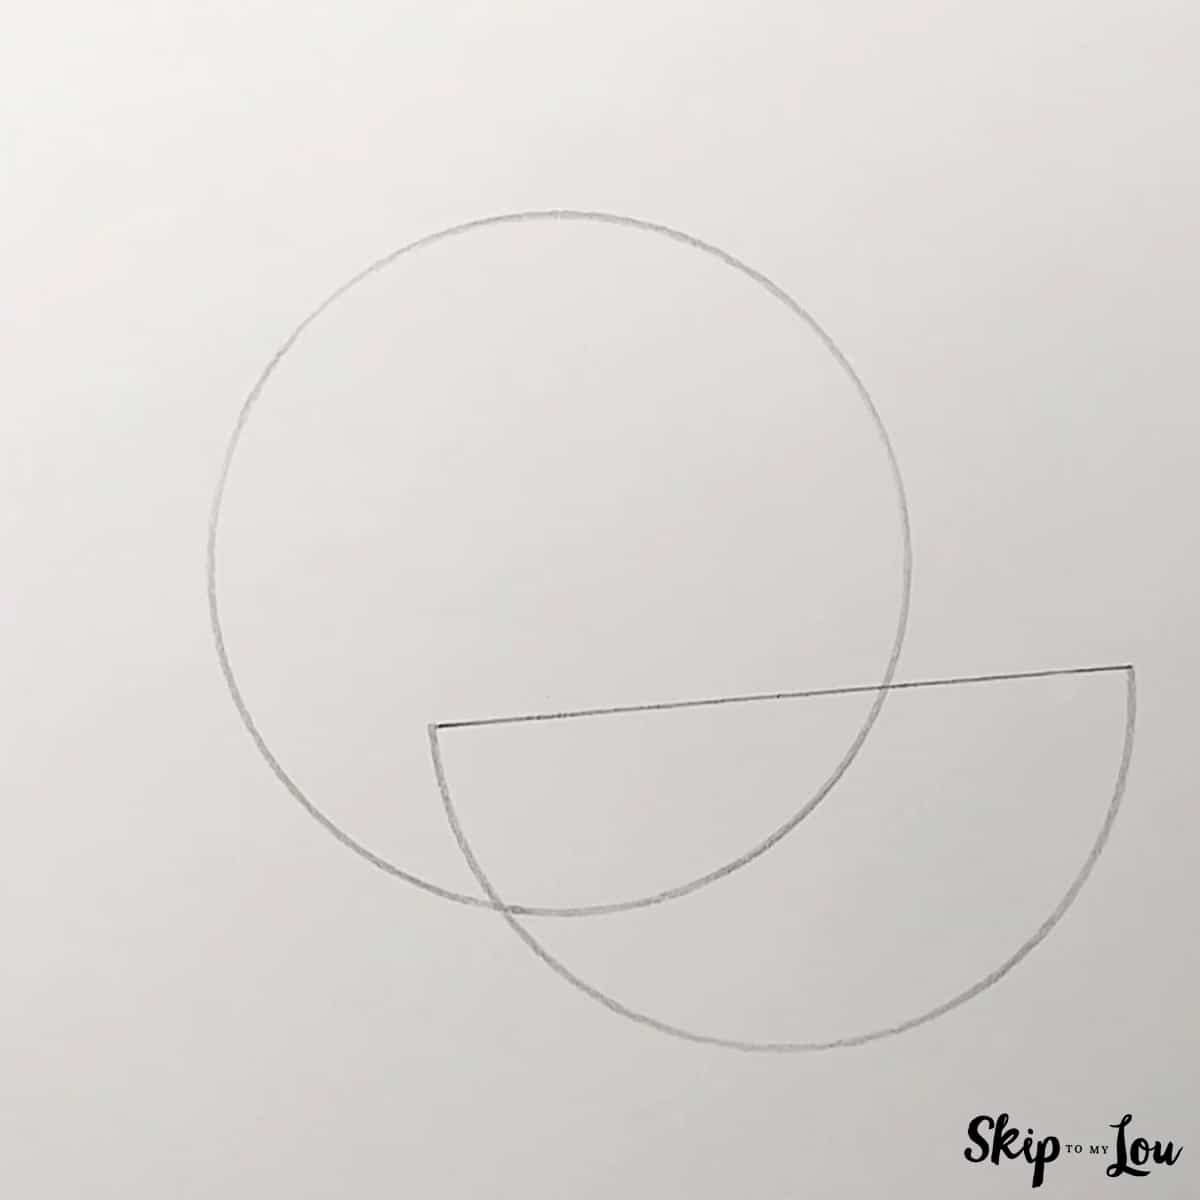
- In the center of your paper, place the object you are using to trace your circle e. Use your pencil and trace around carefully to make the outline of the orange. Move the object down and slightly to the right and this time trace around only the bottom half of the circle. Use your ruler to draw a straight line to connect the sides of the half circle.

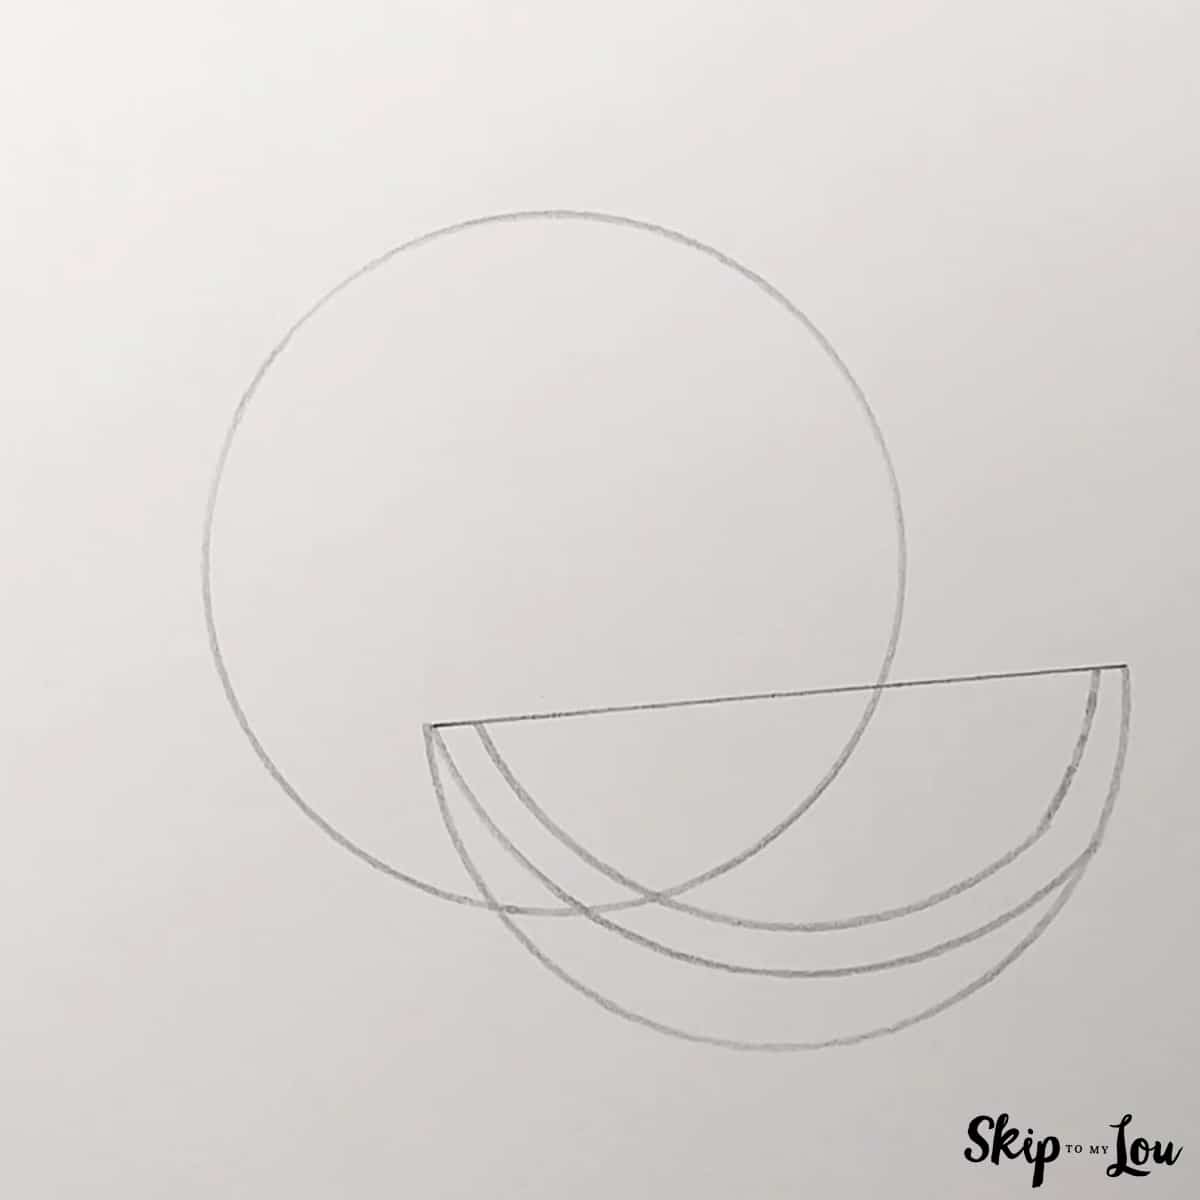
- Using the object you traced with, move in a little bit from the left side of the orange and move the object up so you are tracing a shallower section of the circle. Stop tracing when you reach the right side line. For the last curved line, scoot in and draw a parallel line that connects with the top of the orange segment. See illustration below.
- First, erase all the lines in the background. See illustration below. The only lines showing will be the orange segment and part of the whole orange not covered up by the segment. Now you are ready to find the middle of the top line of the orange segment with your ruler and draw a dot there. Use your ruler to draw 4 straight lines, equally spaced, from the dot to the first curved line.
- First you will erase the dot and a little of the lines Connect the individual orange segments with curving lines and erase any extra lines.
- Add a stem and leaf in this step to create the orange leaf. The stem tilts up from the top of the orange at an angle. See the illustration below. The leaf rests on the orange and covers up some of the orange. Erase the line covered up by the leaf.
- Take out your black pen and draw over your lines.
- .Color your entire orange with markers or crayons to give color. You can add dots to create texture! Now you have a complete orange drawing made by you. . I hope you love my ways drawing guides.


my favorite drawing supplies
- Sketching Pencils
- Kneaded Rubber Eraser
- Sketch Pad
- Erasable Colored Pencils
- Fine markers
- Sketch and Drawing Art Pencil Set
- Artist drawing set (This is great for new and experienced artists. It’s also something I give as a gift.)
Easy Orange Drawing Video
More Fun Crafts and Activities
Now that you have learned to draw a yummy orange try one of these. They are easy to make and fun to do for kids and adults.
I would love to keep you fully stocked with creative ideas, yummy recipes, fun crafts, and loads of free printables. Subscribe to Skip to my Lou to get new ideas delivered to your inbox. Follow me on Facebook, Pinterest, Twitter, and Instagram for all my latest updates.


