My Elephant Drawing step-by-step tutorial will have you drawing the world’s largest land animal in about 15 minutes. These magnificent gentle giants can teach us so much about loving and protecting our friends and family.
I love to draw animals and create coloring pages, too! So please check out my other drawing tutorials like things to draw on Skip to my Lou!

How to Draw an Elephant Dasy Drawing Supplies
You probably already have these supplies, so you are ready to start on this simple elephant drawing.
- Paper
- Pencil
- Eraser
- Colored pens and pencils (grey, black, and white)
How to Draw an Elephant Step By Step
The instructions and illustrated images will show you how to draw this elephant from start to finish. All you need to do is follow the simple steps.
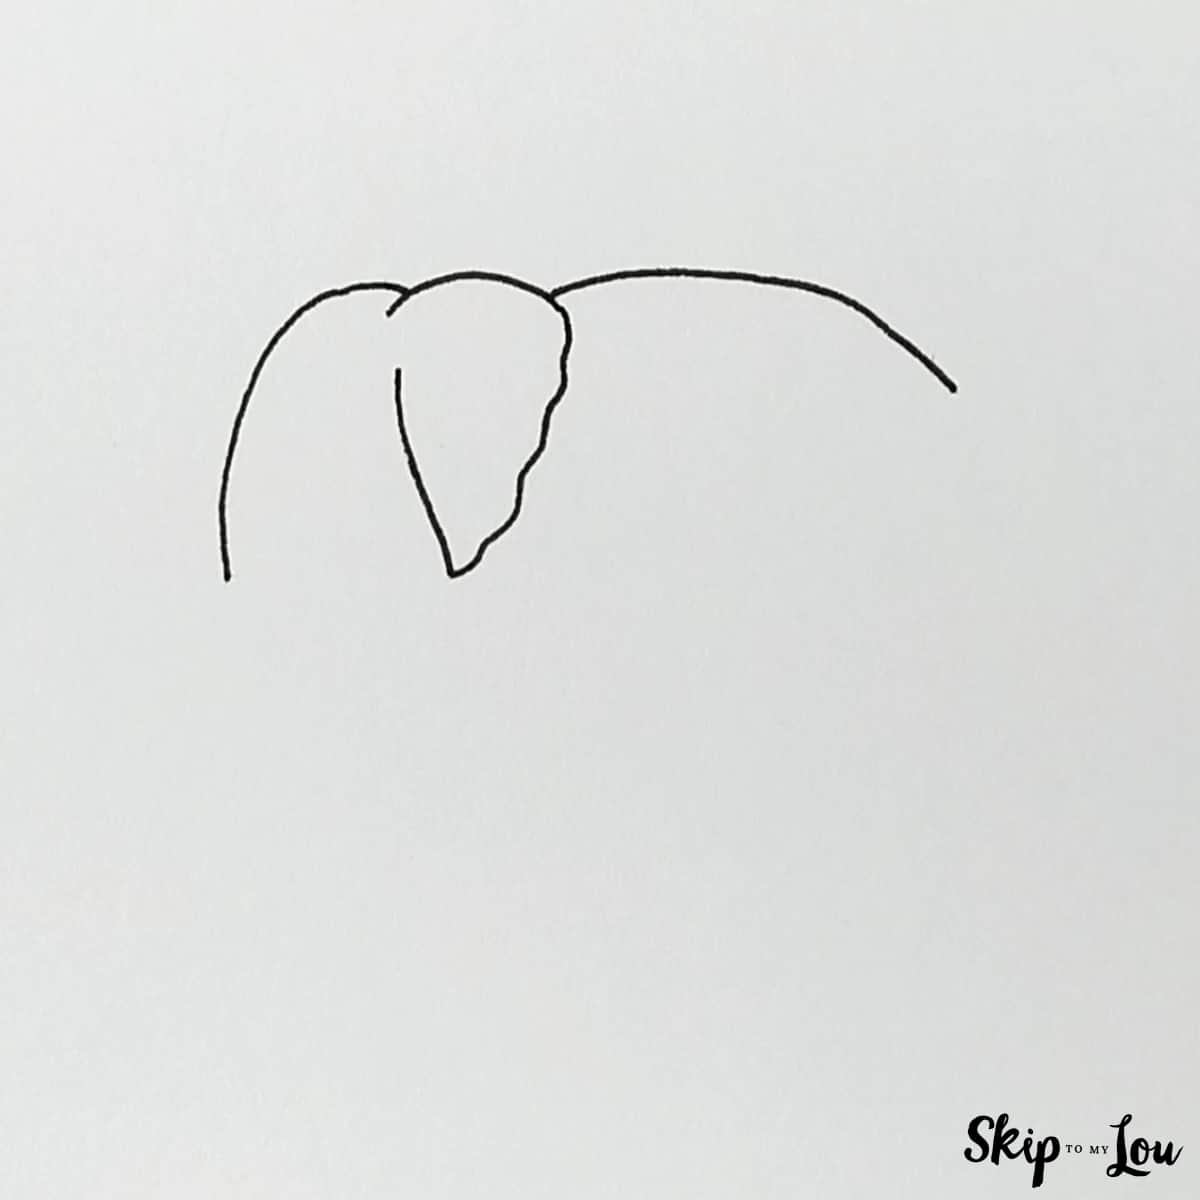
- Use curved lines to draw the forehead, ear, and back. Start by drawing a curved line sloping down and to the left for the forehead of the elephant head. Next, add an ear by drawing a rounded triangle shape with one wavy side. Add a long curving line behind the ear for the top of the back to start the shape of the elephant.

- Finish drawing the head, trunk, and tusks, and add details on the big ears. First, draw a line down several inches with a gentle curve to form the front of the trunk. (Notice in the picture that the length of the trunk is the same as the length of the legs.) Draw the opening of the elephant’s trunk and then continue the line upwards following the curves to form the back of the truck. Draw a lip and jaw that extends to the ear. Add the tusks emerging from the face and erase the trunk sketch lines so the tusks appear to be in front. Add a small oval-shaped eye with an eyebrow line on top. Add detail lines at the top of the ear and on the sides of the ear.
- Add the front legs by dropping lines down from under the ears to the same length as the trunk. Notice how the legs indent slightly at the elephant’s knee and also at the elephant’s ankle. Before leaving this step, draw a short detail line at the top of the leg.
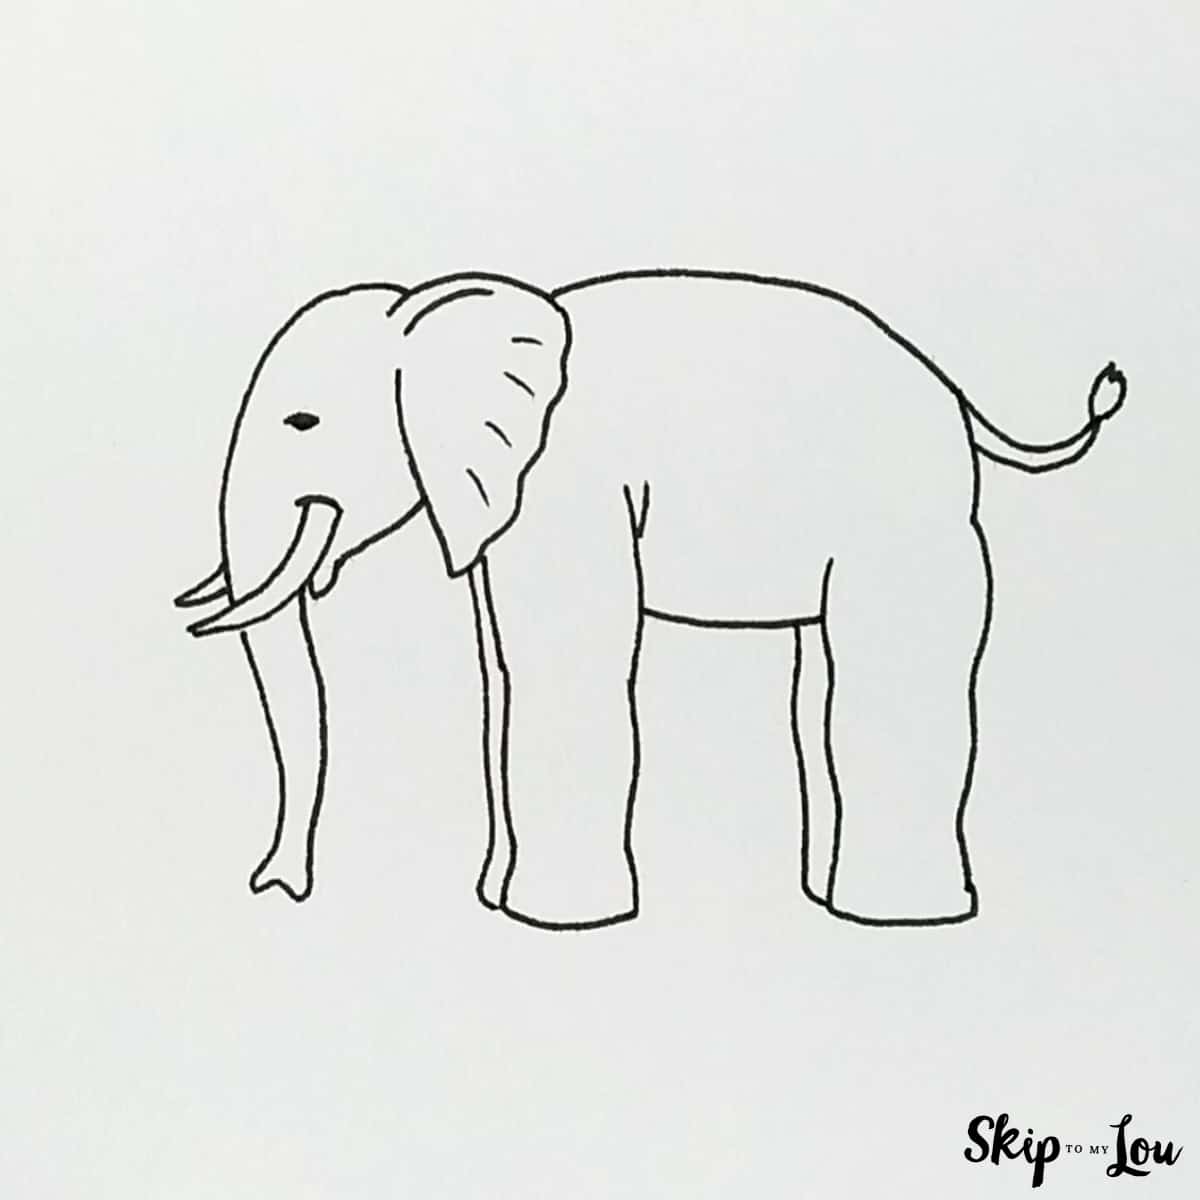
- Now it is time to add the rest of the elephant’s body, back legs, and tail. Start by drawing a large set of back legs. These legs curve in at the knees and ankles like the front legs. Draw a line between the legs for the bottom of the belly. Add a tail with a tuft of hair at the end.
- In step 5, add the detail lines to the trunk, knees, feet, and belly to make the elephant look more realistic. Add at least 9 short lines (wrinkles) along the trunk, 4 toes to each set of legs, and detail lines on the legs and belly as shown in the illustration.
- Use colored pencils or markers to add grey and white to the elephant. Start with an outline of the elephant with a black marker. Then color the tusks and toes white and everything else is grey. You can instead use pencils to shade and color the elephant if you prefer.


Easy Elephant Drawing Video
This elephant sketch is an easy project for kids and adults. Just watch the video for more help if needed.
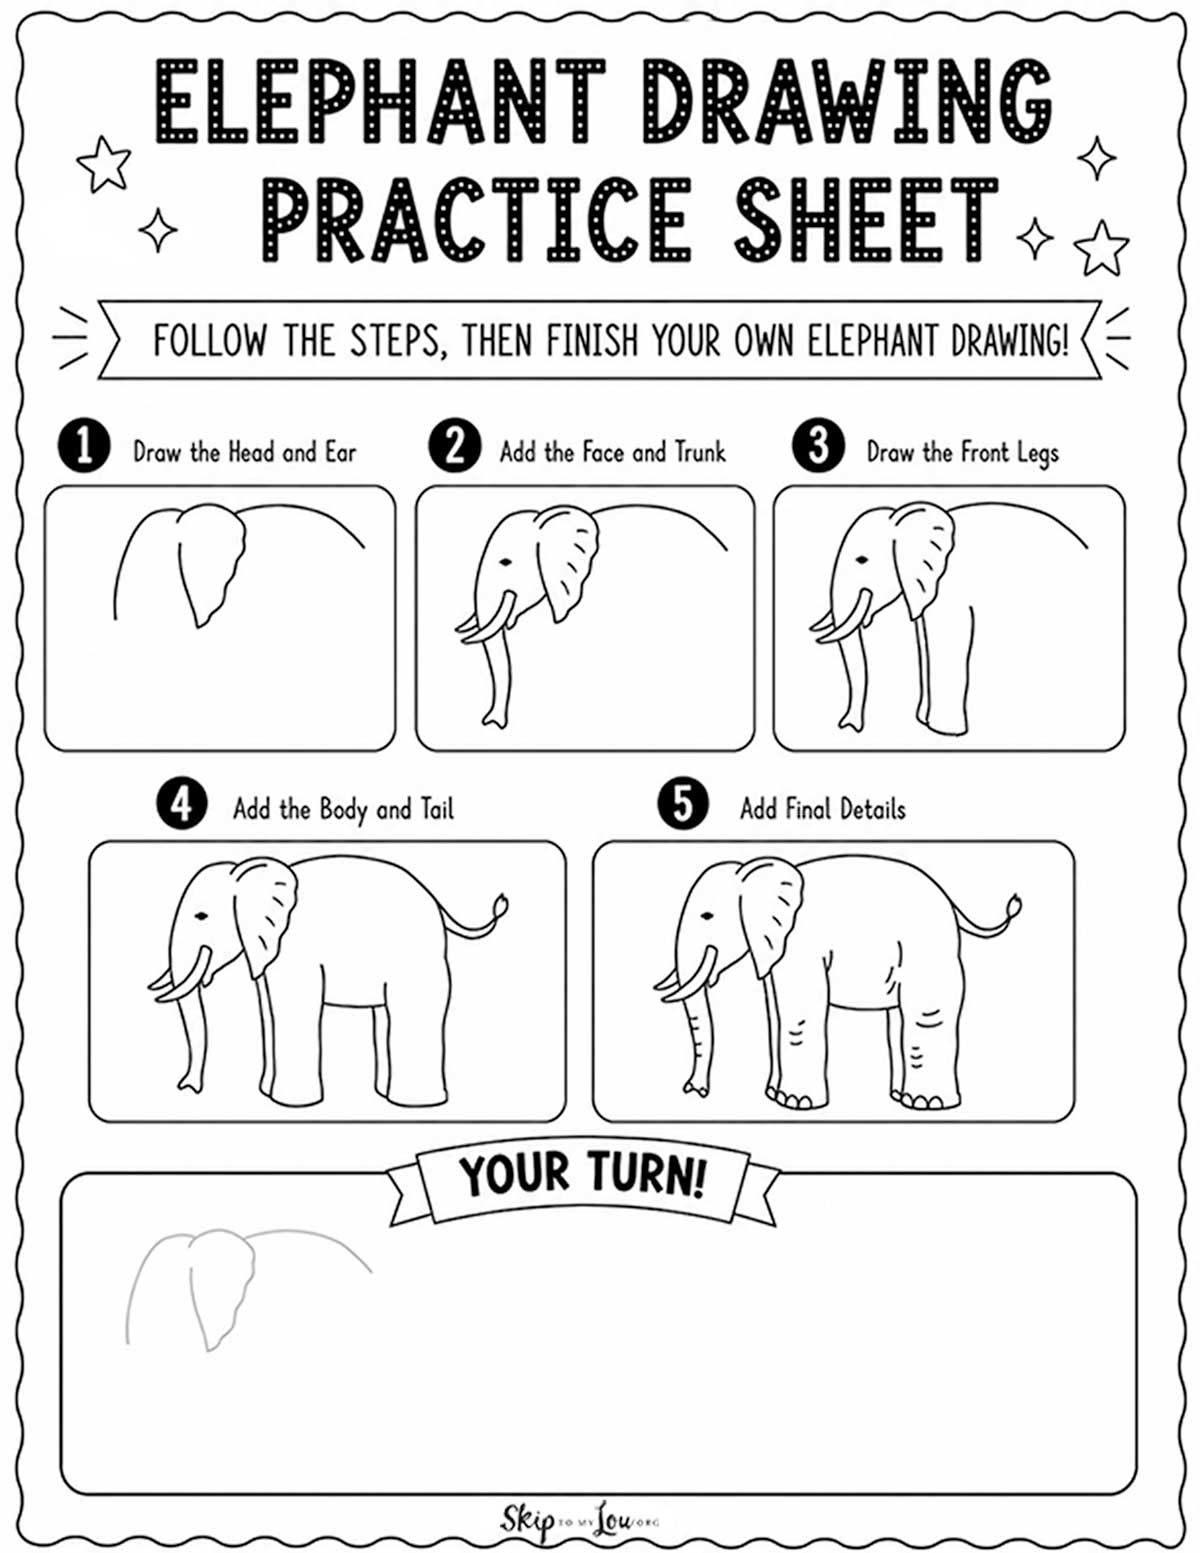
Elephant Drawing Practice Sheet
Use this free elephant drawing practice sheet to help kids learn how to draw an elephant one step at a time. The printable shows each part of the elephant in order, starting with the head and ear, then adding the face, trunk, legs, body, tail, and final details. Kids can follow the steps and then try their own elephant drawing in the large practice space.
My Favorite Drawing Supplies
- Sketching Pencils
- Kneaded Rubber Eraser
- Sketch Pad
- Erasable Colored Pencils
- Fine markers
- Sketch and Drawing Art Pencil Set
- Artist drawing set (This is great for new and experienced artists. It’s also something I give as a gift.)
More Crafts and Activities from Skip to My Lou
Now that you have learned to draw an elephant try one of these crafts. They are easy to make and fun to do.
I would love to keep you fully stocked with creative ideas, yummy recipes, fun crafts, and loads of free printables. Subscribe to Skip to my Lou to get new ideas delivered to your inbox. Follow me on Facebook, Pinterest, Twitter, and Instagram for all my latest updates.


It is easy to Draw
I like simple drawings