My Shoe Drawing tutorial will have you drawing a sneaker in 30 minutes! Find your pencil and paper and this step by step drawing lesson: On your mark? Get Set. Go!
Don’t miss all the fun things to draw on Skip to my Lou! Is coloring a passion of yours, as well? If so, check out these coloring pages: Beautiful Butterfly Coloring Pages.

Shoe drawIng Supplies
Round up these supplies and get ready to draw!
- paper
- pencil
- eraser
- colored pens and pencils
- ruler
How to Draw a Shoe
The instructions and illustrated images will show you how to draw a shoe from start to finish. All you need to do is follow the easy steps.
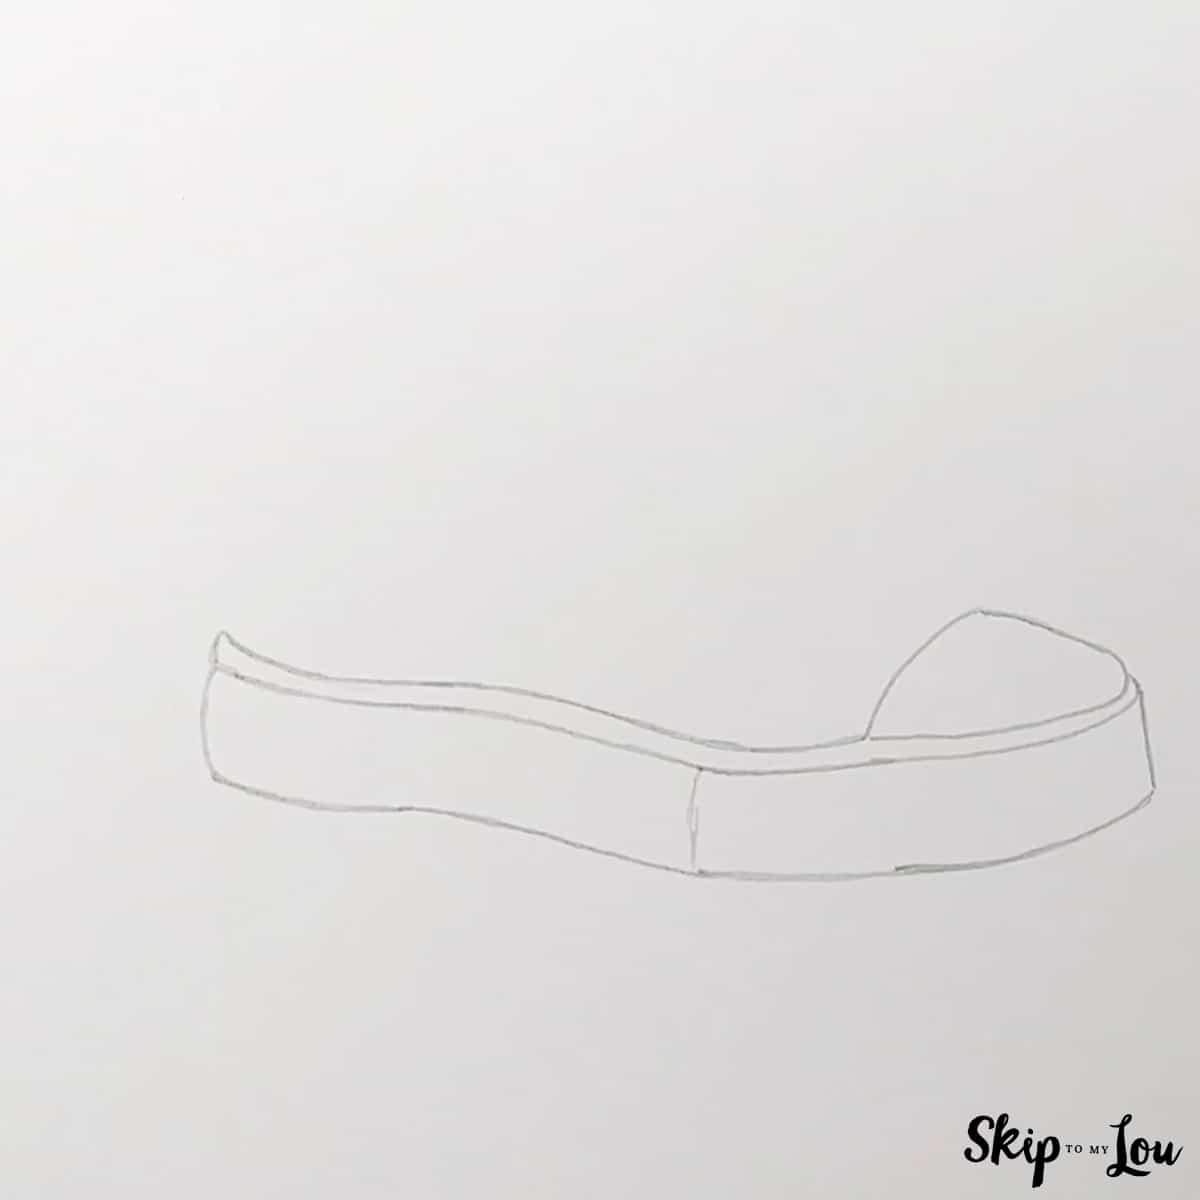
- In this step you will draw the bottom part of the shoe and the front of the shoe. Start from the left and draw a slightly curving line that goes down and curves back up. Add a parallel curving line about an inch above the line you just drew and then add another parallel line above that one. See illustration below. Use a vertical line to connect the lines at the toe of the shoe. Draw another vertical line almost halfway down the shoe and draw curved lines to connect the lines at the back of the shoe. To form the top of the toe section, draw a rounded triangle. See illustration below.

- In step 2 draw the left side of the shoe by drawing a line up from the back of the shoe at least twice as tall as the sole of the shoe. See illustration below. Draw a curving line that dips down and back up before slanting down toward the toe. See illustration below. Draw a line parallel to the line you just drew. See illustration below.
- In this step you will start adding stitching details. Starting with the top edges of the shoe, sketch 2 more sets of parallel lines around the existing lines to represent stitching. At the back of the shoe, add a rectangular line to represent a heel detail. Add a set of parallel lines from the side of the shoe to the top. See illustration below.
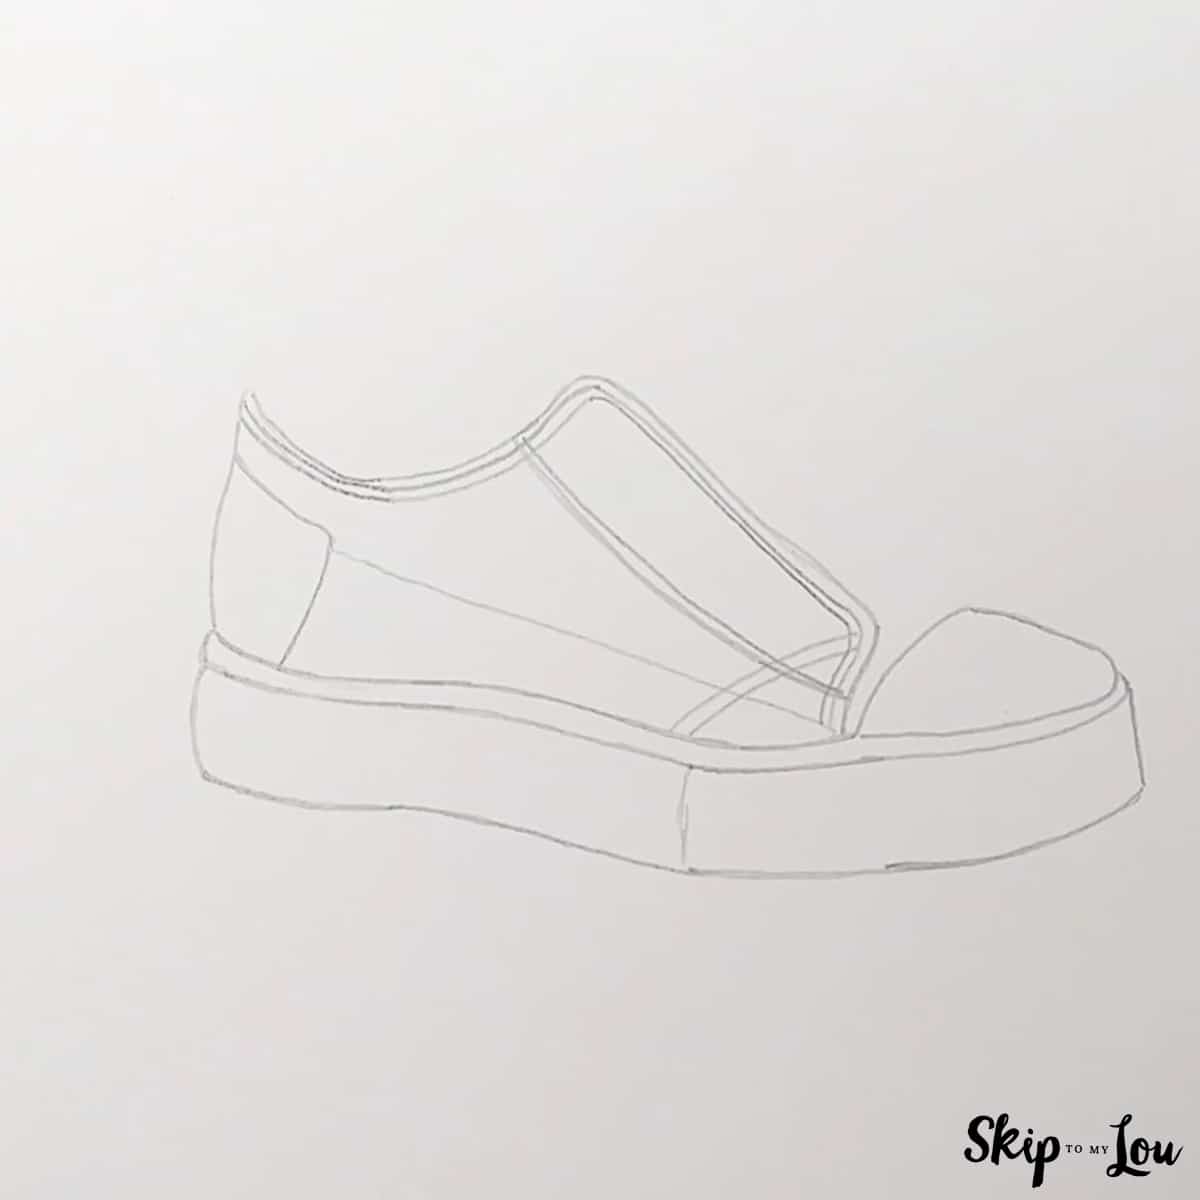
- In this step you will finish drawing the other side of the shoe and add the tongue and eyelets for the shoelaces. Start by making a pencil line from the back of the shoe and draw a curved line to create the back and side of the shoe. Go back and draw another line below it following the same curve. See illustration below. Now draw the tongue of the shoe by drawing a line parallel with the existing top line of the shoe. The tongue should be longer and have a curved top. See illustration below. Draw the other side of the shoe by connecting a line from the toe of the shoe to the tongue. See illustration below. Finally draw 5 eyelets by drawing a circle and then a smaller circle inside. See illustration below.
- In this step you will be sketching in the shoe laces and details around the bottom of the shoes. Start by drawing laces coming out of the bottom eyelet and ending across the shoe. The next laces come out of the other 4 eyelets and go at a downward angle like they are connecting with the eyelet across and down. Now draw the other laces crossing under the ones you just drew. The laces on the left need to appear on top. On the tongue of the shoe draw a label using a small rectangle and a larger rectangle around it. Finally, it is time to add another detail around the sole of the shoe by drawing 2 parallel lines that follow the outline of the shoe from the heel to the toe.
- Now it is time to add the final details to your shoe! Using your eraser first, erase any lines under the shoe laces. The shoe laces need to appear on top of the shoe and the laces coming up through the eyelets are on top of the other laces. See the illustration below. Now go to the toe and draw the cross-hatching lines. Start from the left and draw faint slanted lines all the way across the toe. Then go from the right and draw faint slanted lines all the way back across the toe. The next step is to take out your black marker and outline the shoe, eyelets, laces, heel, toe and sides with a solid black line. See illustration below and notice how not every line gets redrawn with black marker. Any finally, if you want to add some color, go for it!


my favorite drawing supplies
- Sketching Pencils
- Kneaded Rubber Eraser
- Sketch Pad
- Erasable Colored Pencils
- Fine markers
- Sketch and Drawing Art Pencil Set
- Artist drawing set (This is great for new and experienced artists. It’s also something I give as a gift.)
Easy Shoe Drawing Video
Did you know?
There are so very many types and styles of shoes! Most sports and some jobs require certain types of footwear. Which shoes are your favorites? Let me know in the comments what type/style of shoe you would like to draw next! Here are some other types of shoes: Sandals, Clogs, Slippers, Moccasins, Huarache Sandals, Espadrilles, Zoris, Flip-flops, Jandals, Chappals, Babouche Slippers, Mules, Pumps, Cleats, Loafers, High Heel Shoes, Trainers, Running shoes, High-tops, Wing-tips, Boots, and Cross-trainers, just to name 22!
More fun with shoes, gifts and drawings
Now that you have learned to draw this style of shoe try one of these other shoe crafts. They are easy to make and fun to do.
I would love to keep you fully stocked with creative ideas, yummy recipes, fun crafts, and loads of free printables. Subscribe to Skip to my Lou to get new ideas delivered to your inbox. Follow me on Facebook, Pinterest, Twitter, and Instagram for all my latest updates.