Do you want to learn how to draw a skull but don’t know where to start? This easy skull drawing tutorial is perfect for beginners. I’ll show you step by step how to draw a skeleton head using just a few basic shapes. So grab your sketchbook and let’s get started on this!

Are you a fan of sugar skulls and the Day of the Dead celebrations? If so, the drawing skills learned in this lesson will help you create proportioned and correctly scaled skulls. Check out my Sugar Skull Coloring Pages for some drawing ideas and inspiration.
How to Draw a Skull Step by Step
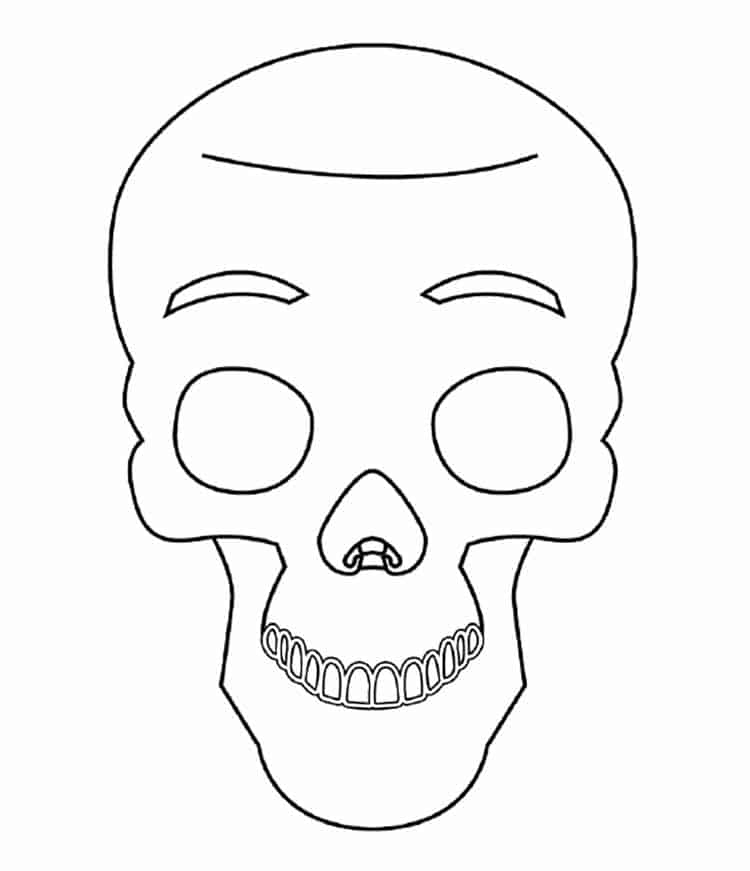
This easy skull drawing is an example of left side/right side symmetry. If you drew a vertical line down the middle of this drawing, the left side would be the mirror image of the right side. As you draw each of the easy steps, keep this in mind.
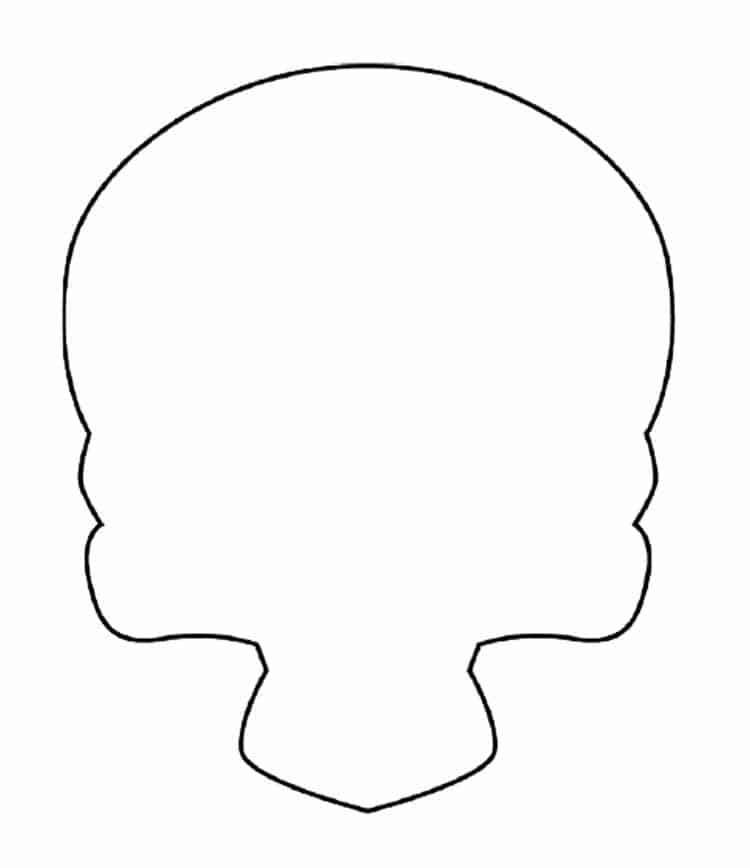
- In the first step, draw the outline of the human skull. Start by turning your paper to the landscape orientation and drawing a large capital letter C on the left side of your paper. Make sure to leave an equal amount of space on the top and bottom. Turn the paper to the portrait orientation and look at the perfect rounded skull you’ve made! To finish the outline, make a slightly pointed hump for the orbital bone on each side of the skull. Next, make a rounded half-rectangle for the cheek on each side of the skull. And finally, make an open triangle shaped jaw bone as shown in the picture.

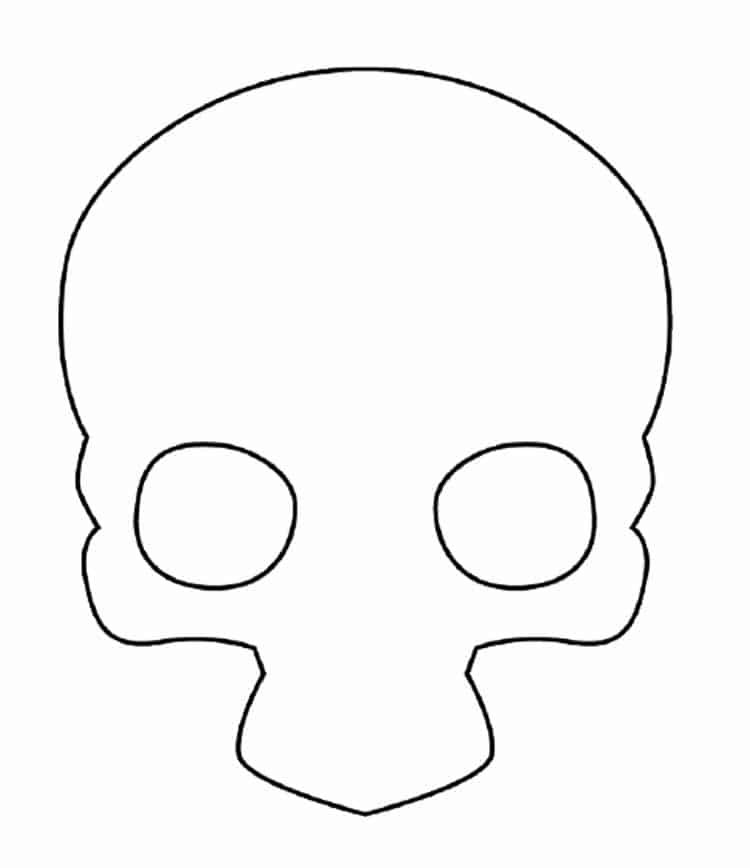
- Add the eye sockets. These are round-ish circles centered in the space above the jawbone and the cheekbone and orbital bone.
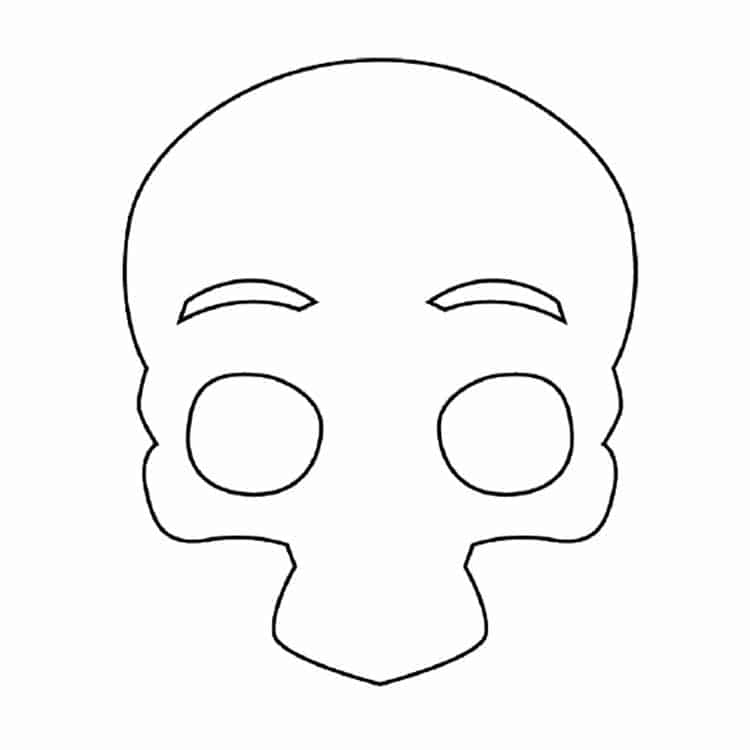
- Make eyebrows with sets of curving horizontal lines. The brows float above the orbital bones and are centered over the eye sockets.

- Add a contour line above the eyebrows as shown in the picture. Draw the line almost all the way across the forehead.
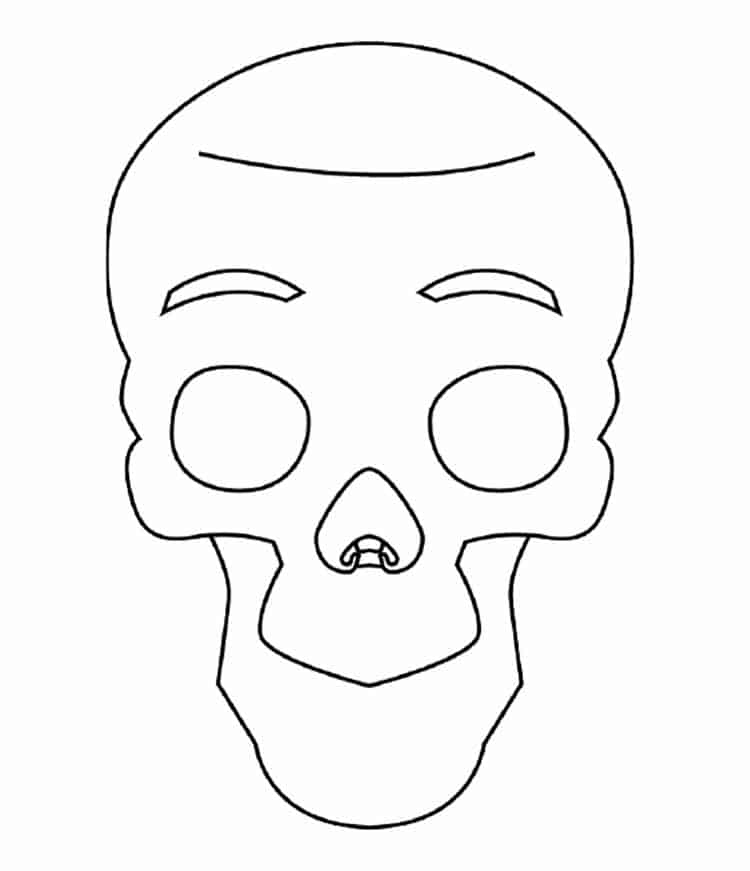
- Draw the nasal cavity by turning your paper upside down and drawing a heart shape between the eye sockets as shown in the picture. Now that the skull has both nose and eyes, you can see the picture taking shape.
- Draw the outline of the lower jawbone. Draw a crooked U shape around and below the upper jaw bone as shown in the picture. Make it look the same on both sides.

- Draw the top row of 12 teeth. Start in the middle of the upper jaw line and draw the two middle teeth. The front teeth are shaped like rounded hills. The rest of the teeth get shorter and smaller as they get farther away from the middle teeth. There are 5 teeth on each side of the middle teeth.
- For the final touches draw the bottom row of 12 teeth under the top teeth. The bottom row of teeth are smaller and more pointy on the bottom than the top teeth. Like you did in step 8, start by drawing the front teeth first and work your way back.


Skull Drawing Easy Printable Guide
Download and print this guide for reference! Try teaching it to someone else, too! Let me know how your skull drawing turned out!

my favorite drawing supplies
- Sketching Pencils
- Kneaded Rubber Eraser
- Sketch Pad
- Erasable Colored Pencils
- Fine markers
- Sketch and Drawing Art Pencil Set
- Artist drawing set (This is great for new and experienced artists. It’s also something I give as a gift.)
Before You Go
Thank you for drawing with me today! I hope you give yourself a high 5 for tackling this tutorial! The more you practice, the easier it is to make your drawing look like you want it to look. So, I’m including some of my favorite drawing lessons here, just for you!
- Now you are ready to draw a face with realistic eyes.
- Want to draw a realistic pumpkin? Here’s one for you Pumpkin Drawing.
- How about a Jack-o-Lantern? Try this Jack-o-Lantern for fun!
- Let’s see, keeping with the Halloween theme, what about Witch Drawing?
- What’s Halloween without a moon? Here’s one to try: Moon Drawing.
- And finally, black cats are great for any Halloween picture, right? How to Draw a Cat.
I would love to keep you fully stocked with creative ideas, yummy recipes, fun crafts, and loads of free printables. Subscribe to Skip to my Lou to get new ideas delivered to your inbox. Follow me on Facebook, Pinterest, Twitter, and Instagram for all my latest updates.


this was super helpful and makes for an easy halloween garland. I made one, copied It a few times with my printer and cut them out to make the garland!
This is so helpful! My kids enjoyed every step and were excited to show me the result. They’re beautiful!
My kids loved trying to draw this skull. They actually turned out pretty well too which is surprising for them.
My son had SO much fun doing this. We’re always looking for more tutorials like this because he loves them and we can’t thank you enough!
I love this idea! My daughter and I were both able to follow the steps and create our own drawing!
What a helpful, easy tutorial! My daughter has already said she’s going to use it to make decorations for our Halloween party next month. 🙂