Learn how to draw a cat with this easy tutorial. With a few basic shapes, you can be on your way to drawing all sorts of cats and kittens. Follow along with the pictures and learn how to draw a cat step by step. These are easy instructions for all ages.
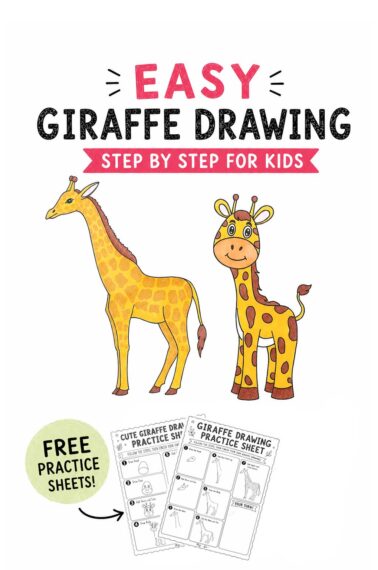
Be sure to check the end of the post for even more tutorials on how to draw various animals.
This article contains affiliate links.
Learning to draw is easy with simple drawing guides and videos. Make sure you check out all of these fun things to draw. There are simple step-by-step drawing tutorials for animals, flowers, and even faces.
Easy Cat Drawing
We’ve been sketching all sorts of things at our house this month, and we’ve practiced making cat drawing easy. Although our cats all turn out differently, they all start with the same basic lines. No matter what, the character of the artist shines through.
My Favorite Drawing Supplies
Drawing is such a creative outlet that is about the preference of the artist. Even the supplies an artist uses are based on what they like. Here are some of my favorite supplies to use for drawing, whether you are new to drawing or seeking options.
- Sketching Pencils
- Kneaded Rubber Eraser
- Sketch Pad
- Erasable Colored Pencils
- Fine markers
- Sketch and Drawing Art Pencil Set
- Artist drawing set (This is great for new and experienced artists. It’s also something I give as a gift.)
It’s fun to test different supplies whether you are learning how to draw a cat or creating on your own.
Easy Cat InstructionS A Printable Step-By-Step Guide
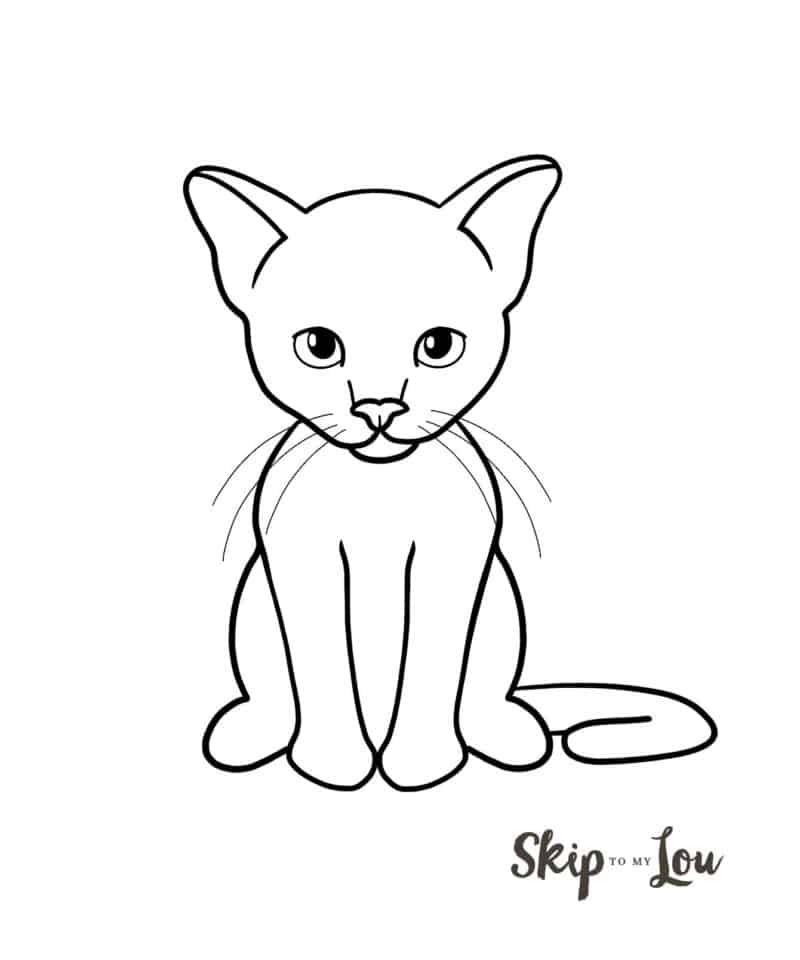
Just print out this how to draw a cat pictorial tutorial and follow along. You will create a basic outline of the cat and then the sky is the limit. Make your cat your own by coloring and adding extra details. Maybe you will give your cat stripes or another cool fur pattern? How about adding a cute collar with your cat’s name?
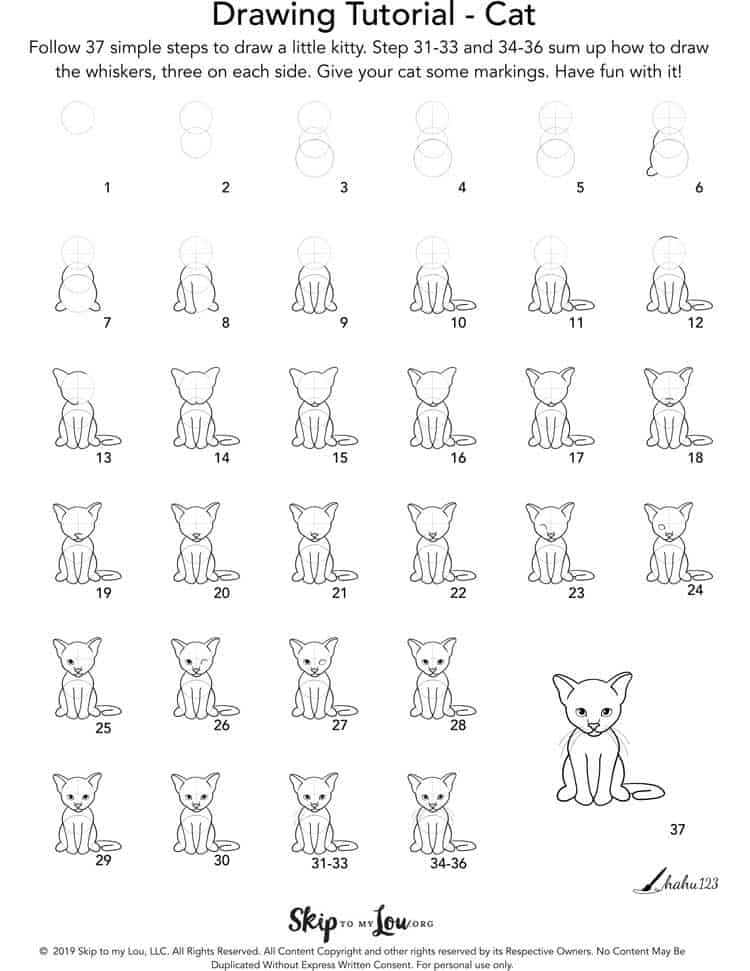
How to Draw a Cat Step by Step Tutorial
Follow these drawing steps.
(Step 1-5) Draw these lines lightly with a pencil.
Step 1: draw a small circle (head guide).
Step 2: add a slightly smaller circle overlapping the first at the bottom quarter (shoulder guide).
Step 3: draw a third circle overlapping half of the second(body guide).
Step 4: add a vertical straight line going down the center of the first circle.
Step 5: add a horizontal straight line through the center of the first circle.
Let’s start drawing. You can make this drawing your own by changing the position of the cat’s ears, nose, and eyes and by making them as big or small as you like.
Draw the Cat’s Body
Starting with step 6 you could now change to a pen or colored pencil.
Step 6: draw along the second and third circle to create the shoulder belly and hind legs; add a bump for the hindfoot.
Step 7: draw the same line mirroring the one in step 6.
Step 8: Start where the second and third circles meet and draw down right next to the first hind foot created in step 6 – add the first front cat’s leg and paw. Try to close all lines.
Step 9: add the second cat’s front leg mirroring the one you created in step 8. Try to close all started lines and fit the front feet next to each other.
Step 10: add a flat swirl-like line for the tail – fit it directly to the body, so that all lines are closed or add step 11.
Step 11: add a line to connect the bottom of the tail to the cat’s body.
Draw the Cat’s head
Step 12: add an arch at the very top of the head (the first circle). Make it as long as you like and how big you want the ears to be. We drew the arch 1/4 of the circle long.
Step 13: add the ear (a soft-edged triangle, starting at the end of the arch – from step 12 – and ending at the horizontal guideline) and the side of the cat’s face (curl up the line slightly as you reach the vertical center guideline.
Step 14: add a second ear and cheek mirroring the one you drew in step 13.
Draw the Face
Step 15: add a little upside-down arch underneath the curled up ends you created in steps 13 and 14. This forms the chin.
Step 16: draw an inverted, curved L-shape line with a slight offset from the top of the ear and along to the head guideline.
Cat Ears
Step 17: draw a second curved L-shape line, mirroring the one from step 16. This has created the detail for the ears.
Step 18: at the vertical center guideline, draw a double arch along the top line of the second guide circle -where you like the nose to be.
Cat Nose
Step 19: draw an inverted flat s-shape line connecting the end of the double arch with the point of the curves from step 13 and 14.
Step 20: add a second flat s-shape line mirroring the one you created in step 19. These lines have created the nostrils and complete the nose.
Steps 21 and 22 (optional): add a small line from the side of the nose upwards to create detail for the back of the nose.
Step 23: Under the horizontal guideline, in the middle of the left side, add an arch for the first eye – the upper eyelid.
Cat Eyes
Step 24: add an upside-down arch connecting each end to the one you drew in step 23 – the lower eyelid.
Step 25: add an oval or circle for the first pupil – make sure, the pupil is connected to the upper eyelid line.
Step 26: Create the second upper eyelid, mirroring the one you created in step 23.
Step 27: Create the second lower eyelid, mirroring the one you drew in step 24.
Step 28: add the second pupil, mirroring the one you drew in step 25.
Steps 29 and 30 (optional): add highlights to the eyes/pupils.
Steps 31-36: add a few thin downward curved lines for the cat’s whiskers – 3-5 on each side.
Finish drawing
Step 37: erase the guidelines. You are now all done with your first drawing of a sitting cat. Add some markings to its coat and color it. Extra lines and shading can create texture for the cat’s fur. It’s a fun drawing practice and perfect for any cat lover.
This how to draw a cat tutorial merely serves as a basic start. You can change it and make it your own in no time. The more you practice, the more you will be able to individualize the drawing. After all, practice only improves your experience.
Now try drawing a tabby cat. Have fun drawing!
Here’s a Video for More Help to show you how to draw a Cat
Love drawing animals? Now that you have your sketch pencils outtTry these drawing how to draw tutorials for more practice.
- If you love cats how about learning to draw BIG cats like this lion and tiger?
- Now you have a cat drawing learn How to Draw a Dog.
- Kids love drawing magical and fantastic beasts like unicorns and dragons.
- Horse Drawing
- Kangaroo Drawing
- Let me also share realistic Cat drawing tutorial for more practice.
- Fish Drawing
If you’ve tried this simple cat drawing tutorial or any of the others on my blog, please let me know what you thought in the comments below! Happy drawing!
I would love to keep you fully stocked with creative ideas, yummy recipes, fun crafts, and loads of free printables. Subscribe to Skip to my Lou to get new ideas delivered to your inbox. Follow me on Facebook, Pinterest, Twitter, and Instagram for all my latest updates.
I would love to keep you fully stocked with creative ideas, yummy recipes, fun crafts, and loads of free printables. Subscribe to Skip to my Lou to get new ideas delivered to your inbox. Follow me on Facebook, Pinterest, Twitter, and Instagram for all my latest updates.


Love this
“I absolutely loved this tutorial on how to draw a cat! The step-by-step instructions were clear and easy to follow, and the final result turned out purrfectly adorable. As a beginner artist, I appreciate the helpful tips and guidance provided. Thank you for sharing such an enjoyable and informative post! Can’t wait to try out more of your tutorials. Warm regards, Martin
Thank you very much for the provided tools.
This makes drawing so easy! My daughter loved it.
This is such a cute and easy tutorial! I’ll have to show this to my artist daughter – she’ll love it.
This was great! I practiced with my niece and we had a cat drawing contest (she won but they both looked pretty darn good thanks to these steps)
Such a fun activity!!!
My daughter loves all things cats and drew like a hundred of these! Thanks!
Great tutorial! Super easy to follow, and super cute 🙂