Cat Drawing is my newest easy step-by-step tutorial! Grab your pencil, paper and follow along with these 7 easy drawing steps to draw a cute cartoon cat just like this!
I love teaching you how to draw all different things, so don’t miss all the fun things to draw on Skip to my Lou! Click to find loads of easy drawing tutorials.

Cat drawing Supplies
Young artists, do you like to sketch animals? Just gather a few supplies you probably already have and start on this simple cat drawing.
- paper
- pencil
- eraser
- colored pens and pencils
It’s Easy to Draw a Cat! Follow These Steps.
The instructions and illustrated images will show you how to draw this cat from start to finish. All you need to do is follow the easy steps.
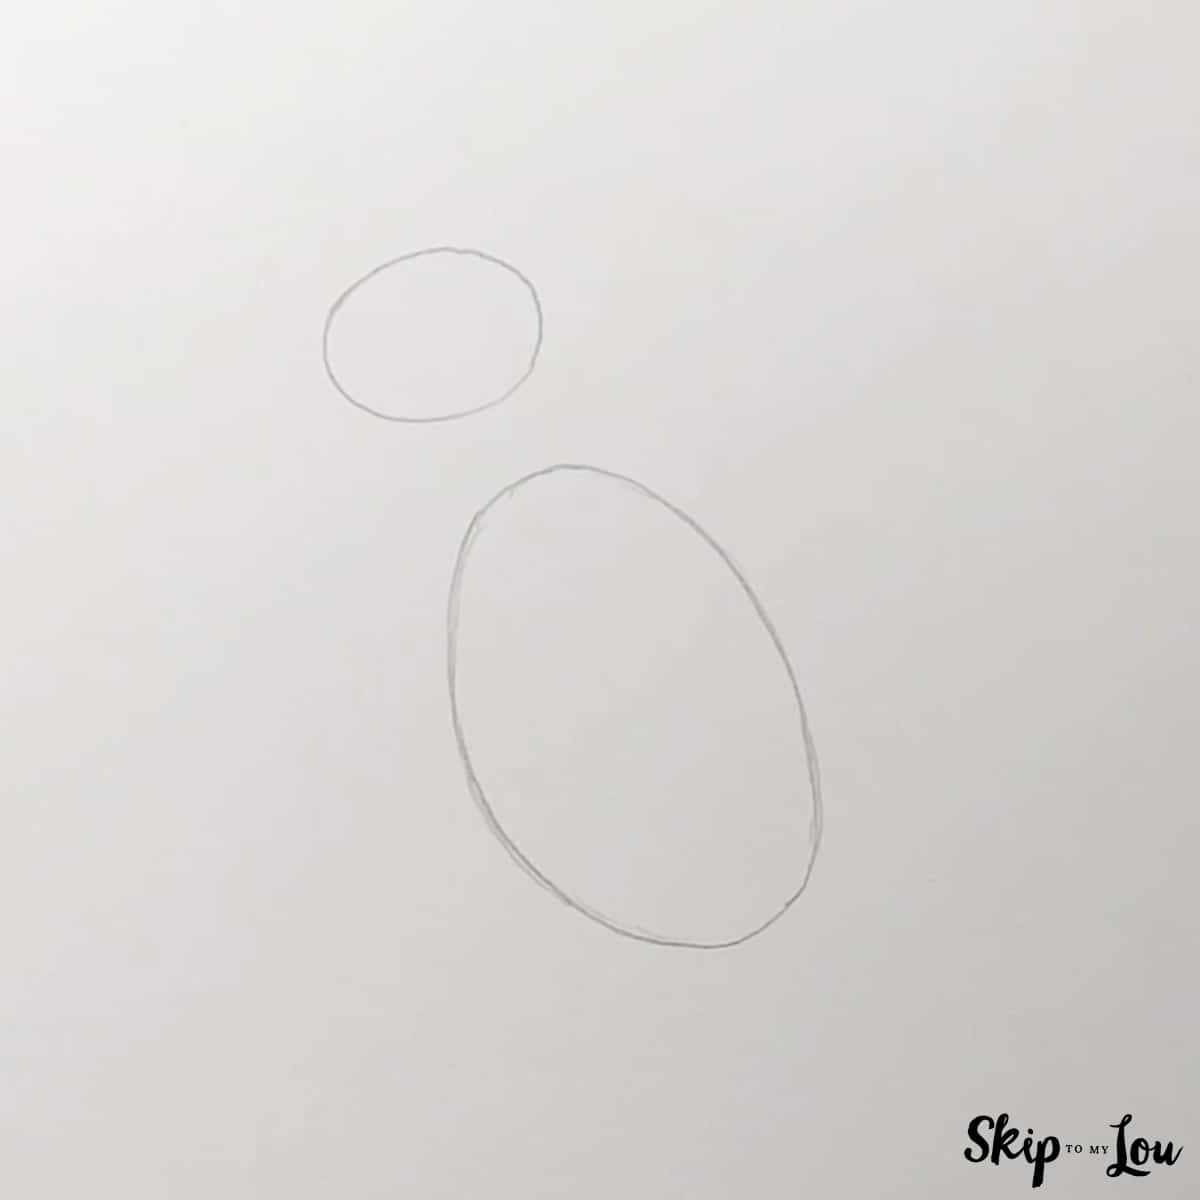
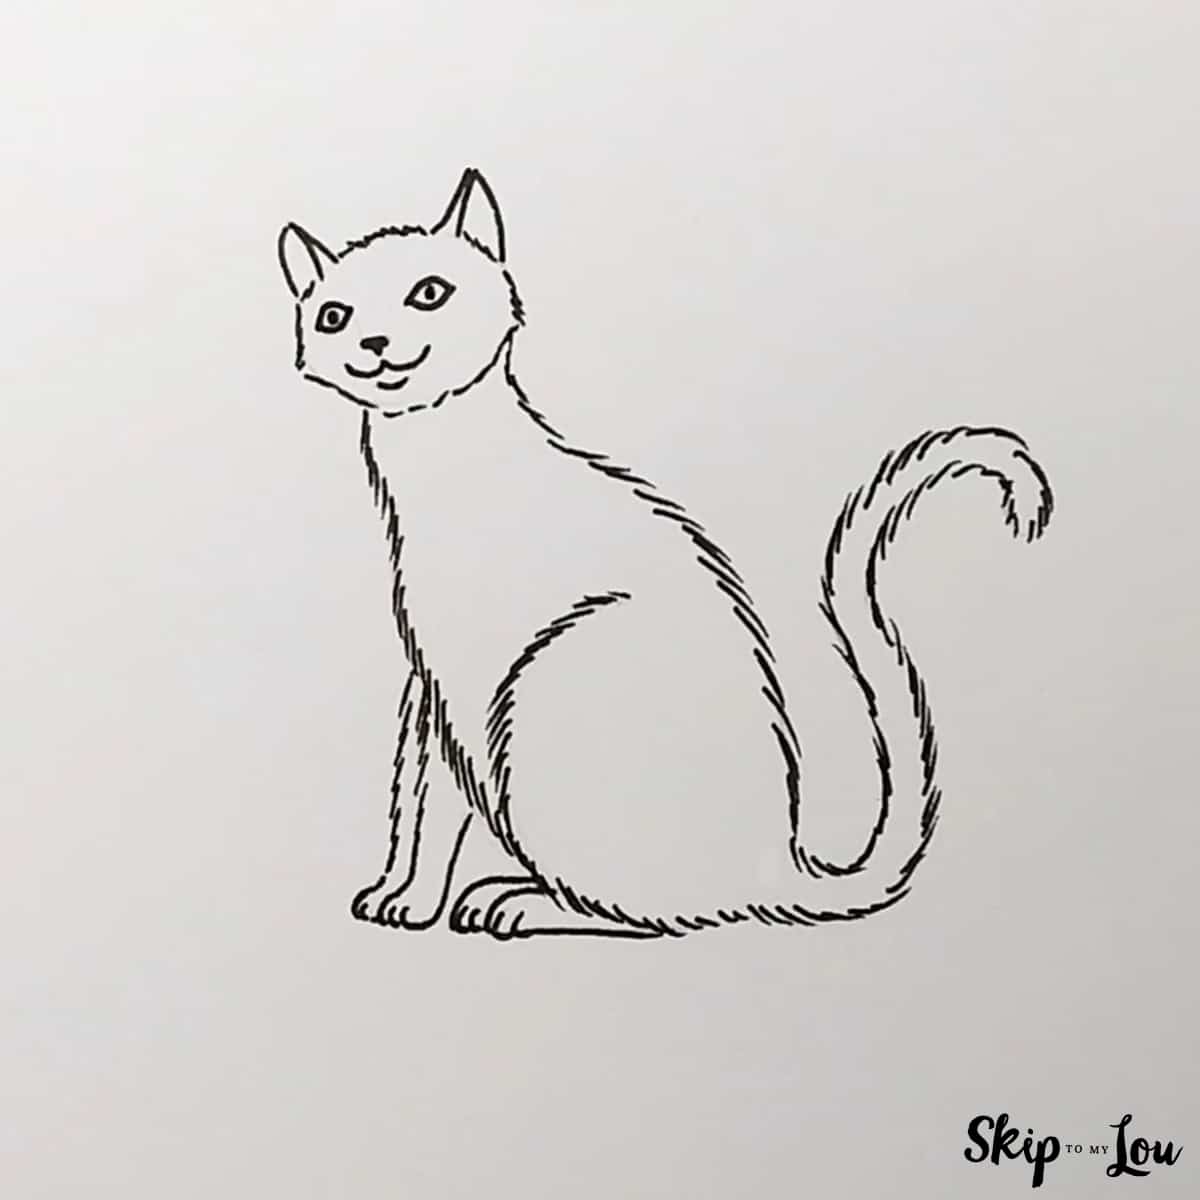
- Draw a small oval for the cat’s head and space down and draw a long oval for the cat’s body. Notice how both ovals are slightly tilted at an angle.

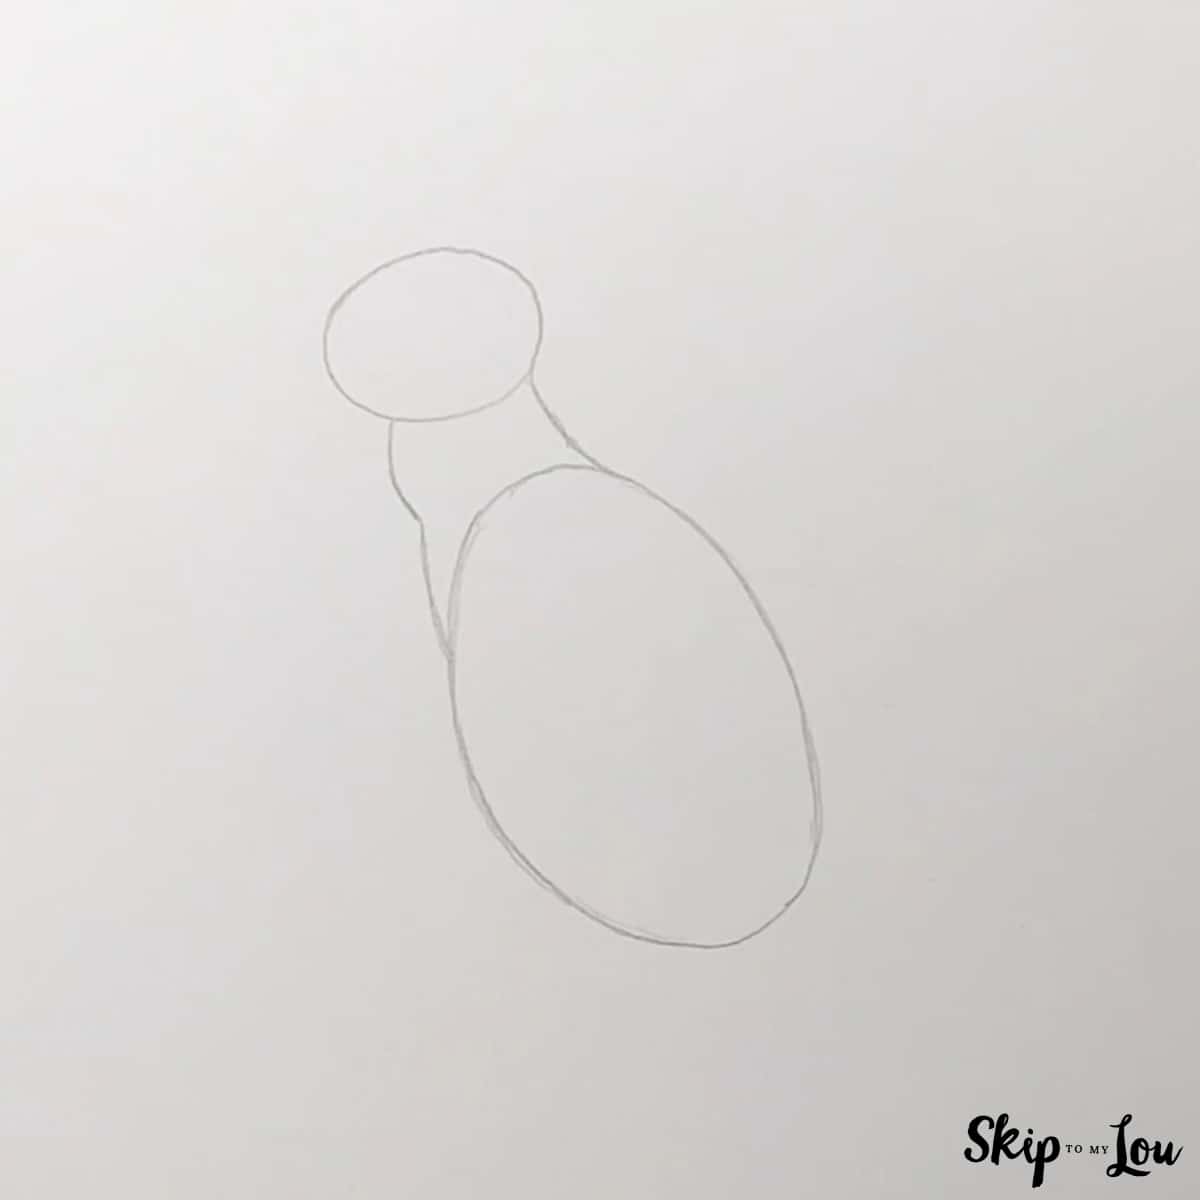
- Draw a curving line from the right side of the cat’s head to the right side of the cat’s body. Repeat on the left side taking care to curve in slightly and back out again to form the front of the cat’s throat.
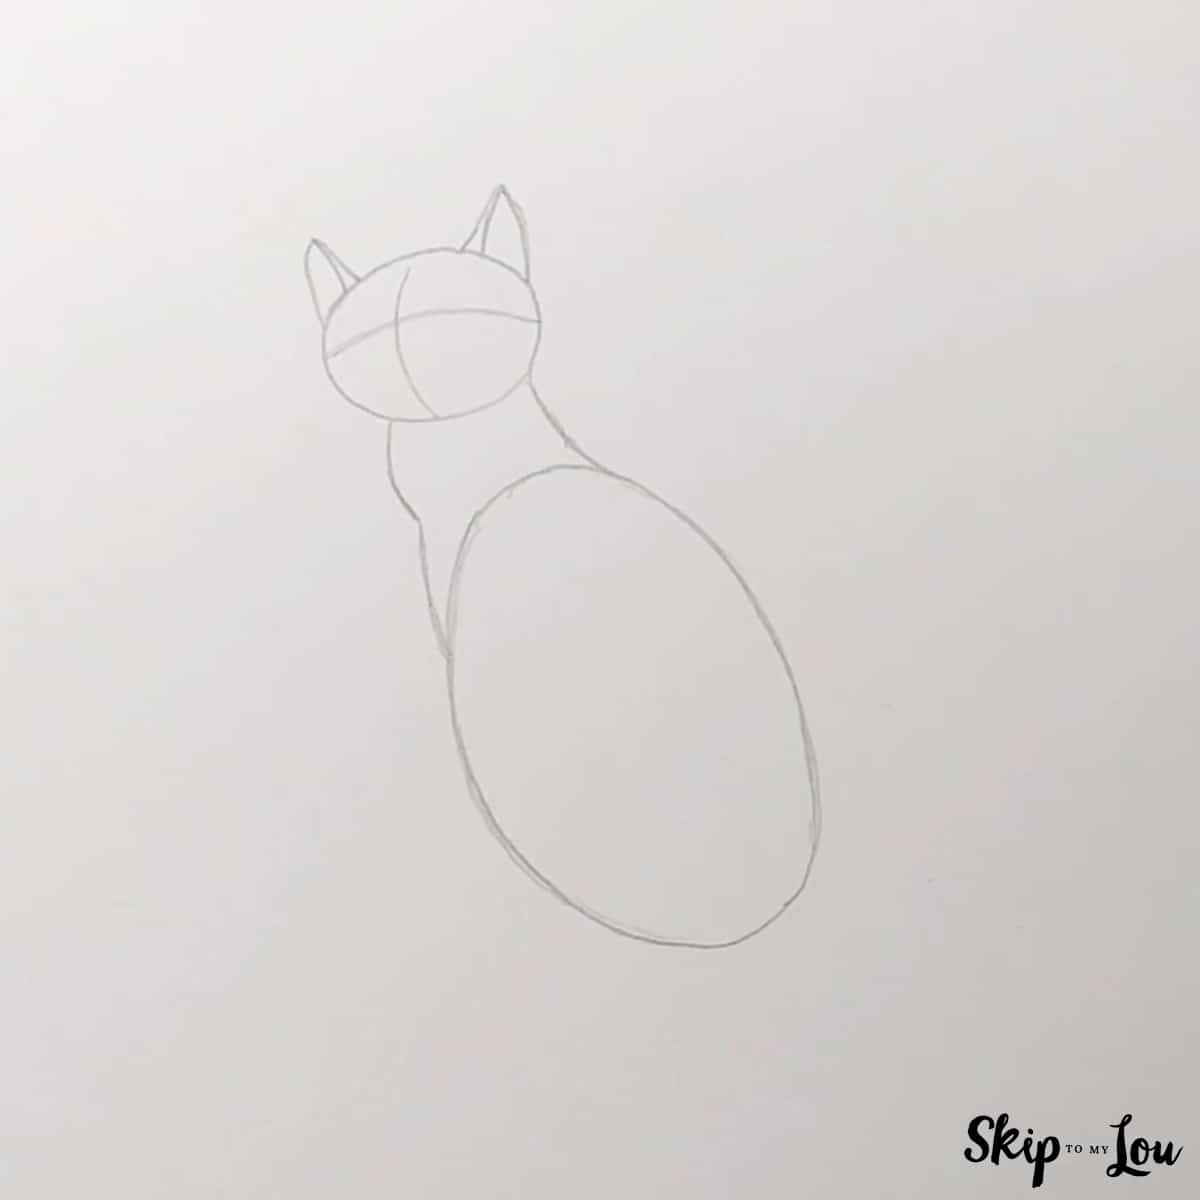
- The outline of the cat is almost complete! In the middle of the cat’s head, draw a curved line from top to bottom. In the middle of the cat’s face, add a curved line from side to side. These curved lines will be erased later, but for now, they serve a guides for placing the eyes, nose and mouth. Draw the ears on top of the cat’s face by using a rounded triangle shape and then adding a straight line on the outside.
- Draw a cat’s face by adding 2 eyes, a nose, a mouth and a chin. The eyes are shaped like lemons and are drawn on the mid-line of the face. Add a pupil right in the middle of each eye right on the guide line. The nose is centered on the middle guide line. Connect the left eye to the left side of the nose with a curved line and do the same with the right side of the nose. Drop wide U shaped lines down from the middle of the nose in both directions and draw another wide U shaped line underneath to represent the bottom lip.
- Draw front legs, paws and back legs and paws in this step. The front legs drop down from the cat’s chest in slanted parallel lines. Curve out and down to form the front paws. Add 2 curved lines inside each paw to represent toes. Draw a half-oval at the bottom of the body to represent the back leg of the cat. Add the back feet by drawing 2 straight lines out and curving down and straight back to the body. Add 2 curved lines to each foot to represent toes.
- Draw the tail in the shape of the letter S, starting and ending at the bottom of the oval body.
- Use a series of short bold strokes to represent the furry texture of the cat’s fur. After you make these bold strokes, go back and erase any original lines and guidelines you drew.
- Finally, add ear hair, eyebrows, whiskers, a fur line at the neck, and a fur chin line using bold short strokes. You just completed your cat drawing EASY!


my favorite drawing supplies
- Sketching Pencils
- Kneaded Rubber Eraser
- Sketch Pad
- Erasable Colored Pencils
- Fine markers
- Sketch and Drawing Art Pencil Set
- Artist drawing set (This is great for new and experienced artists. It’s also something I give as a gift.)
Easy Cat Drawing Video
More Coloring, crafts, and drawing
Now that you have learned to draw a cute cat try one of these crafts. They are easy to make and fun to do.
I would love to keep you fully stocked with creative ideas, yummy recipes, fun crafts, and loads of free printables. Subscribe to Skip to my Lou to get new ideas delivered to your inbox. Follow me on Facebook, Pinterest, Twitter, and Instagram for all my latest updates.