Learn how to draw eyes in the easy step by step tutorial! You won't believe how easy it is. Printable guides and a video will show you exactly what to do.

Learn to create amazing drawings with these things to draw!
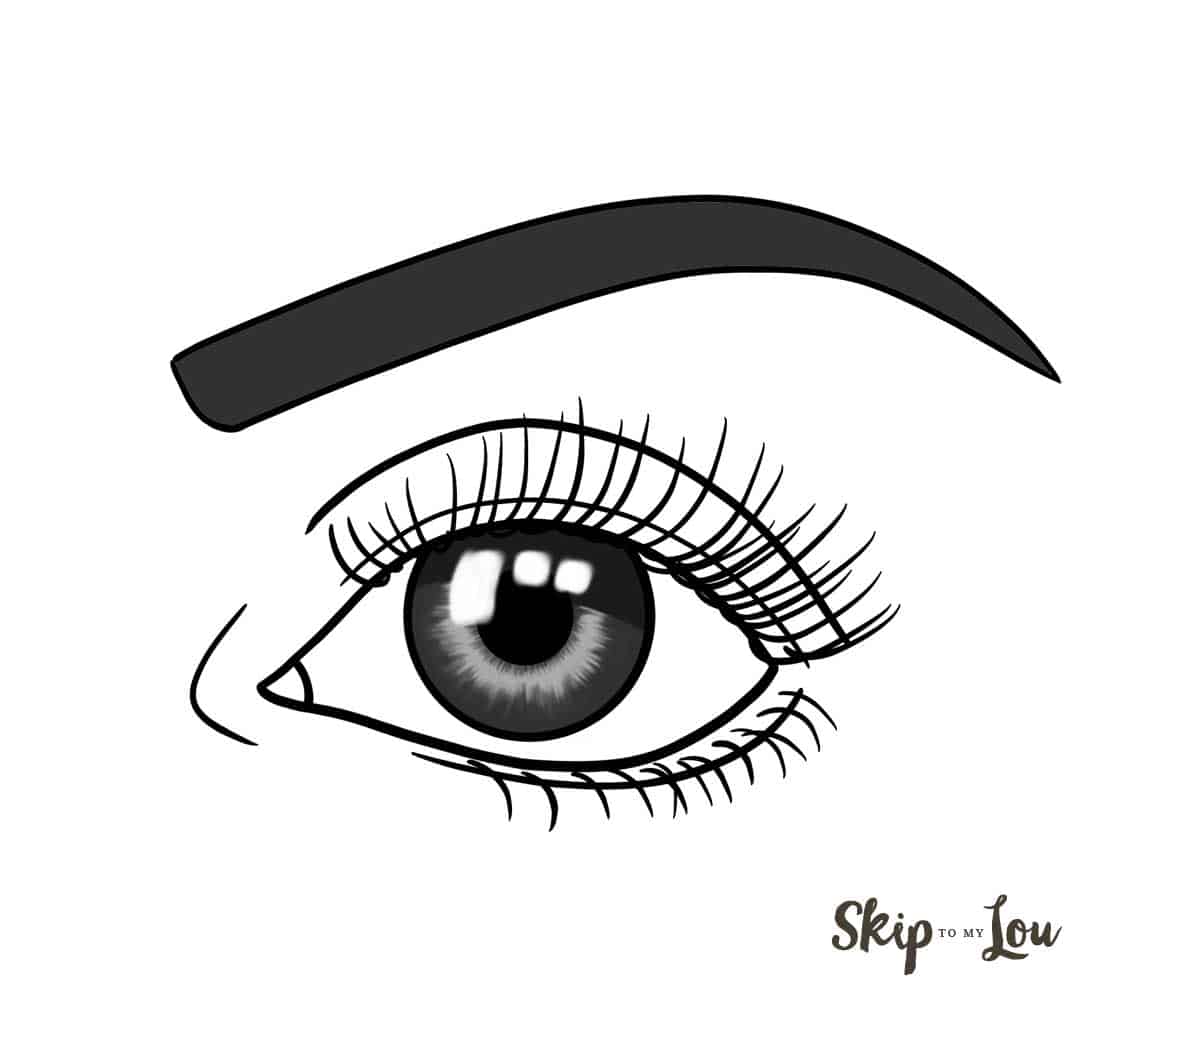
How to Draw a Realistic Eye
As you can see if you follow the easy eye drawing tutorial you will be able to draw eyes! If you like print out the guide
This article contains affiliate links.

How to Draw Eyes Step by Step
Here are the guidelines to follow.
Draw these lines lightly with a pencil. Use an eraser to remove when finished.
You can make this drawing your own by changing the shape of the upper and lower eyelid or the position of the iris and pupil. (You could now change to a pen or colored pencil)
- Draw a circle for the eyeball (this is the only guideline needed and will be used later to draw the iris)
- Draw an arch going through the top of the guide circle (upper eyelid).
- Draw an inverted arch/curve line underneath the guide circle – not touching it, but connecting to the ends of the first arch.
- Add the tear duct – draw a curved line in the left inner corner of the eye.
- Add the crease – above the arch from step 2, draw another arch where you want the crease of the eyelid to be.
- (Optional) Add another arch above and a little to the right of the upper eyelid – here you will place the eyelashes.
- (Similar to step 6) Add an inverted arch underneath and to the right of the lower eyelid – for the lower eyelashes.
- Trace the guide circle to draw the iris.
- Add the pupil – right in the middle of the iris/ guide circle.
- Erase the guidelines.
- Add the eyelashes to the lower lid – draw each lash separately, a curved line (coming from in between the space created in step 7).
- (Similar to step 11) Draw eyelashes to the upper eyelid – simply draw the curved lines upwards, longer and fuller than the ones below.
- Add the brow (draw with a pencil, if you like to fill it in with separate little lines/hairs) – above and a little to the left of the eye, draw a long checkmark shape, that slopes downwards at the end (the peak should be above the right/outer corner of the eye).
- Finish the eyebrow – connect the ends of the line from step 13 with an arched/curved line.
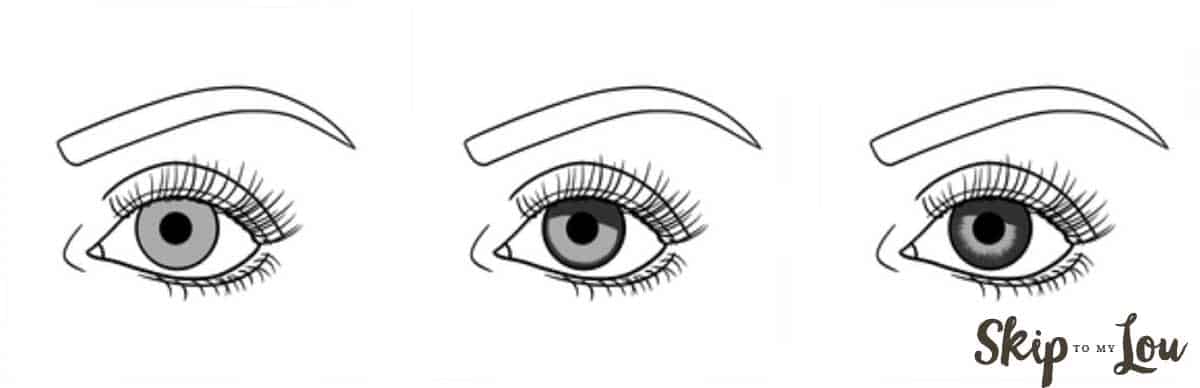
- Add a crease to the corner of the eye – draw a curved line. Little coloring tip for the iris:
- Color in the iris with a light color.
- With a darker color, draw around the inside of the iris outline and add a thicker line below and parallel to the upper lid (this is the shadow from the eyelid).
- Draw short lines (varying in length) or very narrow zigzag lines over the line you draw in the previous step.
- Add the same lines (as you did in the previous step) all around the pupil.
- (Optional) Add a darker shadow in the eye – draw over the line parallel to the upper lid (from step 16).
- The last step is to add highlights – make the eye come to life with some simple highlights below the upper lid.
Now, you are all done with your drawing of a beautiful human eye. You can color the rest and add shading around the eye itself or add short lines/hairs for the eyebrows. This tutorial merely serves as a basic example.
The more you practice, the more you will be able to individualize the drawing. You can change the dimensions and outline of the eye, make the eye look up, down, or to the side by changing the position of the iris and pupil, use shorter eyelashes or stronger lines to make a male eye, or make a rounder eye with a bigger iris and pupil for a child’s eye.
Add longer eyelashes for female eyes. Exaggerate the shape of the eye for an anime face. Practice lightly shading the eye for added dimension. Omit or add any details you like. Make it your own sketch!
My Favorite Drawing Supplies
- Sketching Pencils
- Kneaded Rubber Eraser
- Sketch Pad
- Erasable Colored Pencils
- Fine markers
- Sketch and Drawing Art Pencil Set
- Artist drawing set (This is great for new and experienced artists. It’s also something I give as a gift.)
Watch this Video for More Help
More Drawing Ideas
You might also like to practice drawing animals and flowers with these drawing lessons.
- Horse Drawing
- Unicorn Drawing
- Dog Drawing
- Rose Drawing
- Easy Flower
- Anime Drawing – kids love these big-eyed cartoons.
I would love to keep you fully stocked with creative ideas, yummy recipes, fun crafts, and loads of free printables. Subscribe to Skip to my Lou to get new ideas delivered to your inbox. Follow me on Facebook, Pinterest, Twitter, and Instagram for all my latest updates.


This is so cool! I will have my kids try this. Thank you!
This is such a great guide!
This is such a great tutorial. Drawing eyes has always been hard for me.
super