This granny square crochet bag pattern will send you back to school in style. The added zipper makes a perfect crochet granny square zippered pencil case! It really is a simple project and a great way to keep beautifully organized.
Don’t be afraid of the zipper! You might also like to refer to this how to make a zippered pouch tutorial. You are not going to believe how easy it is!
This article contains affiliate links.

Crochet Pencil Case Supplies
- Size H Crochet Hook
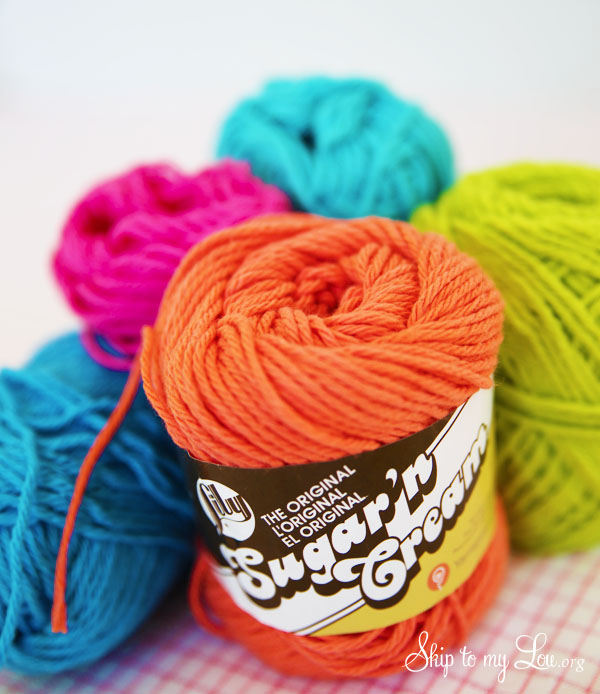
- Cotton Yarn (I used Sugar n’ Cream by Lily)
- Yarn Needle
- Scissors
- Fabric for lining
- Zipper
- Sewing Machine
Step by Step How to Make Granny Squares
This written pattern is a basic granny square crochet pattern. Once you get the hang of it use the classic granny squares to make a variety of projects from bags to granny square blankets.
Crochet STITCH ABBREVIATIONS
- Chain→ch
- Slip stitch→sl st
- Single crochet→sc
- Double crochet→dc
- Repeat pattern x more times between * and *→*…* x times
- Round → rnd
- Space → sp
Note: Ch 5 at beg of each round counts as 1 dc and ch 2 space throughout.
With the first color, ch 4, join with slip stitch.
Base round: Ch 5. (3 dc. Ch 2) 3 times in ring. 2 dc in ring. Sl st in 3rd ch of beg ch 5. Finish off.
Round 1: With new color, slip stitch in next ch. Ch 5. 3 dc in same sp. *Ch 1. Miss next 3 dc. (3 dc. Ch 2. 3 dc) in next sp (corner made). Rep from * twice more. Ch 1. Miss next 3 dc. 2 dc in ch 2 sp from beg of rnd. Sl st in 3rd ch of beg ch 5. Finish off.
Round 2: With new color, slip stitch in next ch. Ch 5. 3 dc in same sp. *Ch 1. Miss next 3 dc. 3 dc in next sp. Ch 1. Miss next 3 dc.** (3 dc. Ch 2. 3 dc) in next sp (corner made).* Rep from * to * twice more, then from * to ** once. 2 dc in ch 2 sp from beg of rnd. Sl st in 3rd ch of beg ch 5.
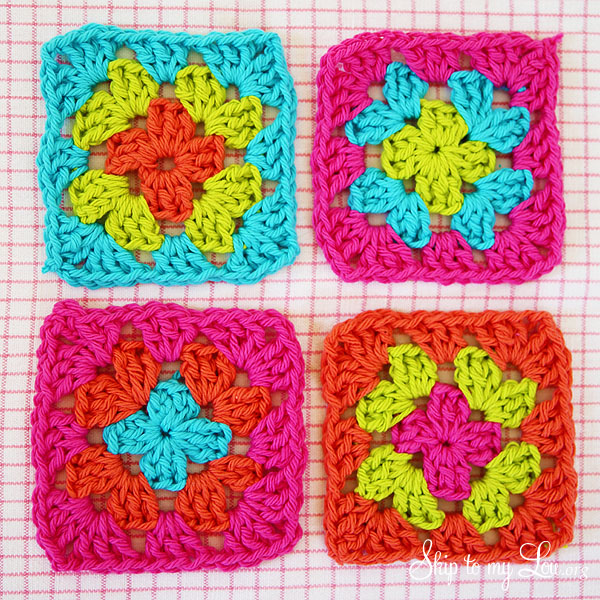
Make 4 crochet squares.
How to Attach granny squares
Join two granny squares side by side by placing two squares back to back (wrong sides facing each other).

In the right corner of the top granny square fasten on new color and chain three.

Three double crochet in corner of the back granny square. Chain 1.
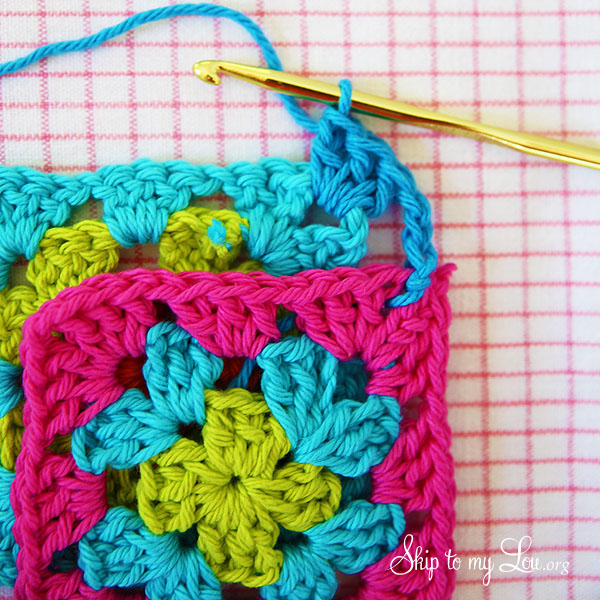
Three double crochet, chain 1 in next chain 1 space on the front granny square.
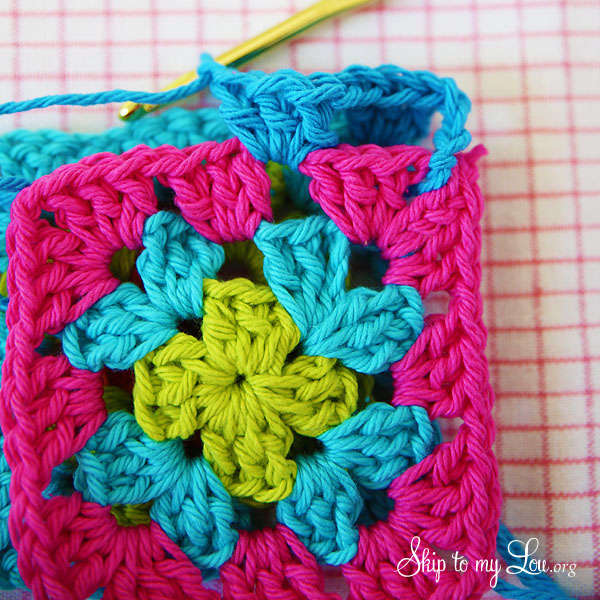
Continue along the entire edge of granny squares ending with a double crochet in the corner space of the back granny square. Fasten off.
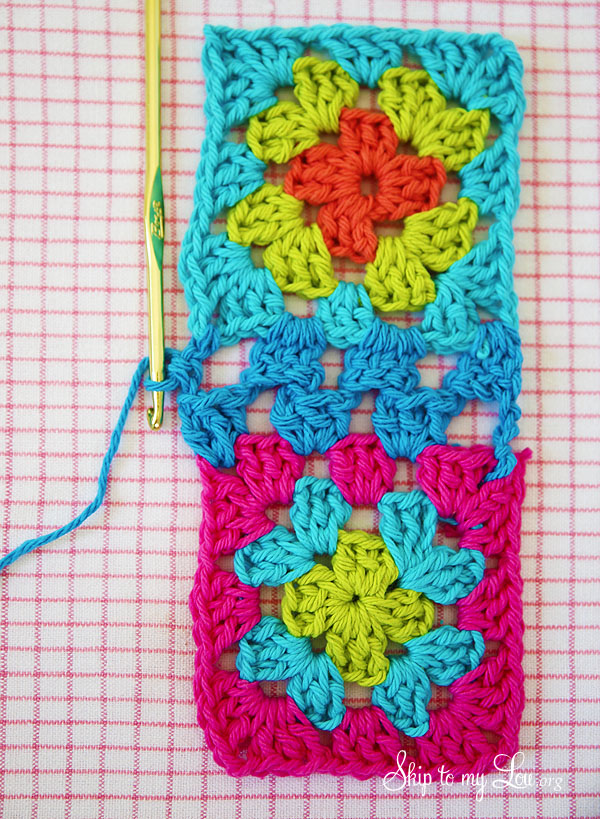
Three double crochet, chain one in each chain 1 space all the way around the two joined granny squares. (3 double crochet, chain 2, 3 double crochet in the corners)

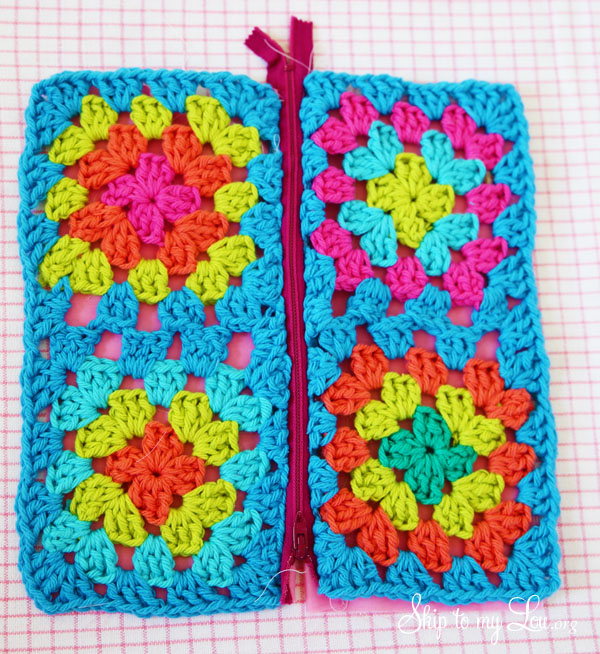
How to make a crochet granny square zippered pouch
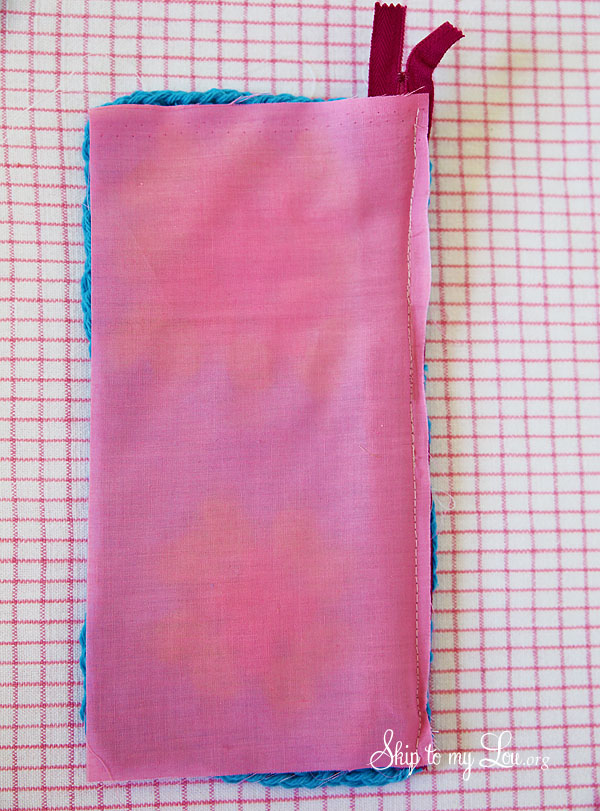
Cut two pieces of lining fabric the same size as the crochet granny square pieces. You will need 1 zipper the length of the joined granny squares.

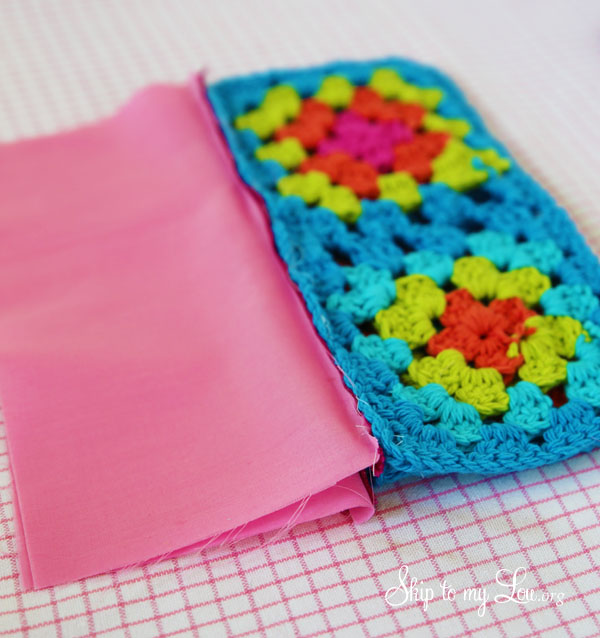
Place 1 crochet piece right side up, then the zipper (face down), and then the lining right side facing down. Line up the three edges.

Use a zipper foot on your sewing machine to sew across the top between the edge of the zipper and the zipper teeth (closer to the zipper teeth). It is easier to baste the zipper to the crochet piece first, then place the lining and sew through all layers. It is a bit tricky sewing the crochet. Use a long stitch length (at least a 3) and go slow trying not to stretch the crochet. No worries if the bottom end of the zipper sticks out, just trim even with the edge of the fabric.
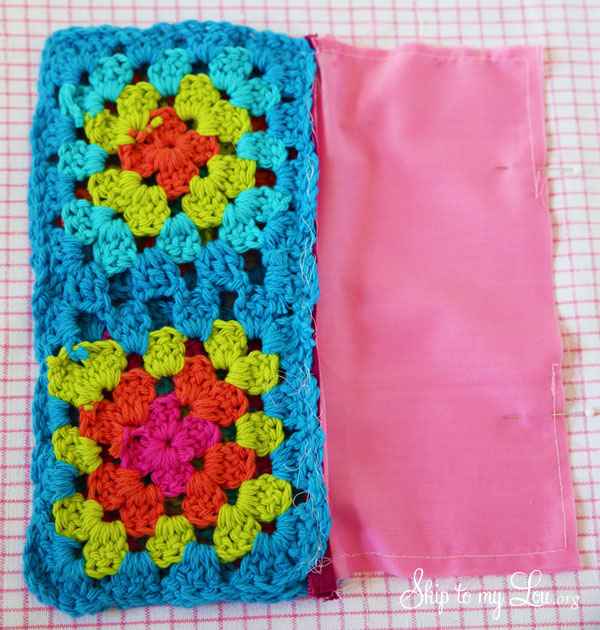
Bring lining and crochet piece to the same side.
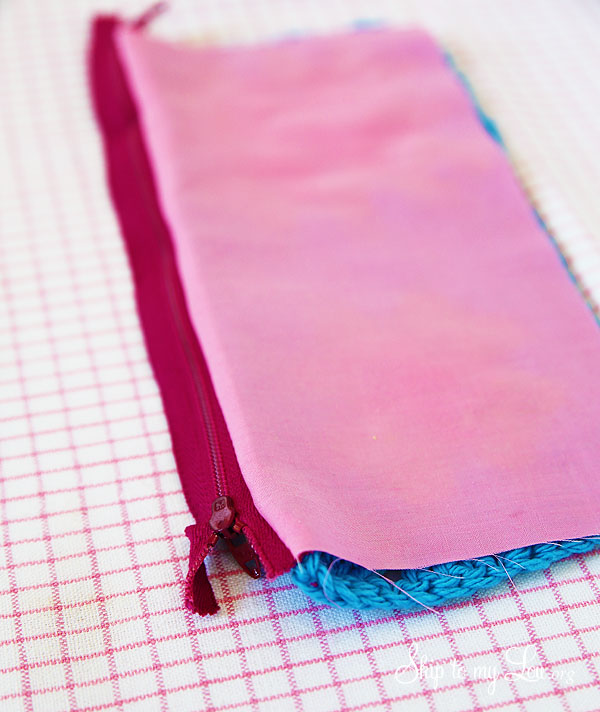
Repeat layers on the other side of the zipper. The crochet piece face up, zipper face down, and lining face down. Sew along the edge close to the zipper.
Open it up and it will look like this. Trim zipper.
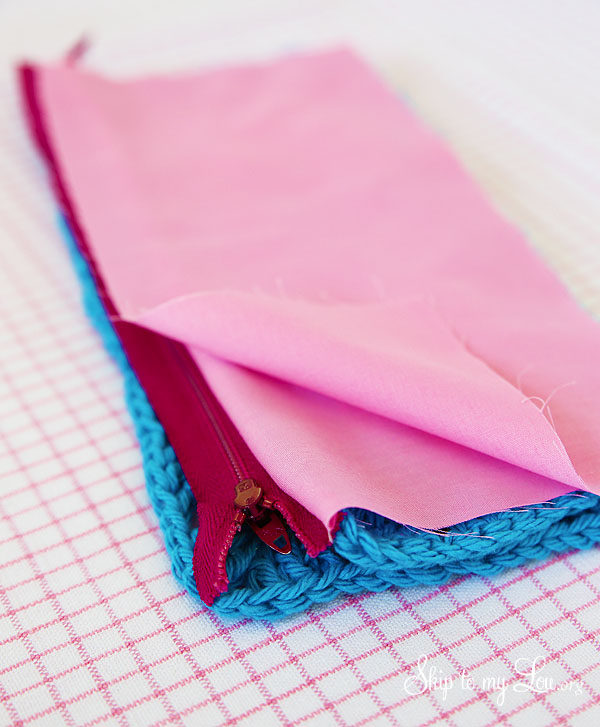
Bring both pieces of lining to one side and both pieces of crochet to the other side. Un-zip the zipper at least halfway so you can turn it once it is stitched. If you forget to un-zip the zipper you won’t be able to turn your pouch right side out.
Pinch zipper towards outer fabric, making sure it is laying nicely as you pin. Using 1/4 inch seam stitch all the way around the pouch leaving a two-inch opening in the bottom of the lining for turning. I reinforce by going back and forth as I pass over the zipper.
Use the opening to turn the entire pouch right side out. Hand stitch (or machine stitch) opening in the lining closed.

Push lining inside the pouch and it is finished!
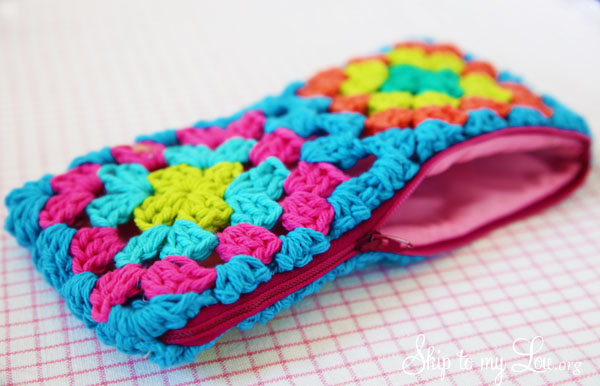
There you have it! You can granny stitch crochet and you have a crochet pencil case pattern. A fashionable way to carry your pencils for sure. Really though this crochet pouch is great to carry anything.

My Favorite Crochet Tools
- If you are like me and like to crochet on the go this tote is a stylish way to keep everything you need at your fingertips!
- My MOST FAVORITE tool is these portable scissors that always make it through security and fit perfectly in my hook case.
- A️ yarn bowl is a beautiful way to wrangle yarn while crocheting
- Keep organized with this crochet hooks kit with a case. This 85-piece kit has over 2,500 ⭐️⭐️⭐️⭐️⭐️ five-star reviews.
- Crochet Stitch Dictionary: 200 Essential Stitches with Step-by-Step Photos is the most helpful resource to keep handy!
Easy Crochet Projects for You
- Crochet Sweater Patterns For Everyone
- Crochet Star
- Crochet Wreath Ornament tutorial
- Crochet Stitches
- Crochet Baby Blanket Patterns
- Crochet Scarf Patterns
More Fun Things to Crochet
- Make a dishcloth with this crochet granny square tutorial.
- Crochet Rose – the perfect embellishment for crochet hats!
- Beautiful Crochet Coffee Sleeve – this makes a beautiful gift!
- Floret Dishcloth
- Crochet Bookmark – another fashionable school accessory!
- Free crochet bag pattern
I would love to keep you fully stocked with creative ideas, yummy recipes, fun crafts, and loads of free printables. Subscribe to Skip to my Lou to get new ideas delivered to your inbox. Follow me on Facebook, Pinterest, Twitter, and Instagram for all my latest updates.


Thank you so much for sharing this. Love the colors and the tutorial make it look so easy! I liked your post so much I featured it in my back to school round-up. https://whatsnanamaking.com/back-to-school-diy/
Hi would like the pattern please but is it free
i just love it and i am in the process of making this beautiful pencil case
I love this pattern because it’s super easy and your step by instructions are easy to follow. I used thread instead of yarn to make this pattern and my squares are smaller. How do I attach them? I wanted to attach 6 or 8 together. I actually wanted to make a sunglasses case with it. I also thought it would be great to use the pattern for a blanket. Thanks for sharing the pattern.
I love these things. it is cooooool.
Thank you.
Nice idea!!!! I’m making one for my mobile! and for my children….
I saved this. I am partial to Granny ANYTHING and I love that its cotton yarn. Thanks for a great simple pattern with great instructions on how to put in a liner. Thanks!
What a lovely idea!
My grandma has seen them and one is alredy done. You know how speed they can be with crochet! Thanks to share your ideas!
Made this for my daughter’s senior year back to school. Filled with cute pens, headphones, lip balm and Smarties candy.
Thanks for the great step by step tutorial!
Forget about school….I’m making one for my crochet hooks! <3 √
This is gorgeous! I have had an idea to make myself some sort of clutch bag with granny squares that’s been floating around in my mind for a while now. I could just use this method and just make it a little bit bigger.
I never even thought of making a pencil case but now I want to make that too! Love the colours you have used here.