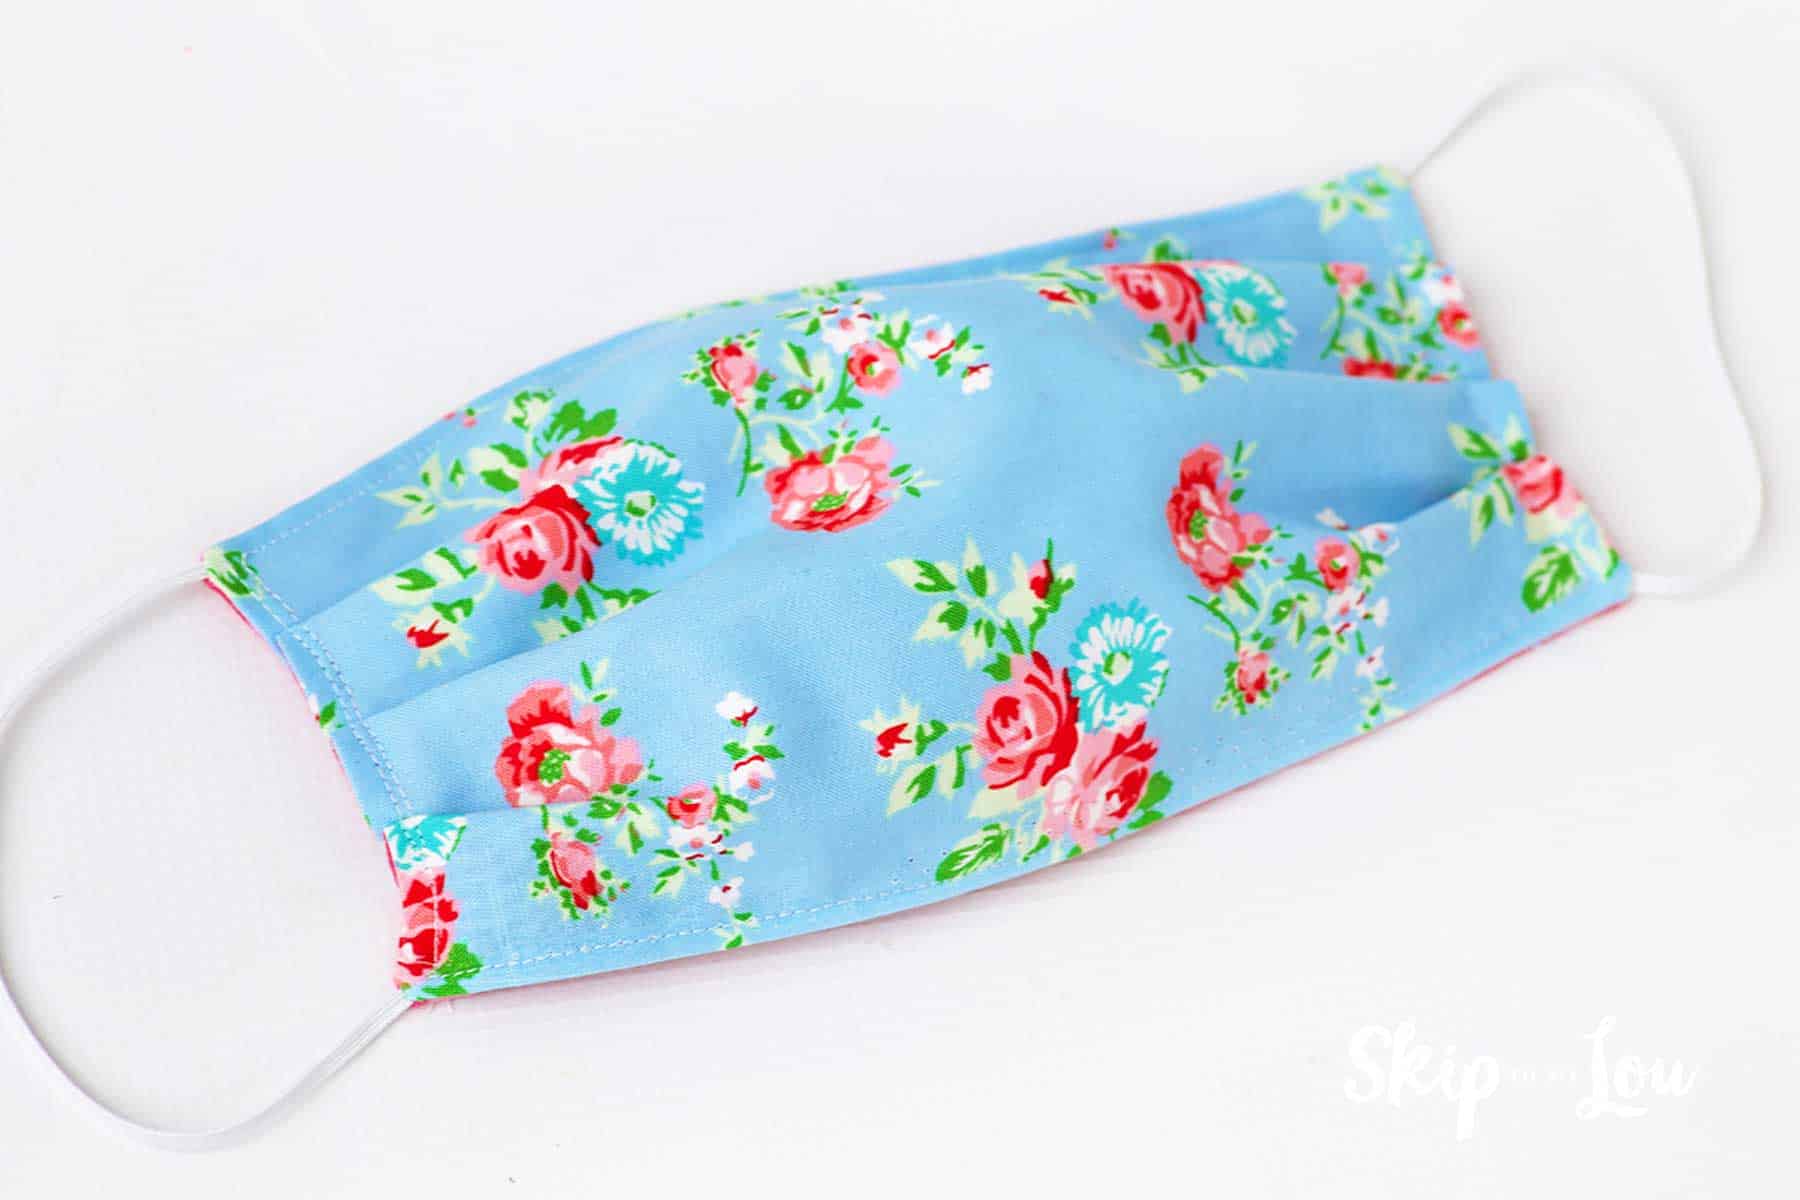
Sew this DIY Face Mask in minutes! With a tiny bit of fabric and elastic, you can make a comfortable and stylish face mask. Use my free printable pattern in small, medium, and large.
If you are making loads of homemade face masks and want to give them here are some cute face mask tags.
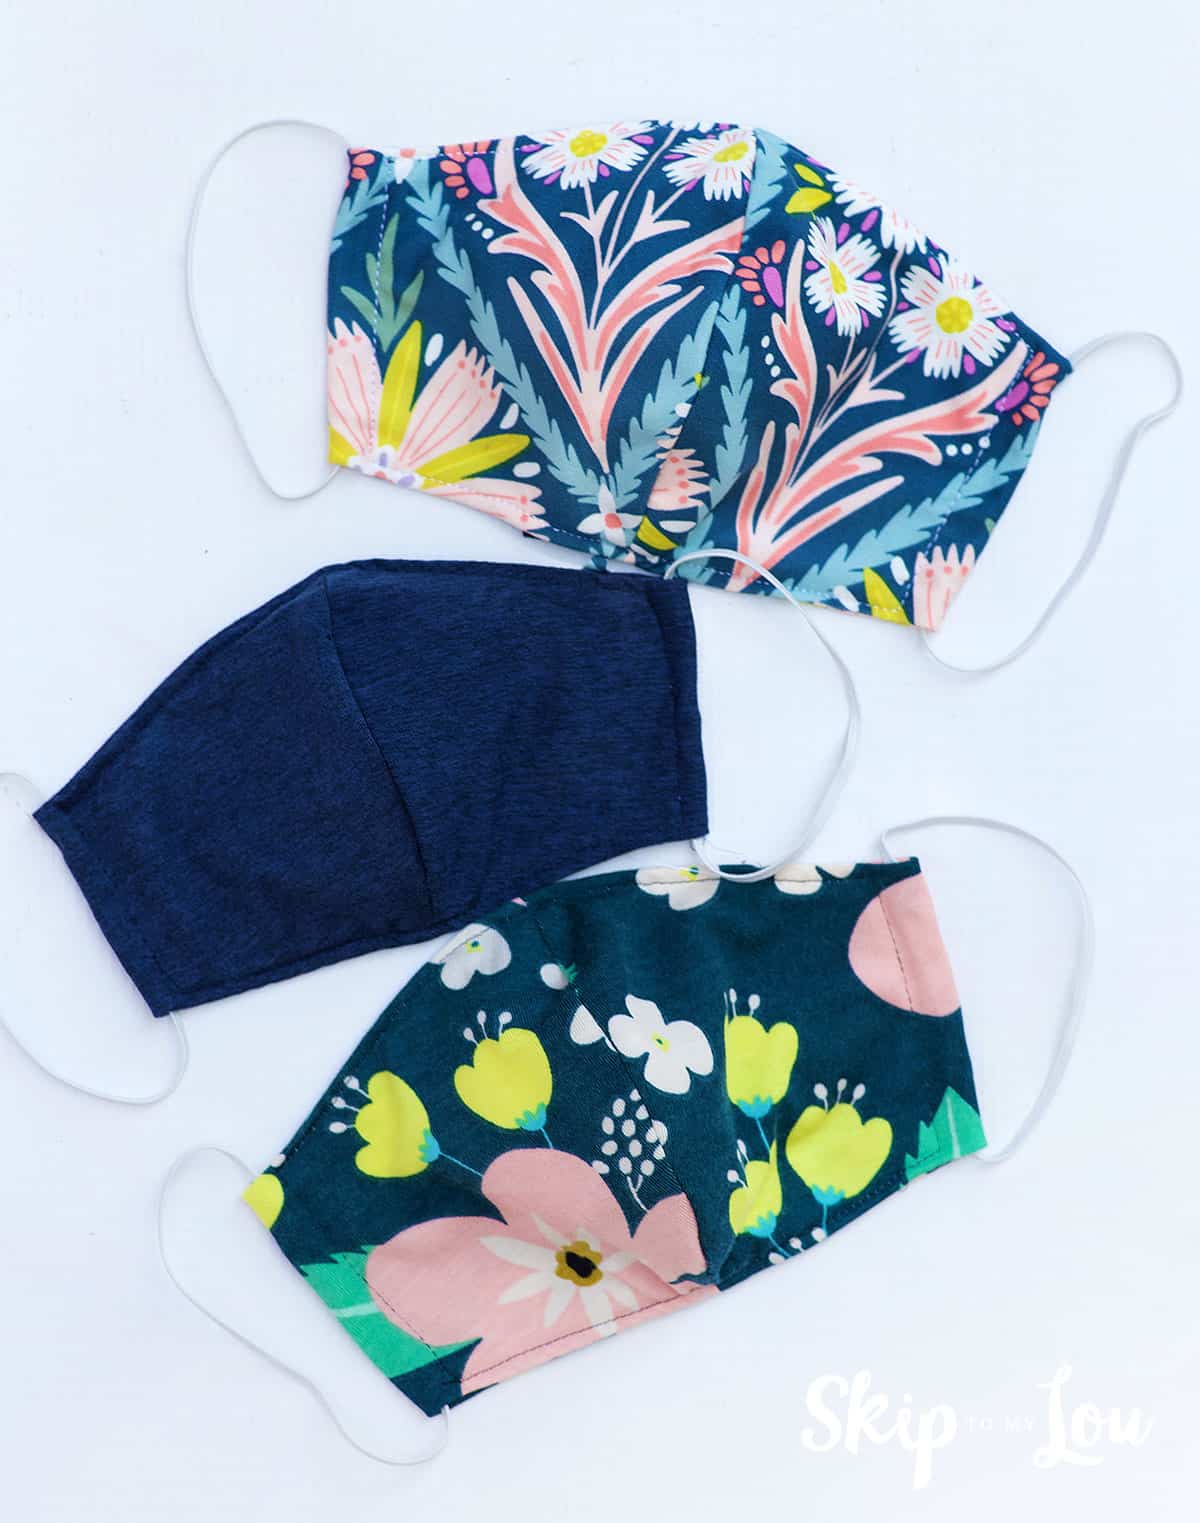
Our first masks were made from tightly woven cotton. My daughter, who now wears a mask to school every day likes the feel of a softer knit fabric.

Here are the Supplies You Need to Make a DIY Face Mask:
- fabric (I used soft stretchy cotton)
- elastic (1/8 inch wide flat elastic, or elastic cording)
- scissors
- sewing machine
- rotary cutter
- cutting mat – I love this cutting mat that also works for pressing
- bodkin
- pins
TIP: Pre-wash fabric before beginning this project. The masks will require frequent washing and you don’t want them to shrink after you sew them.
ELASTIC CORDING NOTES: Cut the pieces of elastic cording longer than you think you need to allow enough cord for tying a knot. For a medium mask I cut my pieces 11 inches.

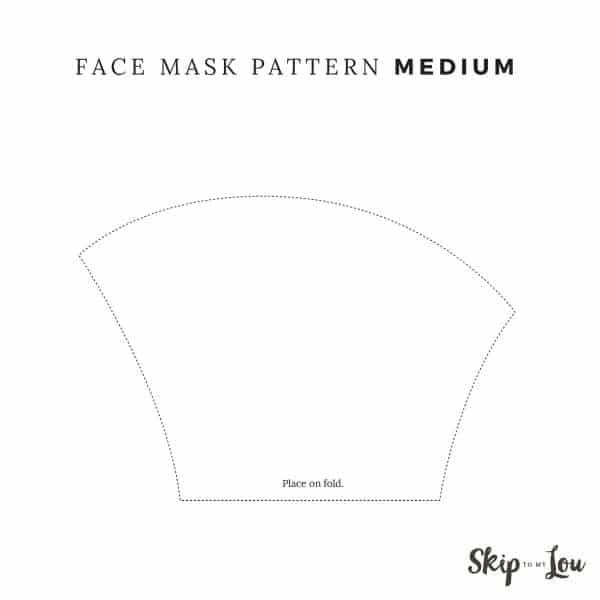
Get Your Face Mask Pattern Ready
First, you will need to download the face mask pattern. There are three sizes to make a kid’s fabric mask or one for women or men.
- Click the image to download the face mask pattern PDF..
- Print on regular copy paper. You can use the entire shape or half the shape and place on the fold of the fabric. If you are working with a print that you want to line up or show a specific part of the fabric cutting around the whole pattern is easier. If it doesn’t matter I like using the pattern template that is placed on the fold of fabric.
SMall Face Mask Pattern For Kids
The small size fabric face mask pattern is good for older kids and young teens. If you have a child let’s say about 6 and younger this template still works great, just use a 1/2 inch seam instead of a 1/4 inch seam.
This pattern works together so quickly it is no trouble to make one and then make adjustments so they fit perfectly on your child. With so many different face sizes it is hard to say which size will be best.
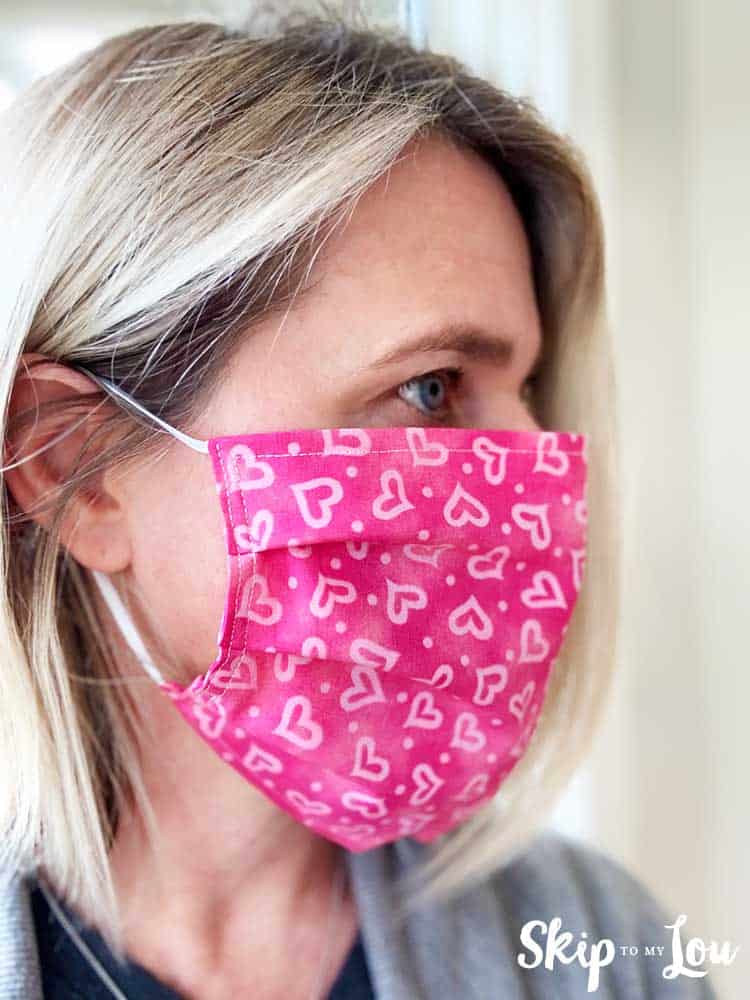
After sewing loads of masks, this mask is the best fitting most comfortable mask we have made.


Medium Face Mask Pattern

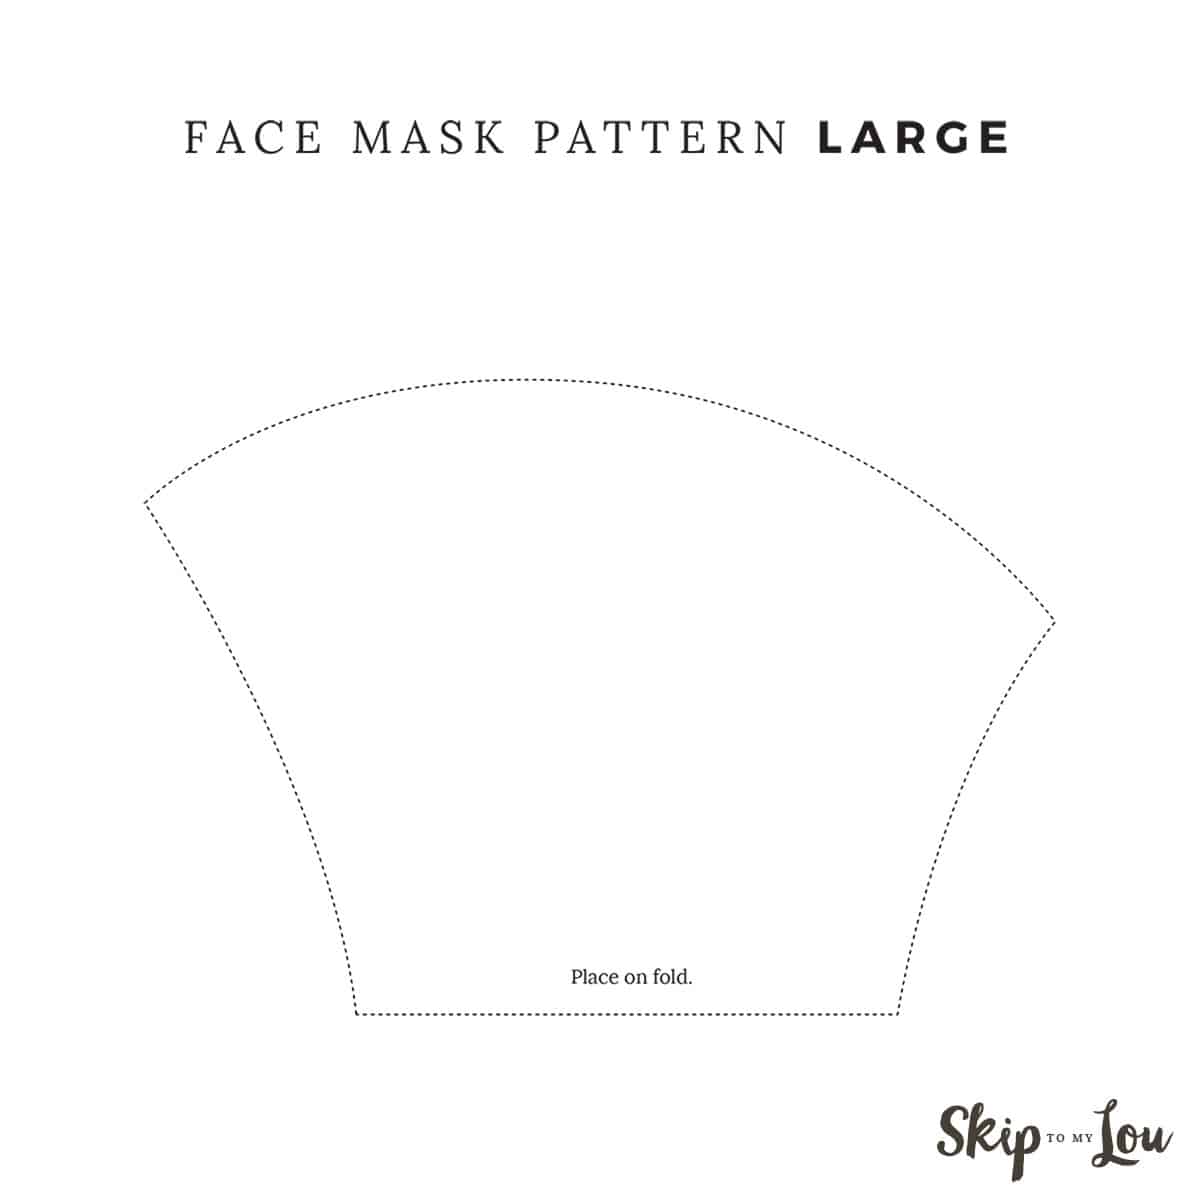
Large Pattern
This pattern piece measure 9″ x 6 1/2″

How to Make a Fabric Face Mask
Cut out two pattern pieces out of your fabric. We used a soft stretchy cotton knit.
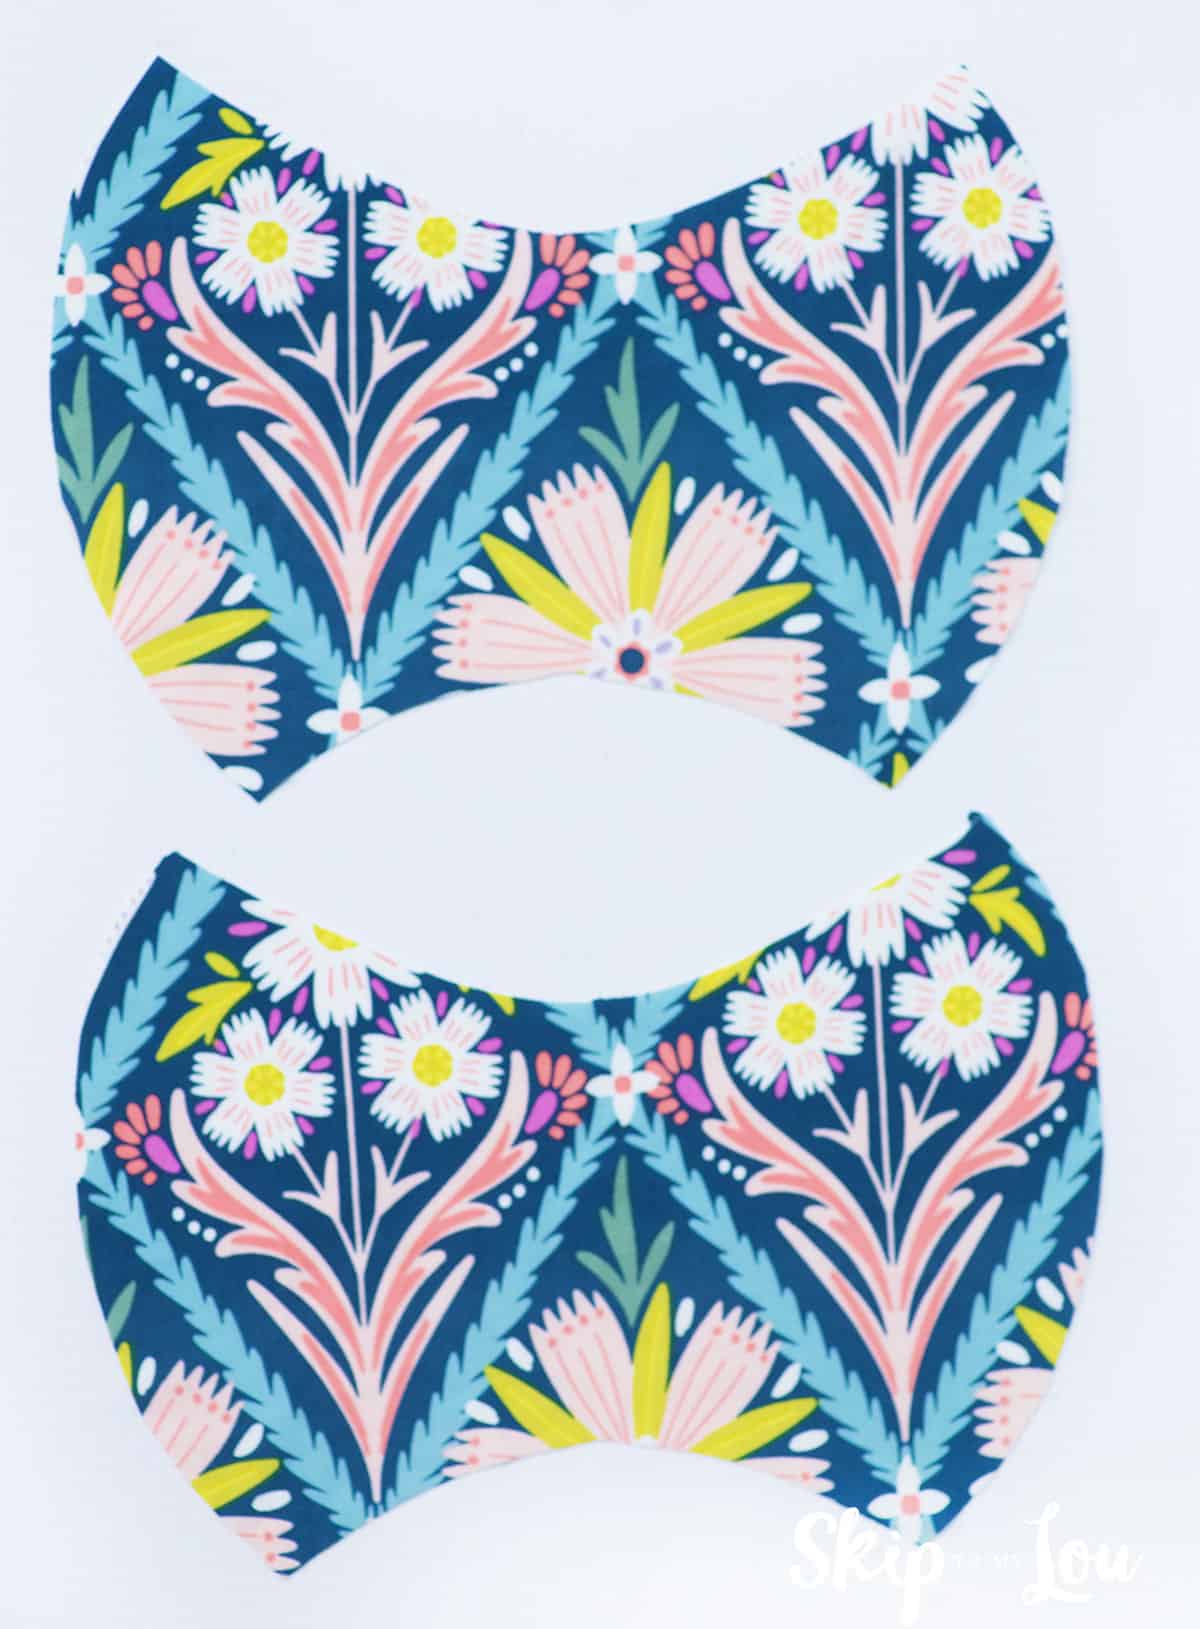
With right sides together stitch together the curved side using a 1/4 inch seam. Since I am using a stretchy fabric I used a stitch length of 3. You will find this setting on your sewing machine.

Clip the fabric along the curved edge close to the stitching. Be careful not to clip the seam. This will help the seam lay nicely.

Fold the mask right sides together so the curved stitching line is in the center.
Using a 1/4 inch seam start 1/2 inch away from the edge and stitch across the top, stopping 1/2 inch from the other side. Repeat along the bottom but leave a 1 1/2 inch opening for turning.
UPDATE: I now sew along the bottom leaving the opening at the side. I finish stitching about an inch from the side instead of 1/2 inch. It is less starting and stopping and still easy to turn the stretchy knit through. It will get secured when topstitching.

Turn mask right side out. Top stitch close to the edge, but 1/2 inch from the sides.

Cut two pieces elastic approximately 9 inches for a small mask (children), 9 1/2 +inches for a medium mask (women), 10+ inches for a large mask (men).Feed elastic pieces through the side openings.
TIP: The elastic sizing is important for fit and comfort. Each person will be different. Using the elastic cording that can be tied and knotted is a bit easier to adjust. Be sure to test elastic size before stitching the flat elastic or tying off the elastic cording. It is better to cut is larger than you think, it can always be made smaller.

Stitch the ends together about 1/4 -1/2 inch from the end. Check sizing before stitching ends of elastic.

Trim elastic close to stitching.

Pull stitched ends into the casing to hide. Finished!
If you find the finished mask slips down on the elastic while wearing you can make a stitch through the fabric and elastic to hold it in place.

This pattern is so quick and easy you can make a stack of masks in no time at all. We figure we need one for every day of the week.

FREE Printable Face Mask Instructions
Click on the image to print the instructions to make the DIY face masks. It just takes a few steps but keeping this guide by your sewing machine will be handy.

More Free Mask Patterns
I have you covered (pun intended) with two more styles of DIY Masks. I hope you will find them simple to sew and easy to wear.
I have a homemade DIY surgical mask pattern with sizing for kids too.
and also a face mask with filter pocket. Both are easy homemade face masks!
Fun Ways to Connect and Thrive
I would love to keep you fully stocked with creative ideas, yummy recipes, fun crafts, and loads of free printables. Subscribe to Skip to my Lou to get new ideas delivered to your inbox. Follow me on Facebook, Pinterest, Twitter, and Instagram for all my latest updates.


This is genius mask template!
Thank you! This is a great & simple pattern for the type of fabric I will be using. I’ll add a wire in the nose, but otherwise no other changes!
ahh thanks, Mandi! I am so glad it worked for you.
I used interfacing with this template and it worked like a charm. I took a piece of interfacing and folded it in half so that each side of the fold was large enough to cover half of the template and laid it on top of the fabric I chose for the mask on the left side.
Then I placed the template over the fabric and interfacing and drew a line to cut out. Pinned together and cut. After cutting I took one piece of interfacing and moved it to the left-backside of the mask then sewed as instructed. I trimmed any interfacing that ran over into the ear loop section to avoid any bulk there.
Happy sewing!
Thank you!! I cannot tell you how thankful I am. I was trying to figure this out and this is exactly what I had in my mind. I was tired of cutting multiple pieces of fabric and pleating and all of the failed attempts with other templates. This one is the best!
I’m 89 years old and appreciate the offer of free pattern and instructions because I have no money to buy one….
Thank you so much for this easy to follow pattern. I can now make several more for my grandchildren to wear to school.
No Sue, this one doesn’t have a filter, but I have this pattern that has a special pocket if you prefer.. https://www.skiptomylou.org/face-mask-with-filter-pocket/
They are beautiful, but I have one important question. No filter of any kind?? I’ve been making masks with a washable, non-woven fabric as a middle layer. (Simple fabric will not filter out germs.) In this serious time of Covid-19, I think you should add this layer.