Get ready to hop into the Easter holiday season with this how to draw the Easter Bunny guide, using simple shapes. This step-by-step drawing guide is great for younger kids, or even older kids. They’ll find the simple steps in this cute bunny drawing lesson easy to follow. This fun and engaging Easter Bunny step-by-step tutorial is the perfect activity for kids of all ages to do on an Easter Sunday.
Use this drawing tutorial to draw a cute Easter Bunny, an easy way for your little artist to improve their drawing skills during the Easter holiday. Your children will have a great time drawing this folkloric figure with basic shapes in these easy Easter drawings. A great way to keep your children entertained during your Easter celebration.
Join Skip to My Lou and embark on a world of fun and exciting family activities! Our step-by-step tutorials for drawing, coloring, and crafting are perfect for the whole family to enjoy together.
Related: Check out How to Draw a Dog and How to Draw a Butterfly for more drawing inspiration.
This article contains affiliate links.
Easy Easter Bunny Drawing Video
So, why not add a little creativity to your Easter celebration this year? With clear and step-by-step instructions, your little ones will have a blast improving their drawing skills and creating their very own Easter Bunny masterpiece. Grab your pencils and paper and let’s get started on this exciting Easter drawing adventure together!
Essential Drawing Supplies for Drawing the Easter Bunny
- Sketching Pencils
- Kneaded Rubber Eraser
- Sketch Pad
- Erasable Colored Pencils
- Fine markers
- Sketch and Drawing Art Pencil Set
- Artist drawing set (This is great for new and experienced artists. It’s also something I give as a gift.)
How to Draw The Easter Bunny Step-by-Step
Step 1
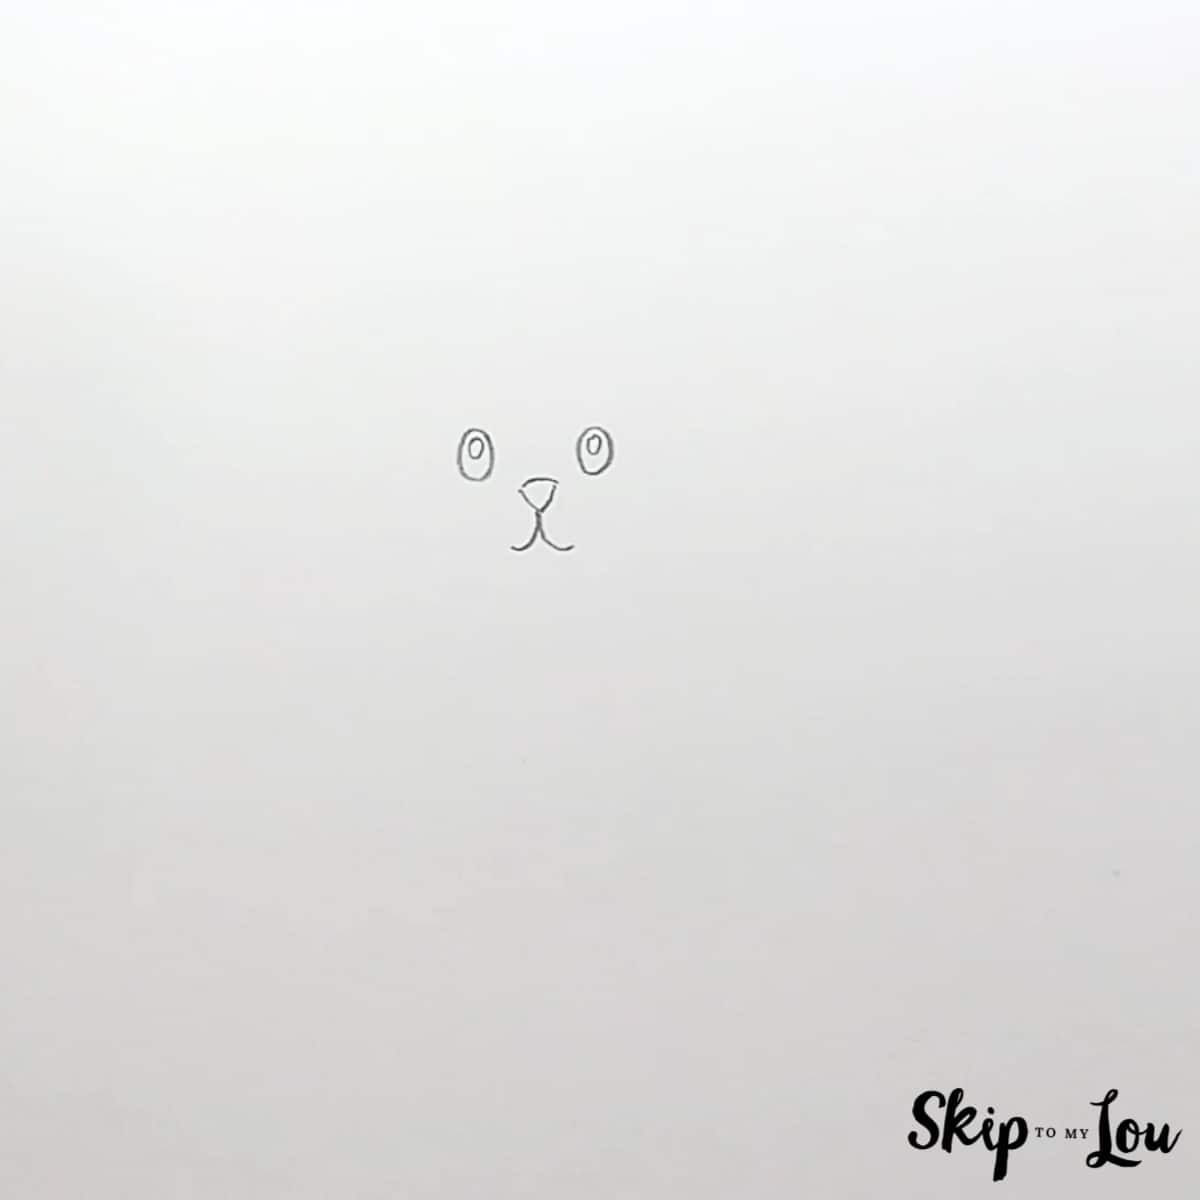
First, let’s begin by drawing your cute Easter Bunny’s face. In the center of your page, draw a nose with an upside-down triangle shape. After that, from the bottom of the nose, draw two curved lines to give the shape of the mouth.
Above the nose, draw two oval shapes for the eyes. To finish, add circles in each eye for the pupils.
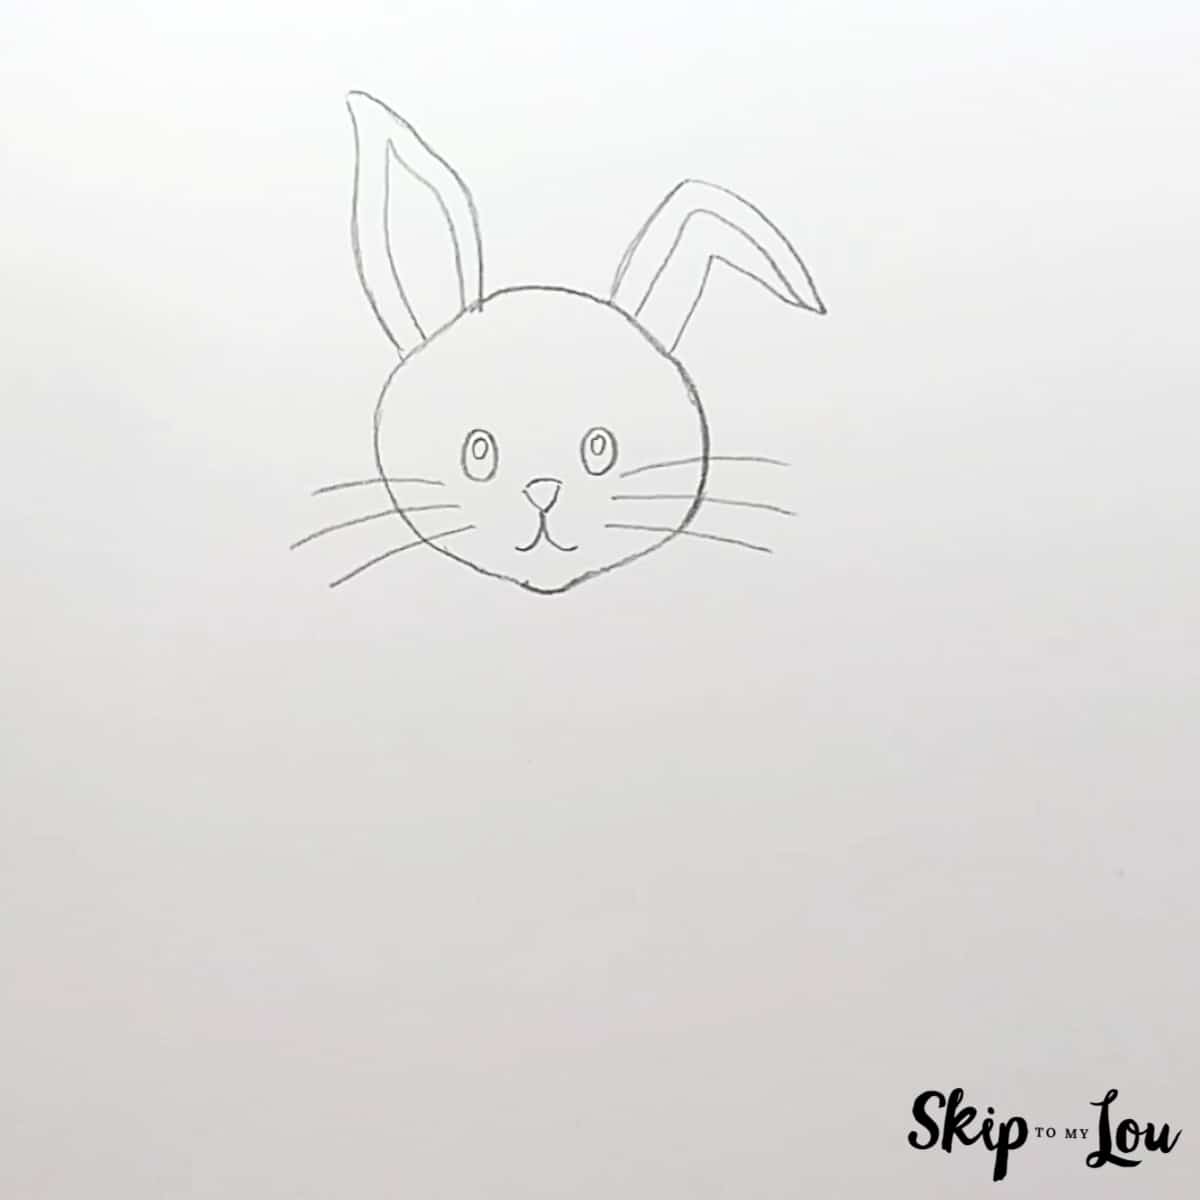
Step 2
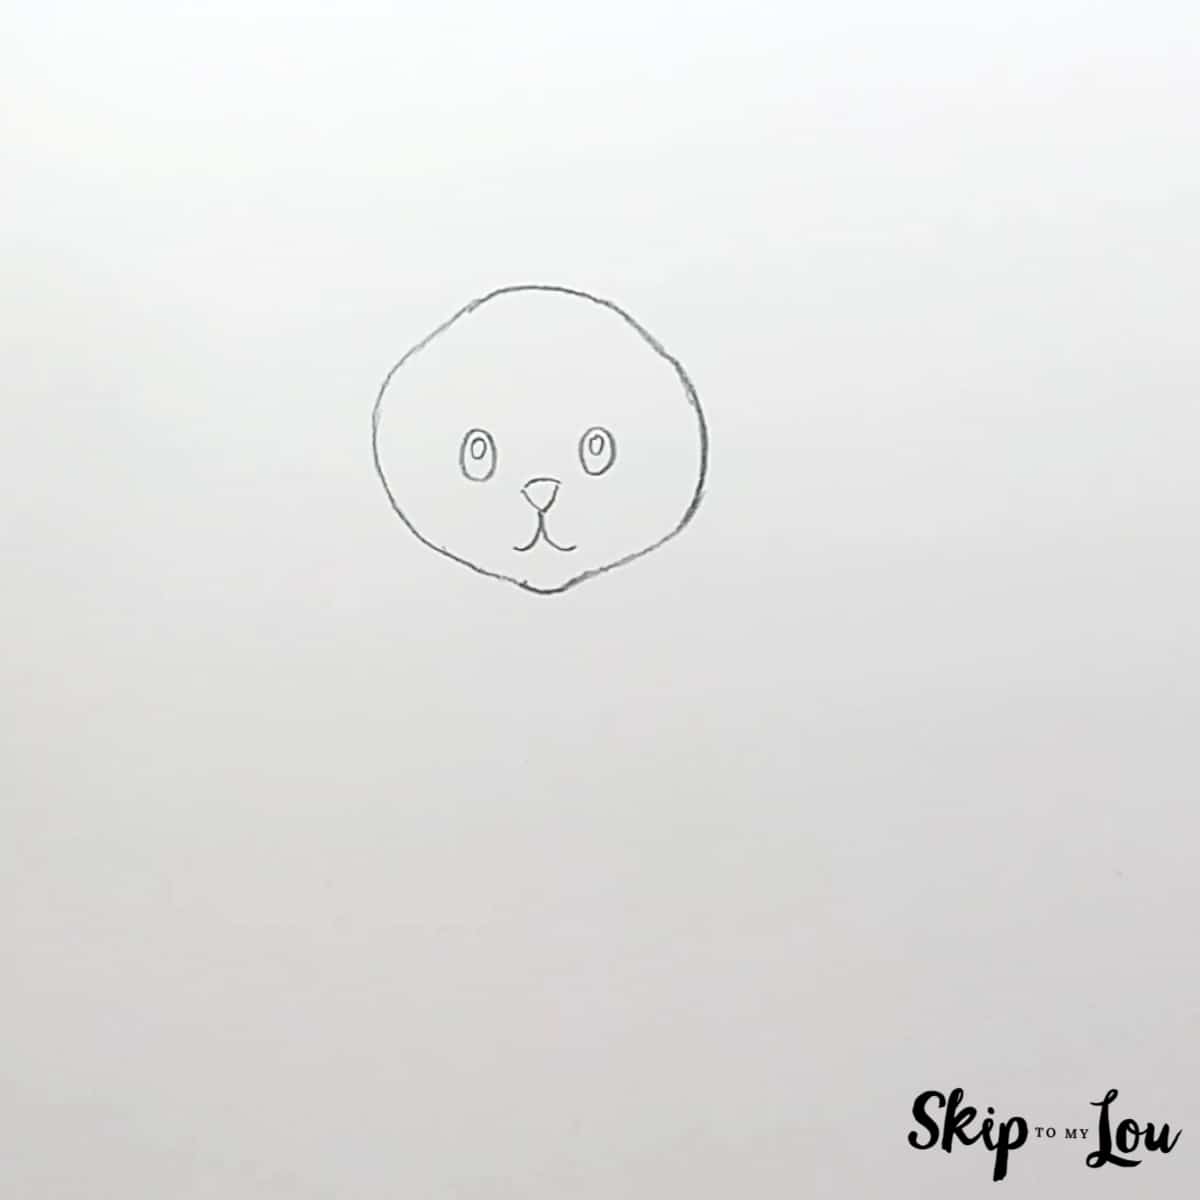
Next, we need to draw the bunny’s head. Draw a curved line right around your bunny’s features. Leave a bit more space at the top, and a little bump at the bottom to form a chin. Use the picture below to help.
Step 3
A bunny needs ears! Firstly, on the top-left side of the head, add an ear. Use a curved triangular shape, just like in the reference image below. To complete, draw another triangle on the inside of the first, to show the inside of the ear.
Secondly, let’s draw the ear on the right of the head with a slight bend. Use three lines and copy the drawing below.
Finally, add three curved horizontal lines on both sides of the face to form whiskers.
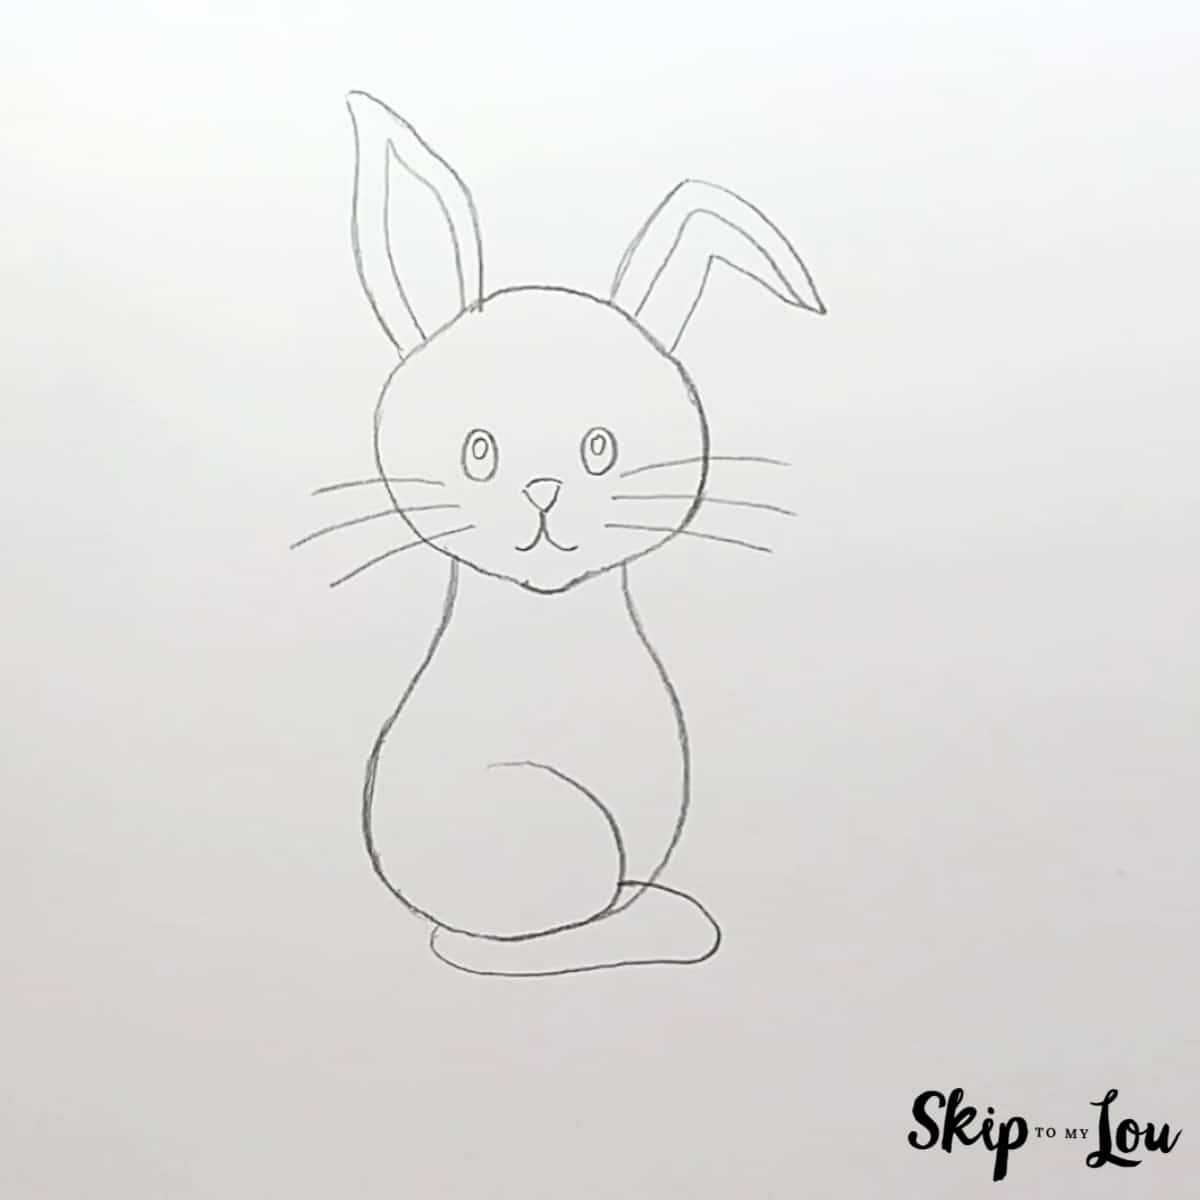
Step 4
Now we should draw the bunny’s body. Starting at the bottom-left of the head, draw a line downwards that curves around and comes back up to the bottom-right of the head, just like in the picture.
After that, add a curved line at the bottom for the bunny’s leg. Finally, add a curved-rectangle shape at the bottom to form the foot.
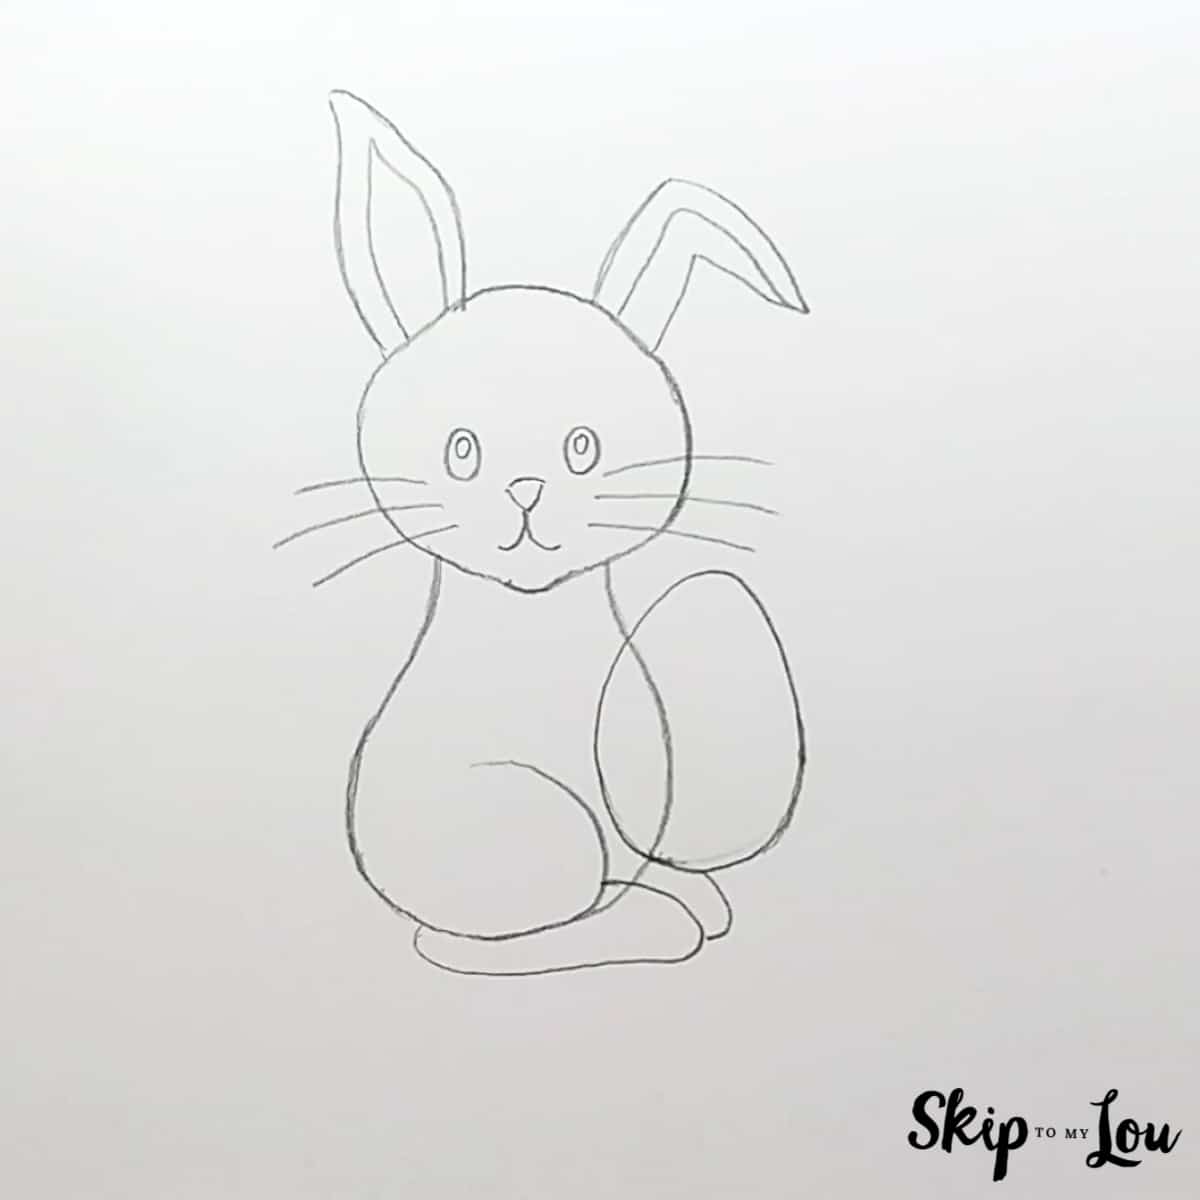
Step 5
Draw a large egg to the right of your Easter Bunny drawing. It should almost be as large as the bunny’s body.
After that, underneath the egg, draw a second foot.
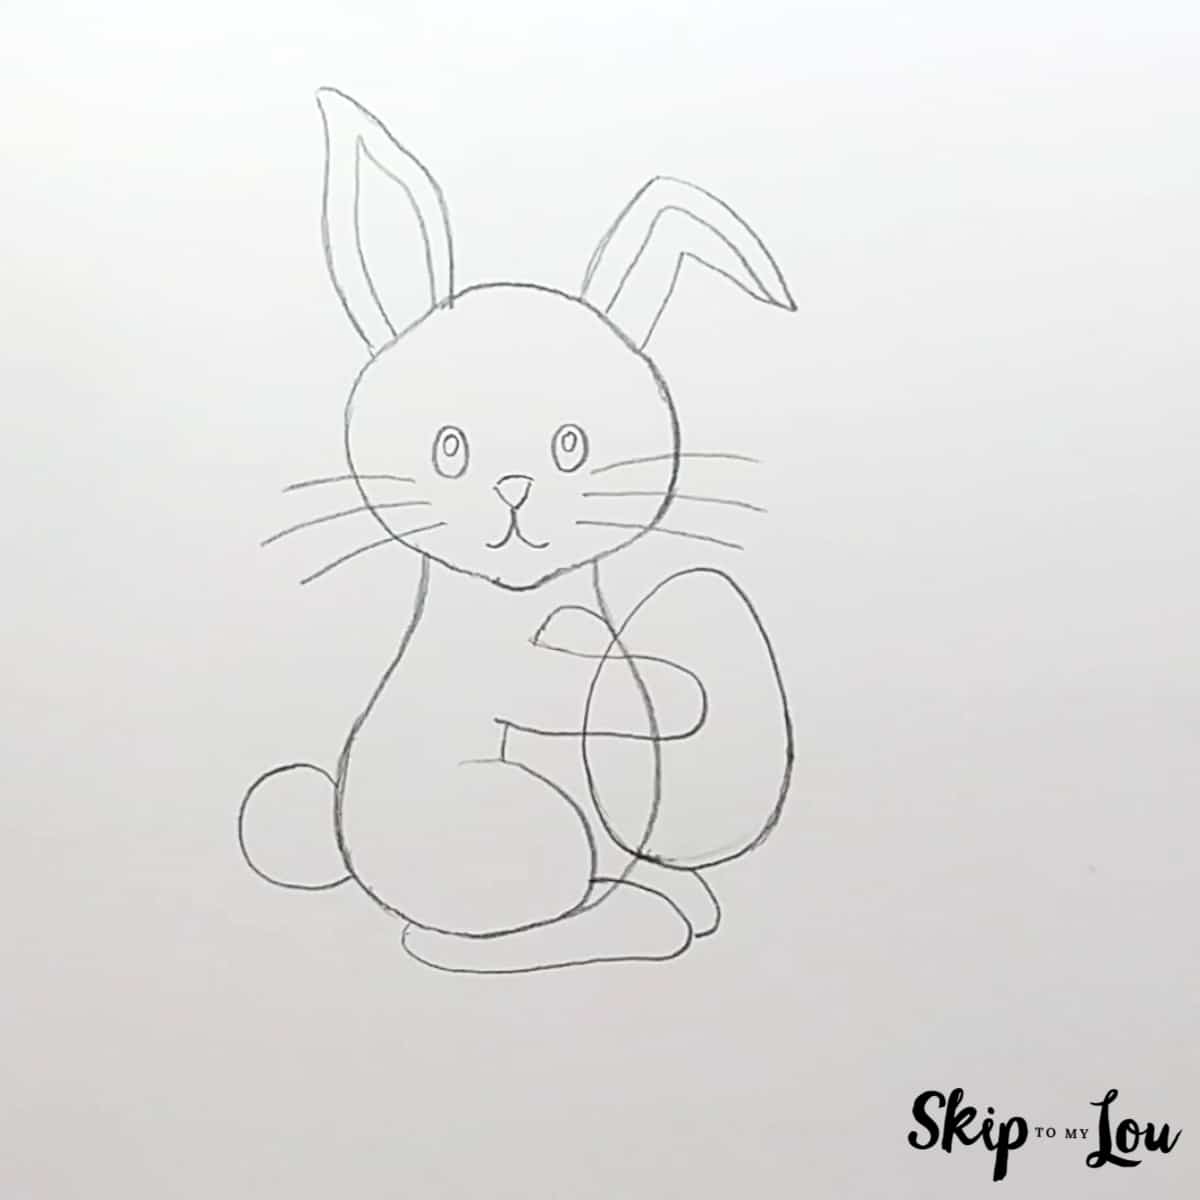
Step 6
First, let’s draw your bunny’s arm and hand. Extend two lines from the body into the center of the egg, and use a curved line to connect them.
Second, underneath the arm, add curved lines to show your bunny’s stomach.
To finish, add a bunny tail on the bottom-left with a circular shape.
Step 7
In this step, we add some details to make your Easter Bunny look great! Try to copy the features from the picture below. Notice the egg’s decoration, the fuzzy tail, and the toes on the feet.
Finally, use a marker to draw over your pencil lines. Now your cute little Easter Bunny really stands out!
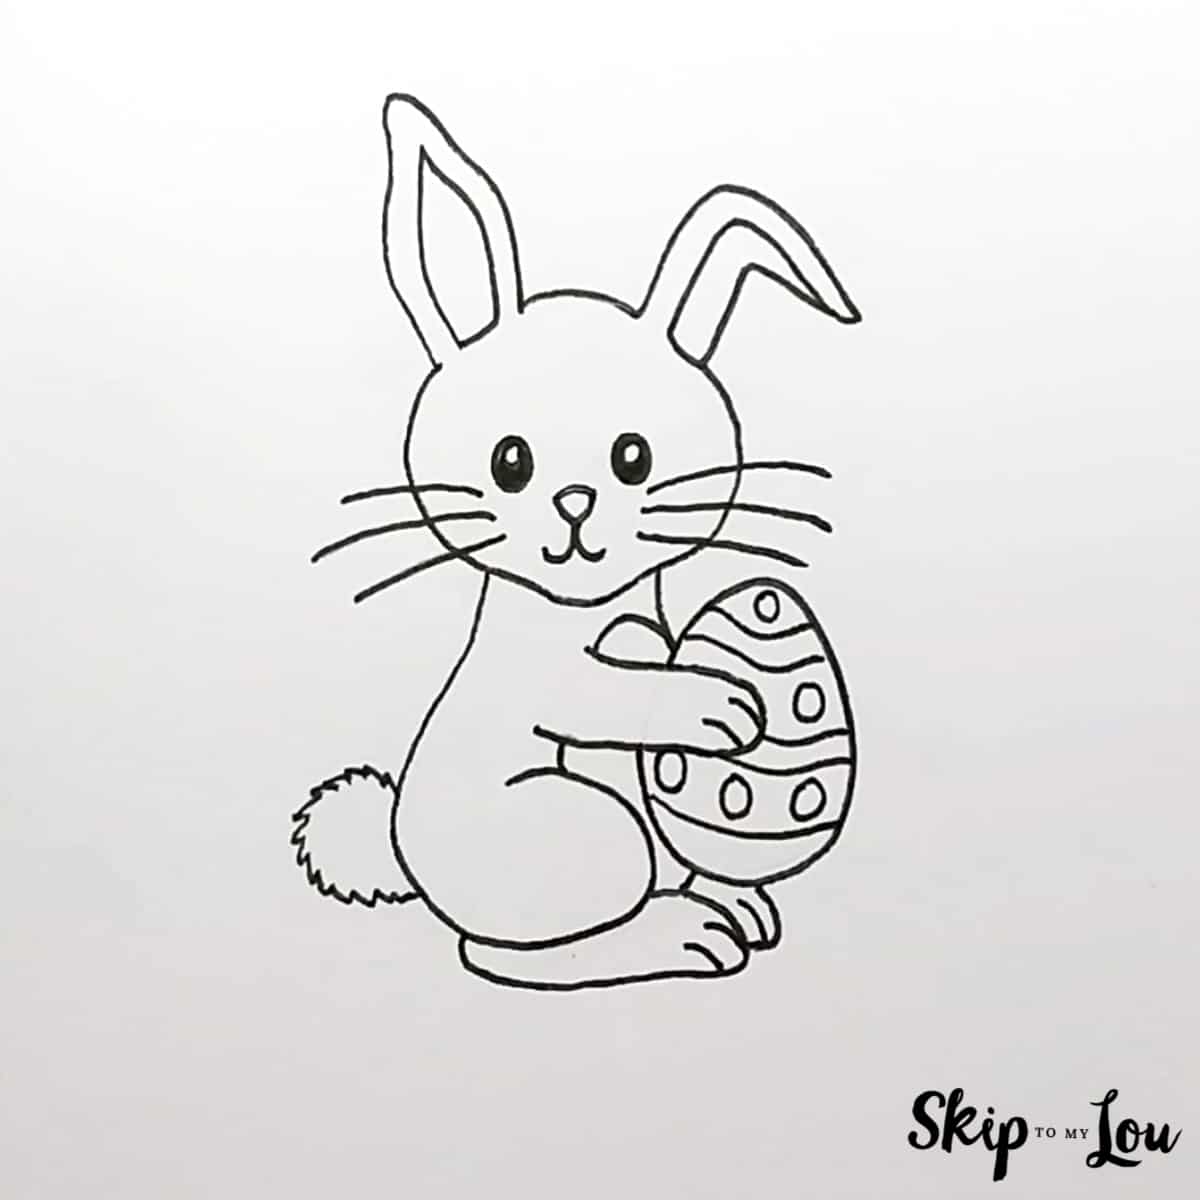
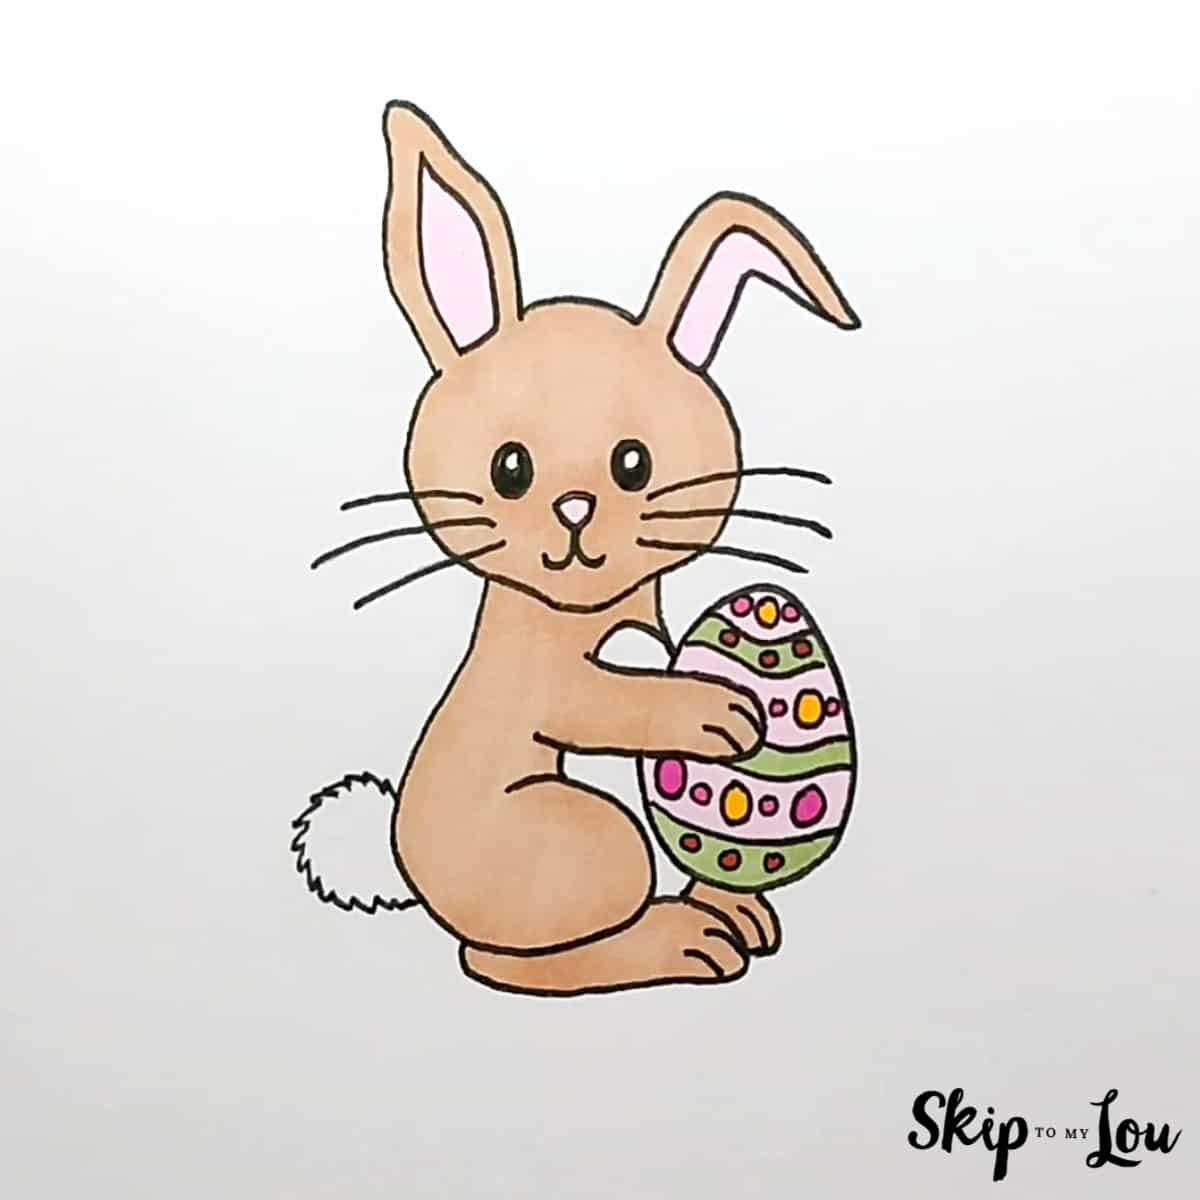
Your Finished Easter Bunny Drawing
You can color your Easter Bunny, using colored pencils, or even oil pastels. Start by coloring the bunny with a light brown shade. This will give your it a soft and fluffy appearance, just like a real bunny.
Let your creativity run wild and add some bright colors to the Easter Egg. Think about using a rainbow of colors, or perhaps choosing your favorite color scheme. You can even add your own patterns or designs to your egg to make it extra special.
Your finished artwork will be a beautiful addition to your Easter decorations or a thoughtful gift for a loved one.
More Fun Drawing Tutorials
Are you eager to elevate your drawing skills and take on new challenges? Look no further!
- Have fun with this How to Draw a Basketball Guide.
- This Dinosaur Drawing Tutorial is great for kids.
- Improve your drawing skills with How to Draw a Bird.
- This Step-by-Step Guide to Drawing a Book will encourage more reading.
- Use this Fire Drawing Guide to improve your skills.
I would love to keep you fully stocked with creative ideas, yummy recipes, fun crafts, and loads of free printables. Subscribe to Skip to my Lou to get new ideas delivered to your inbox. Follow me on Facebook, Pinterest, Twitter, and Instagram for all my latest updates.