In this post, we’ll show you how to draw hair through simple steps to draw realistic hair, from straight hair and curly hair to short hair and long hairstyles. By breaking hair down into simple shapes, you’ll be able to capture the essence of female hair in a way that brings your drawings to life.
This step-by-step guide is perfect for kids of all ages, from preschool and kindergarten to toddlers. We’ll guide you through fun and easy steps to create different hairstyles that’s short, long, or anything in between. Get ready to unleash your child’s creativity and have fun with this engaging activity that’ll keep them entertained for hours.
Explore fun family activities with Skip to My Lou! We offer an array of step-by-step tutorials for drawing, coloring, and crafting that the whole family can enjoy together. Start creating happy memories today!
Related: Check out How to draw a dog and How to draw a butterfly for more drawing inspiration.
This article contains affiliate links.
Easy hair drawing
Whether you’re at home, in the classroom, or outside, our easy hair drawing tutorial is a fun and easy activity for kids of all ages. All you need is a pencil and paper, and you’re ready to get started. Follow our step-by-step process of hair drawing and watch as your child’s creativity comes to life.
Essential drawing supplies for drawing hair
- Sketching Pencils
- Kneaded Rubber Eraser
- Sketch Pad
- Erasable Colored Pencils
- Fine markers
- Sketch and Drawing Art Pencil Set
- Artist drawing set (This is great for new and experienced artists. It’s also something I give as a gift.)
How to draw hair step-by-step
We have two guides for the shapes of the hair! One for long hair, and one for short hair. Follow these simple steps and basic shapes, and you’ll be drawing your own hair in no time!
Long hair
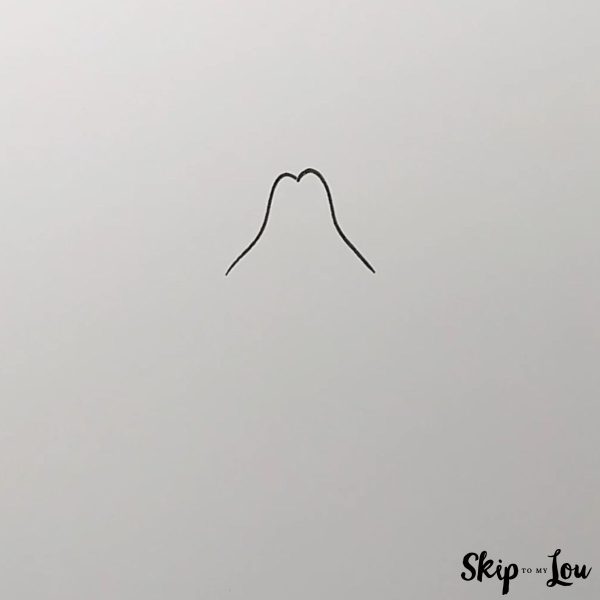
Step 1
The first step is to draw the top of the head. Draw two short curved lines that meet in the middle of your page, just like in the reference drawing below.
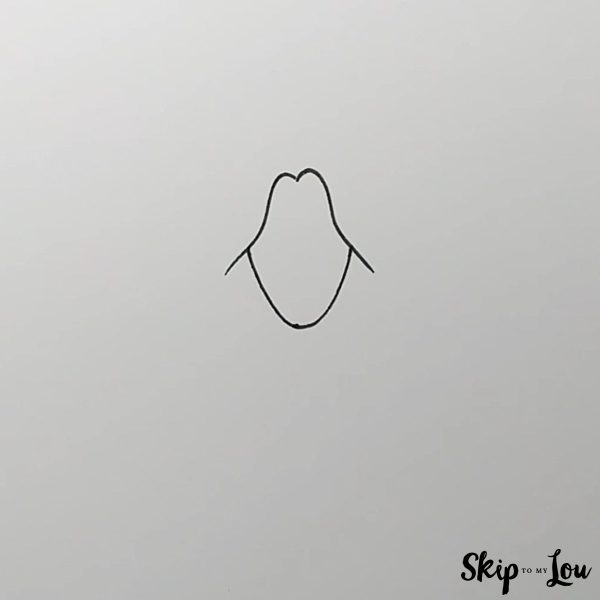
Step 2
Secondly, we should draw the overall shape of the head. Draw a curve at the bottom of your drawing that connects to the hair on both sides, just like in the example below.
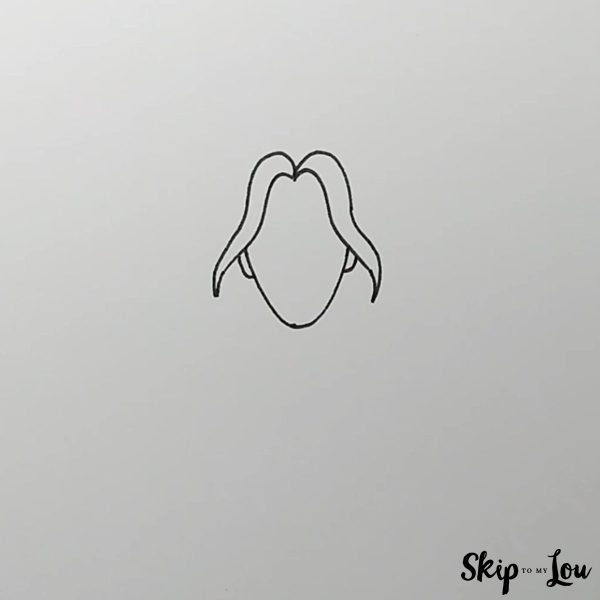
Step 3
Next, we’re going to add some hair strands. Add a second curved line to each side of the head. After that, put two little ears underneath the hair.
Step 4
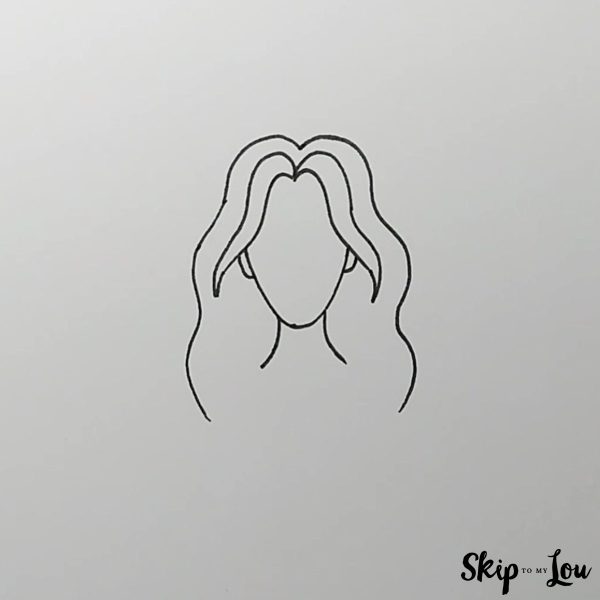
In the previous step, we added some hair strands. The next step is adding the full length of hair to our line drawing so we can show the direction of the hair.
Starting at the middle of the top of the head, draw a flowing line down past the bottom of the head, on both sides. After that, add two small vertical lines that curve outward below the head to form a neck.
Step 5
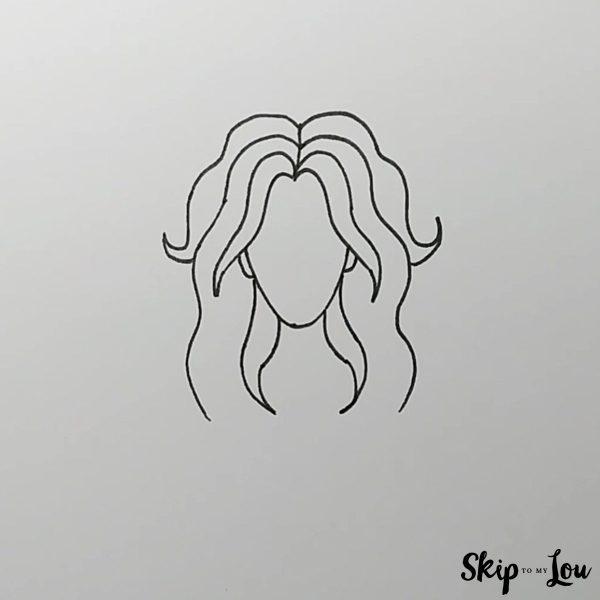
In this step, let’s add more layers of hair to create a better hair texture. Draw curved lines on both sides of the head connecting the ears to the bottom of the neck. Additionally, add some stray hairs to the top with pencil strokes that flick out to the sides at the tips of the hair. We can now see the overall flow of the hair.
Step 6
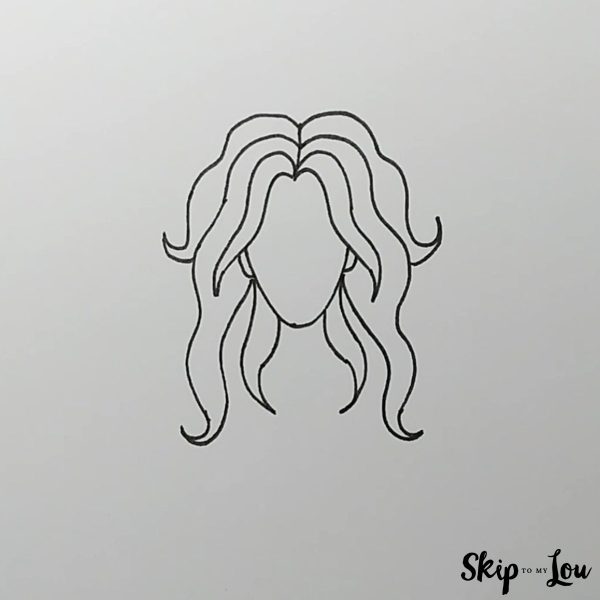
Let’s add some more individual strands. Connect the bottom of the longest strand of hair to the ear. Your hair drawing should look similar to the reference image below.
Step 7
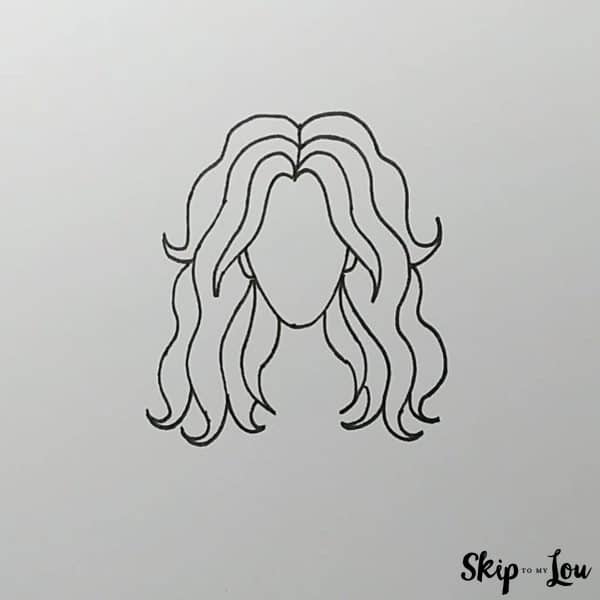
Next, we can add more strands to make the hair look fuller. Notice the added lines in the picture below, and try to copy them to finish our overall hair shape.
Step 8
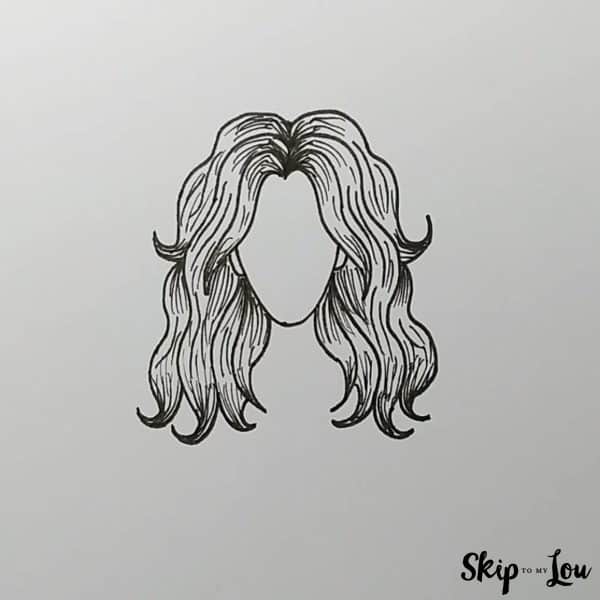
We’ve got a general outline, but to make it more realistic, we need the texture of the hair. The final step is to add lots of individual strands as shown below in this particular example. Add dark areas to show shadow areas. Look at this long wavy hair!
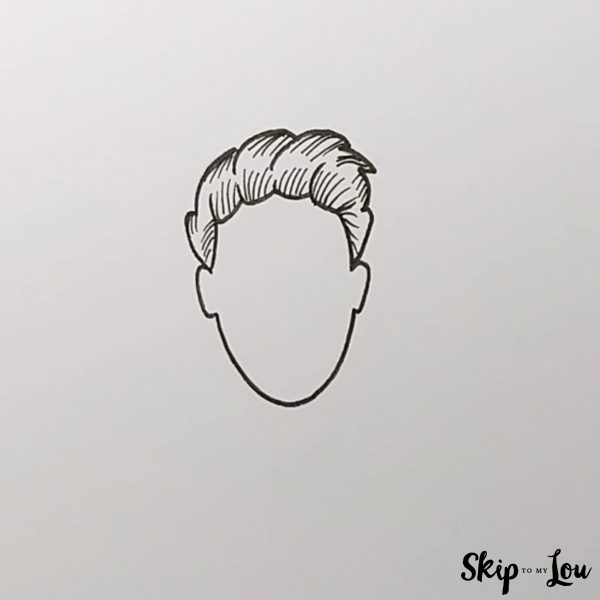
Short Hair
Step 1
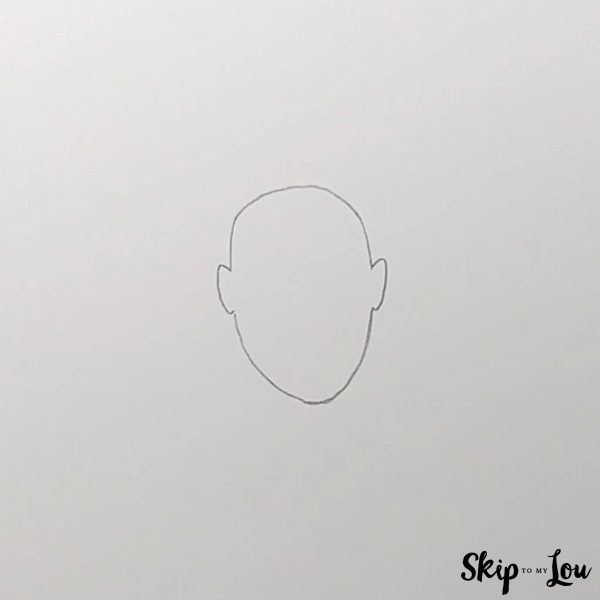
First, we draw the oval shape of the head, with two ears on both sides. Notice the ears are about halfway down the head.
Step 2
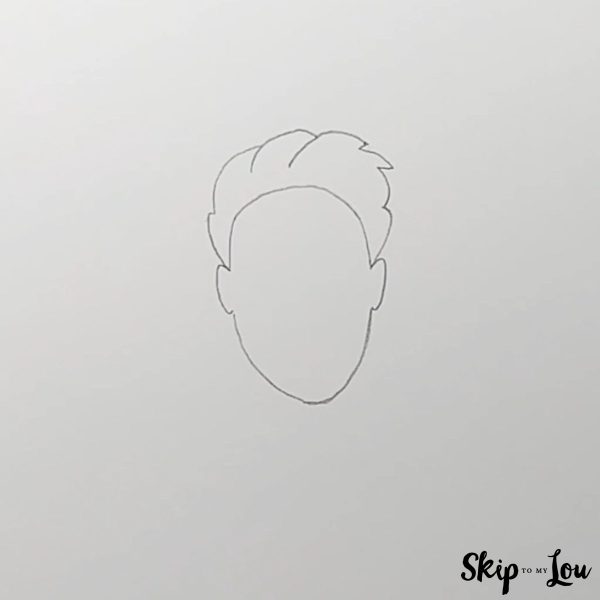
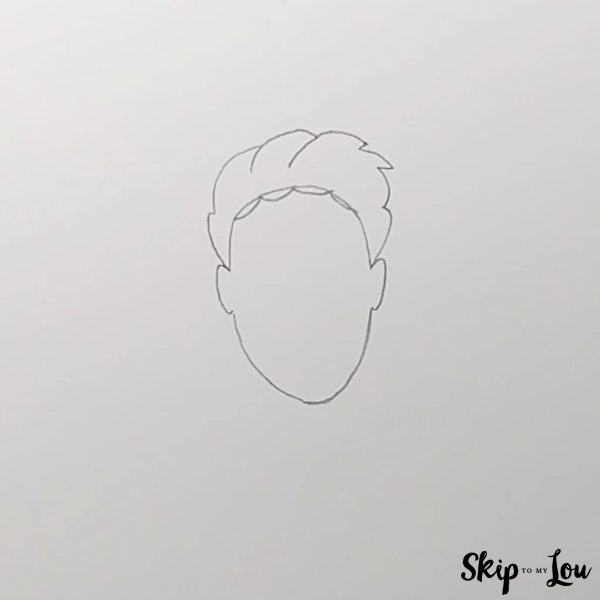
Next, we’ll add our short hair. Draw a jagged line from the top of one ear to the other. Add more pencil marks, like in the reference photo below, to make it look more realistic.
Step 3
After that, add four small upside-down semi-circles at the bottom of the hairline.
Step 4
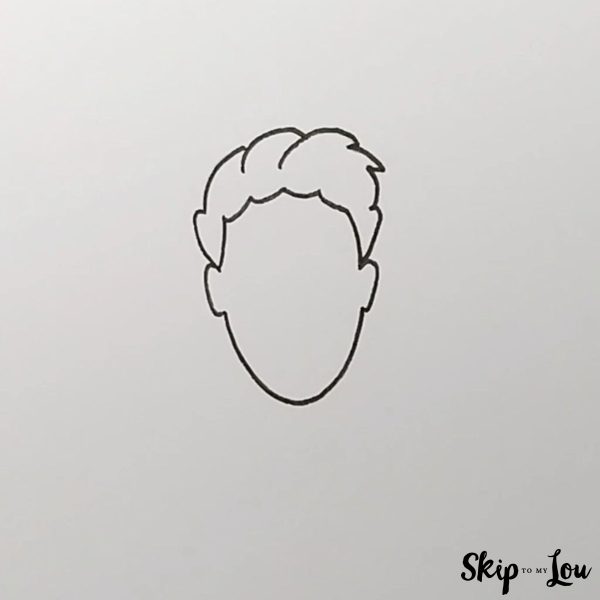
Next, remove the guideline at the top of the head with a kneaded eraser. After that, you can trace your pencil lines with a thick marker pen so your face with hair looks nice and clear.
Step 5
Finally, add some more detail with some individual hairs to improve the hair’s texture and make it look like real hair.
Your finished hair drawings
Once you’ve finished, it’s a good idea to give your hair a color.
Once you’ve mastered this hair drawing reference, try drawing different kinds of hair, or perhaps even try some anime hairstyles.
More fun drawing tutorials
Looking for more drawing tutorials? Check out our fun art challenges and take your skills to the next level!
- Encourage more reading with his Guide to Drawing a Book.
- How to Draw a Fire will show you how to make a fiery masterpiece.
- Use this Braids Drawing Guide to draw some afro-textured hairstyles.
- This Drawing Bodies Tutorial helps beginning artists draw human bodies.
- Great for youngsters, How to Draw a Snake will keep your children occupied.
I would love to keep you fully stocked with creative ideas, yummy recipes, fun crafts, and loads of free printables. Subscribe to Skip to my Lou to get new ideas delivered to your inbox. Follow me on Facebook, Pinterest, Twitter, and Instagram for all my latest updates.


