At Skip to My Lou, we love paper crafts, with origami animals being one of our favorites.
A square piece of paper, a couple of folds and you can make various animals that are so much fun for kids to try.
Today, we are focusing on origami instructions that give a HOOT! Yes, if you’ve wanted to make an origami owl, you’ve come to the right place.
Origami is the perfect way to enhance creativity, plus it’s a lot of fun, too

Origami is a great way for kids to expand their creativity, and we have so many other animals for them to try out afterward, including an origami frog, an origami parrot, an origami crane, as well as a paper rabbit.
For beginners to origami, we’ve provided a video too, so you can see exactly how the folds should be made.
So get your kids to pack away their toys, and start paper folding! They’ll produce owls that look similar to their real-life counterparts!
Supplies Needed for This Origami Parrot Tutorial
You will need the following supplies:
- A square sheet of paper
- Colored pencils or a marker
You won’t need glue or a pair of scissors for this origami owl.
Video Lesson: Origami Owl
Step-by-Step Instructions for Folding an Origami Owl
So let’s start folding our origami owl.
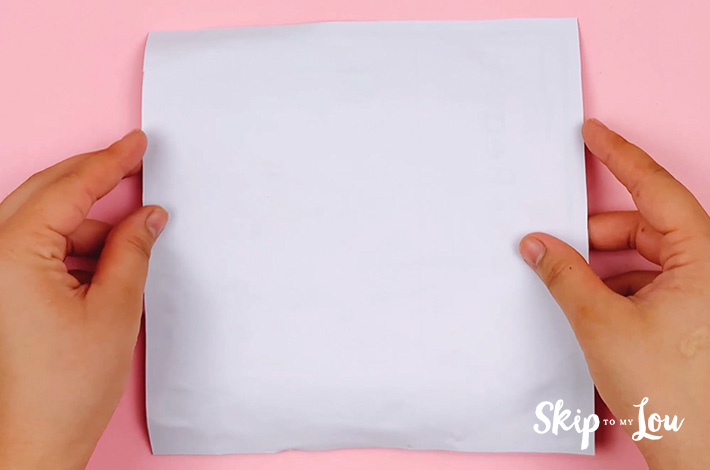
Step 1: Start with a square sheet of paper. You can use white paper, and then decorate the owl yourself, but it looks far better if you opt for a colored piece of paper. Take the paper and fold it in half.
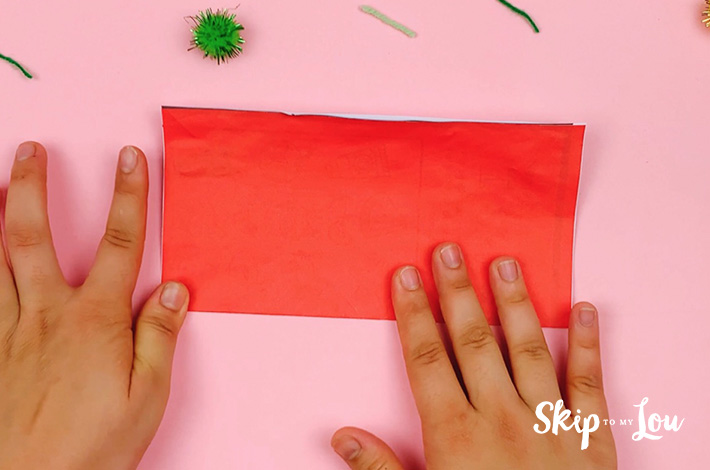
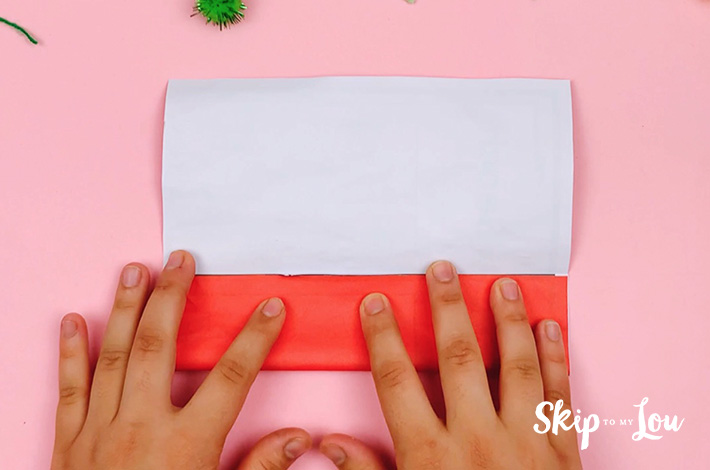
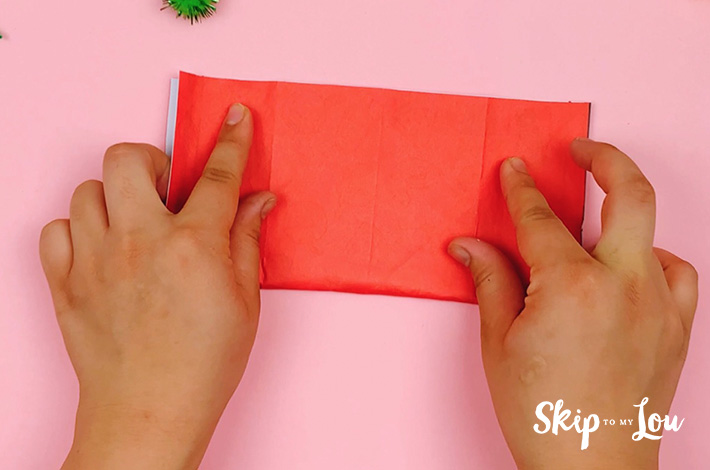
Step 2: Now fold the bottom of the paper upwards to the center crease line. Flip the paper 180 degrees and do the same again, as shown in the images below.
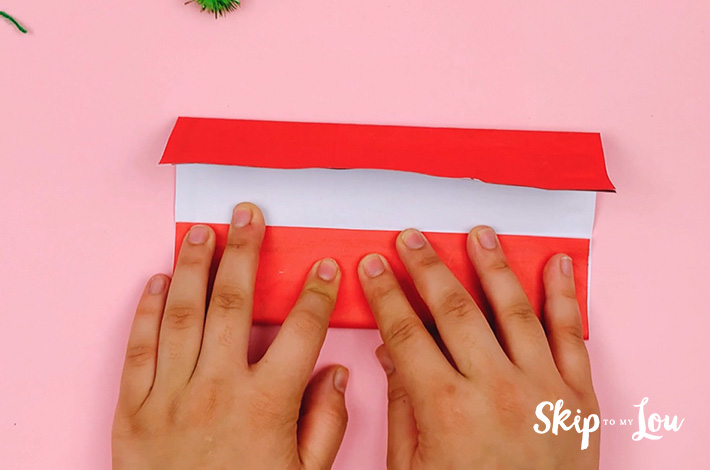
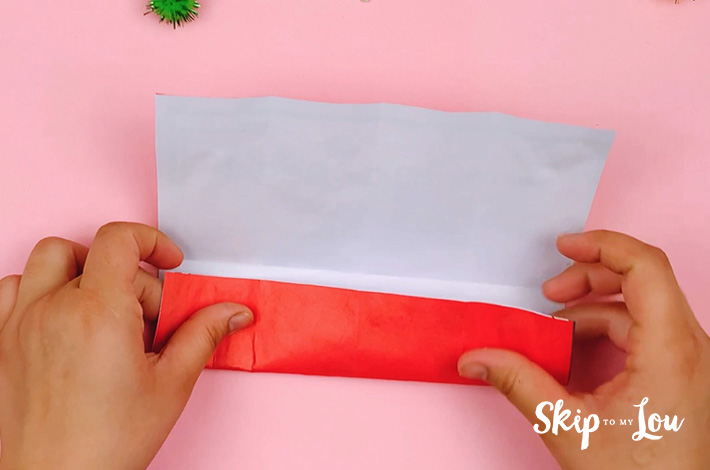
Step 3: Flip the paper 90 degrees and fold in half.
Step 4: Unfold the paper again, and make the same folds you made in step 2. Fold the bottom towards the center crease line, flip 180 degrees, and do it again. If you are unsure, the video shows these steps clearly.
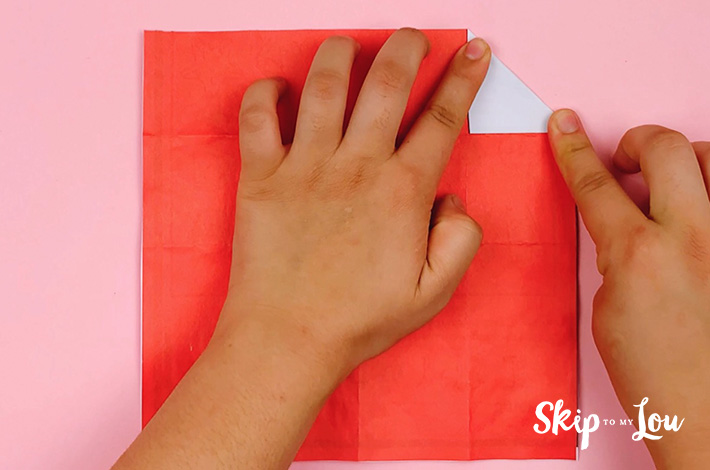
Step 5: Unfold the paper and flip it over, with the color side now showing. Fold the right-hand corner over to form a triangle. Do the same for the left-hand corner.
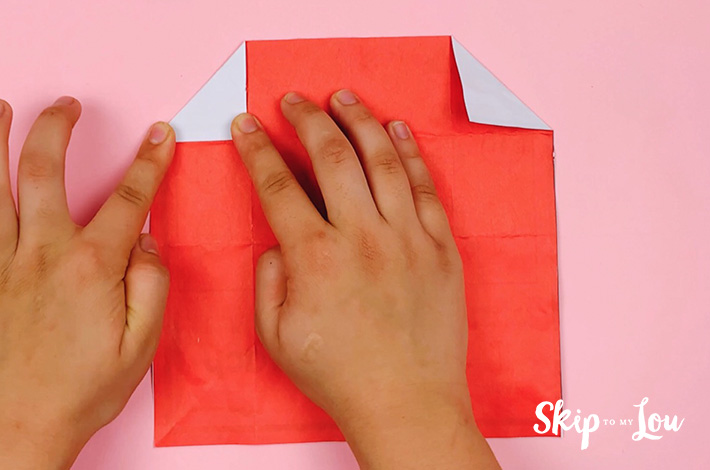
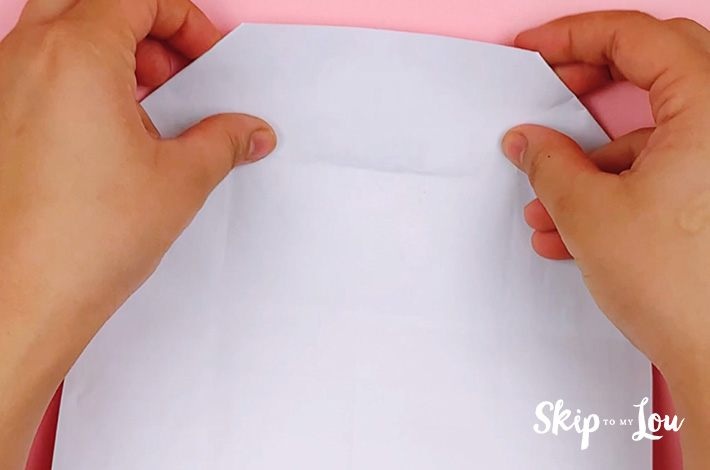
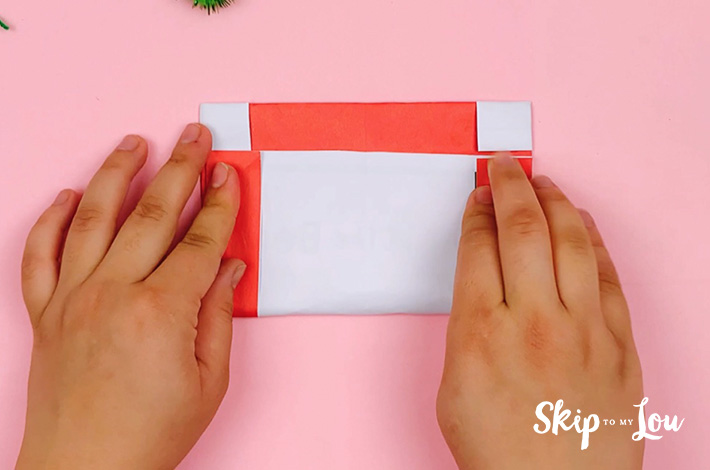
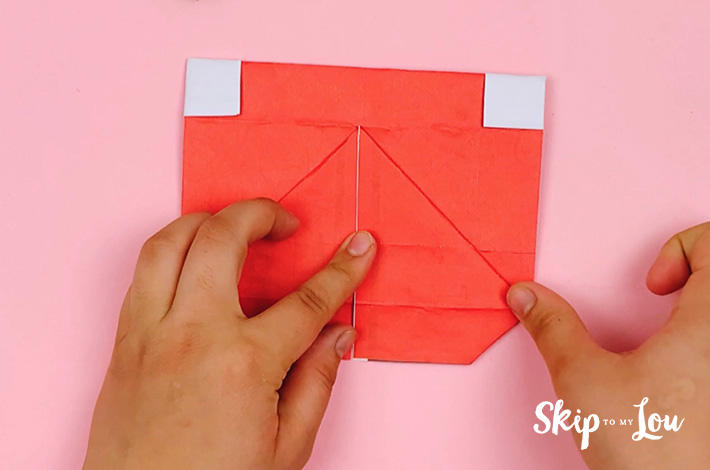
Step 6: Flip the paper over and fold the top section down towards the first crease line, as shown in the image below.
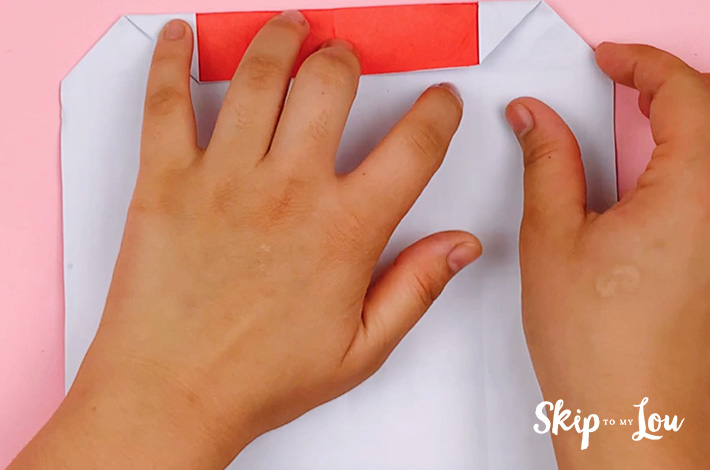
Step 7: Fold the two sides in just as you did with the top section of the paper.
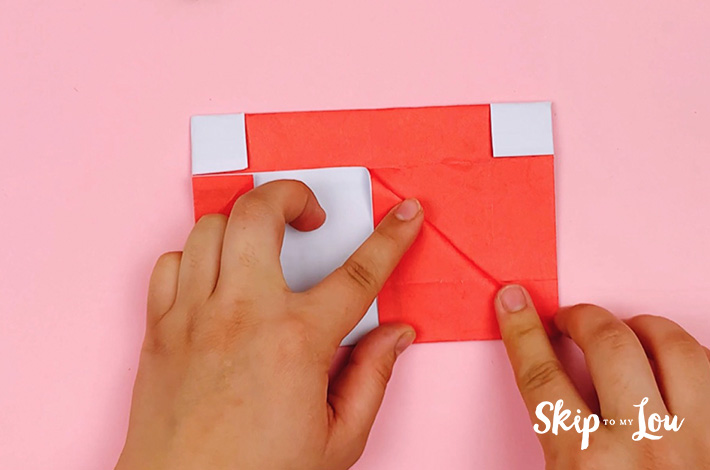
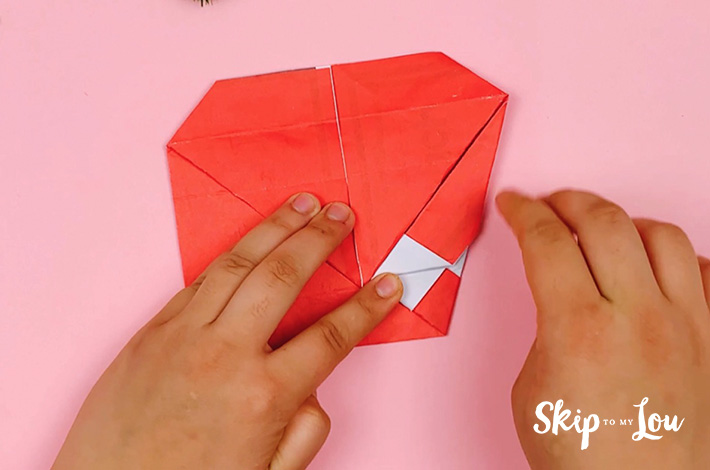
Step 8: Flip the paper over once again, and fold the bottom section upwards towards the top crease line.
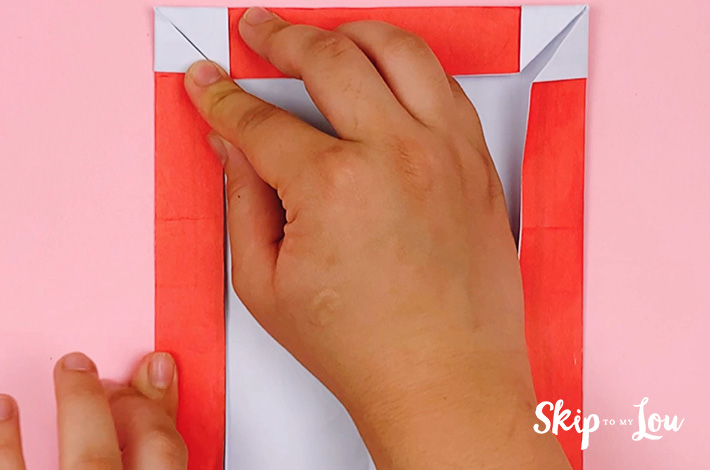
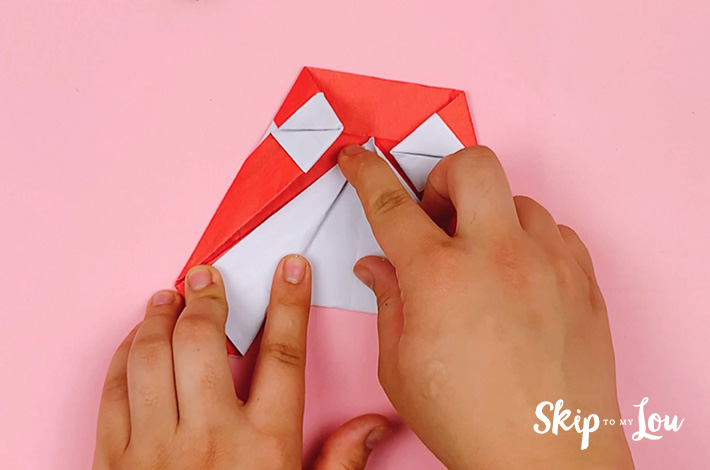
Step 9: Now fold both the left and right-hand sides of the bottom flap to form triangles, as shown in the images below.
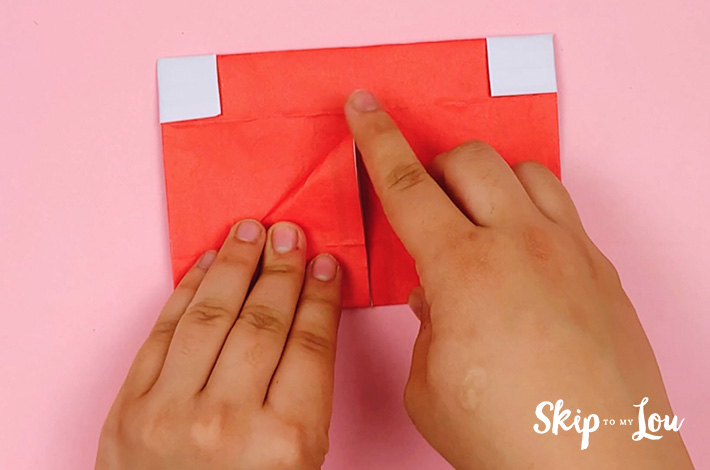
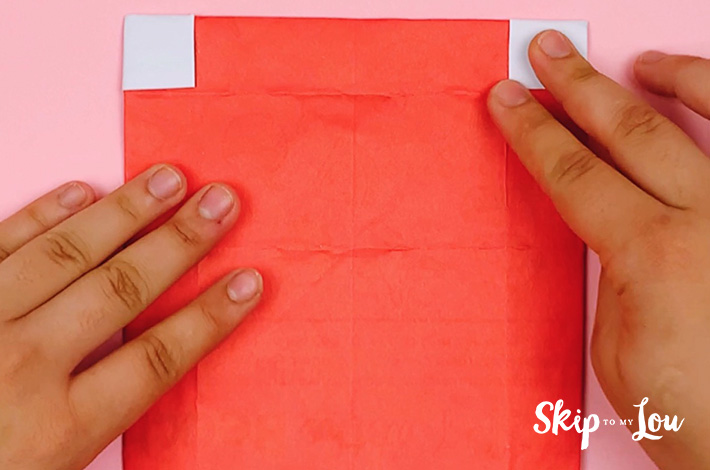
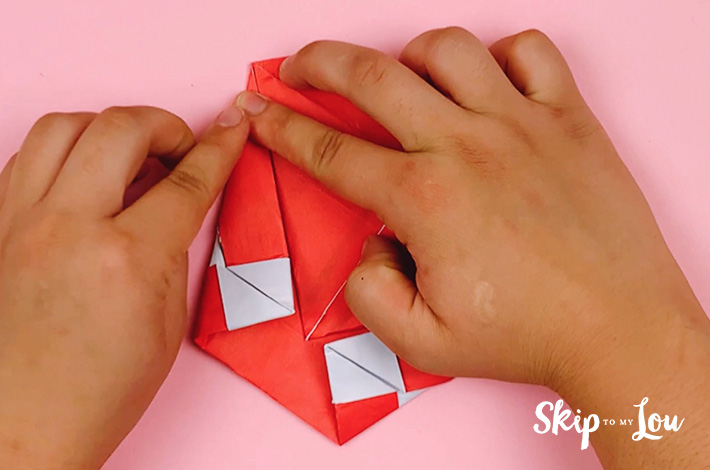
Step 10: Unfold the two triangles slightly, bringing out the flaps downwards. If you are unsure, the video shows this clearly.
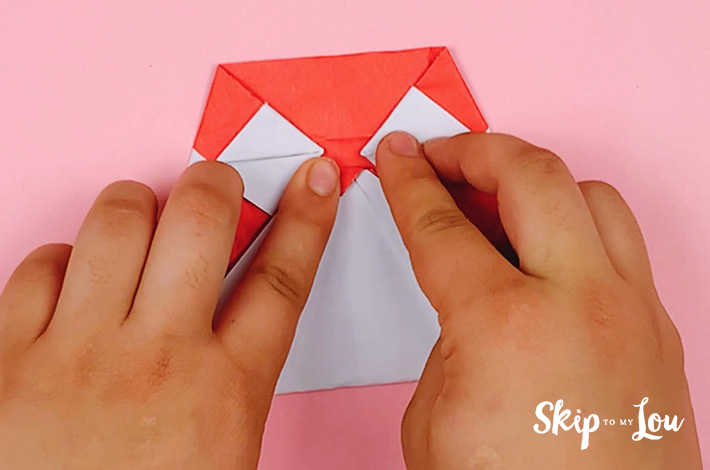
Step 11: Flip the paper 180 degrees again. Fold the right-hand side at a 45-degree angle. Do the same with the left-hand side.
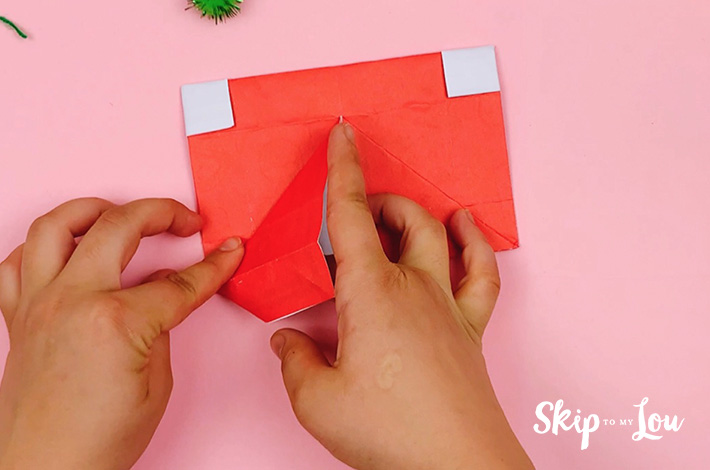
Step 12: Flip the paper 180 degrees again and now fold the two central flaps of paper outwards, as shown in the images below.
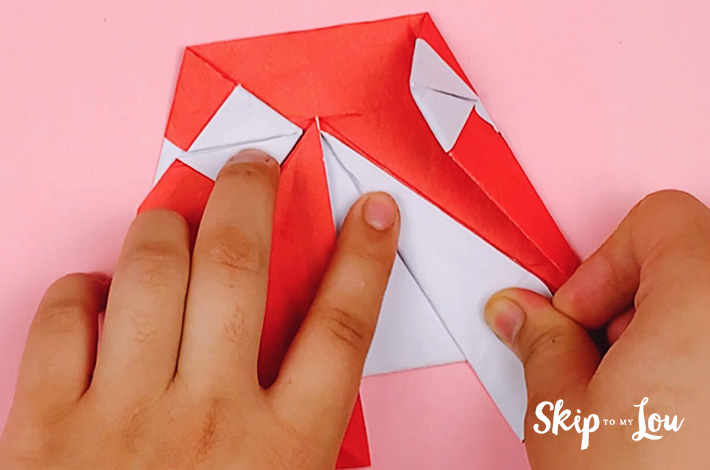
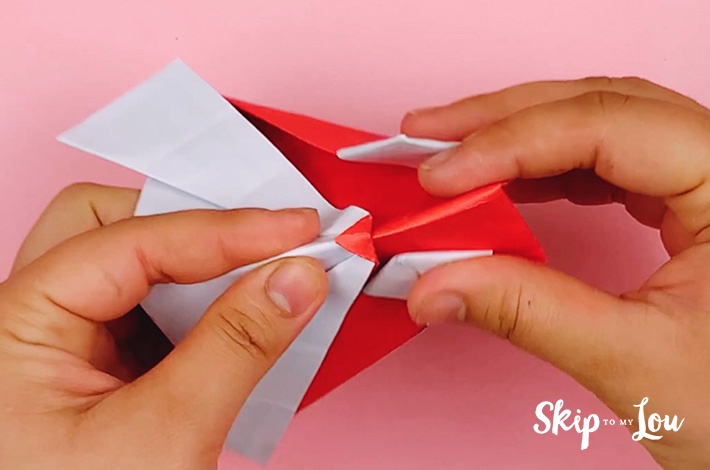
Step 13: Fold the top triangle over to form the owl’s beak.
Step 14: Fold the owl shape in half. Work the creases to form the shape of the head perfectly. The video shows this clearly.
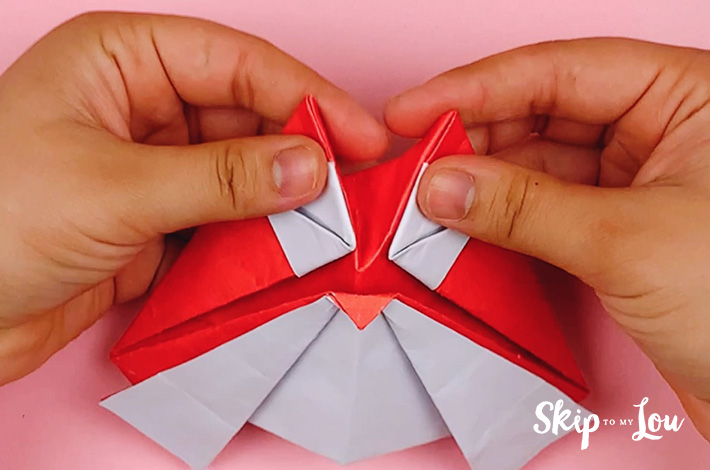
Step 15: Flip the paper over and now fold the bottom two wings inwards.

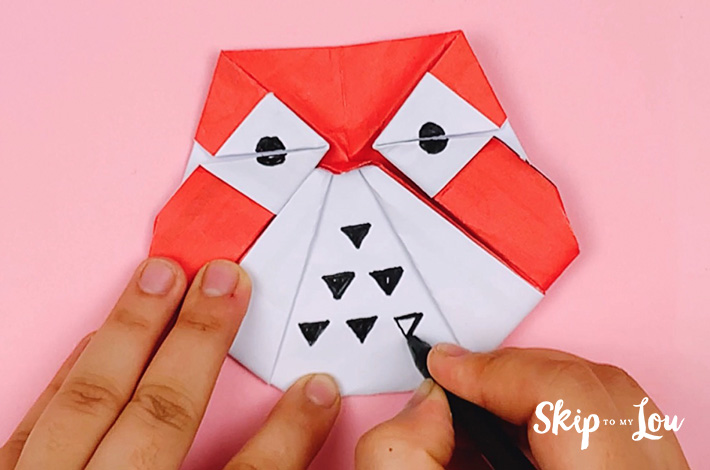
Step 16: That’s the folding done, so now it is time to decorate your owl in any way you see fit. Start by drawing some eyes and add a few feathers, too.
Hoot! Hoot! Well done, your origami owl is complete.

Other Origami Projects to Try
There are many other origami projects on Skip to My Lou, so be sure to try these out.
- 8-Step Origami Wreath Tutorial {Paper Craft}
- Origami Candy Box Paper Craft: An Easy And Fun Tutorial
- Craft Idea: Origami Paper Favors
- Easy Origami Butterfly {Paper Craft}
- Craft Idea: Origami Pen Holder
- Fold a One-of-a-kind Origami Crown {Craft Tutorial}
I would love to keep you fully stocked with creative ideas, yummy recipes, fun crafts, and loads of free printables. Subscribe to Skip to my Lou to get new ideas delivered to your inbox. Follow me on social media on Facebook, Pinterest, Twitter, and Instagram for all my latest updates.
–


