Folding origami is fun for everyone, both kids and adults alike.
Today on Skip to My Lou, we are going to show you how to fold an origami wreath.
This can be used as a decoration for different occasions or use it as an origami Christmas wreath at the most festive time of the year! It’s the perfect Christmas decor for your front door, that’s for sure.
This is an easy origami project for beginners; your kids will love making wreaths.

Skip to My Lou is packed with other fun origami folding instructions including Craft Idea: Origami Paper Favors, Easy Origami Butterfly {Paper Craft}, and Fold a One-of-a-kind Origami Crown {Craft Tutorial}
Supplies Needed for This Origami Wreath Tutorial
You will need the following supplies to create an origami wreath.
- Paper plate
- Scissors
- Pieces of paper (in a rectangle shape)
- Glue
- String or ribbon
- Hole punch (optional)
- Origami ribbon (This is optional, but you can fold a ribbon from our easy tutorial to add to your wreath).
Video Tutorial: Easy Origami Wreath
How To Fold An Origami Wreath
Let’s jump straight in, good luck!
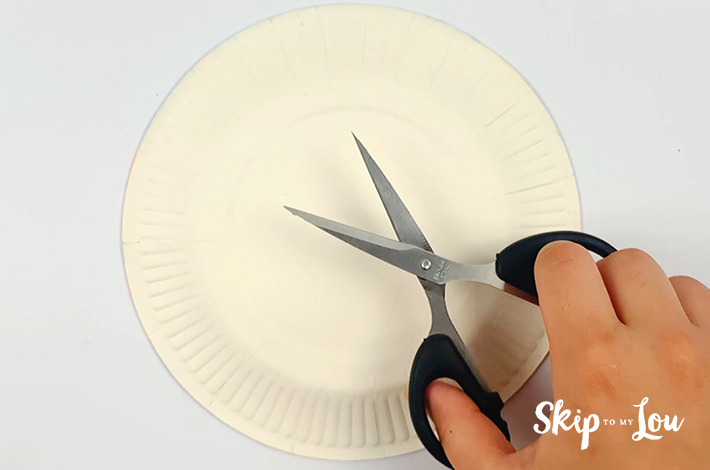
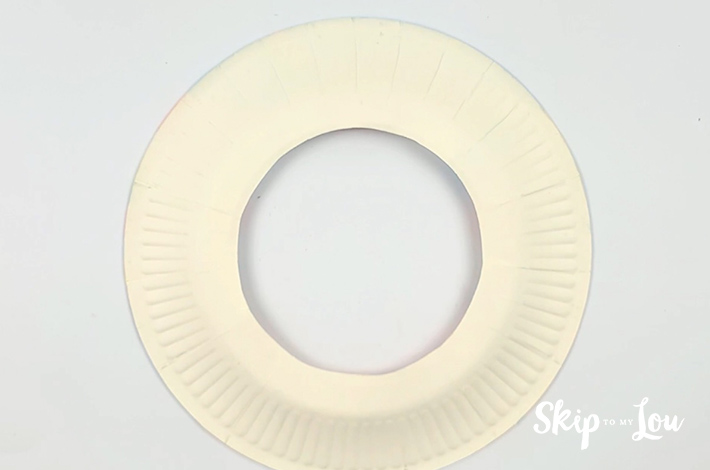
Step 1: Take your paper plate and cut a circle in the middle.
Step 2: You’ll need quite a few pieces of rectangular paper as shown in the image below. You can opt for one color, but the wreath really will pop if you add a few colors to the mix.

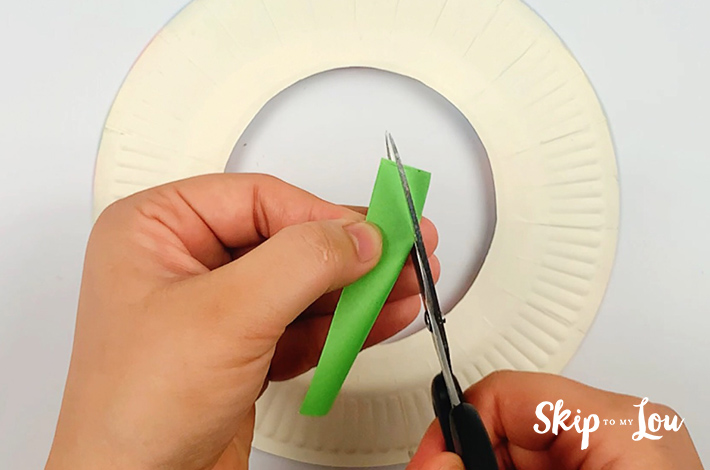
Step 3: The petals will need to be folded and cut first. Take the first piece, fold it in half, and cut it at an angle as shown in the image below.

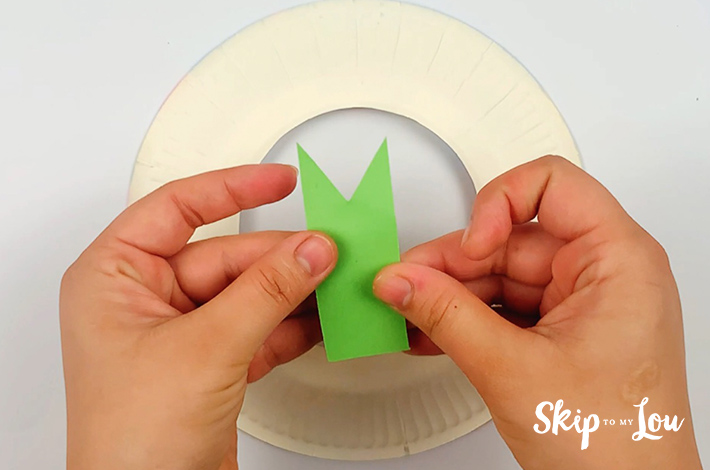
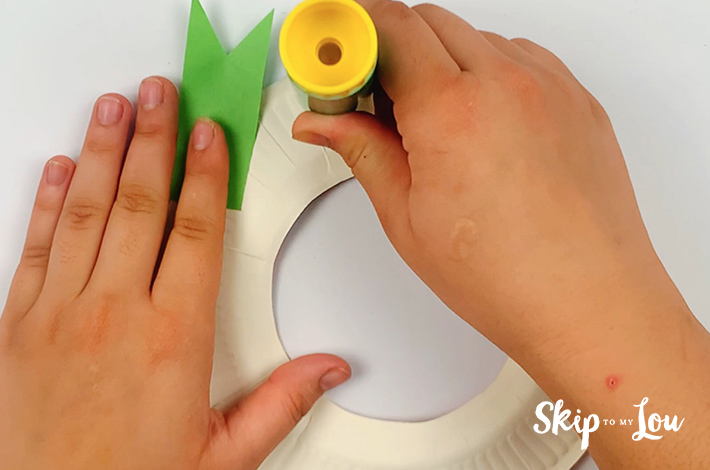
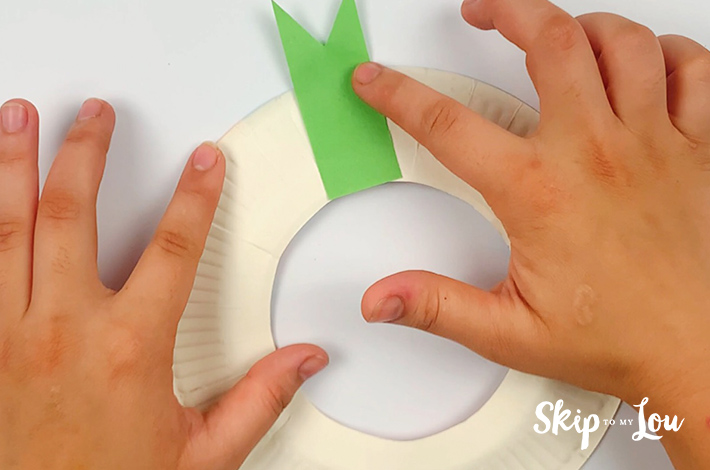
Step 4: Now you will glue the wreath petal to the top of the paper plate.
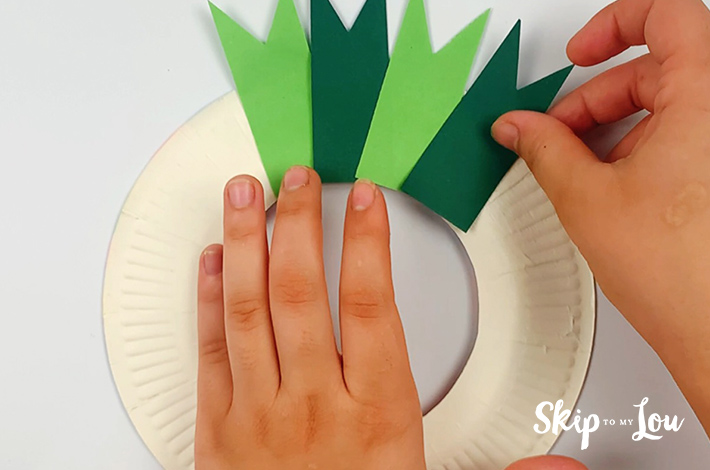
Step 5: Now make more petals and attach them to the plate until you get to the bottom edge with the last piece. You could use one color paper or different colors, it’s up to you.

Step 6: It’s time to decorate. Cut out small paper circles and glue them on. You could even decorate with beads, or place some festive stickers.

Step 7: Add a bow to the bottom of the wreath. We have a tutorial for a ribbon bow that works perfectly as decoration.

Step 8: Attach a string or ribbon to the top of the wreath by either gluing it on or using a punch to create a hole to tie it to.

And there you have your festive origami wreath or perfect party decoration.
Other Origami Projects to Try
We love origami projects at Skip to My Lou, so be sure to check these out.
- Jumping Origami Frog {Paper Craft}
- Easy Origami 8-Petal Flower Step-by-Step Guide
- How To Make An Origami Cat: A Step-by-Step Guide
- How to Make an Origami Crane
- DIY Origami Gift Card Holder
- Make a Puppy Ears Card
I would love to keep you fully stocked with creative ideas, yummy recipes, fun crafts, and loads of free printables. Subscribe to Skip to my Lou to get new ideas delivered to your inbox. Follow me on Facebook, Pinterest, Twitter, and Instagram for all my latest updates.


