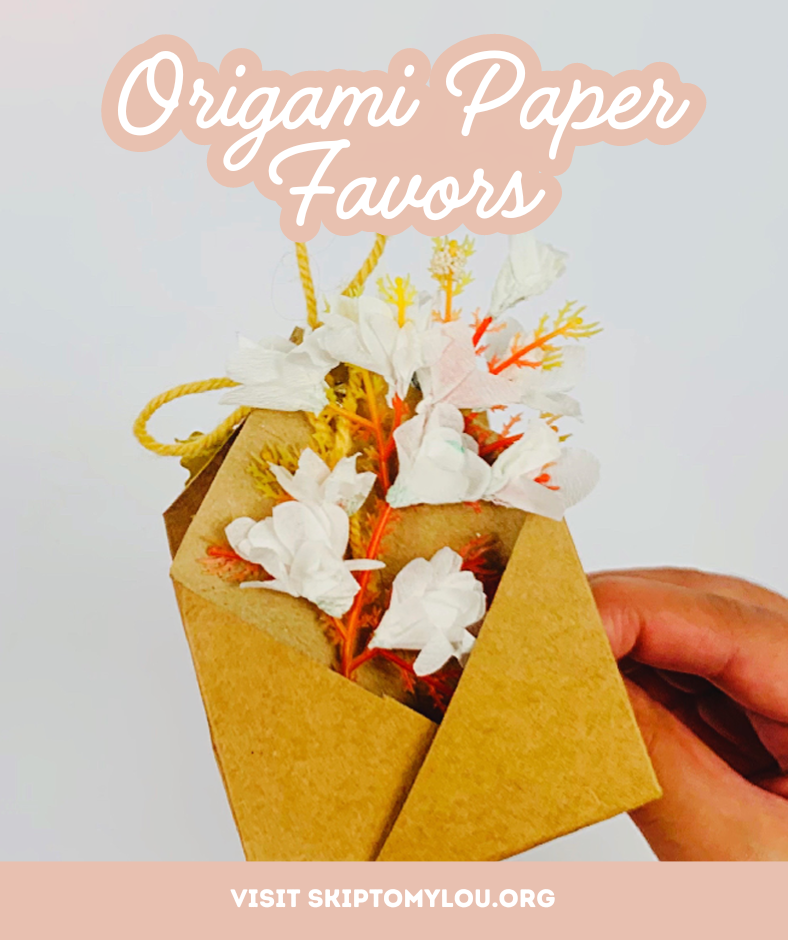
I love folding origami, and today, I’ve got something a little different for you.
Yes, using origami paper, or whatever fun gift wrapping you have around the house, I am going to show you the precise steps to fold cute party favors you can use as a thank-you gift.
I love to take these to my friends who invite us over for dinner as a gesture of gratitude they’ve made to take the time to entertain us.
Even if you are an origami beginner, our step-by-step instructions and video will guide you to produce a super little gift package that you can use for just about any occasion.
We have so many paper crafts and creative activities featuring various paper shapes at Skip to My Lou including How To Wrap A Gift Perfectly, Fold an Origami Bow Tie in 9 Simple Steps, How to Fold an Origami Pen Holder, and many more. Why don’t you try them out?
Supplies
For this tutorial, you will need the following supplies:
- A pair of scissors
- Paper or thin cardboard (which makes it far sturdier which I prefer)
- A pair of scissors
- A punch
- String
Video: How To Fold an Origami Paper Favors
Origami Tutorial: How to Fold Paper Favors
Follow these step-by-step instructions to fold your origami paper favors. Remember, if you are unsure, watch the video which shows each step clearly.
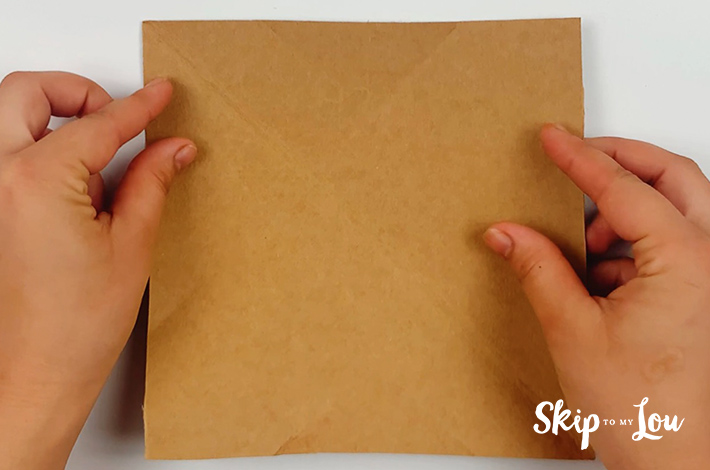
Step 1: Start with a square piece of sturdy paper.
Step 2: Fold it in half but at a 45-degree angle to form a triangle.
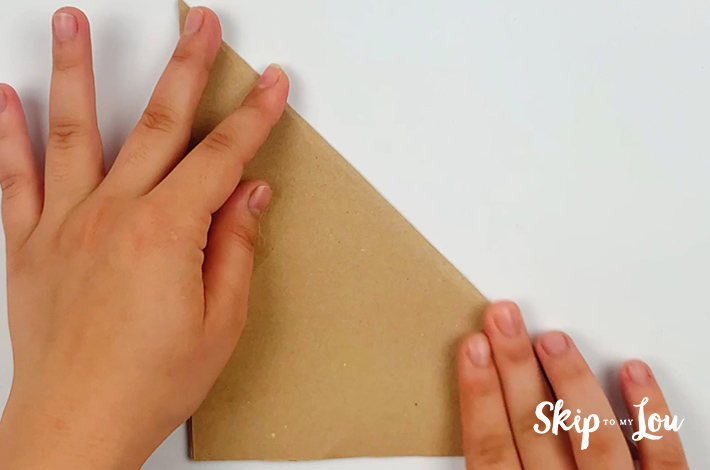
Step 3: Unfold and turn the paper so the fold you made forms a straight line through the middle with one corner of the square pointing straight up.

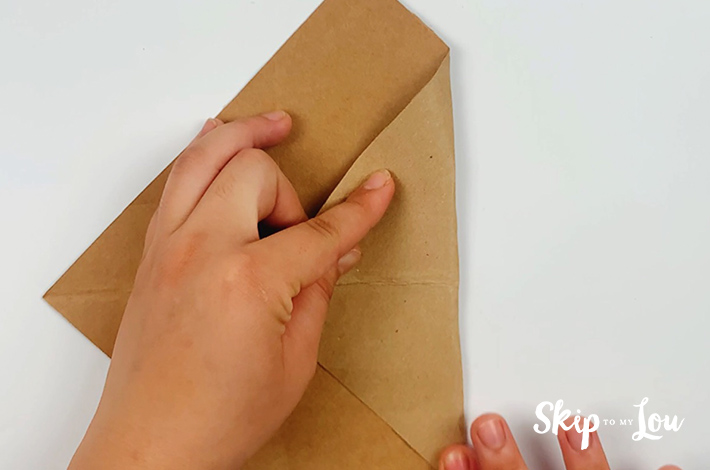
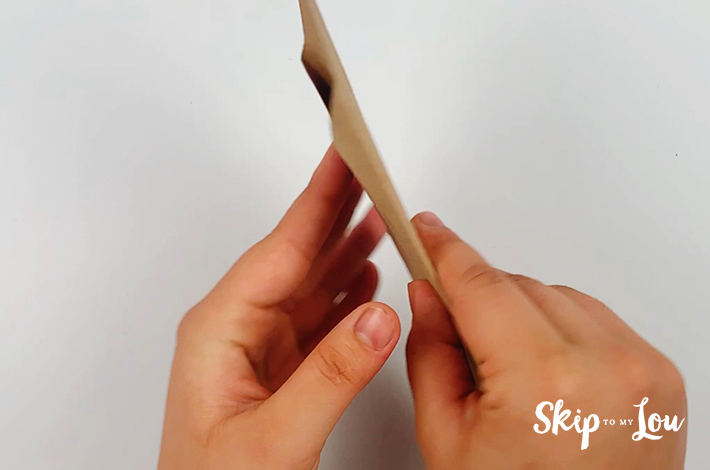
Step 4: Now fold the right-hand side over as shown in the image below. Do the same with the left-hand side and then unfold again.
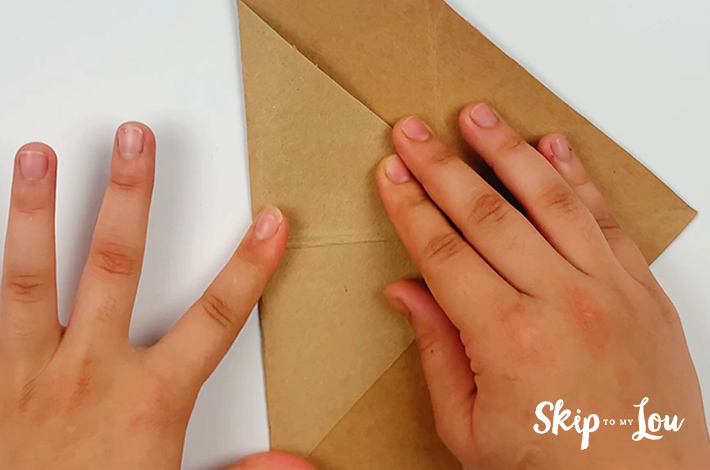
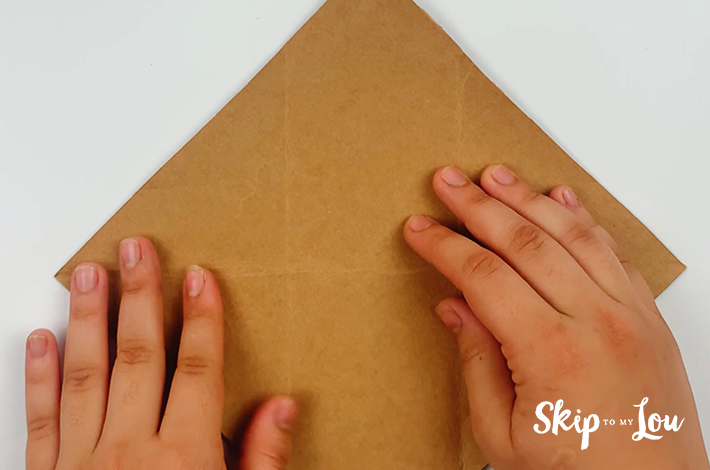
Step 5: Rotate 90 degrees and make the same folds on the right and left sides as you did in step four, and then unfold the paper to the original square shape. If you are struggling, watch the video which shows this clearly.


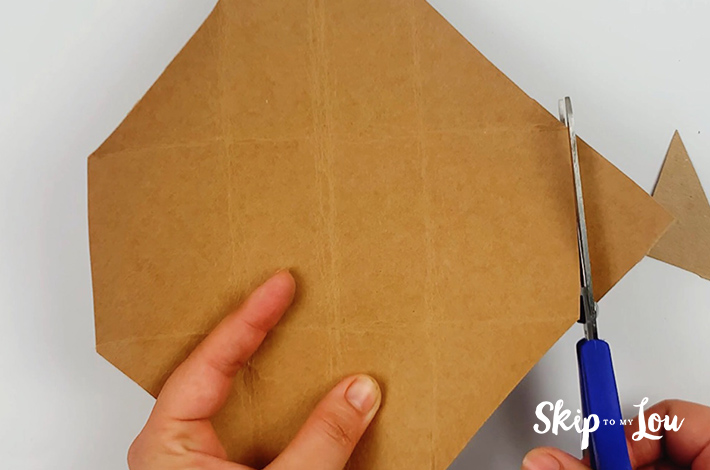
Step 6: Using scissors, cut off the triangle on the right and left sides.
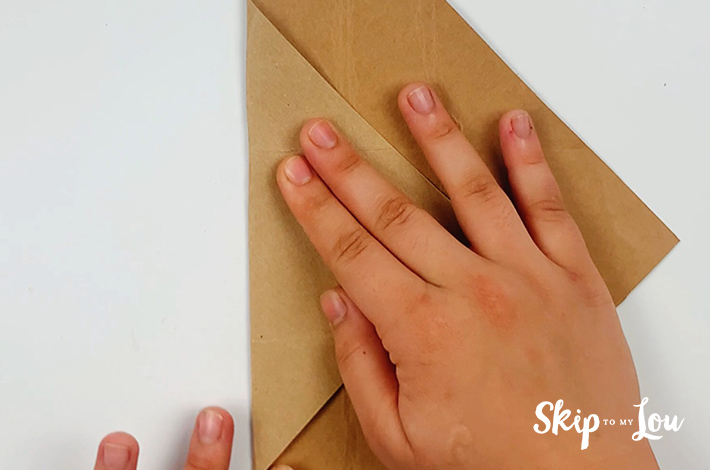
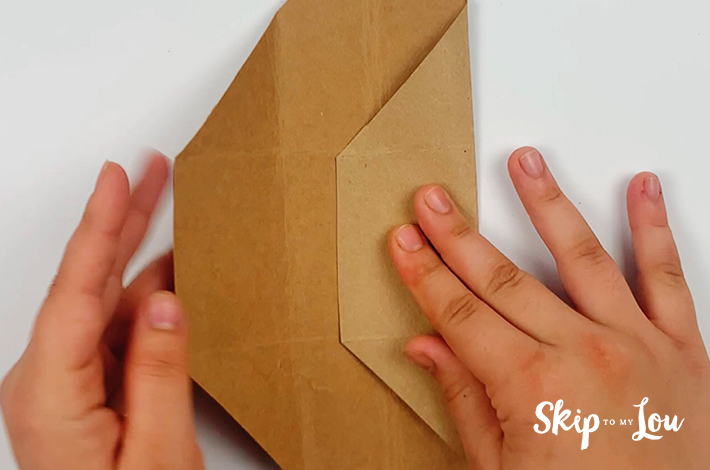
Step 7: Now fold the right and left side inwards along the folds you have already made as shown in the picture below.
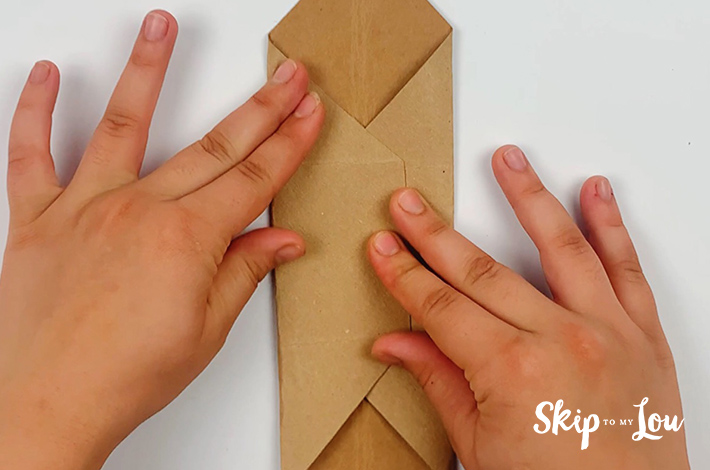
Step 8: Flip the paper over and the top downwards and bottom upwards as shown in the second image below. Remember to watch the video if you aren’t sure of the exact folds to make.
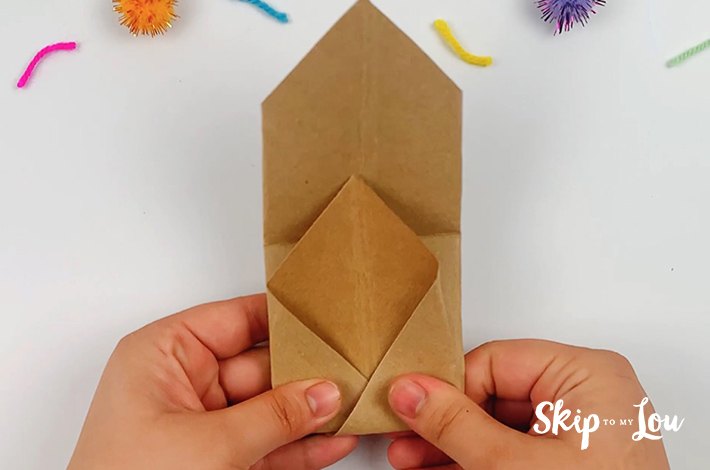
Step 9: Now bring the top of the two upper triangles on each side together. You will see that this forms a pocket. Punch a hole in both of them.

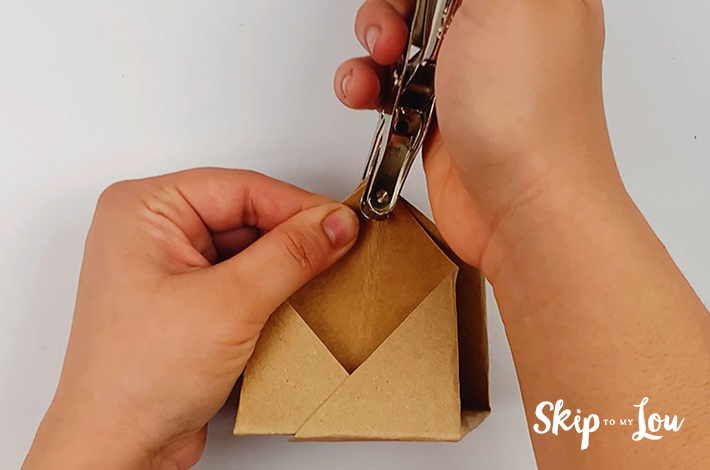
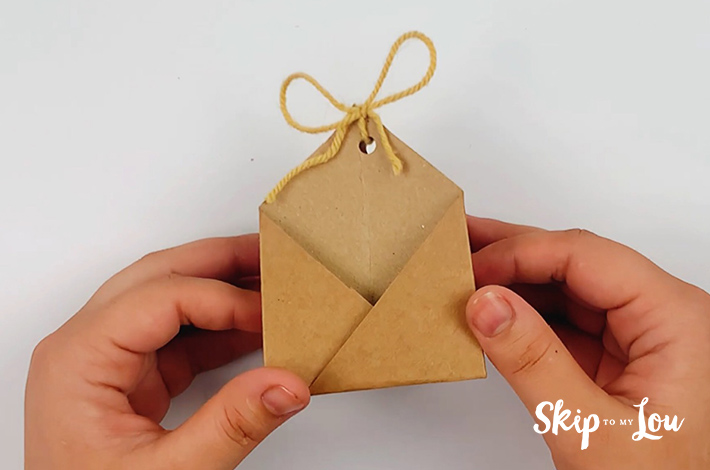
Step 10: Attach a string or ribbon to add your personal touch.
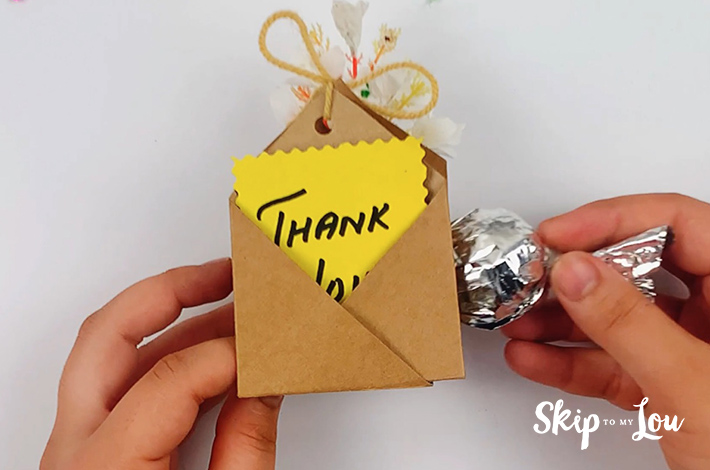
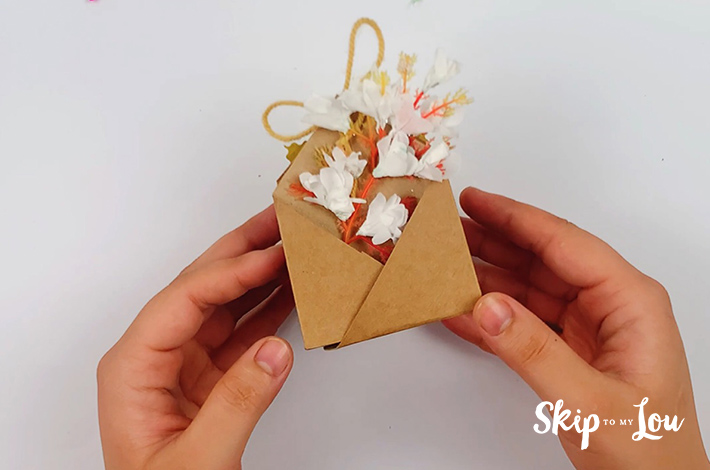
Step 11: Add a small gift, or a thank you note of your choice.
Try These Other Easy Origami Crafts
- Try this fun Origami Pen Holder.
- Follow our Easy Origami 8-Petal Flower Step-by-Step Guide.
- Make an Simple Origami Gift Bag {Free Craft Idea}
- Your kids will love this Bunny Origami.
- Meow! This Origami Cat is fun to make!
I would love to keep you fully stocked with creative ideas, yummy recipes, fun crafts, and loads of free printables. Subscribe to Skip to my Lou to get new ideas delivered to your inbox. Follow me on Facebook, Pinterest, Twitter, and Instagram for all my latest updates.


