I love giving gifts!
Taking the time to pick the perfect gift for my nearest and dearest is something I cherish. Thoughtful gifts that I know those receiving them will love, are one of life’s simple pleasures, right?
What I don’t enjoy, however, is wrapping gifts. That was until I found the perfect way to do so, and in today’s blog post, I want to share the method I use all the time.
The best part is that no more double-sided tape or scissors are necessary, just some wrapping paper a fold here and there, a couple of creases and you are good to go!
You can use this method for all gifts, including Christmas presents, birthdays, anniversaries… just about any occasion.
Related: You Are Made of Wonderful Gift Tags and Free Printable Gift Tags
Supplies Needed
You will need the following supplies:
- Wrapping paper (you could even use tissue paper or brown paper with this method). Make sure you have enough paper, depending on the size of the box your are wrapping.
- A gift
Video: How To Wrap a Gift Box Perfectly… Every time
How To Wrap A Gift Perfectly: Step-by-step Instructions
This is how you wrap a gift perfectly every time. Remember to watch the video if you are struggling to follow the steps.
Step 1: Start with square paper (rectangle paper won’t work as well for this method). Now take the end of the paper and flip it over. I like to work on a big surface, like a kitchen table. It just makes things far easier.
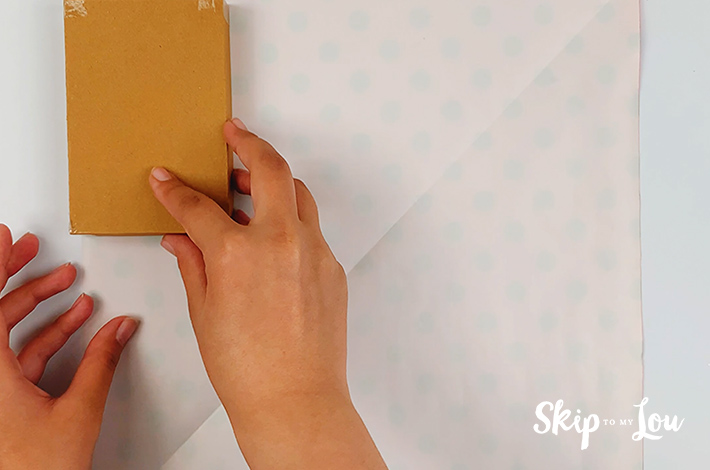
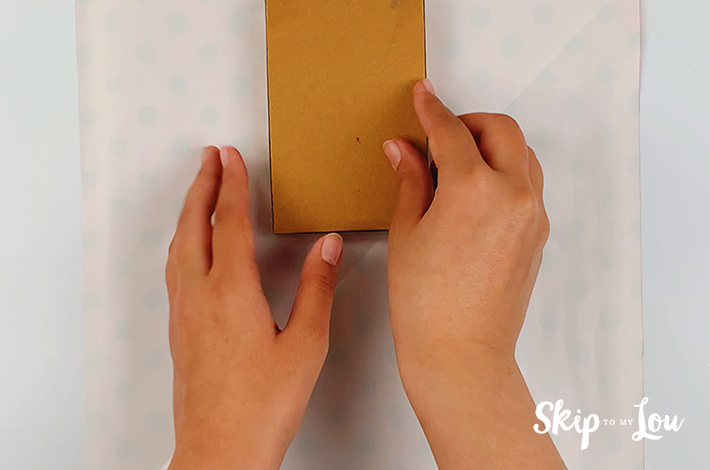
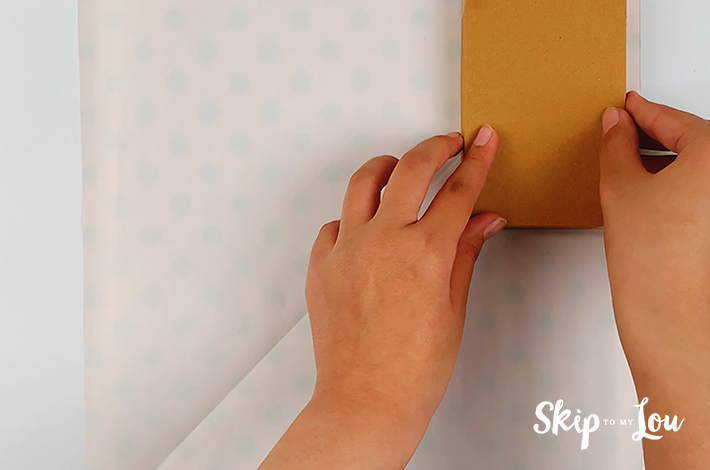
Step 2: Take your box and measure from the start of the paper on the left side to the end of the paper on the right side as shown in the images below. You must be able to flip the box over three times. Then you will know if your paper is a large enough piece.
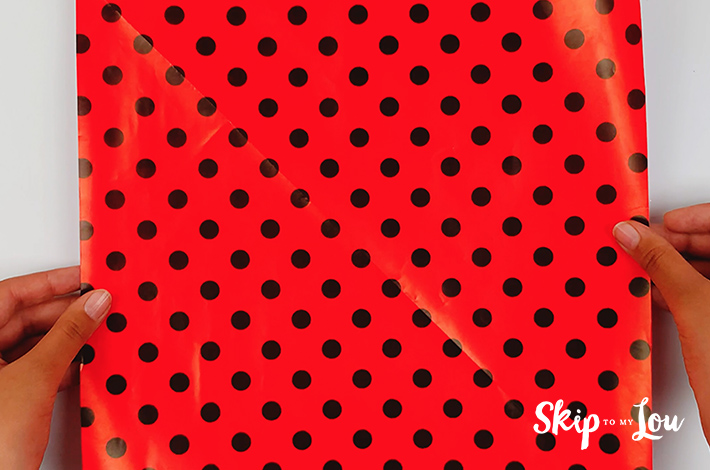
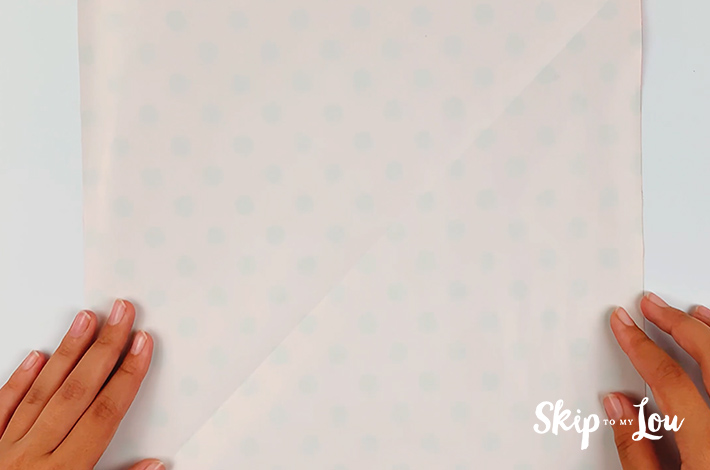
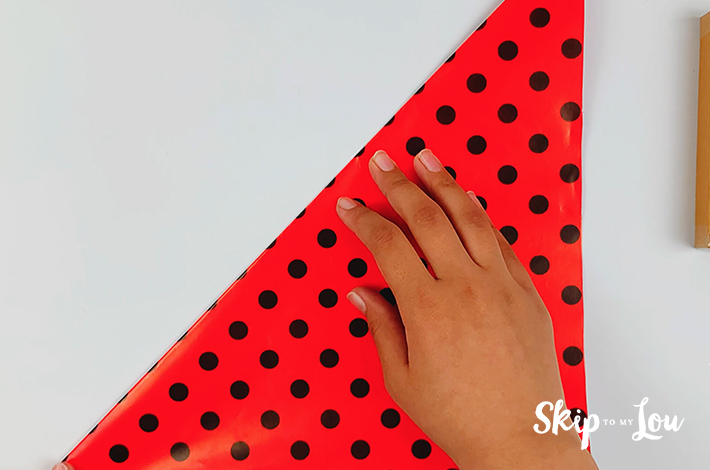
Step 3: Take the wrapping paper and fold it in half at a 45-degree angle to make a triangle-shaped fold as shown in the image below.
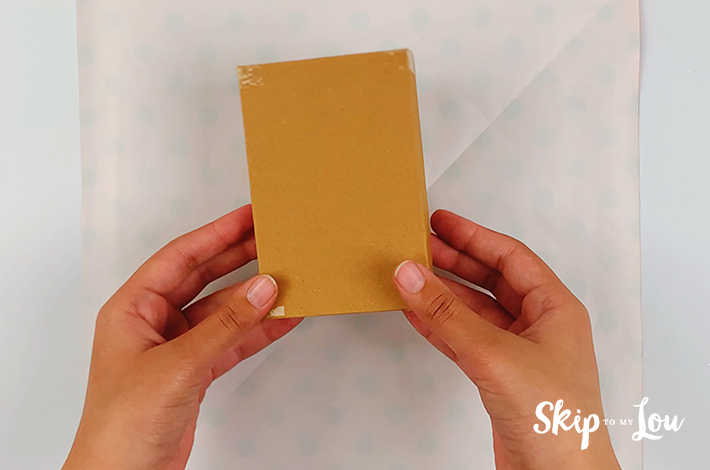
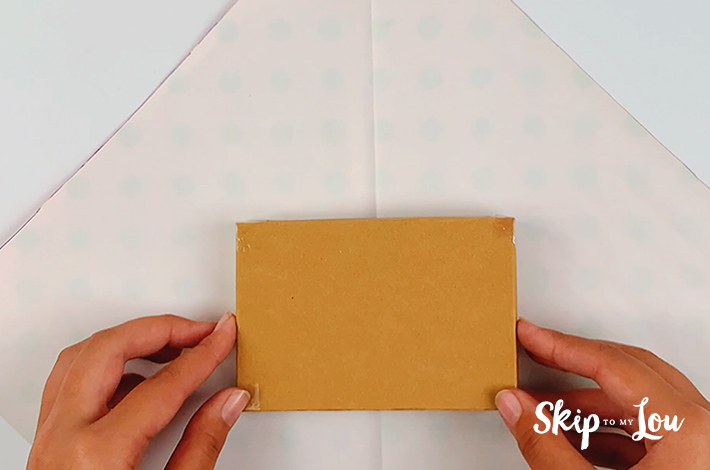
Step 4: Now place the gift box in the center of your paper to gauge where you will begin folding.
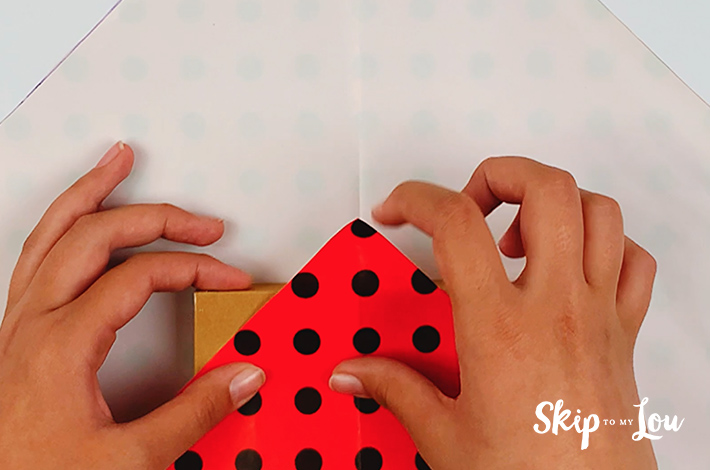
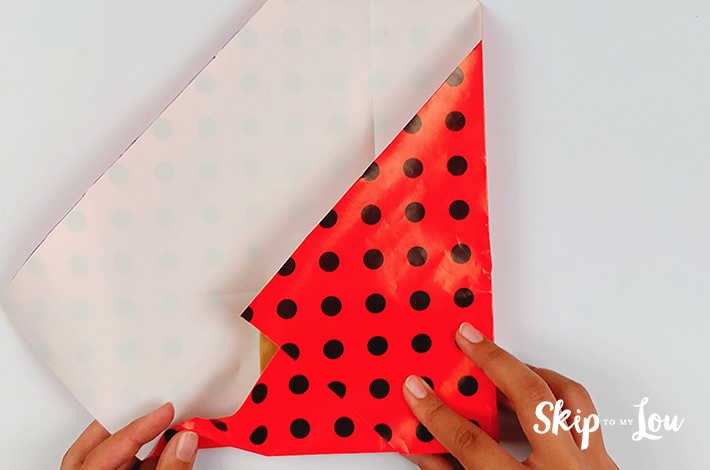
Step 5: Fold the bottom flap upwards, moving the box down slowly until you have just the triangle of the bottom corner sticking over the top of the box. Fold the triangle shape fold and tuck the end of the paper underneath the box.
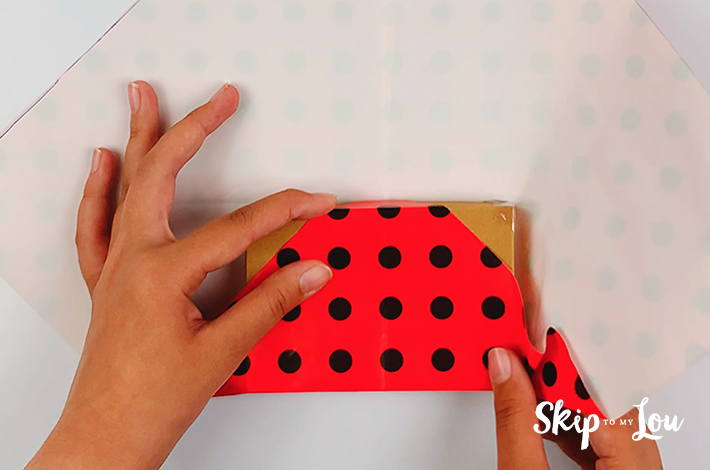
Step 6: Now fold the side of the wrapping paper on the right side along the length of the box. There is a fold you need to make that is not shown clearly in the image, so check the video to see how it’s done. Do the same with the left-hand side.
Step 7: Do the same with the left-hand side. Here, the folds are shown more clearly.
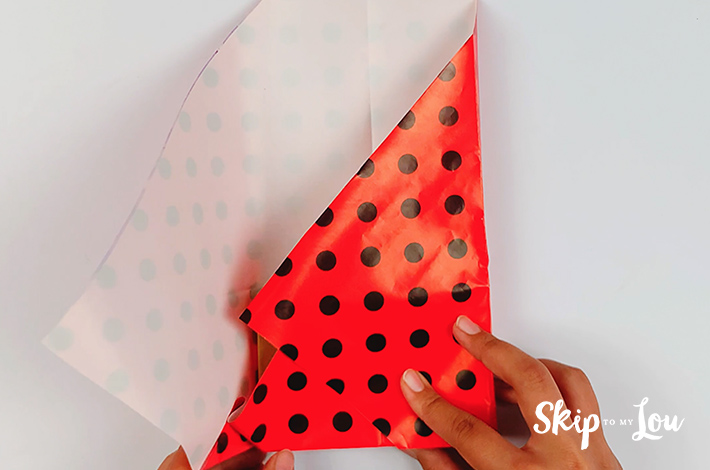
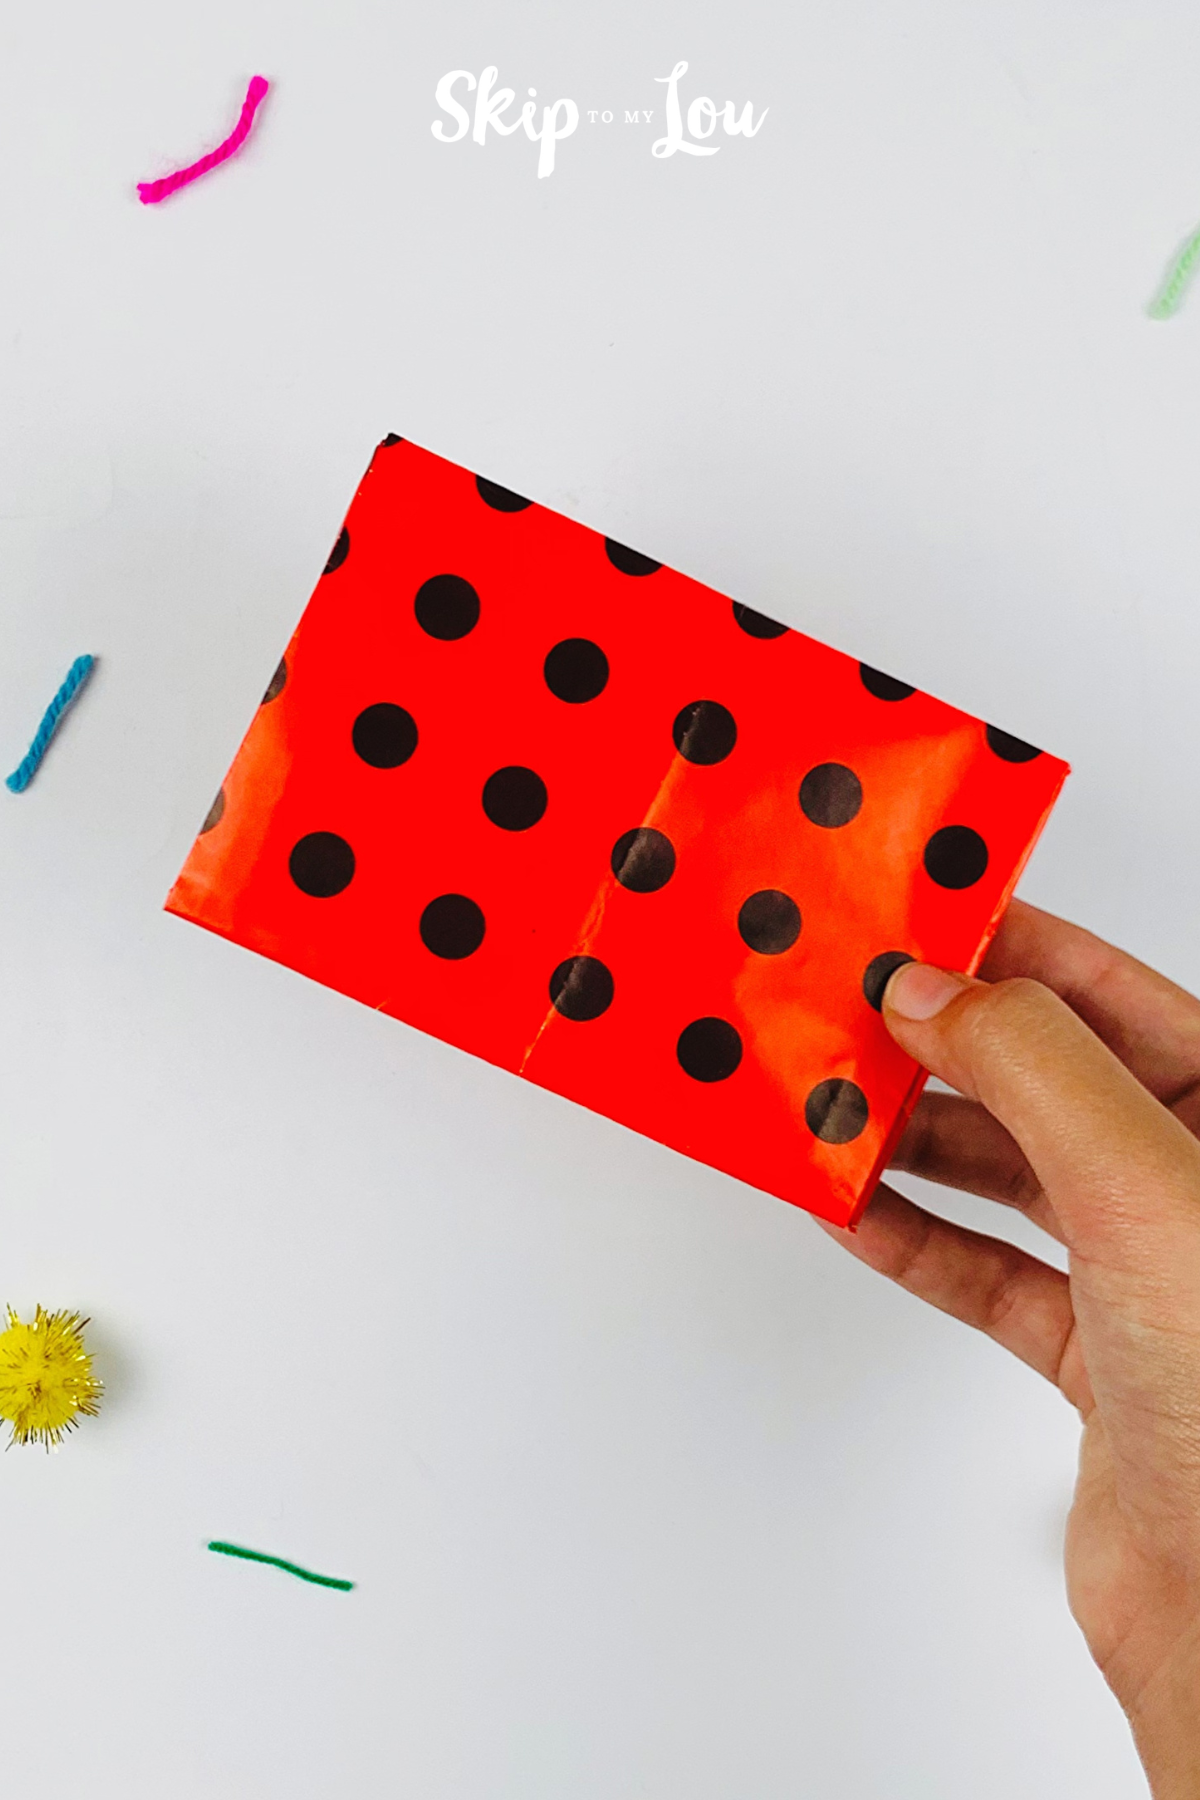
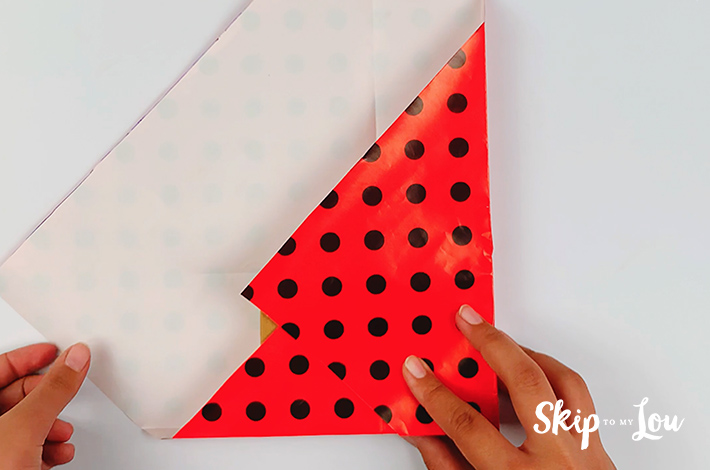
Step 8: Your gift should look like this once you are done. The bottom, left and right seams should fit securely against the gift box.
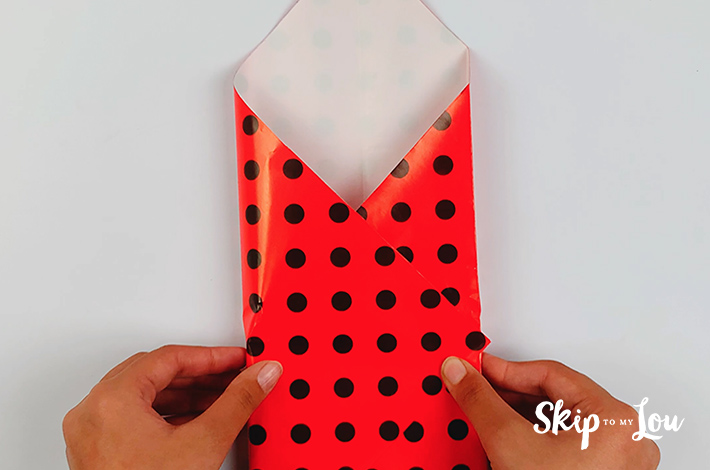
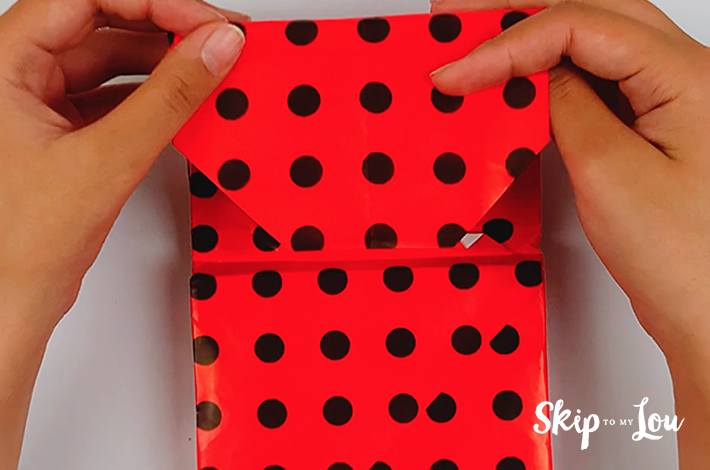
Step 9: Make creases along the top section of the wrapping paper as shown in the image. Now fold the already wrapped section of the gift box upwards.
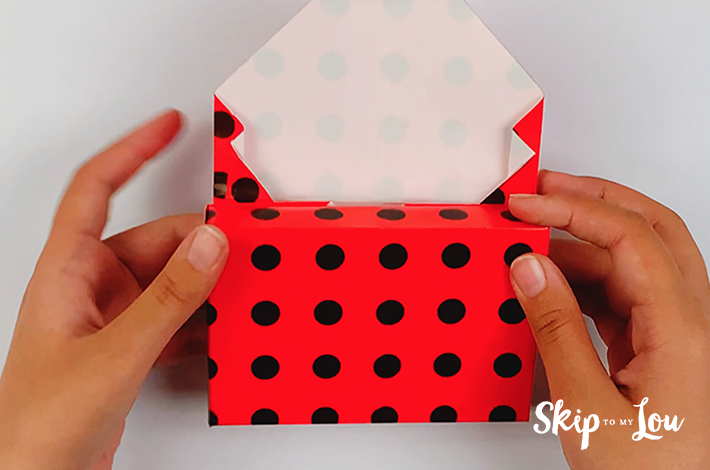
Step 10: Now flip the box over to start tucking the top flap inwards.
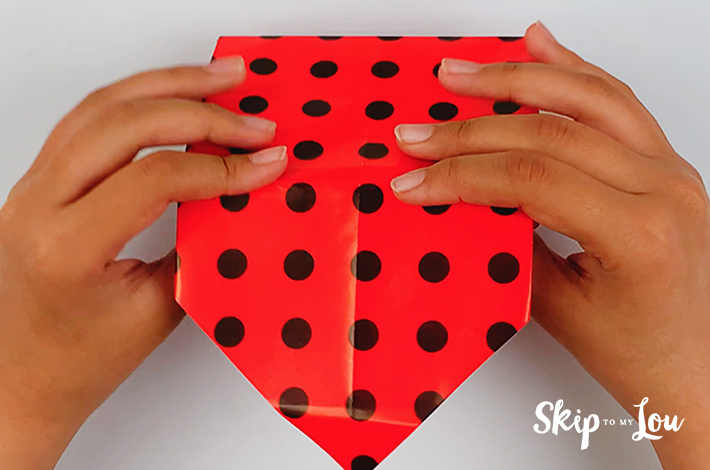
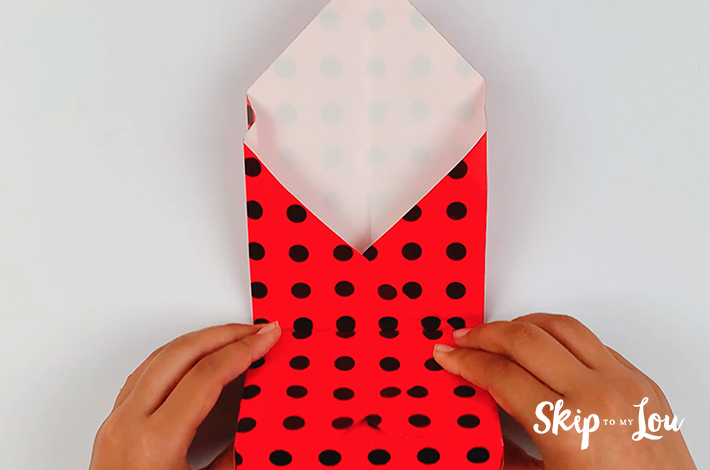
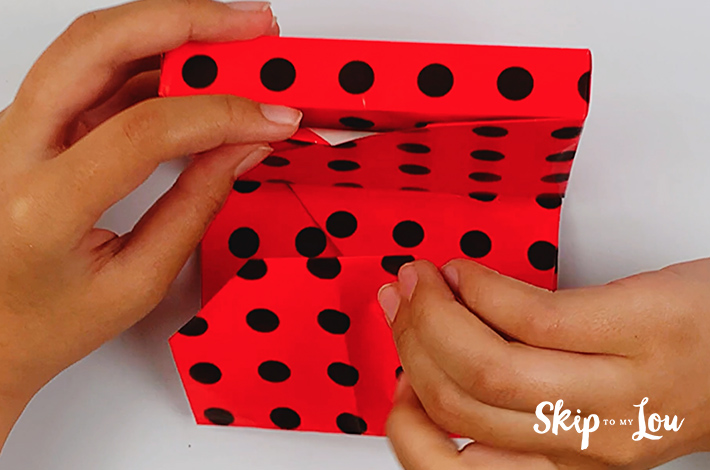
Step 11: There are a few final folds to make. Flip the top flap back over and fold the triangular part that sticks out above the box back down, as shown in the images below.

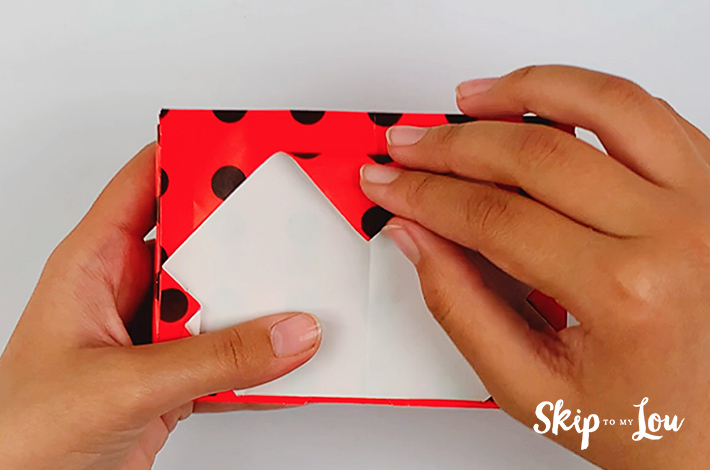
Step 12: Now fold the top flap over the gift box and tuck it in underneath. The video shows this very clearly if you are struggling.
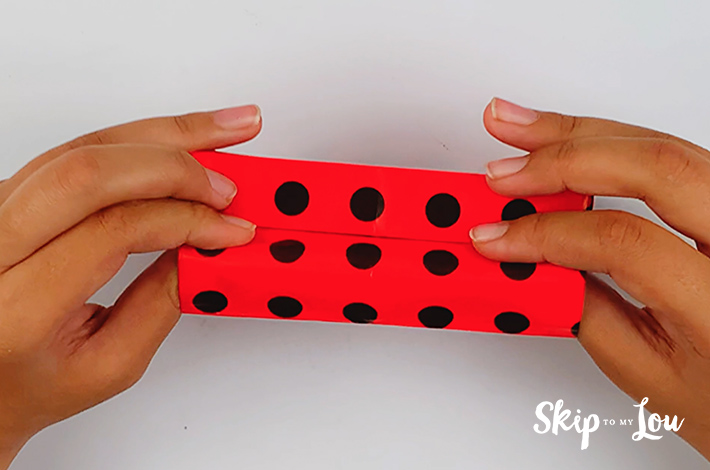
Step 13: Tuck the flap in underneath the wrapping paper.

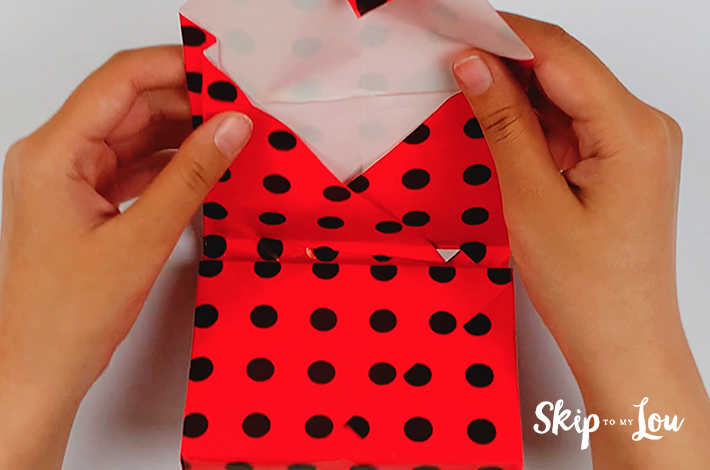
Step 14: Your gift box is complete and perfectly wrapped. Remember, the video shows each step clearly if your aren’t sure.
Ways to Enhance A Wrapped Gift or Gift Bag
You can make any wrapped gift extra special by adding the following:
- Ribbons or bows
- Glitter
- Stickers
- Other embellishments
Gift tags
Every gift needs a gift tag and we have so many options for you to try:
- Printable Teacher Appreciation Gift Tags
- Back to School Teacher Gift Tags
- Face Mask Gift Tags
- Homemade with Love Holiday Gift Tags Craft
- We Miss Our Peeps Gift Tags
- Happy Valentine’s Day Gift Tags
- Care Package Printable Gift Tags
I would love to keep you fully stocked with creative ideas, yummy recipes, fun crafts, and loads of free printables. Subscribe to Skip to my Lou to get new ideas delivered to your inbox. Follow me on Facebook, Pinterest, Twitter, and Instagram for all my latest updates.


