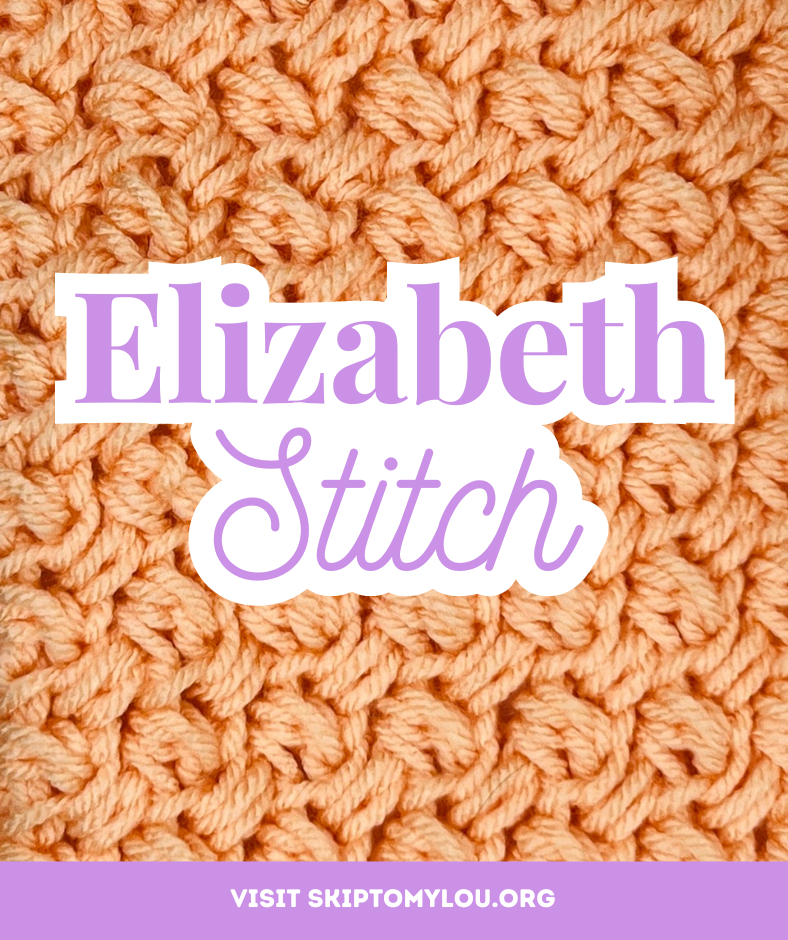
The Elizabeth stitch is a lovely crochet pattern that creates a textured, lacy fabric. It’s perfect for adding a touch of elegance to your projects.
This stitch pattern has a unique texture that looks both delicate and sturdy. It’s great for making scarves, shawls, and perhaps even fingerless gloves – a thoughtful handmade gift.
If you’re looking to expand your crochet skills, it’s the perfect stitch for learning how to work with more complex patterns. It’s a great way to practice creating consistent stitch sizes and working with different types of yarn, too.
Ready to give this gorgeous stitch a try? Keep reading to learn step-by-step instructions on how to crochet this beautiful stitch and start making your own elegant creations.
This article contains affiliate links.
The Elizabeth stitch is best suited for those at an intermediate skill level. You’ll need to be comfortable with chain stitches, single crochet, and yarn overs. Having a bit of experience with working into chain spaces and maintaining even tension will also be helpful.
Now, let’s dive into the pattern instructions to create this rich-textured crochet stitch, starting with the foundation chain.
How To Make an Elizabeth Stitch Stitch: Step-By-Step
First, gather these supplies:
- Crochet hook: Check out our crochet hook guide to select the best crochet hook size.
- Yarn: Choose your preferred color and weight of yarn.
- Scissors: For cutting the yarn when you’re done.
- Darning needle: To weave in and secure your ends.
Steps
Foundation Chain
Begin this free crochet pattern by chaining multiples of 2 + 4 to your desired length.
Elizabeth Stitch
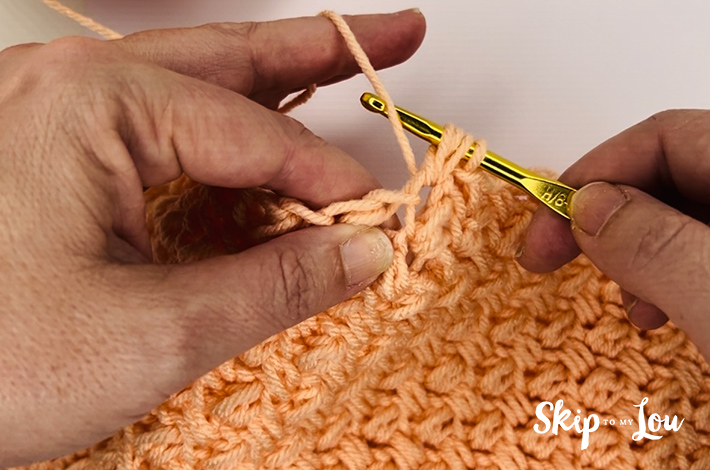
Start your new stitch inserting your hook into the fourth chain from the hook.
Then, draw up a loop through the chain stitch.
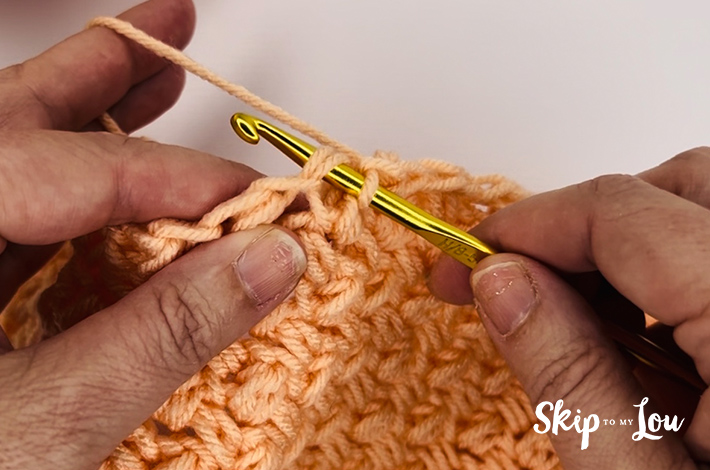
After that, yarn over.
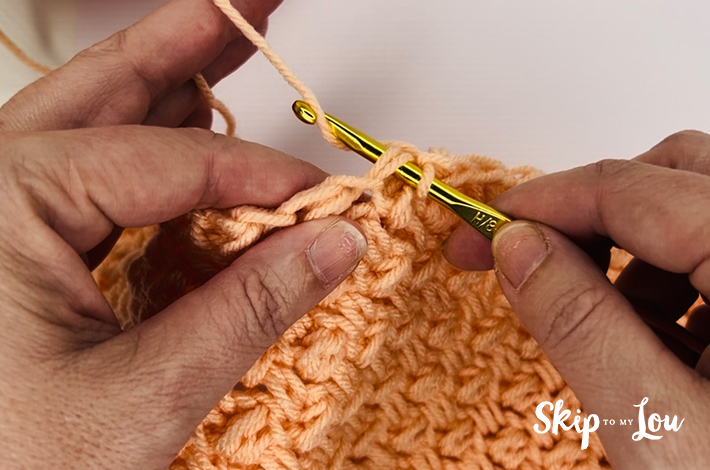
Then pull through, leaving two loops on your hook.

Yarn over again.
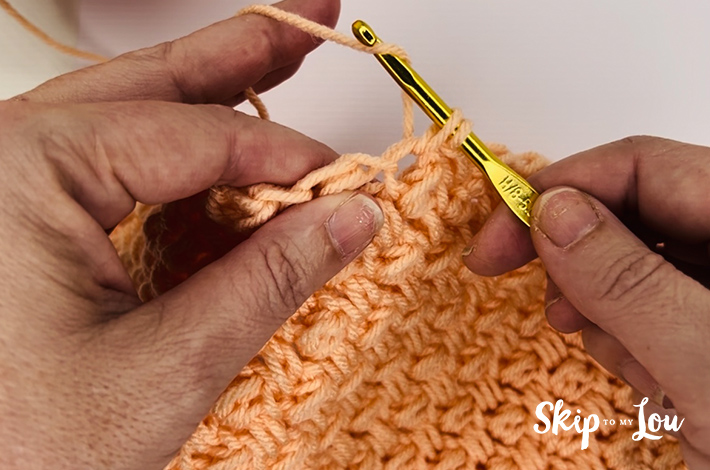
Then insert your hook back into the same chain stitch.
Then yarn over again.

And pull through to leave four loops on your hook.
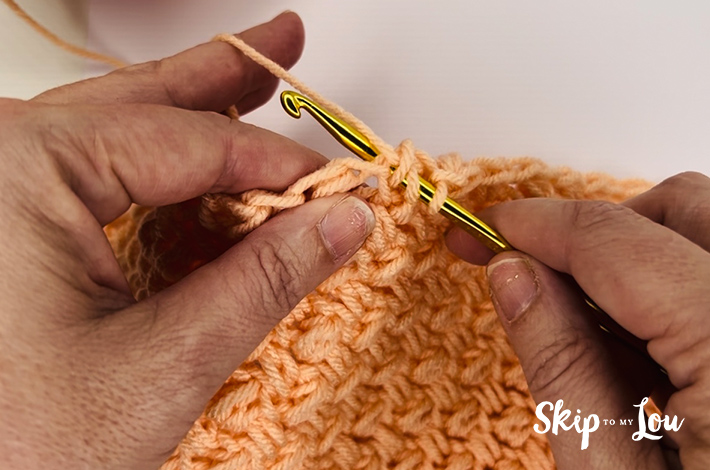
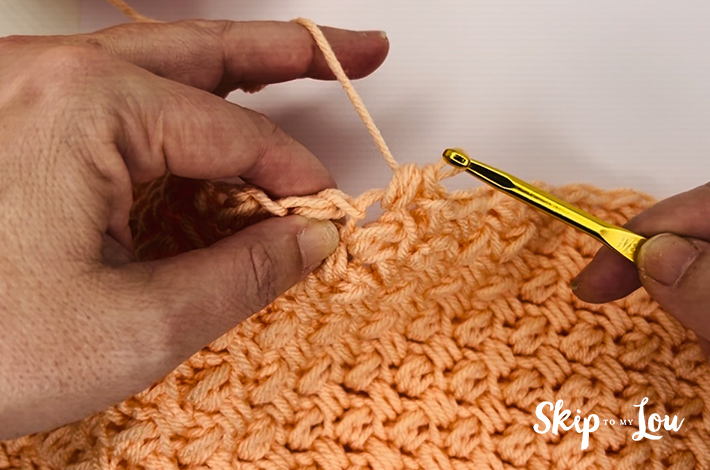
Yarn over once again.
Pull the yarn through all four loops on your hook.
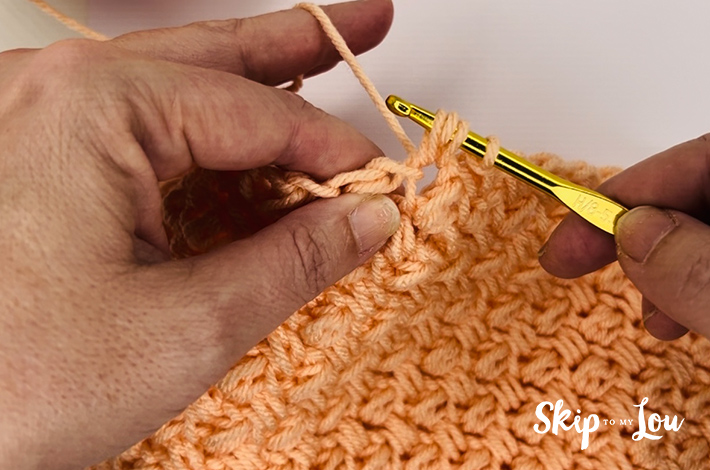
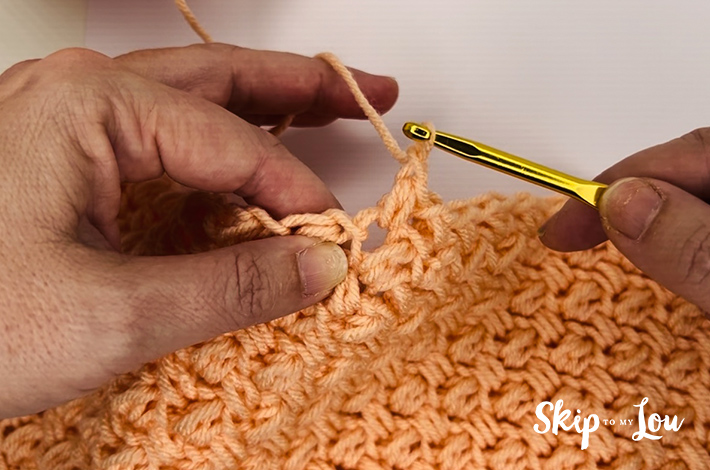
To make the last stitch, chain 1 to secure the stitch. Then, begin the next chain.
Overall, this crochet pattern is great for personal use. Try to make the perfect accessory – your finished products are sure to impress. It would be best if you also tried using different yarns to create different textures.
My Favorite Crochet Tools
Each of these useful crochet tools will improve your crochet projects:
- If you are like me and like to crochet on the go, this tote is a stylish way to keep everything you need at your fingertips!
- My favorite tool is these portable scissors that always make it through security and fit perfectly in my hook case.
- A yarn bowl is a beautiful way to wrangle yarn while crocheting
- Keep organized with this crochet hooks kit with a case. This 85-piece kit has over 2,500 ⭐️⭐️⭐️⭐️⭐️ five-star reviews.
- Crochet Stitch Dictionary: 200 Essential Stitches with Step-by-Step Photos is the handiest resource!
Tips and Basic Crochet Stitch Tutorials
- How to Begin a Chain Crochet
- How to Create a Slip Knot
- Selecting the Right Crochet Hook
- Single Crochet Stitch
- Double Crochet Stitch
Easy Crochet Projects For You
Looking for another crochet pattern listing? Give these a try:
- How to do a Diamond Stitch
- Popcorn Stitch Simple Tutorial
- Granny Stitch: Step-by-Step Tutorial
- How To Crochet the Star Stitch
- Shell Stitch: Step By Step Tutorial
- Linen Stitch Crochet Tutorial
- How to do a Mini Bean Stitch
I would love to keep you fully stocked with creative ideas, yummy recipes, fun crafts, and loads of free printables. Subscribe to Skip to my Lou to get new ideas delivered to your inbox. Follow me on Facebook, Pinterest, Twitter, and Instagram for all my latest updates.
Happy crocheting!