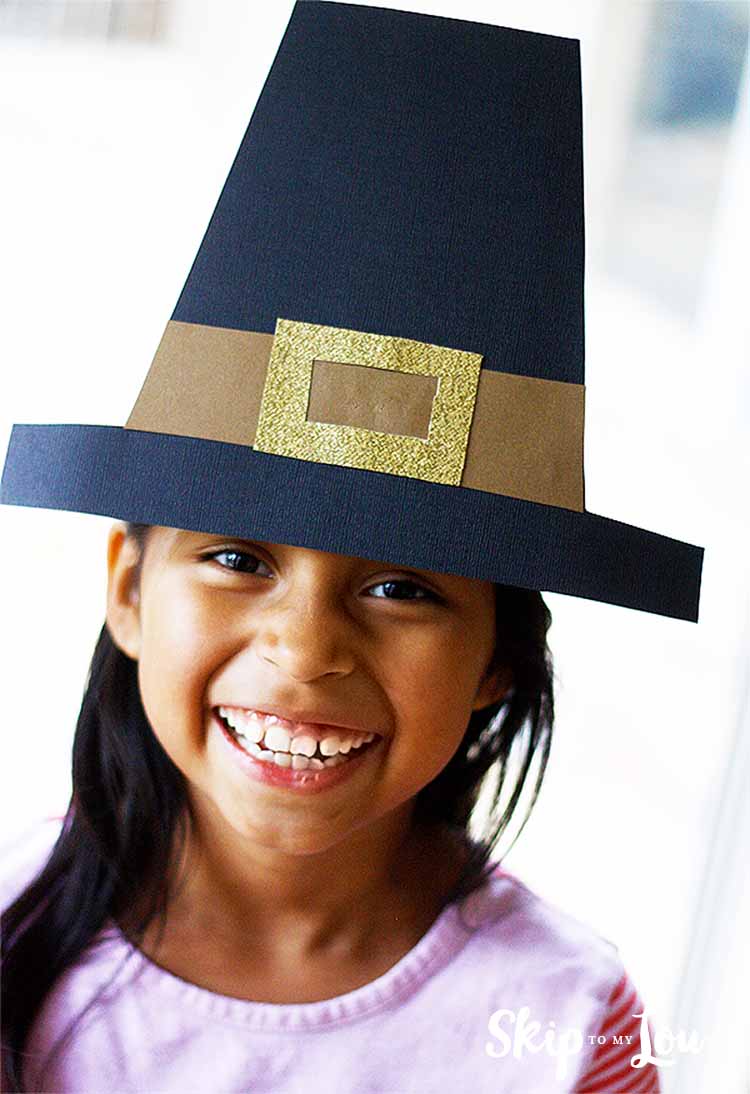
Paper Pilgrim hats will make you the best-dressed guest at your Thanksgiving dinner. Get your kids involved with this fun pilgrim hat craft activity by making a hat for themselves. And for more laughs, have them make extra to share with guests.
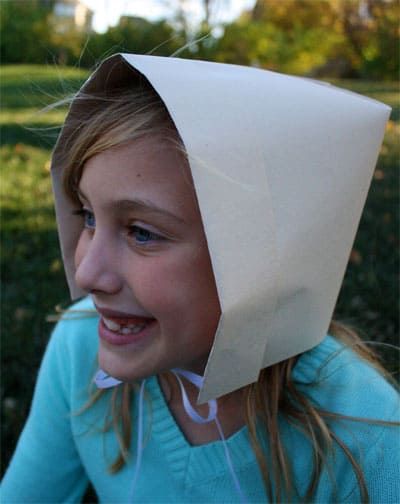
Do you prefer a Pilgrim bonnet? No worries I have a paper Pilgrim bonnet tutorial. Either way, you will have a fun and festive Thanksgiving with these awesome hats. I’ve made this an easy pilgrim craft so there won’t be any extra holiday stress. Make sure you have all the supplies ready (I’ve included a list) and you’ll have a great way to entertain the kids before your meal.
I would love to keep you fully stocked with creative ideas, yummy recipes, fun crafts, and loads of free printables. Subscribe to Skip to my Lou to get new ideas delivered to your inbox. Follow me on Facebook, Pinterest, Twitter, and Instagram for all my latest updates.
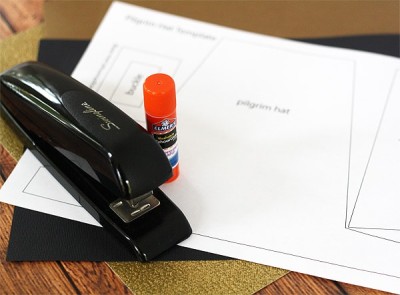
Pilgrim Hat Supplies
It doesn’t take many supplies to be a pilgrim at your Thanksgiving feasts, but definitely have them gathered up and ready to go before you begin.
- Pilgrim Hat Template (printable)
- black cardstock or construction paper
- brown cardstock or construction paper
- gold glitter paper (found at a crafts store or online) (or yellow paper will work)
- scissors
- stapler
- glue stick
Recently I discovered adhesive-backed glitter paper and love it. Try using it for this craft if you have it on hand. It will eliminate the need to glue the buckle.
How to make a Pilgrim Hat
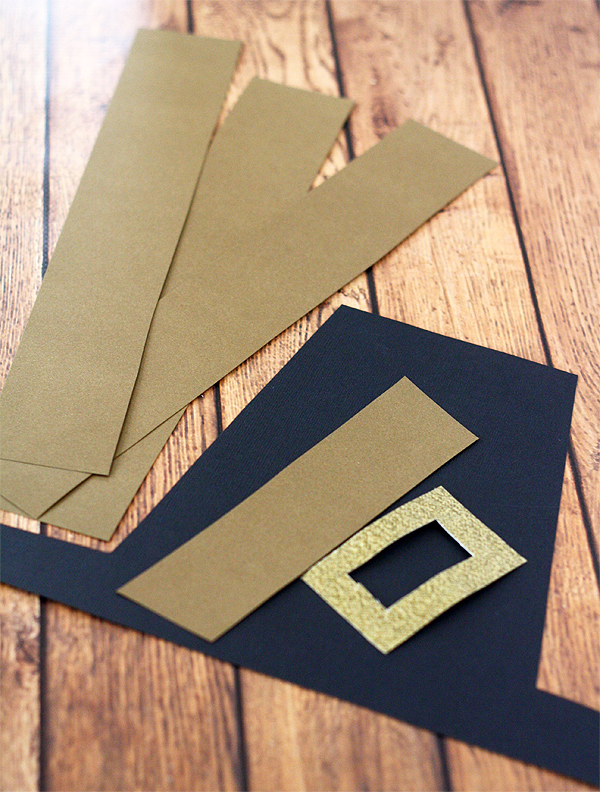
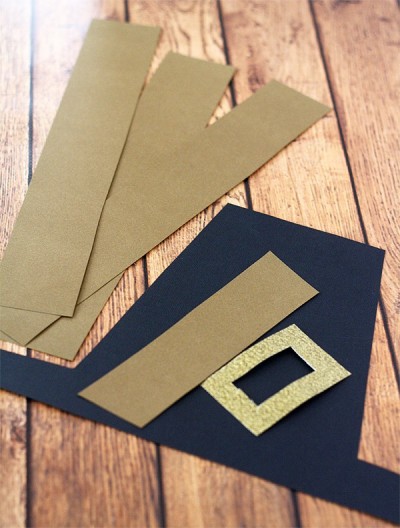
Follow these easy step-by-step instructions to make your own paper hat. First, download the printable Pilgrim Hat Template and print on regular copy paper. Cut along the lines and cut out all the pieces to create a stencil to trace around.

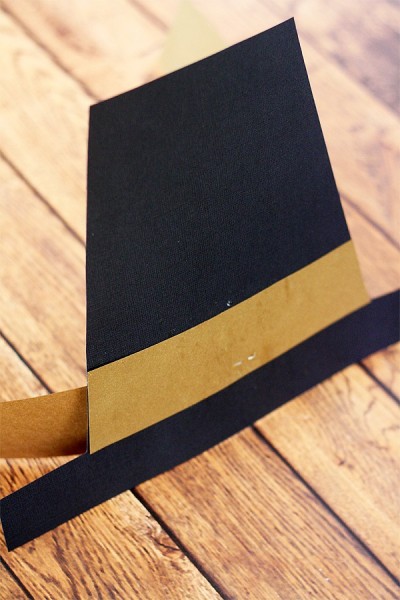
- Trace the hat onto black cardstock and then cut it out.
- Trace the band onto brown cardstock and then cut it out.
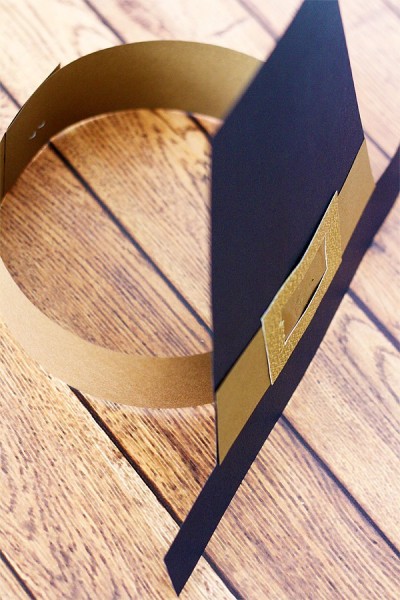
- Next, trace the buckle onto the backside of the glitter paper and then cut the buckle out. No worries if you can’t find glitter paper. Simply add your own glitter to the buckle piece.
- Finally, cut two to three strips lengthwise from the brown paper for the band that goes around the head.
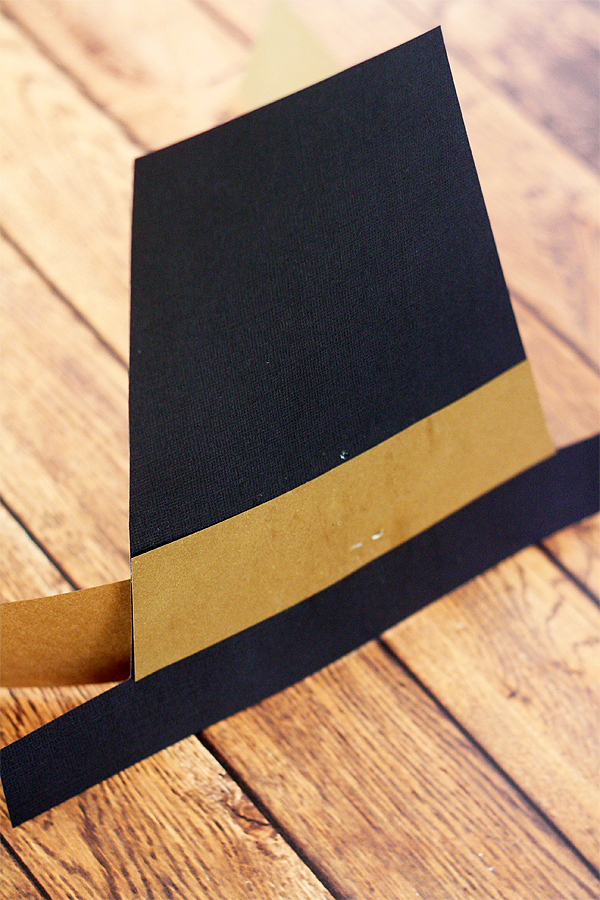
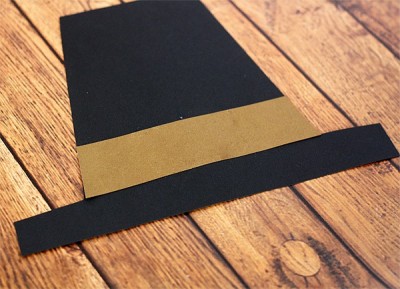
5. Glue the brown decorative band piece to the front of the hat.

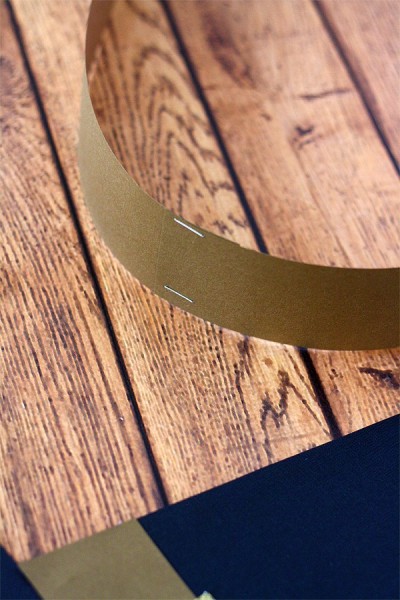
6. Staple two of the long brown strips together. Make sure it will fit around the head. If not, then attach the third strip to make it longer.

7. Staple the long band that goes around the head to the back middle of the bottom edge of the hat about 1/2 inch up.
8. Glue on the gold buckle, place it so it covers the staples.
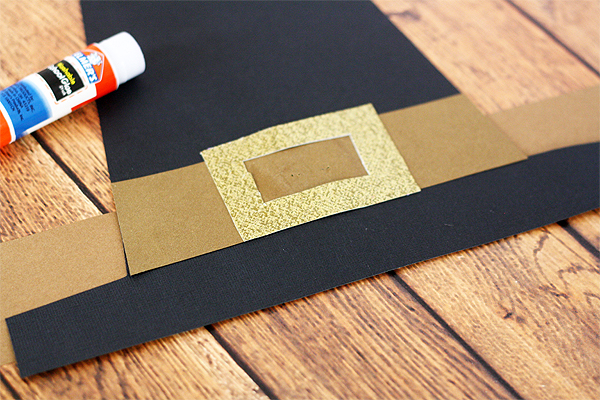
9. Place the long band around the head to determine the correct size and then staple the ends together.

PIlgrim hats are finished
Let the feast begin! The Pilgrims have arrived! What a cute way to celebrate Thanksgiving and include activities for the kids! Enjoy this Thanksgiving hat while eating your pumpkin pie, and get a cute holiday photo too!

If you want a special Pilgrim hat for the ladies be sure to check out my DIY Pilgrim bonnet! These Pilgrim crafts for kids are so easy, and fun for the adults to get involved too! Either one of these hats would make the perfect pilgrim costume.
Some people might like a feather headdress and dress like Native Americans.
I didn’t realize but people also wear pie hats and turkey hats for Thanksgiving. Have you seen these Holiday hats? I would much rather eat my Thanksgiving turkey than wear one. Haha.
Complete the Pilgrim hat with a pair of black baseball pants, a white shirt, and cardboard buckles fastened to dress shoes and you have an easy Thanksgiving costume.
More ways to make Thanksgiving special and fun for all!
- Thanksgiving Trivia – print these cards to play a fun game while testing your guest’s knowledge.
- Thanksgiving Party Favors – Cute pilgrim hat made from a drinking cup.
- Turkey Coloring Pages and Thanksgiving Coloring Pages – Coloring pages are great crafts for preschoolers and can help keep them busy during dinner.
- Felt Turkey Crayon Holders – Kids will love to find their crayons nestled in these holders. Super easy to make and also gives each child something to take home.
- Turkey Finger Puppets – Sew up these oh so darling finger puppets in minutes. They will provide loads of imaginative play for the kids.
- Dinner Conversation Starters – While visiting, keep the conversation flowing with these pretty cards each with a different conversation question. {free printable}
- Turkey Vegetable Platter – Everyone will be eating their veggies when they see this display!
- Thanksgiving jokes will have everyone laughing!
I hope that these easy pilgrim craft ideas will help you have a memorable holiday! The best part, kids (and adults) will be kept entertained!
I would love to keep you fully stocked with creative ideas, yummy recipes, fun crafts, and loads of free printables. Subscribe to Skip to my Lou to get new ideas delivered to your inbox. Follow me on Facebook, Pinterest, Twitter, and Instagram for all my latest updates.

How to Make a Pilgrim Hat {Free Printable}
Equipment
- Printer (for to print the template)
- Pair of kids paper scissors
- Stapler
Ingredients
- 1 piece Black construction paper or cardstock
- 1 piece Brown construction paper or cardstock
- 1 piece Gold glitter paper or yellow construction paper
- 1 each glue stick
- 1 each Pilgrim Hat Template (Free Printable)
Instructions
- First, download the Pilgrim Hat Template and print on regular copy paper. Cut along the lines and cut out all the pieces to create a stencil to trace around.

- Trace the hat onto black cardstock and then cut it out.
- Trace the band onto brown cardstock and then cut it out.
- Trace the buckle onto the backside of the glitter paper and then cut the buckle out. No worries if you can't find glitter paper. Simply add your own glitter to the buckle piece.
- Cut two to three strips lengthwise from the brown paper for the band that goes around the head.

- Glue the brown decorative band piece to the front of the hat.

- Staple two of the long brown strips together. Make sure it will fit around the head. If not, then attach the third strip to make it longer.

- Staple the long band that goes around the head to the back middle of the bottom edge of the hat about 1/2 inch up.
- Glue on the gold buckle, place it so it covers the staples.

- Place the long band around the head to determine the correct size and then staple the ends together.

Very cute, but leave off the buckle to be historically accurate 🙂
This is such a cute craft project. I am cutting them out for thanksgiving day! The kids will love them.