Are you learning how to do new crochet projects? Then you’ve got to learn how to make crochet granny squares! These squares can be the heart of stunning blankets, beautiful bags, or even square motifs as smaller garments.
This photo tutorial will guide you through creating traditional granny squares using simple steps, perfect for both seasoned and beginner crocheters alike. Learning new stitches takes a little bit of effort, but with some practice, you’ll be mastering the method in no time. Let’s get started!
This article contains affiliate links.
What is a Granny Square or Granny Stitch?
The classic crochet granny square, a cornerstone of crochet patterns, is a versatile motif typically worked in the round. Its structure consists of clusters of double crochet stitches separated by chain spaces, forming a square shape. The best thing about the granny square is that it can be made in various sizes, colors, and yarn weights, offering endless creative possibilities. Whether you’re aiming for a vintage-inspired blanket or adding flair to modern accessories, the granny square is your go-to foundation.
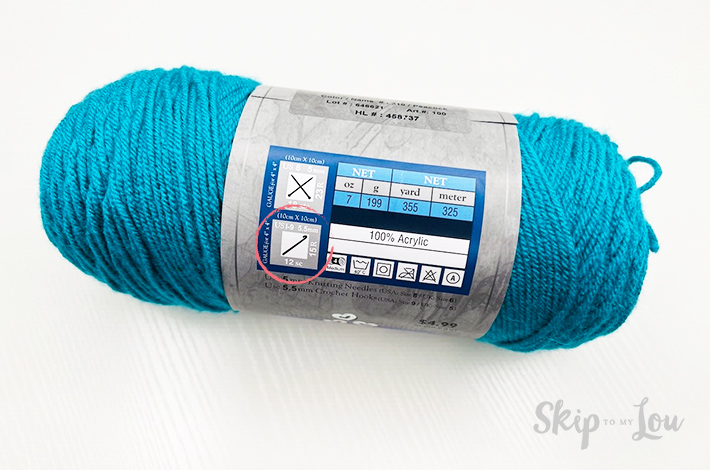
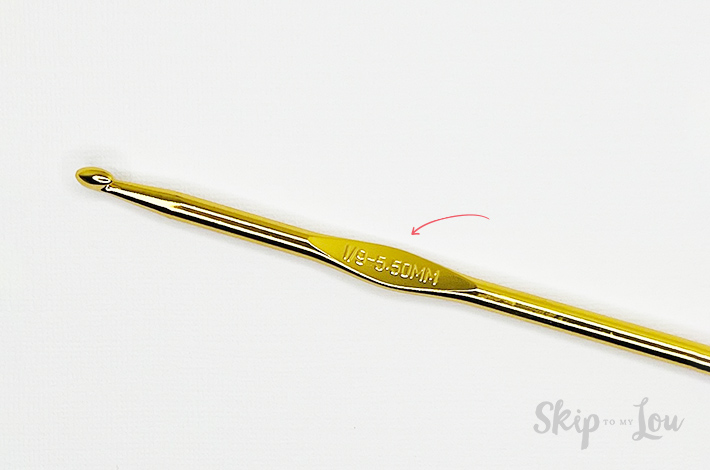
Pick your yarn and pay attention to the hook size recommended on the label. Here in the red circle, you can see it requires a US 1/9-5.50MM.
Materials Needed:
– Yarn of your choice
– Crochet hook (size as indicated on yarn label)
– Scissors
– Yarn needle for weaving in ends
Stitch Abbreviations Used:
In crafting the granny square, we’ll be using fundamental crochet stitches. Here’s a rundown of the stitch abbreviations integral to this pattern:
- ch – chain stitch
- ch-sp – chain space
- dc – double crochet
- sl st – slip stitch (Insert hook, yarn over, pull through stitch and loop on hook)
- st(s) – stitch(es)
Within the pattern, there are specific stitches and formations that give the granny square its unique texture:
Special Stitches:
Granny Cluster (3 dc cluster): The essence of the granny square is in the granny cluster, a combination of three double crochet stitches worked into one stitch. In our pattern, these clusters are linked with chain stitches for spacing and definition.
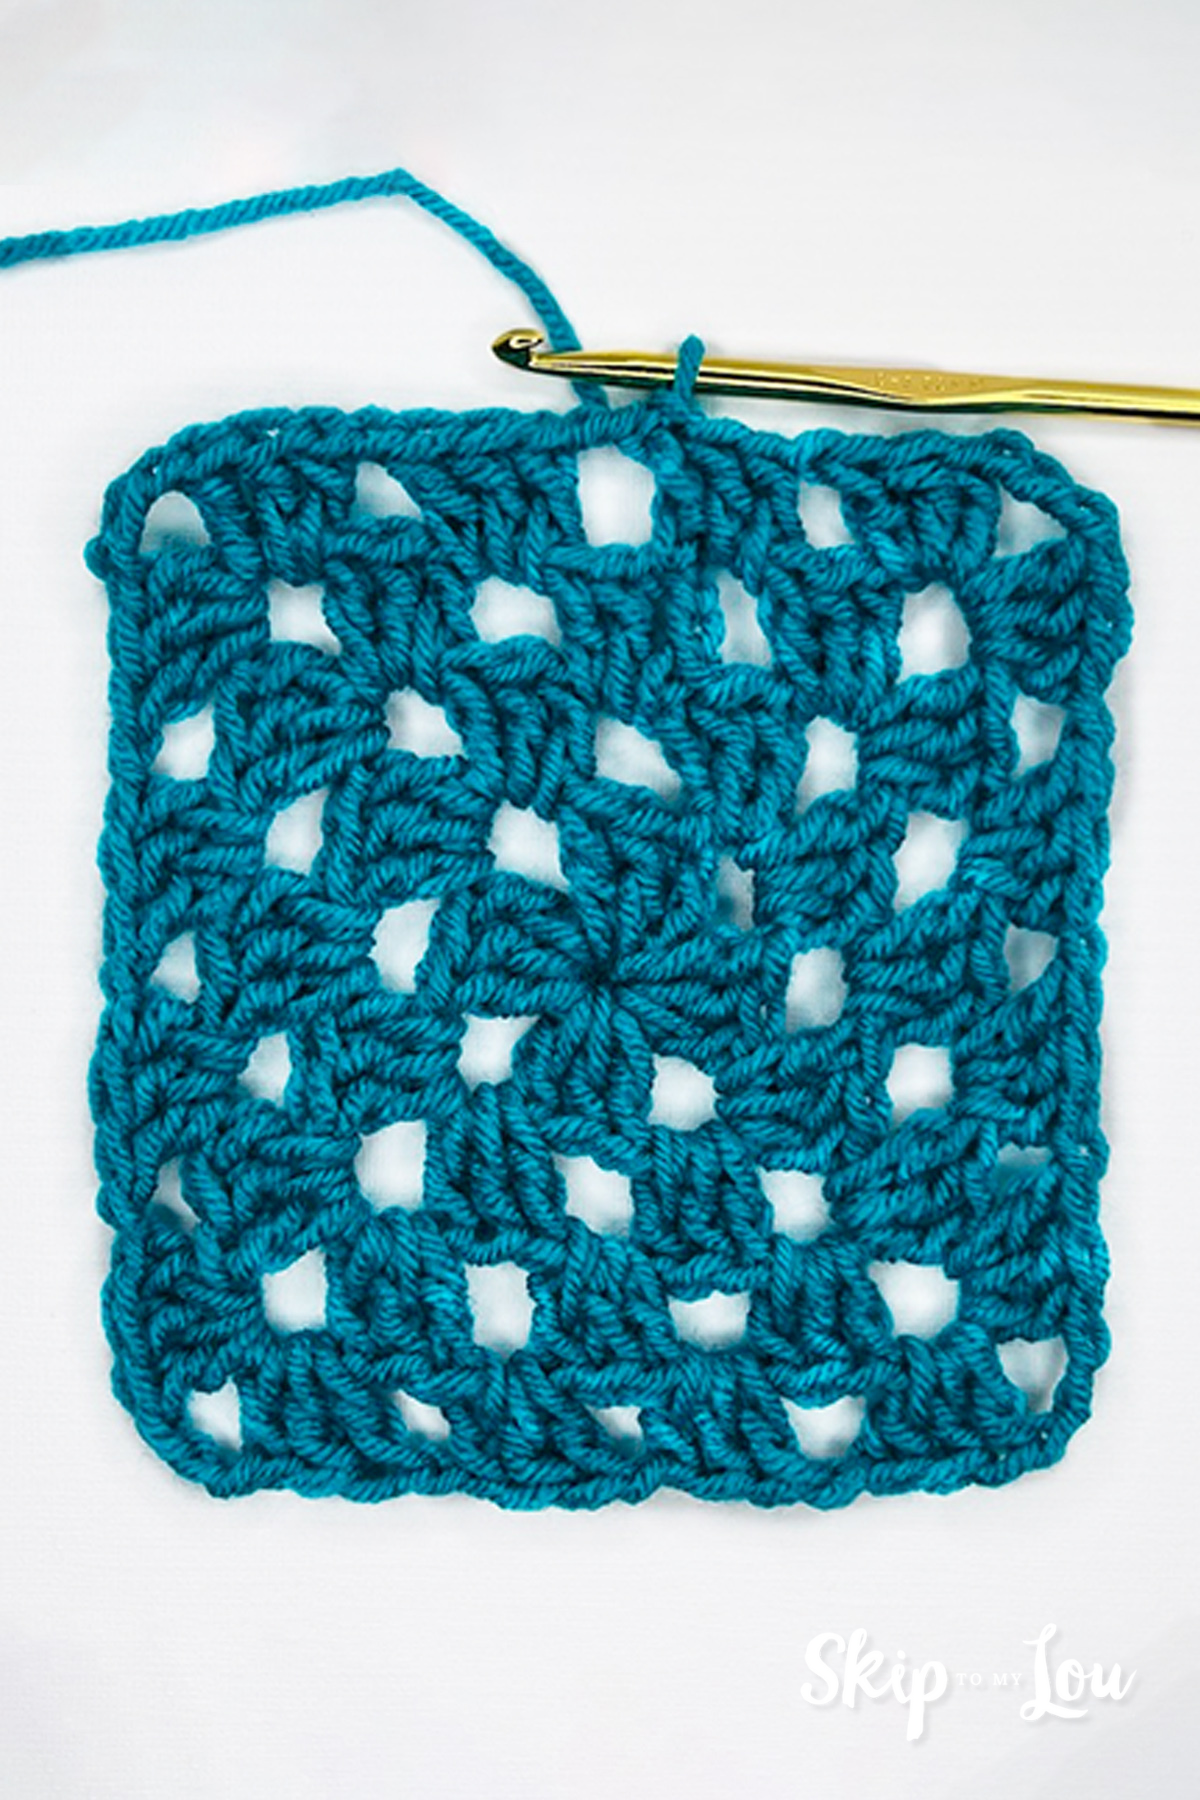
Granny Square Crochet Tutorial – Step-by-Step Instructions:
Foundation Ring
There are different ways to start a granny square: start a single chain, chain stitch center ring, or a magic ring. In this tutorial we started with a chain stitch center ring, one of the easiest and most basic stitches since it’s simple, making it the easiest way to get started.
Begin the granny square by creating a center ring using a chain stitch method.
1. Chain 4 stitches and join them into a circle with a slip stitch.
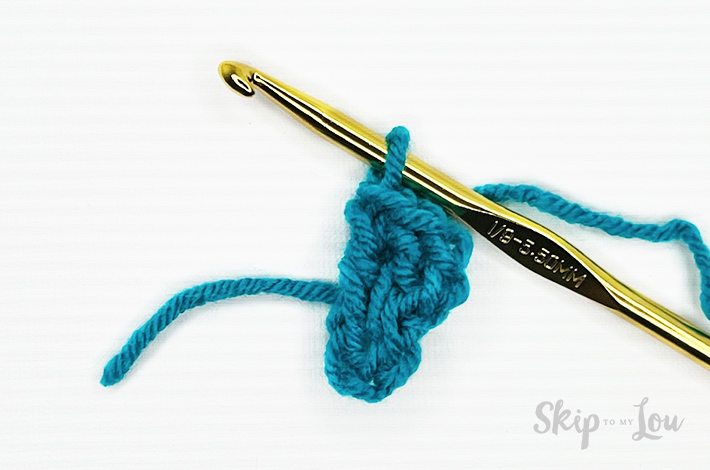
Round 1:
Let’s start with the first round:
1. Chain 3, serving as the first double crochet of the cluster.
2. Work 2 double crochet stitches into the center ring.
3. Chain 3 to form a corner.
4. Create three more clusters of 3 double crochet stitches separated by chain-3 spaces.
5. Join the round with a slip stitch to the top of the initial chain-3.
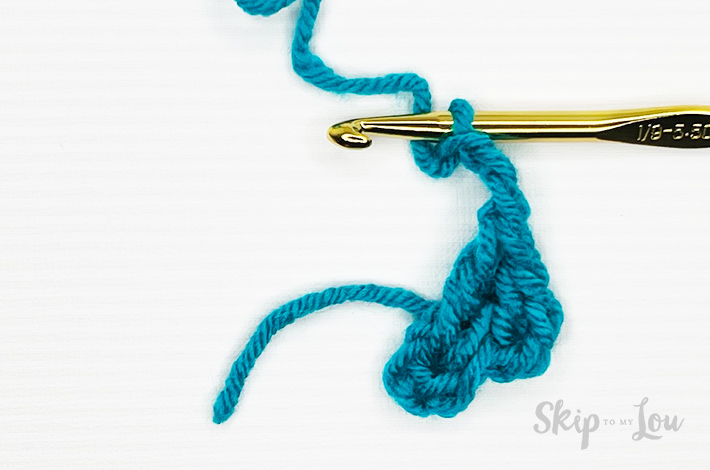
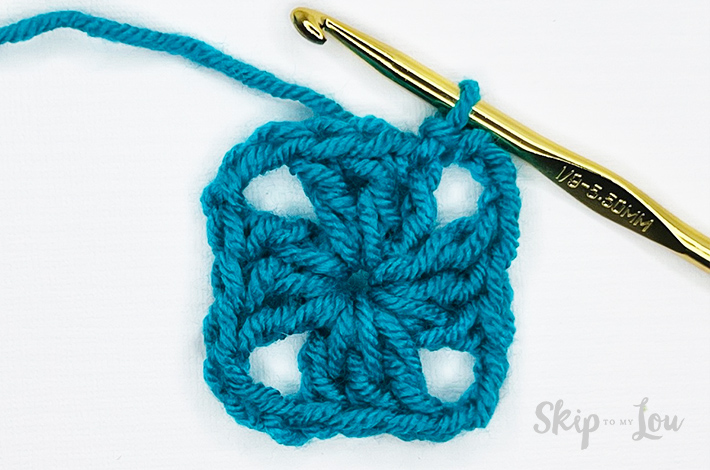
Round 2:
1. Chain 4 (counting as 1 double crochet and a chain-1 space).
2. In the corner space, work 3 double crochet, chain 3, 3 double crochet, and chain 1.
3. Repeat step 2 for the next two corners.
4. Complete the final corner with 3 double crochet, chain 3, 2 double crochet, and chain 1.
5. Join the round with a slip stitch.
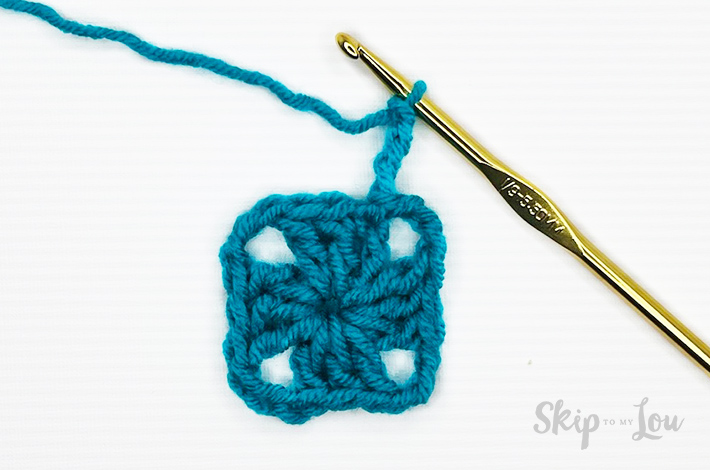
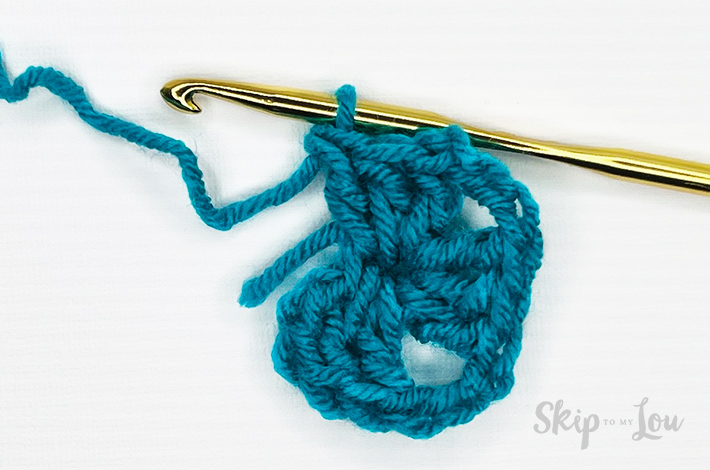
Round 3:
1. Chain 3 (counts as 1 double crochet).
2. Create clusters of 3 double crochet separated by chain-1 spaces.
3. Work corners with 3 double crochet, chain 3, 3 double crochet, and chain 1.
4. Continue alternating clusters and corners around the square.
5. Join the round with a slip stitch.


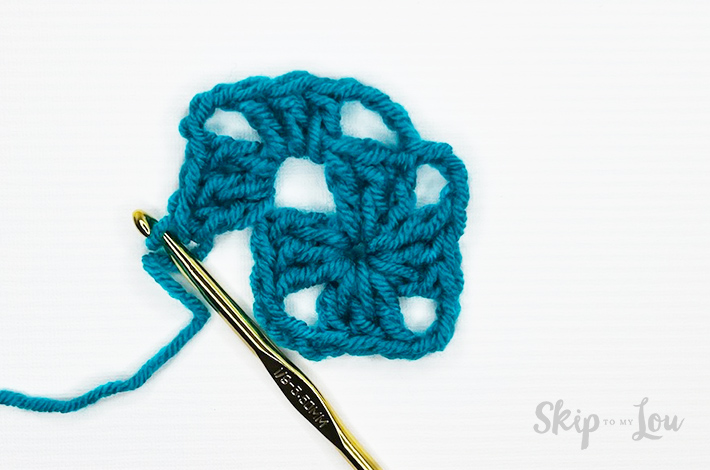
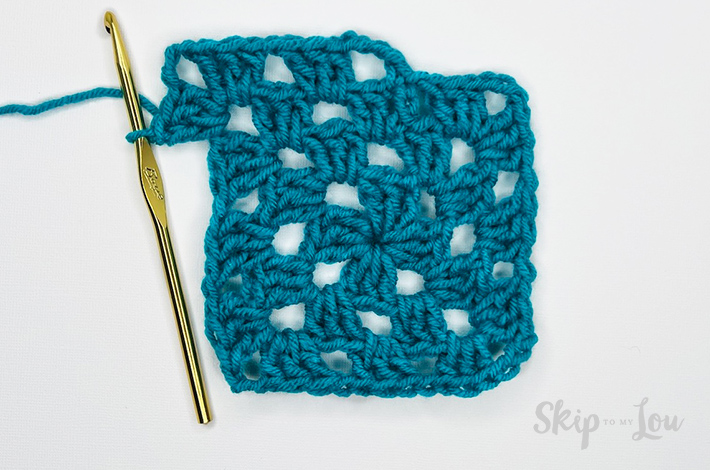
Round 4:
1: Chain 4. (This counts as 1 dc and the ch-1 space.)
2: Into the next ch-1 space, work: 3 dc, ch-1.
3: Into the next ch-3 corner space, work 3 dc, ch 3, 3 dc, ch 1.
4: Repeat steps 2 and 3 in each of the remaining ch-1 and ch-3 spaces.
5: In the last ch-1 space, work 2 dc.
6: Join with a sl st to the top of the starting ch-3. This completes Round 4.
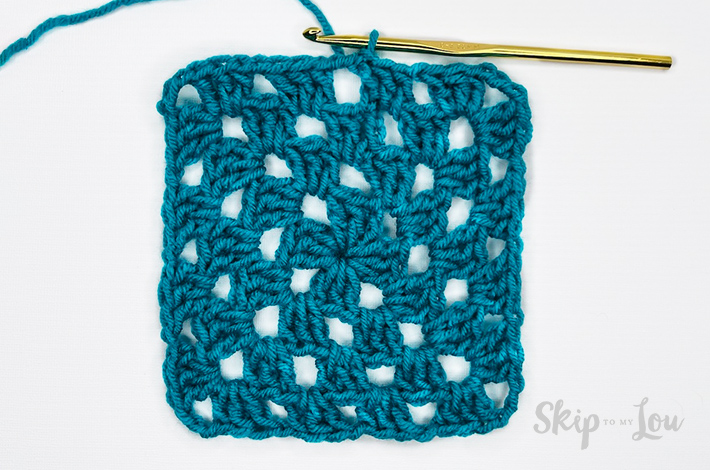
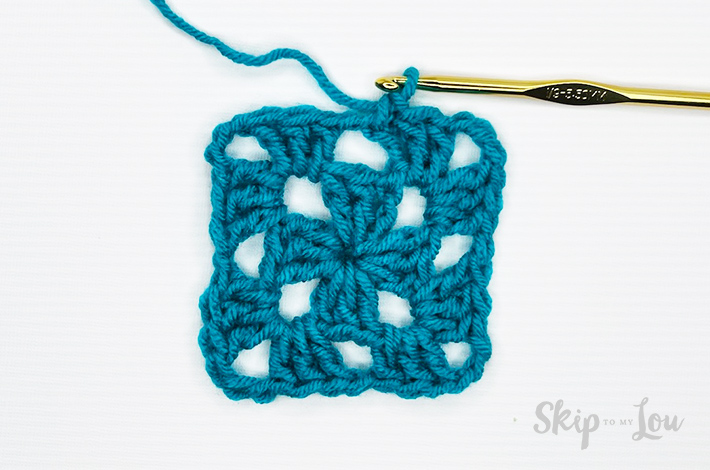
Finish off your last round, cut the yarn, leave a tail, and weave in the ends with a yarn needle to complete your classic granny square. And you’re ready to use it as you please! Below you’ll find some ideas to use it with.
Granny Square Projects
Now that you know how to make your own granny squares, here are some ideas and tutorials for you to try:
- Crochet Granny Square Patterns
- Crochet Granny Square Zippered Pouch Tutorial
- How to Crochet a Granny Square Dishcloth
- Crochet Blankets
US Terms vs. UK Terms in Crochet:
In the crochet world, the terminology can vary between regions, mainly in the naming of stitches. For instance, what’s called a “single crochet” in the US is known as a “double crochet” in the UK. It’s crucial to be mindful of these differences when following patterns to ensure accuracy in your work.
My Favorite Crochet Tools
This post includes affiliate links.
- If you are like me and like to crochet on the go this tote is a stylish way to keep everything you need at your fingertips!
- My MOST FAVORITE tool is these portable scissors that always make it through security and fit perfectly in my hook case.
- A️ yarn bowl is a beautiful way to wrangle yarn while crocheting
- Keep organized with this crochet hooks kit with a case. This 85-piece kit has over 2,500 ⭐️⭐️⭐️⭐️⭐️ five-star reviews.
- Crochet Stitch Dictionary: 200 Essential Stitches with Step-by-Step Photos is the most helpful resource to keep handy!
Easy Crochet Projects For You:
Need a free crochet pattern? We’ve got many tutorials for you! It doesn’t matter if it’s your first time,
- Crochet Sweater Patterns For Everyone
- Crochet Star
- Crochet Wreath Ornament
- Crochet Stitches
- Crochet Baby Blanket Patterns
- Crochet Scarf Patterns
- Crochet Star Free Pattern
Tips and Basic Crochet Stitch Tutorials:
- How to start a chain crochet
- Slip knot
- How to choose the right hook size
- Single crochet stitch
- Double crochet stitch
I would love to keep you fully stocked with creative ideas, yummy recipes, fun crafts, and loads of free printables. Subscribe to Skip to my Lou to get new ideas delivered to your inbox. Follow me on Facebook, Pinterest, Twitter, and Instagram for all my latest updates.