This No Sew Frozen Cape can be made in about 15 mins! Lets say thirty minutes if you have to run to the store for the felt. Bella was invited to a Frozen Birthday party and was asked to go in character. She decided to go as Olaf and I made a nose. After she saw the nose she said, “I would rather be Anna!” Oh No! I looked at the clock and had 45 mins before the party started. I went to the fabric store and grabbed some felt and came home and cut and glued and she arrived as Anna right on time for the party!

Supplies for No Sew Frozen Cape
2 yards 72 inch wide craft felt
2 – 28 inch long pieces of ribbon
2 yards decorative trim (pom pom fringe or fur trim)
glue gun
sharp scissors
How to make a Frozen Cape
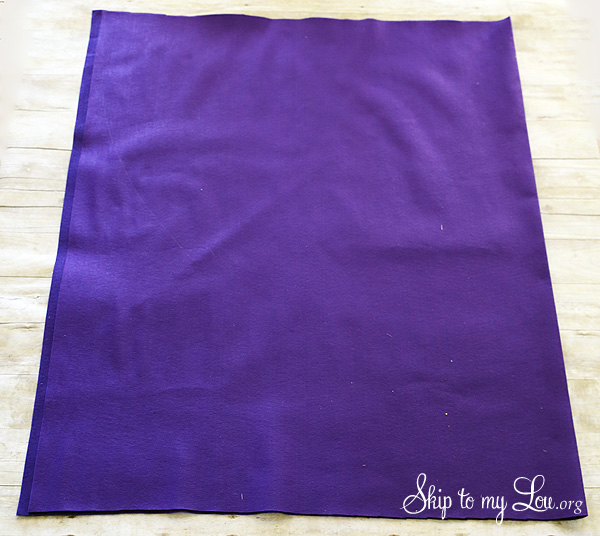
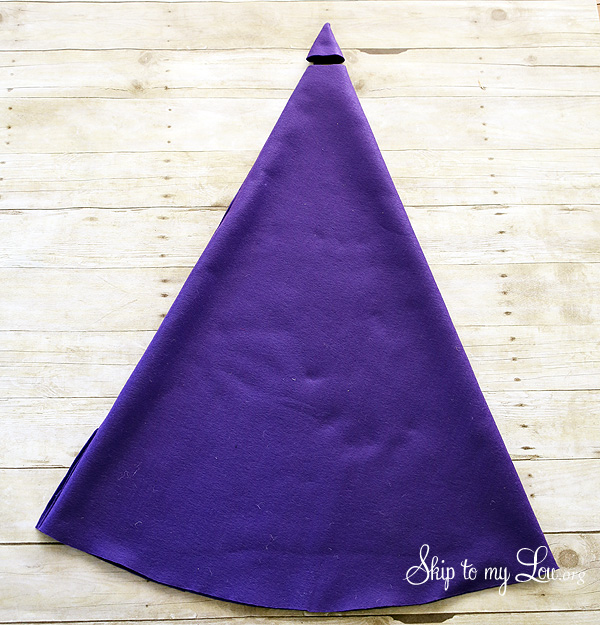
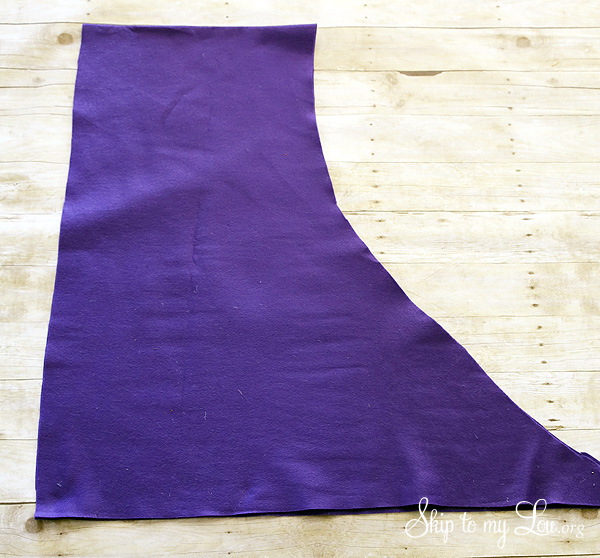
Lay out felt with fold on the right side..
Fold over the top left corner to right side.
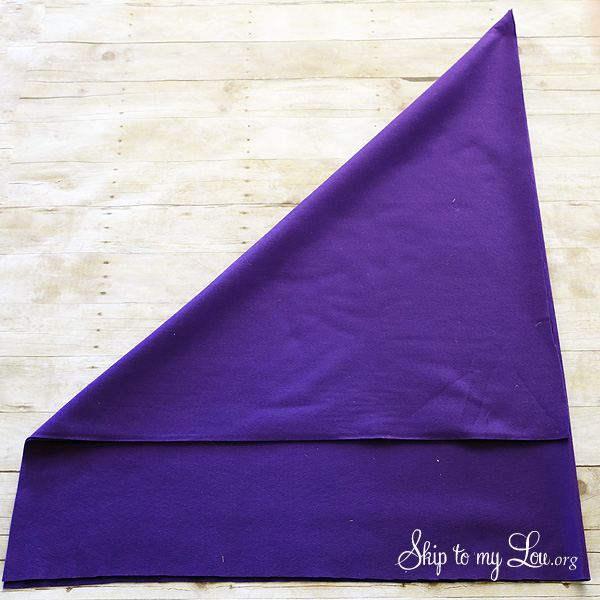
Carefully flip felt over and fold again.
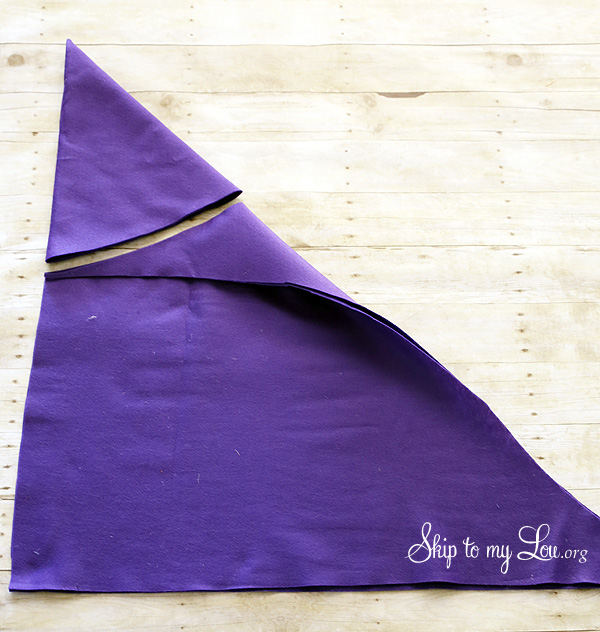
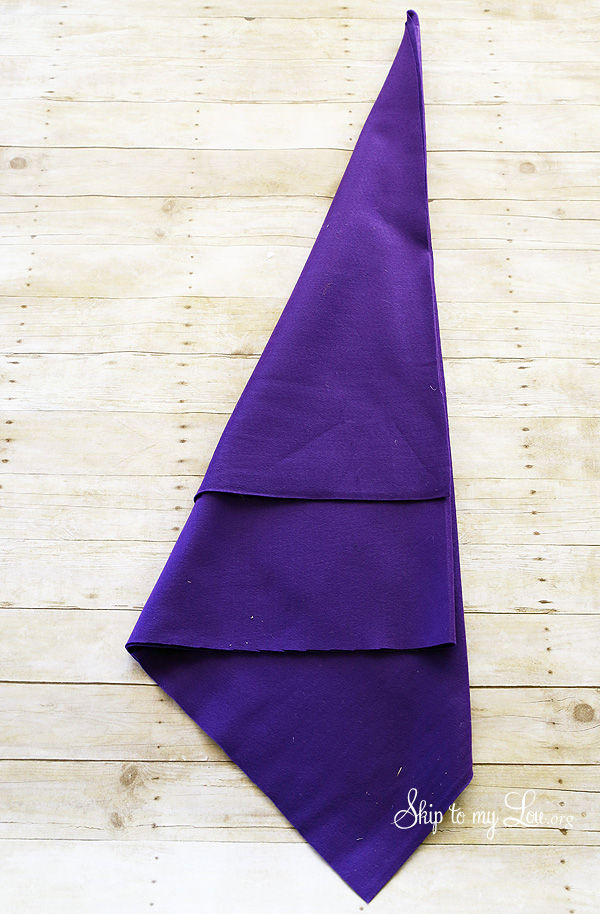 With sharp scissors cut an arc through all layers of felt. If it is too difficult open felt up one fold and cut the arc.
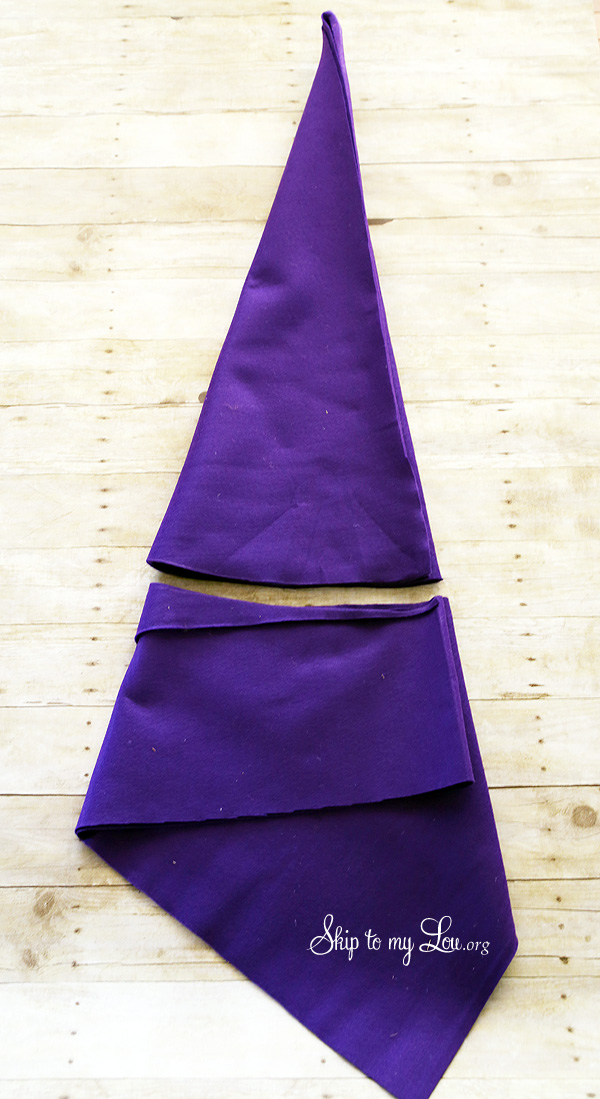
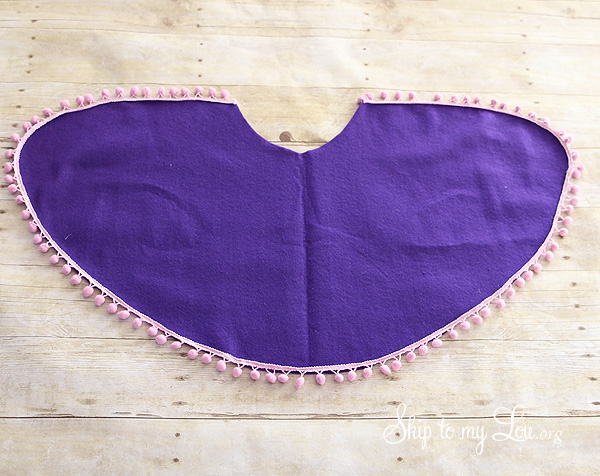
Open up felt one fold and cut an arc at the top for the neck hole. Main part of cape is now finished!
How to make the capelet
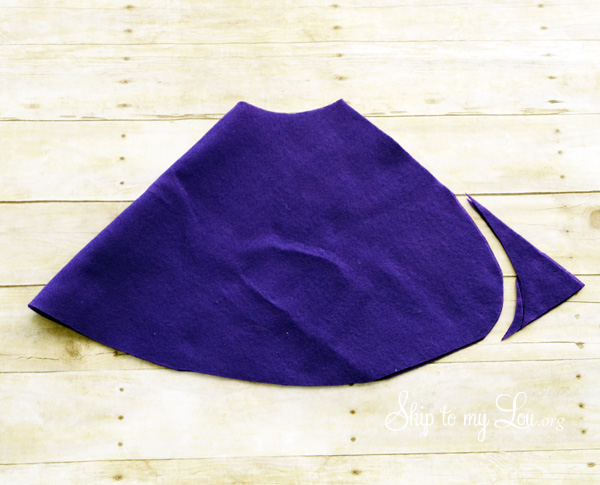
Lay out extra felt.
Fold felt over and cut an arc.
Cut an arc at the top for the neck. Try to make it the same arc as the main cape so the neck areas will match up.

With scissors round off non folded edge of capelet.
Hot glue decorative trim along the outside edge of the capelet. This can also be sewn.
Lay capelet on top of large cape. Sandwich a length of ribbon on each side of the neck. Place hot glue in between the layers of felt along neck, making sure to to secure the ribbon ties with glue.

Finished! Let it go!
Looking for another new sew project? This no sew witch costume is so easy.
Family costumes are a fun way to dress up for Halloween!


Thank you thank you thank you! I am not really good as sewing. Once I tried to make napkins with leftover cloth. There was not a straight edge nor proper corner to be had. I resigned myself to be the mom who bought all costumes… And then I could not find an Anna cape, for my daughter’s costume. I looked on pinterest and found this. AND I MADE IT! It isn’t too pretty up close, but my daughter squealed in delight when she saw it and from a distance it’s perfect. Thank you for such an easy tutorial!!!
I just ran out and purchased all the materials, but I am confused on how to get started. My fabric, off the bolt, came in a long rectangle and looks nothing like the first picture. Did you ever publish a video to help? We care down to crunch time and I would love any help you can offer. Thank you!
Hi Cindy, I am trying to tackle this cape project that sounds so easy however, like the last person that posted I do not understand the third step either. I try to flip over and fold again but it doesn’t look like ur folds. Did u ever make a video? Thanks for any help u can offer!
I wrote in yesterday, but don’t see my request for the video. Will you post a video so it would give a visual to what you have done. This is such an awesome idea!!
Yes! Would you show a video? That would be great! We are trying to figure it out right now, and I’m a bit confused. Thank you for this amazing idea! I can send my girls out into Halloween weather and they can stay warm.
I only flipped so the short edge remains visible so I knew where to cut. I am so sorry everyone I made this confusing.
I left the fabric as it comes off the bolt, so it should be folded when you begin. Does this help? Maybe I should make a video, would that help?
You don’t need to flip over, it is just when you fold as is it is hard to see where to cut. You want to cut at the shortest edge and it is harder to see if it is inside.
I am about to make a cape and yours seems the most easiet, but what I am struggle with is the third step where you say:Carefully flip felt over and fold again.
Are you flipping the felt over and which way is the fold going? Any further help you can give on that part would be greatly appreciated.
Maybe it is just me but I found this VERY difficult to follow. Your fabric dimensions look nothing like what I have. In your pictures the fabric looks more square like and mine is looking more rectangular…..2 yards (72 inches) by 2 72 inches wide (2 yards)….once you flip it over and fold I can not get it to look anything like your picture….any insight?!!!
Looks great and easy!
Thanks you for tutorial!
Hi!
I love this cape, however I am confused with the flip over and fold again part. Can you help me out???
Thanks!
Oh my goodness, I totally LOVE this! My girls are still over the moon for frozen and I WAS in desperate need of help on making their costumes! Thank you so much, I will be making this today!
Thank you so very much for this tutorial! You inspired me to just get my little girlie’s cape done! She threw a fit (she’s 2) when she found out she would be a witch for halloween. We’re talking full on apocalypse is coming. When I asked her what she wanted to be, of course it was Anna. This tutorial rocks! I used it as a stepping off point and I am truly so grateful! THANK YOU!
Never mind!!! I missed the “fold” instruction on the first step…hope this goes well 😉 I thank you for the no-sew instruction for those of us that are not very crafty!!
Thank you,
Tiffany