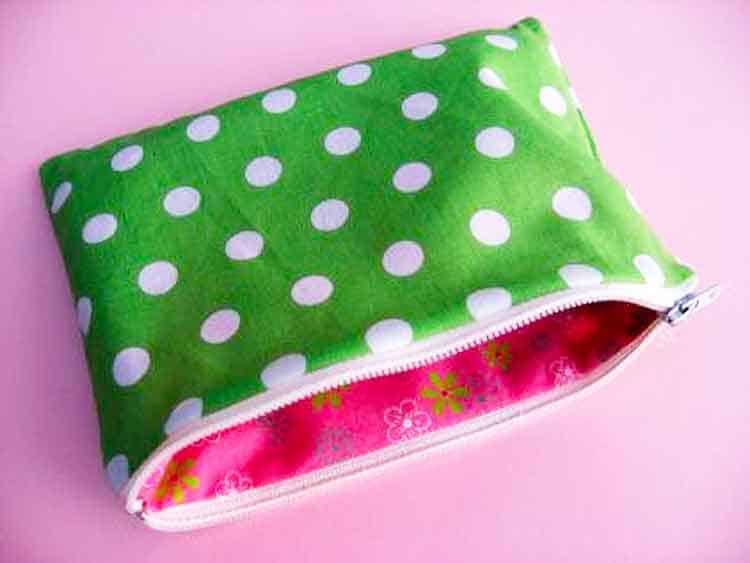
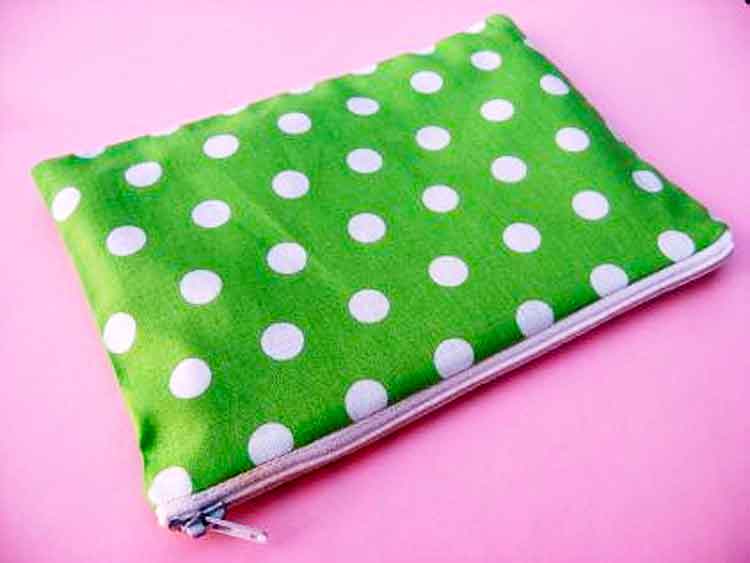
Here is a quick little how to make a lined zippered pouch tutorial. It isn’t that hard and I always feel like I have really accomplished something when I am finished. Fill a small zipper pouch with a favorite goodie or gift card to make a great gift!
RELATED: Make a matching tote bag with this free pattern.
Here is What You Need:
- fabric (this is a great way to use up fabric scraps. This is also a great fat quarter project)
- zipper
- thread
- scissors
- sewing machine
- zipper presser foot
- needle (if hand stitching opening closed)
- ruler or measuring tape
Fabric Cutting Guide
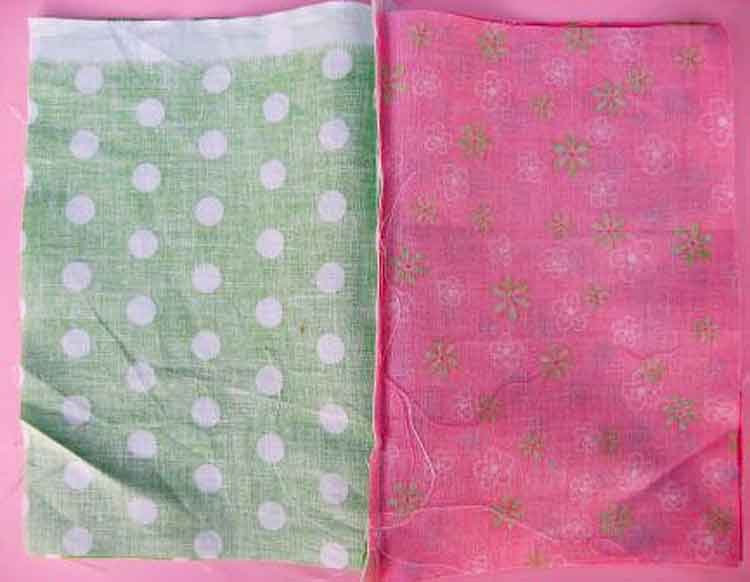
To make a pouch cut
- Two outer pieces of fabric and two lining pieces of fabric all cut the same length as the full length of your zipper and any width you choose.
How to Make a Lined Zippered Pouch Tutorial
This zippered bag tutorial is so easy! Just follow the step-by-step instructions. This is a perfect project for beginners!
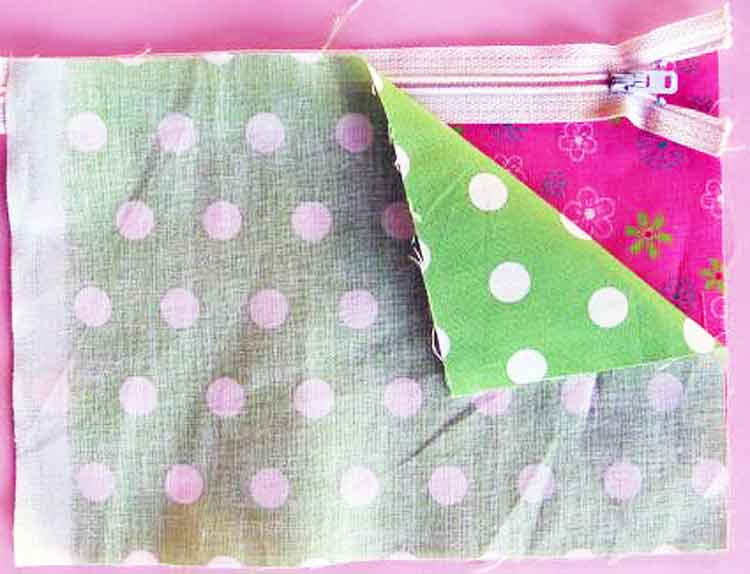
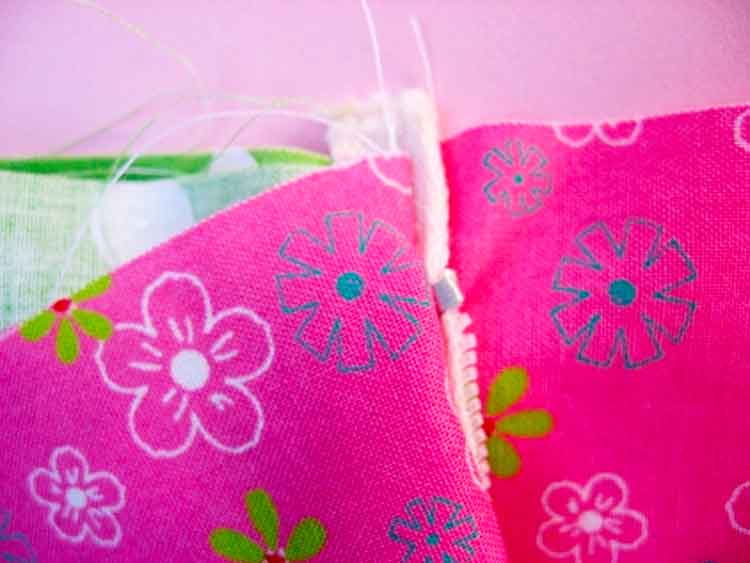
- Make a zipper sandwich. Place 1 piece of lining fabric face up, then the zipper, and then the outer fabric right side facing down. Line up the three edges.
- With a zipper foot sew across the top between the edge of your zipper sandwich and the zipper teeth (closer to the zipper feet).

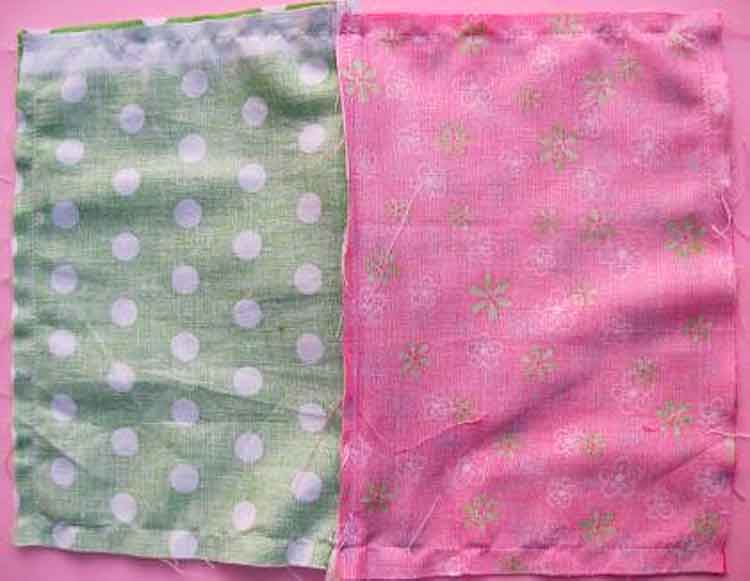
- When finished and you pull the fabric back it will look like this. Repeat this for the other (side) edge of the zipper. Oops, the fabric should go all the way to the end of the zipper.

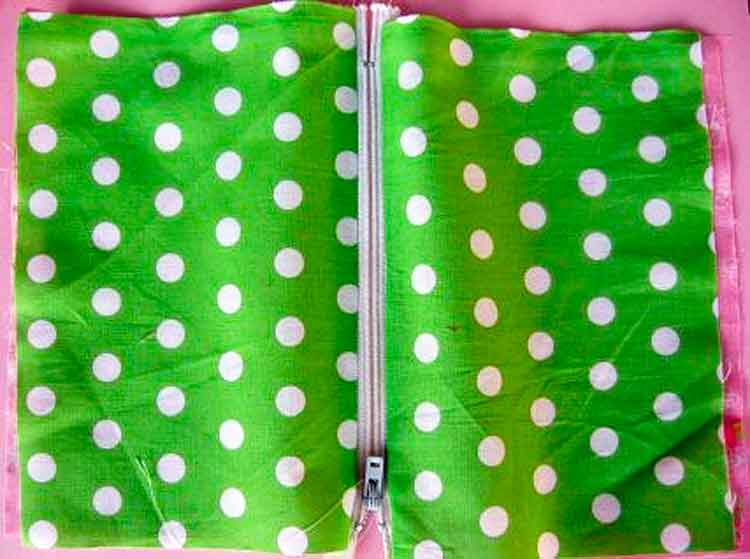
- When both sides are completed it will look like this. Hopefully, you will have pinned before sewing and all of your edges will match up beautifully (unlike mine). You can topstitch along the zipper now if you like.

- Bring both pieces of lining to one side and both pieces of your outer fabric to the other side. Un-zip the zipper at least halfway so you can turn it once it is stitched. If you forget to un-zip the zipper you won’t be able to turn your pouch right side out.

- The zipper teeth should be pinned toward the lining side. I lay the zipper ends on top of each other with teeth facing the lining side and pin.

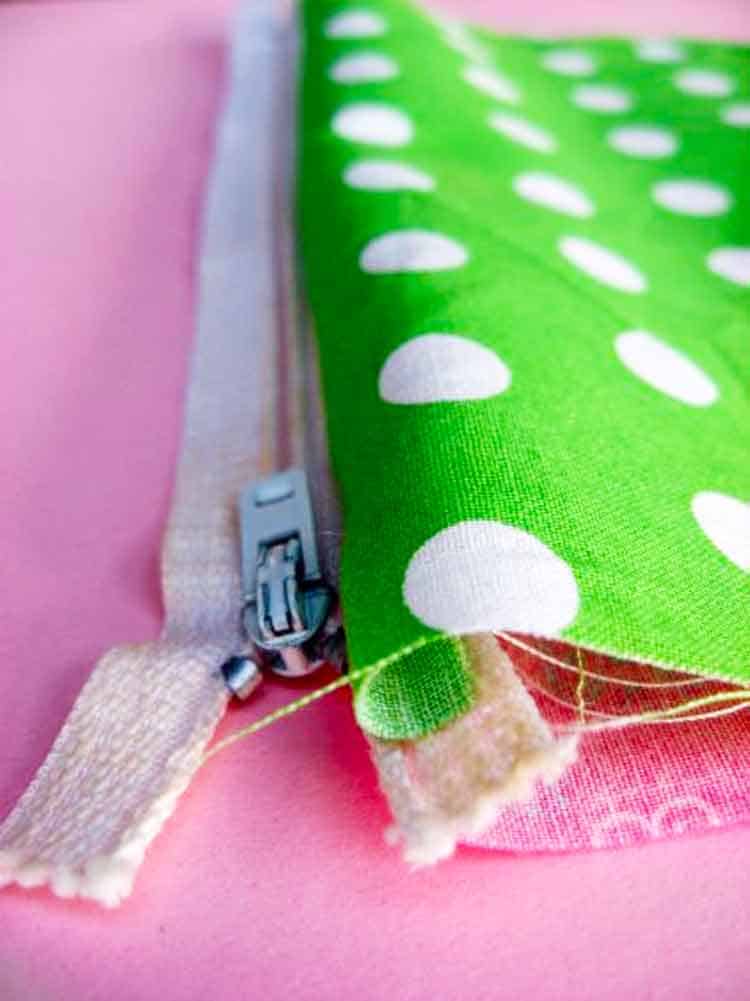
- Sew all the way around 1/4 inch from the edge. Make sure you sew on the outside of the metal parts on each end of the zipper, this will be easy to do if you cut your fabric the total length of the zipper. Leave a two-inch opening at the bottom of the lining side. Clip corners.

- Turn right side out. Stitch opening closed by machine or slip stitch by hand.

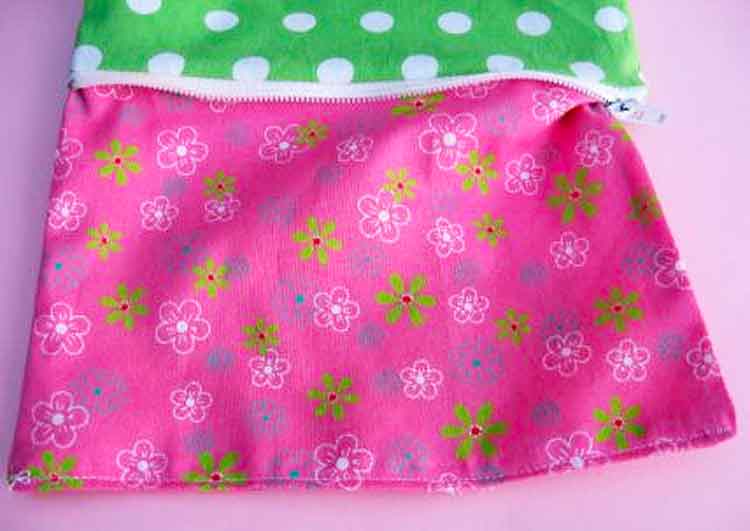
- Push lining inside and you are finished!
- Finished! You did it! Now you know how to sew the zipper. I hope it was easier than you thought. You can even add a cute zipper pull if you like.
How easy was that! Now try one of these bags with my free sewing patterns.
More Zippered Pouches to Make
- Pleated Pouch – another super easy zippered pouch tutorial
- Leather-Trimmed Zippered Pouch
- Car Shaped Pouch
- Two Color Pouch
- Crochet Granny Square Zippered Pouch
- Upcycled Cardboard Pouch
- Quilted First Aid Kit
- Theme Print Zippered Pouch
- Juice Pouch to Zippered Pouch – fun pencil zipper pouch
- Boxy Cosmetic Makeup Bag – the perfect make-up pouch
Make Your Pouch Extra Special
I was a mentor for one of the youths at our church. At Confirmation they are each given a different bible verse, special to them, to mark the occasion.

I wanted to give my Confirmand (the sweetest girl) a gift with her bible verse so I decided to make a little zippered pouch with the bible verse sewn inside. I printed the verse onto printable fabric (like this) and sewed it onto the lining before stitching the pouch together. I also covered the lining pieces and the piece with the scripture with iron-on vinyl before I sewed. I wanted her to be able to use it for make-up etc.

Another bonus was that it doubled as the “gift bag” for this beautiful handmade cross.

I would love to keep you fully stocked with creative ideas, yummy recipes, fun crafts, and loads of free printables. Subscribe to Skip to my Lou to get new ideas delivered to your inbox. Follow me on Facebook, Pinterest, Twitter, and Instagram for all my latest updates.


Oh how fun! And I just bought the cutest fabric-perfect timing! I’ll be linking.
That is so dang cute, I’ll have to try that one! I just love polka dots.
This is getting added to my “Christmas/Birthday” Gift list. I love to make tons of different things and have them ready for any occasion! This will be perfect! Thank you for all of your ideas, they are fantastic!!
You have taken away my zipper fear. I think I must attempt it now!
I have about a zillion zippers here that I got from my husband’s grandmother and am too intimidated to try to use them, but I think this might help me try!
What a fantastic gift! I wish I’d done something similar for my youth group members.
What a sweet and thoughtful gift. You’re my mentor also – I’m so excited to try this!
Thanks so much for this. It seems like I should have been able to come up with it myself, but sometimes it takes another person to spur my creativity. Thanks!
I really love your tutorials! Thanks so much. I’m not great at sewing, but you make it so easy to understand. Please keep them coming!
I had bought fabric to make little zippered waterproof bags for swim ware and my daughters diaper bag, but I have never sewn in a zipper so the fabric has been just sitting there. Now I know how! Thanks! Love your fabrics.
so cute, & super easy. to think zipper always intimidate me. i think now i might actually have the confidence to try something like this! i’ve done basic zippers before, but never something with a “lining”!
thank you for that, I look forward to making a few – and you know I am not religious but was so very touched at the little details that you put into that. What a beautiful gesture to sew inside and the extra touch of making it into a gift bag – that girl is going to feel extra special, and you will have certainly left a wonderful life impression on her.
oooh.. I can’t wait to make one of these! Mind if I post a picture and link to my site?
What a beautiful and meaningful gift!! Thanks for the great tutorial – Must add it to my ‘to-do list!’
Cute and super duper easy! I love this idea and it can have so many applicaitons. Using iron on vinyl is brilliant too. I don’t remember seeing that so I’ll have to look for some.
Thanks for the great tute!
Jessica
http://www.MomShots.com