When it comes to paper crafts, origami is so much fun, and for the whole family too. Today, we take things under the sea with our easy origami paper fish folding tutorial.
This origami model is not too difficult to start and our step-by-step tutorial, which includes video instruction results in an easy origami fish just from a square piece of paper.

Why Making an Origami Fish is a Great Activity for Kids
Using origami skills to make a simple paper fish, or any other animal or sea creatures for that matter, a creative idea can be turned into hours of fun for both young and old alike.
Not only will a fish model made from folded paper teach your child excellent problem-solving skills, but it will also help them be patient, and build their concentration too. Remember, their first origami fish might not turn out exactly as planned, especially if your child is fairly young, but with persistence, their origami model will be perfect.
Supplies Needed for This Origami Fish Tutorial
You will need the following supplies:
- A pair of scissors
- A sheet of square paper
- A pen
- Paper glue (optional)
Video: How To Fold A Colorful Origami Fish Step-by-Step
How to Fold an Origami Fish
You don’t need to go and buy special paper for this, a regular piece is fine, but try for one with color, as white paper is just a little boring for our funky origami fish. Remember to watch the video as it shows all the folds in real-time, and can be a massive help if you are stuck.
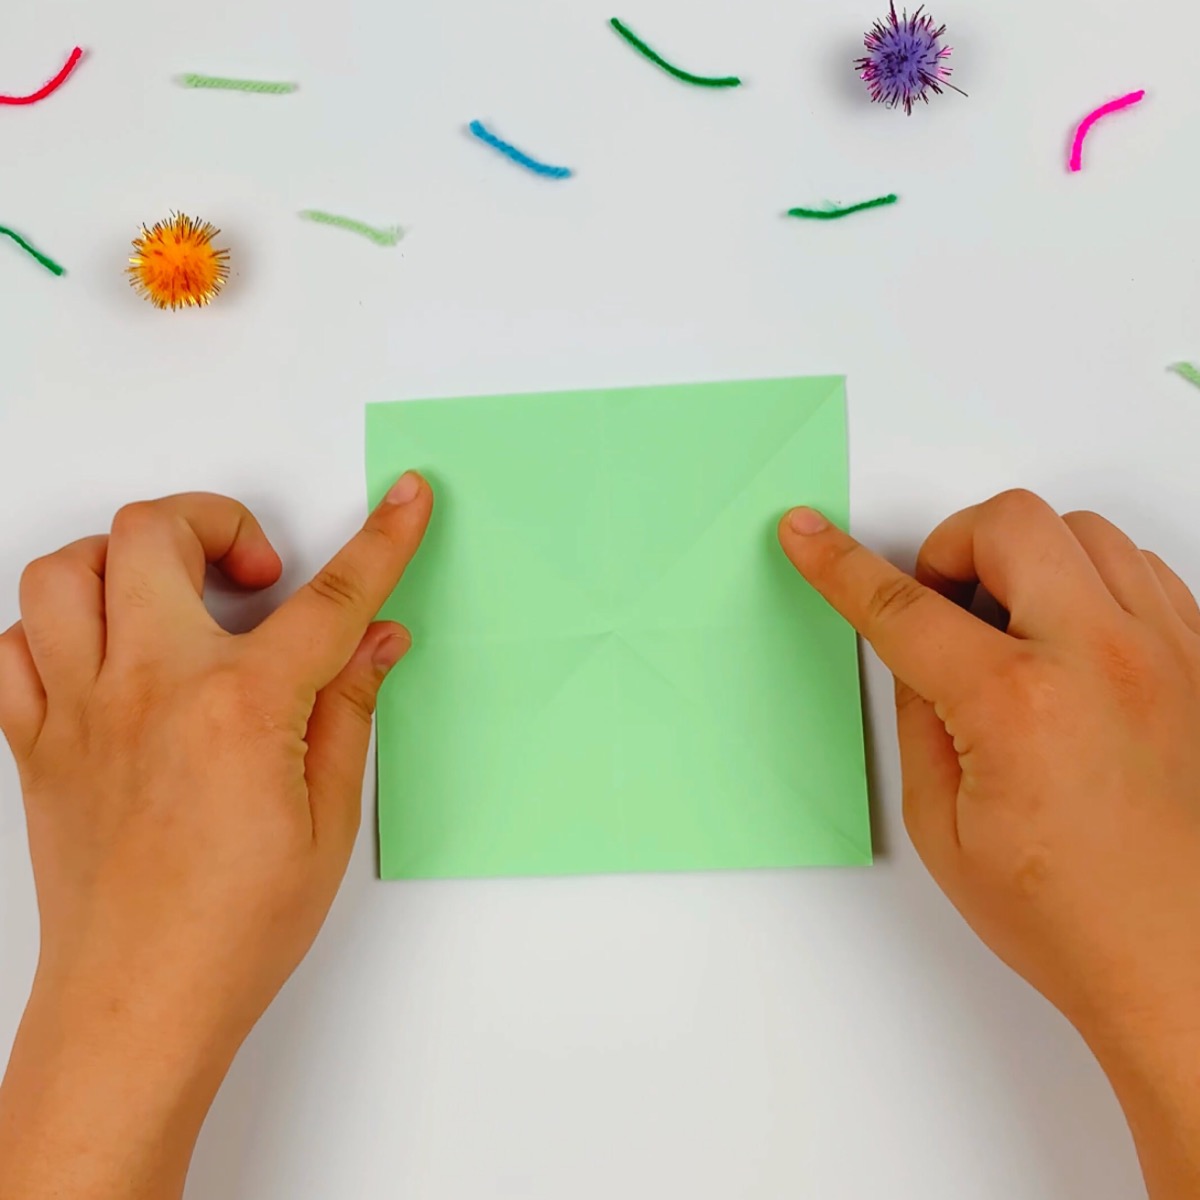
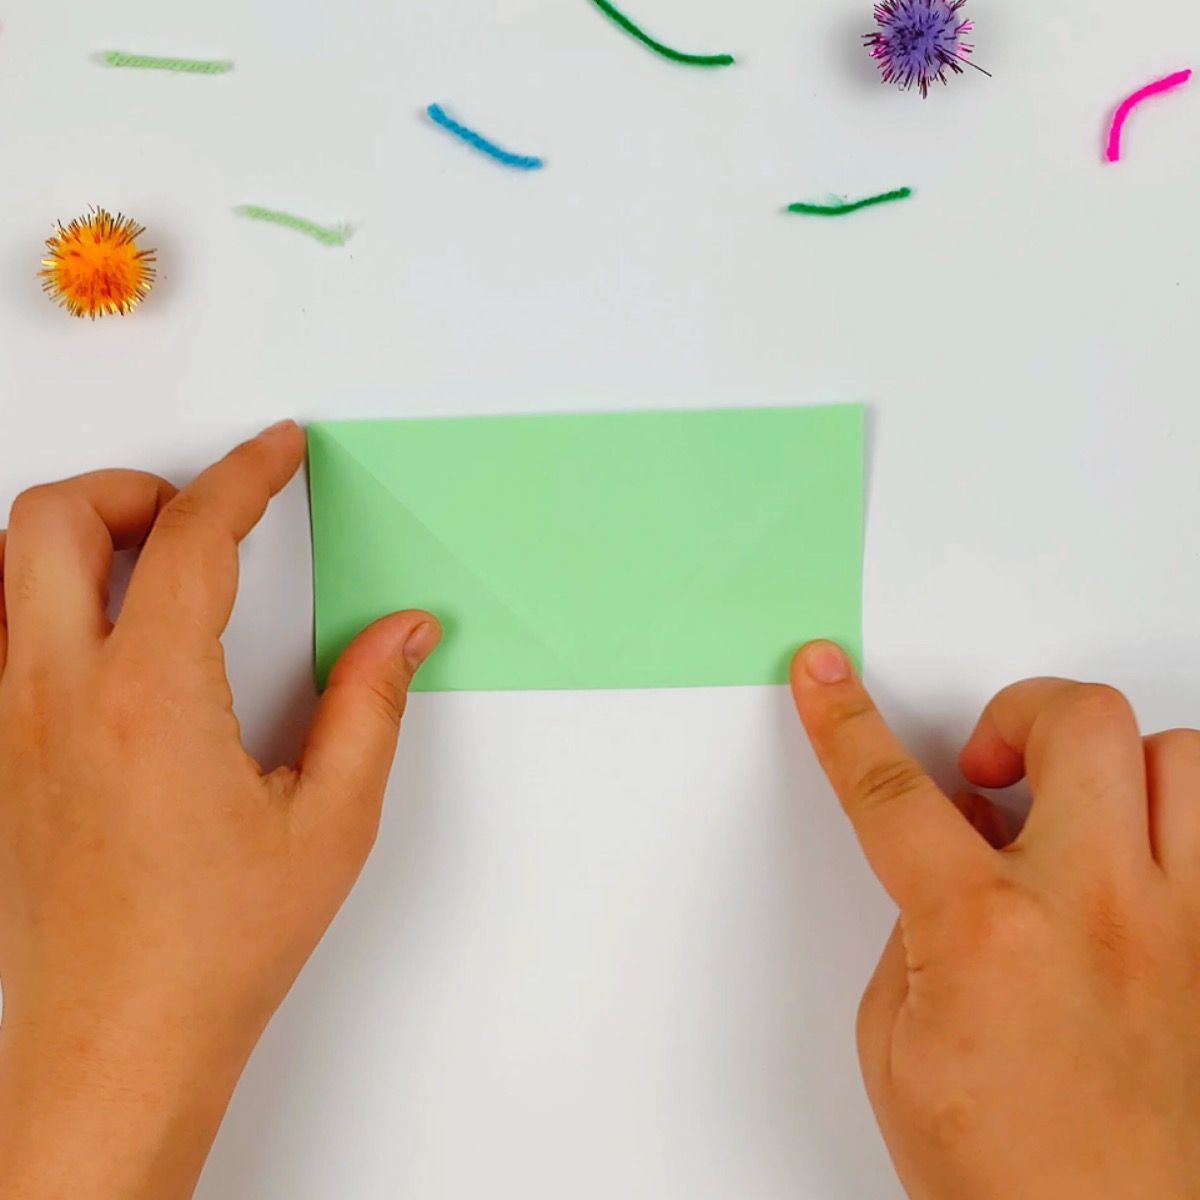
Step 1: Fold the paper in half from the bottom edge to the top point, flip it 90 degrees to either the left-hand or right-hand side, and fold it in half again as shown in the image above.
Step 2: Now flip the paper 45 degrees and fold the bottom flap up towards the top so that it forms a triangle. Flip it 45 degrees again and do the same. The paper will now have creases through it at 90 degrees, 180 degrees, and at both 45-degree angles that separate it into eight sections. If you are unsure, watch the video that shows it clearly.
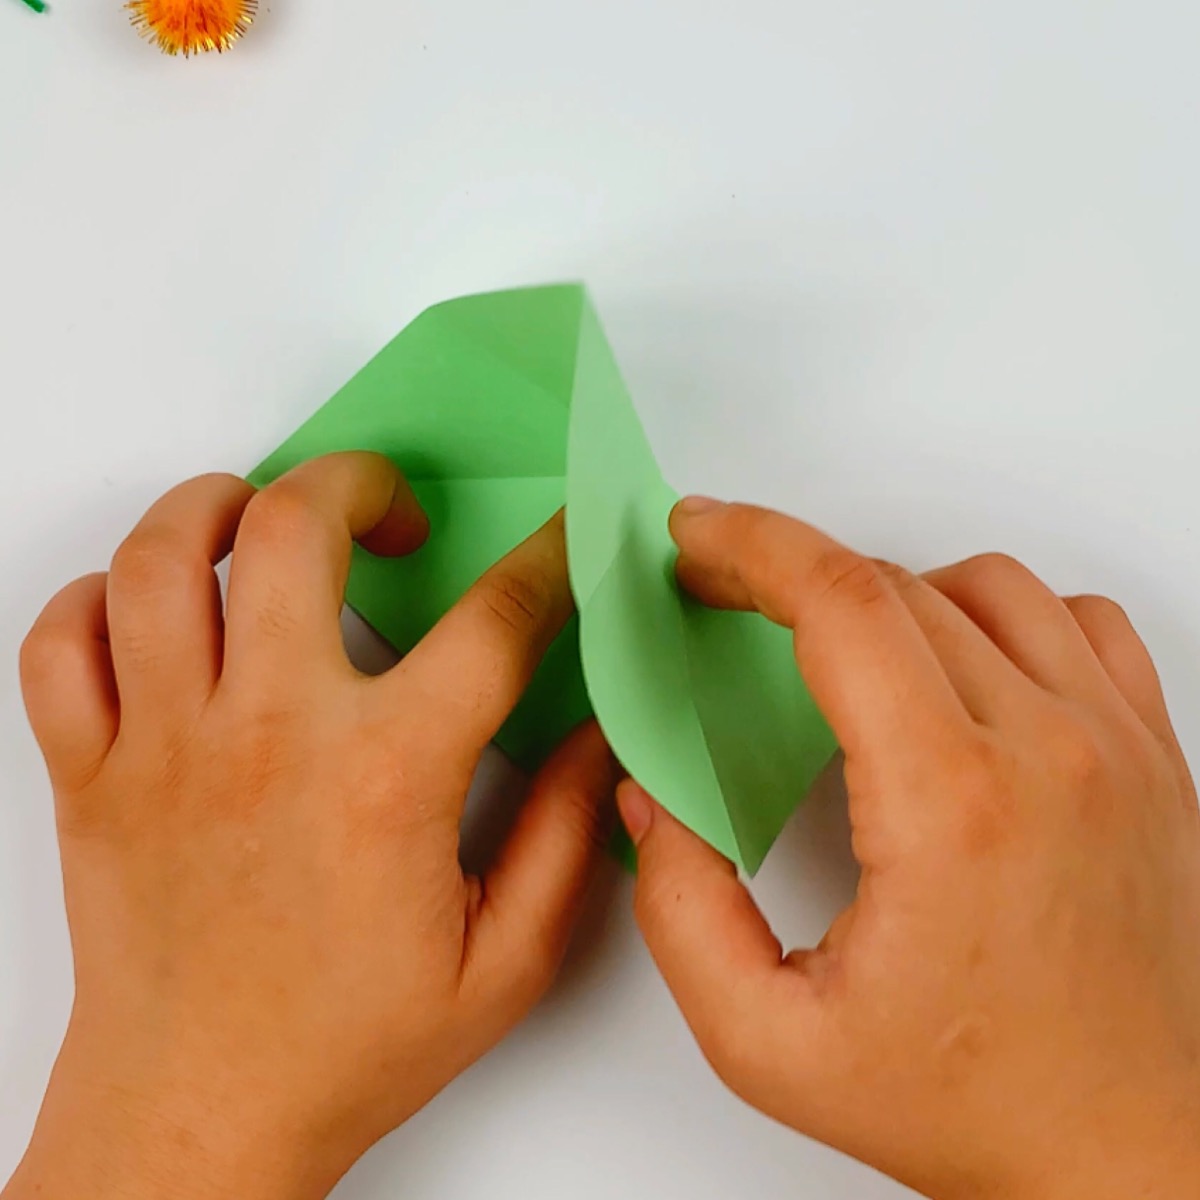
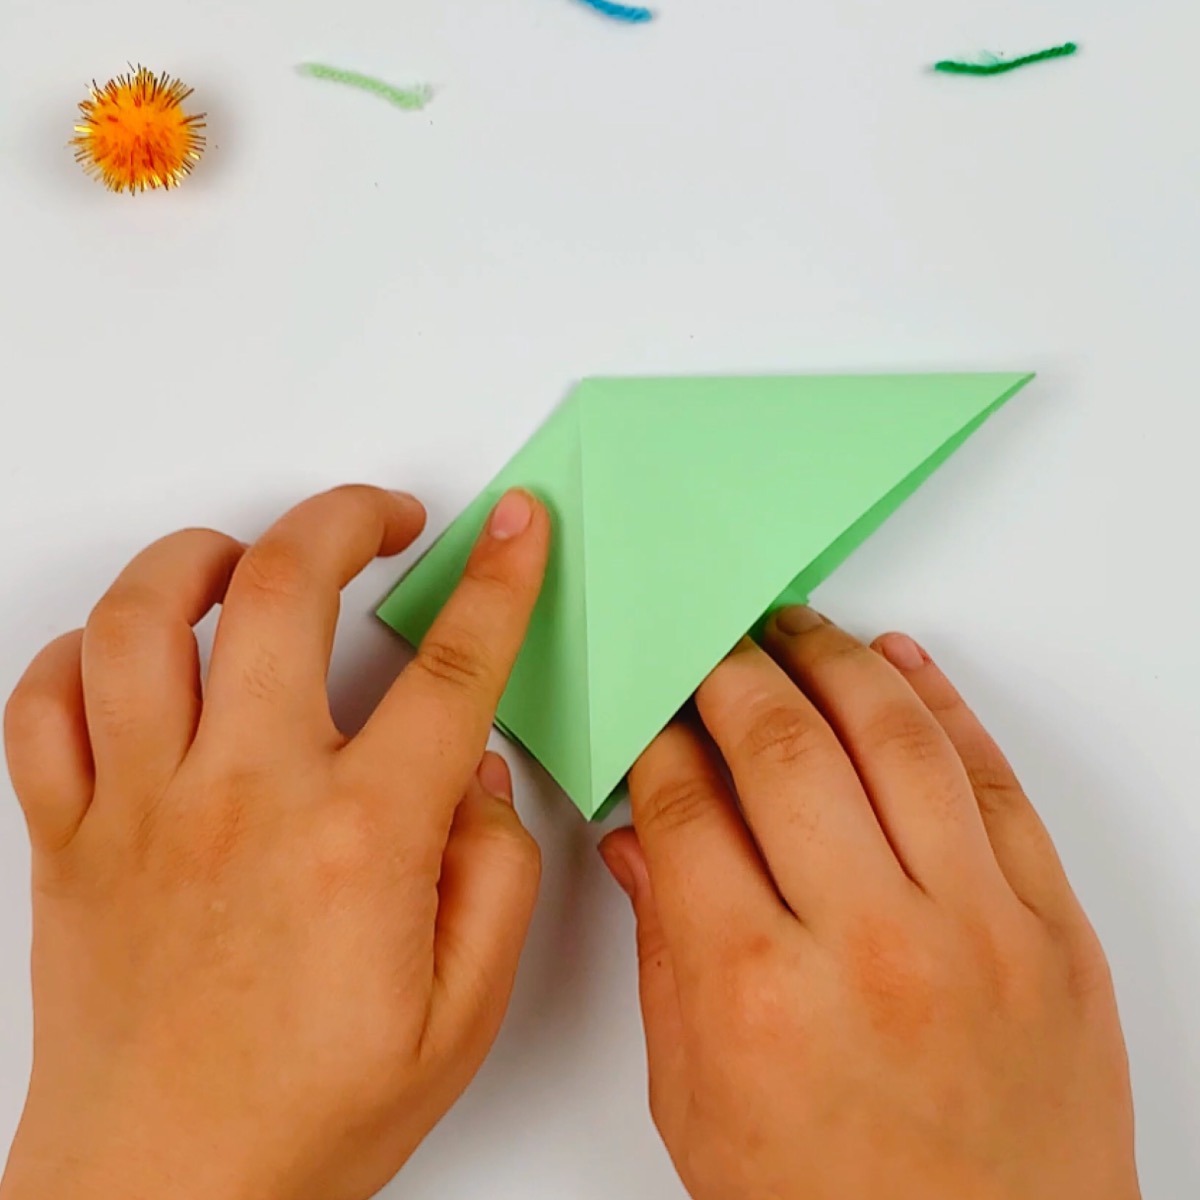
Step 3: This is a little tricky as you need to fold the bottom right edges of the sides of the paper as shown in the images above. Watching the video shows this clearly.
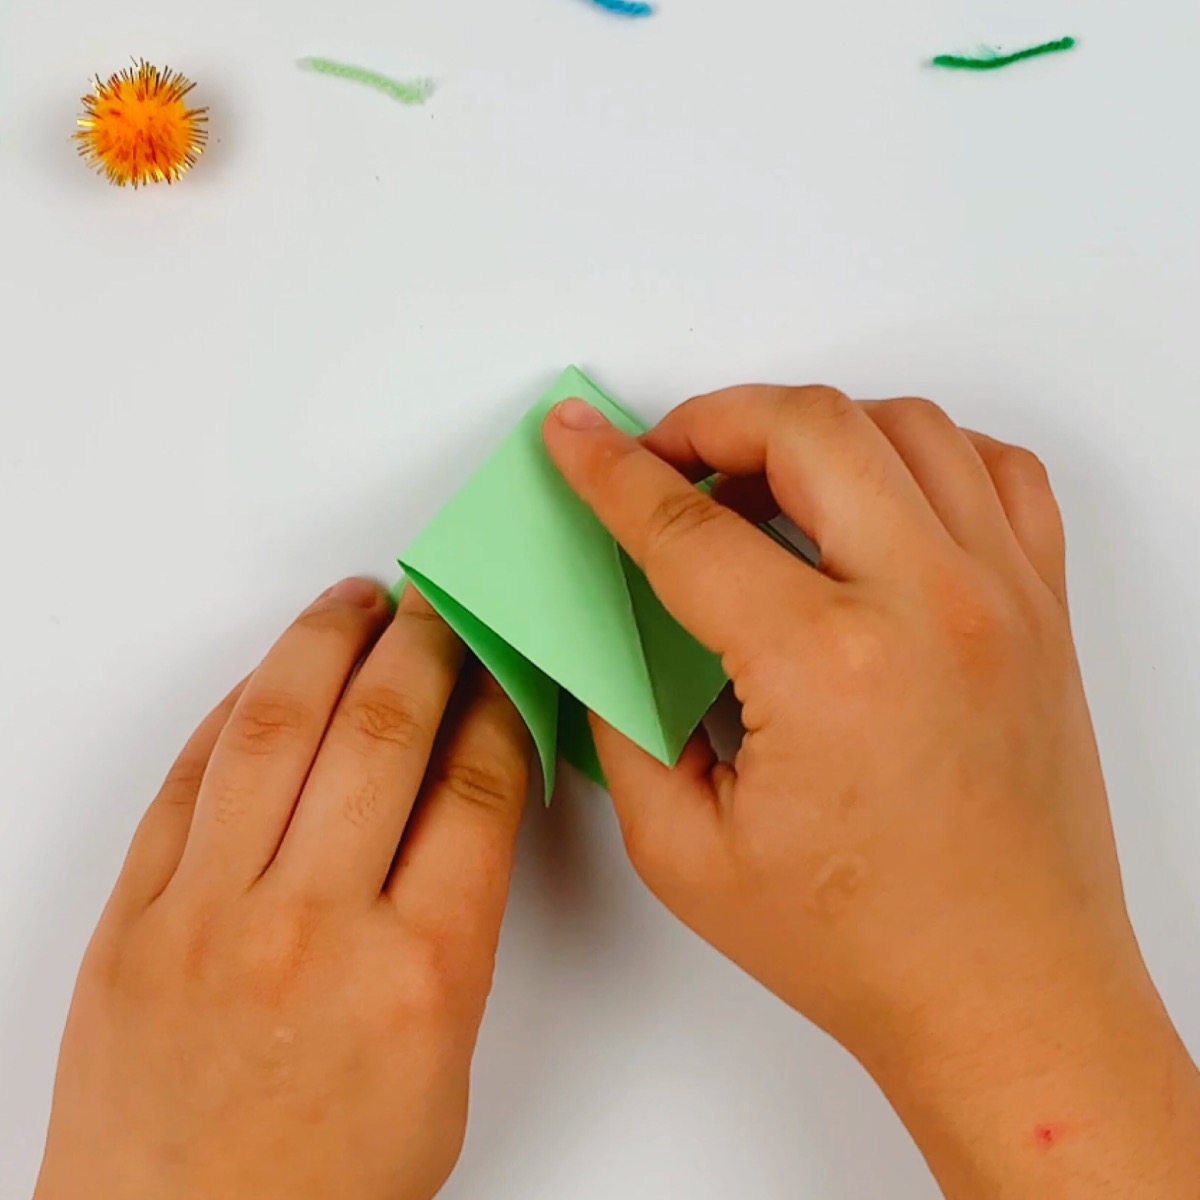
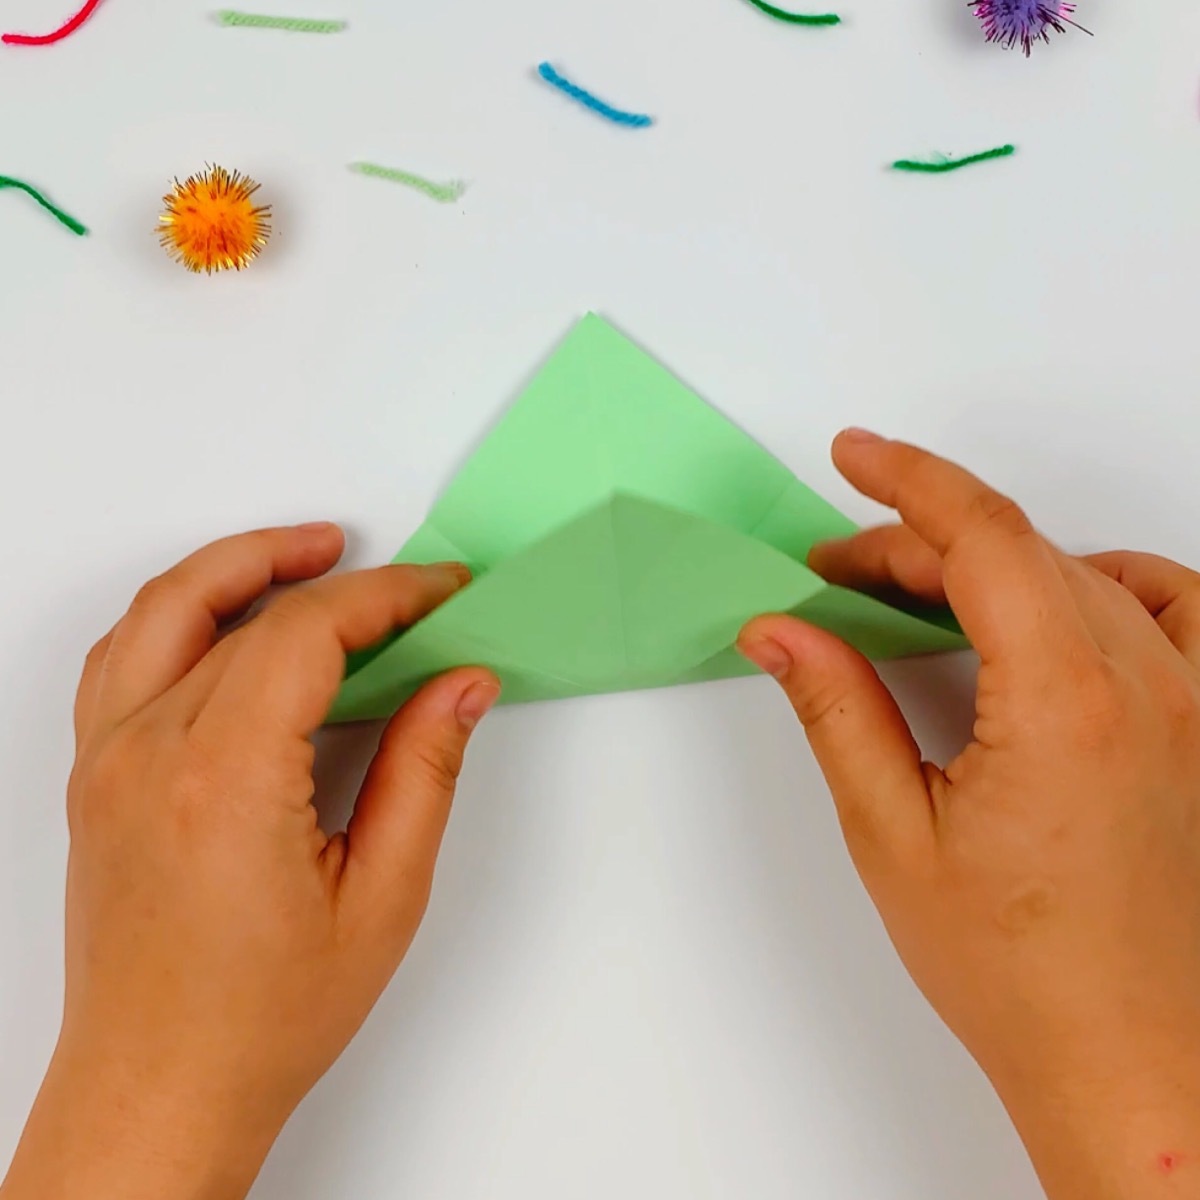
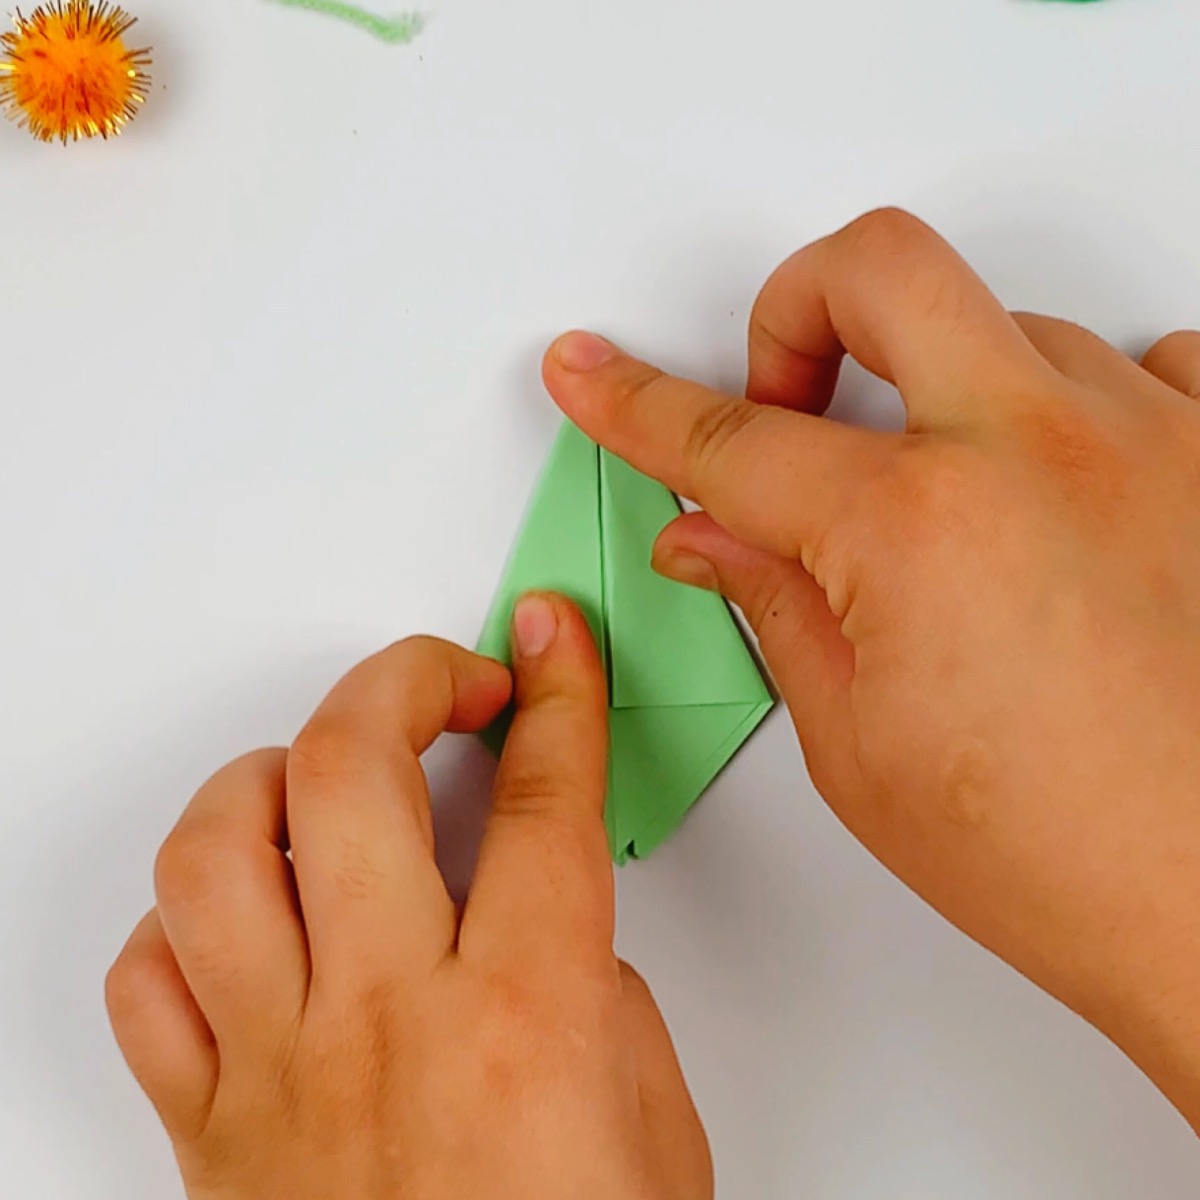
Step 4: Now take the top left section, including the left flap, and fold downward but don’t press down. Take the top-right side and fold that down toward the left side. The top left section tucks in under the top right section to form a diamond shape. This process is clearly shown in the video.
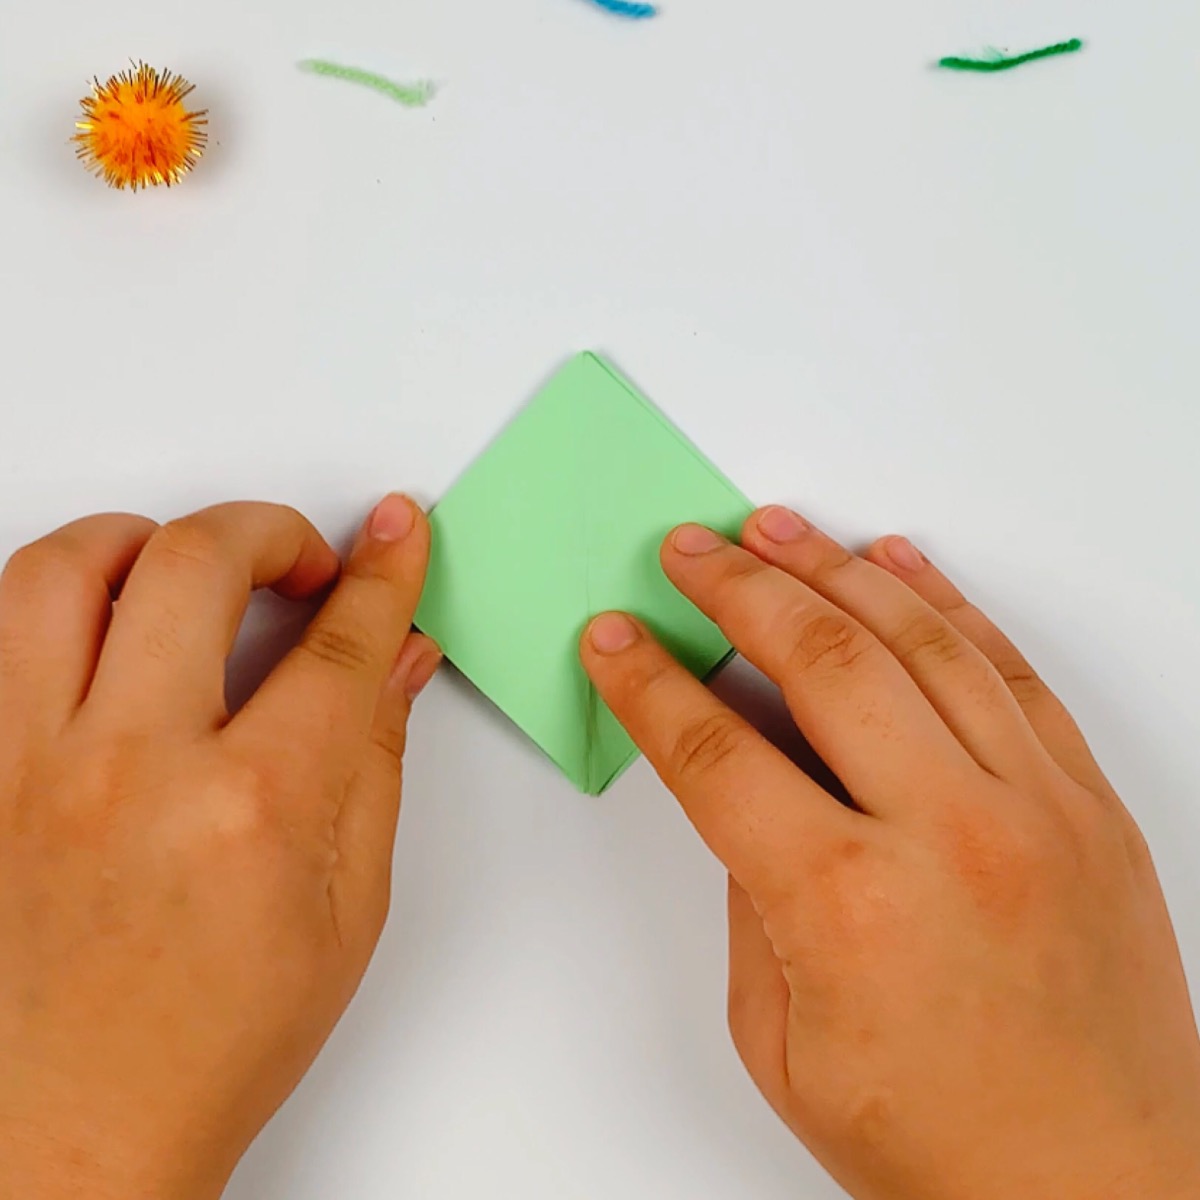
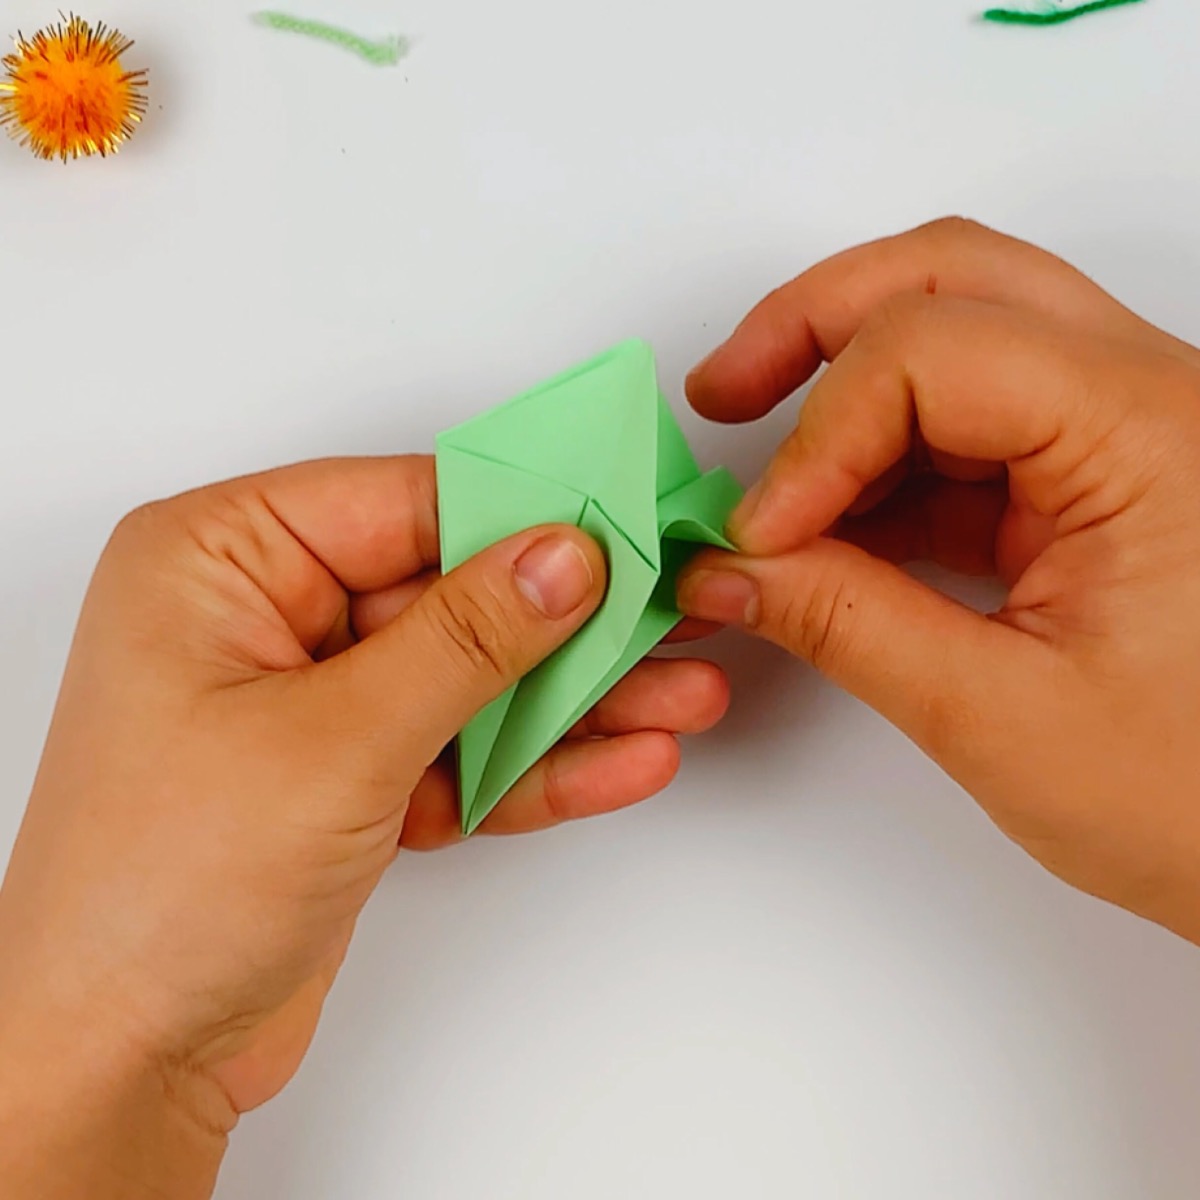
Step 5: Fold the top piece of paper on the right-hand side, as shown in the image above. Now mirror that on the left-hand side.
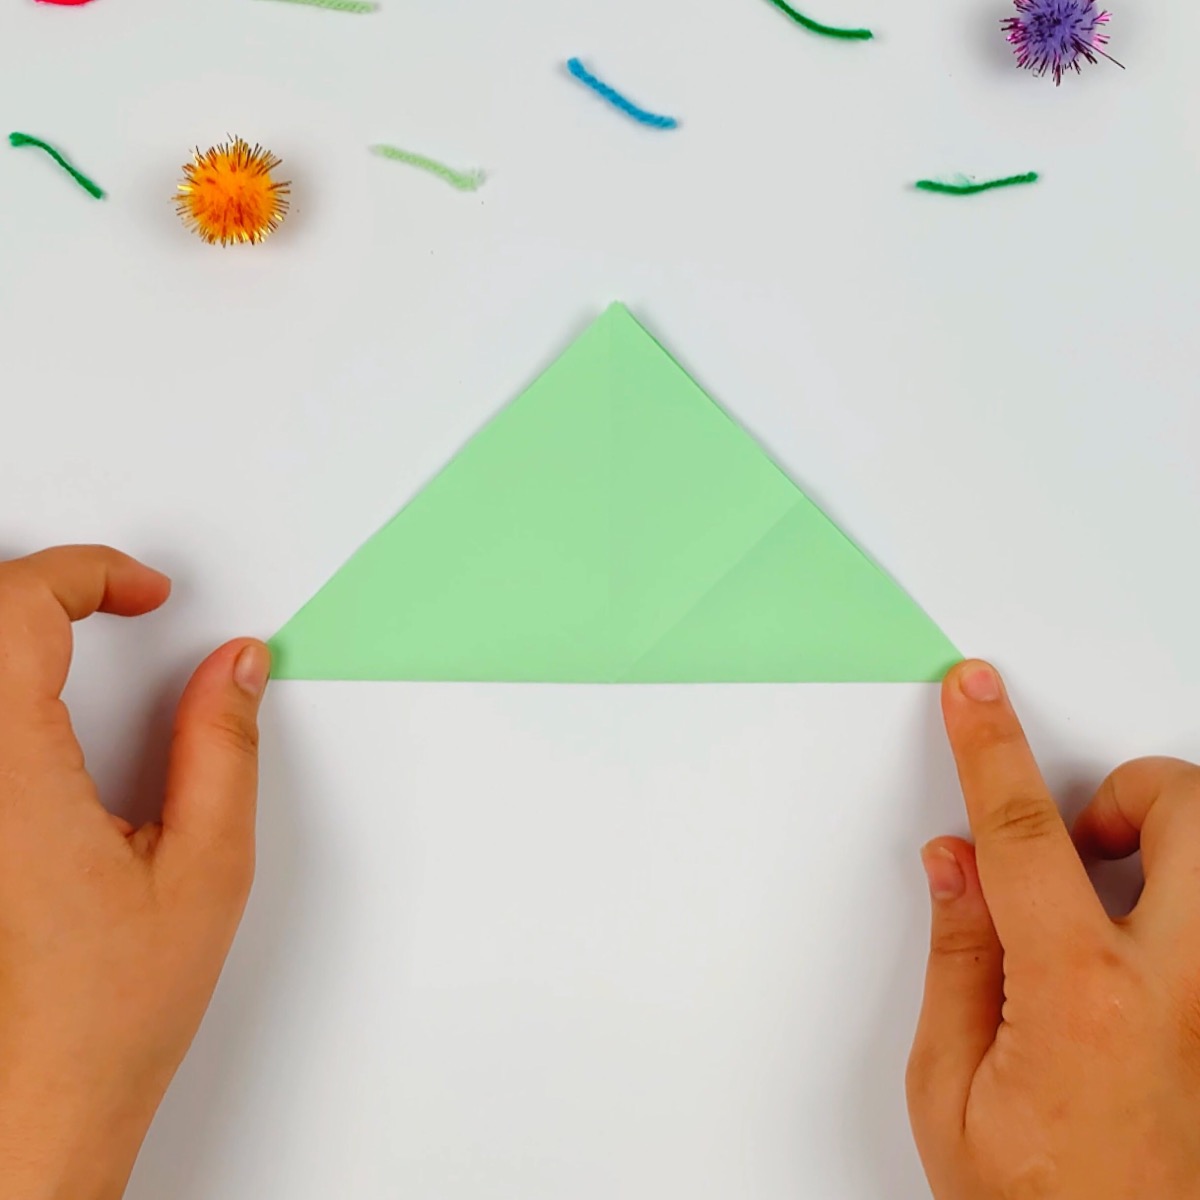
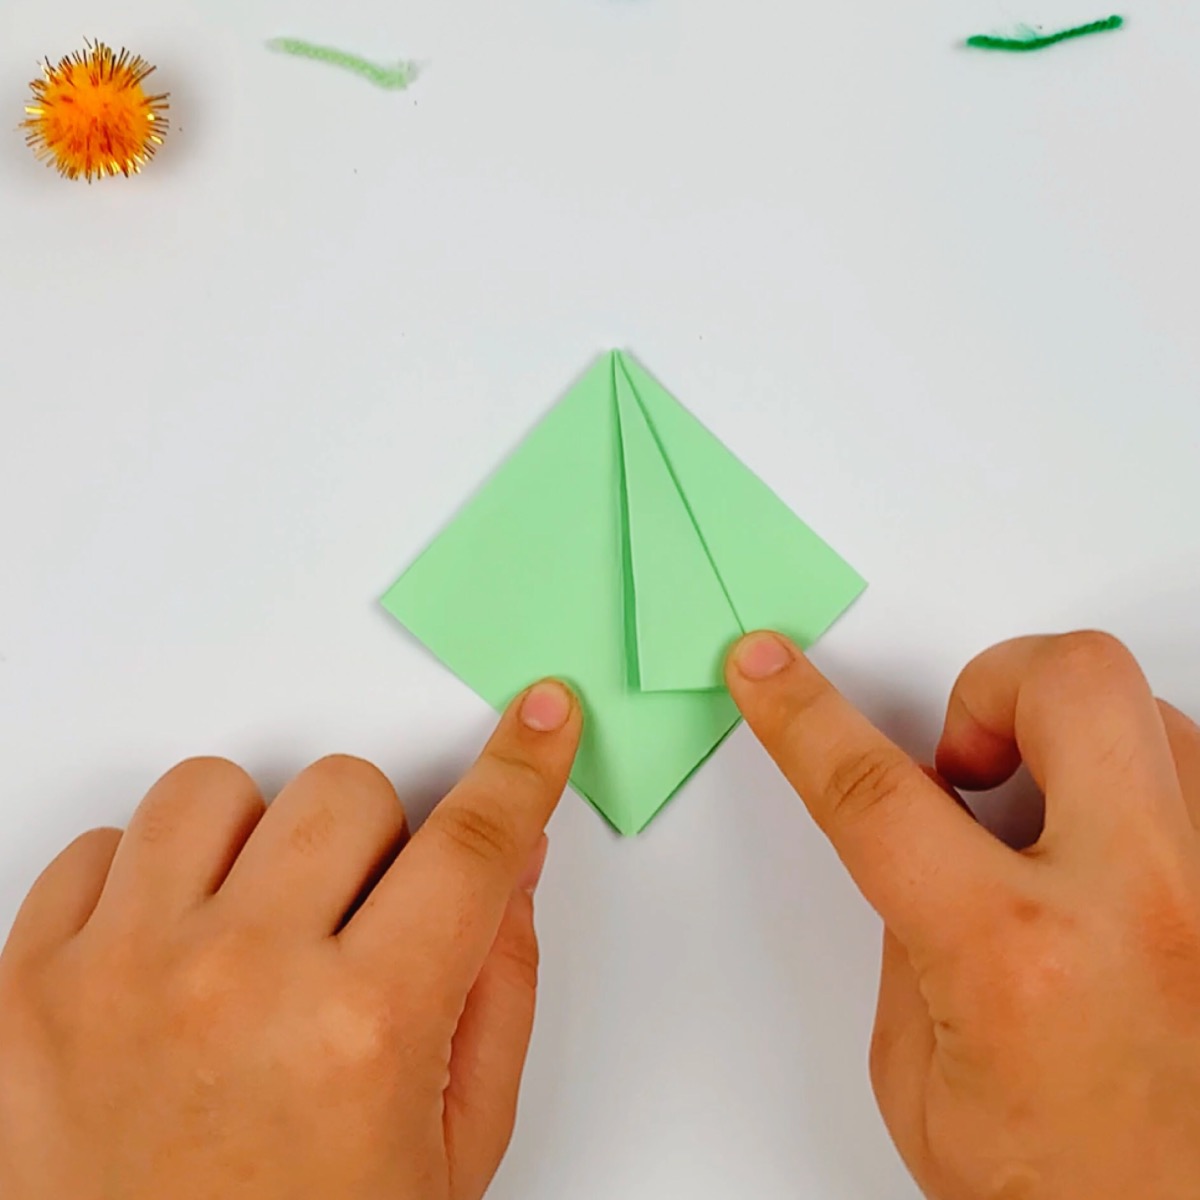
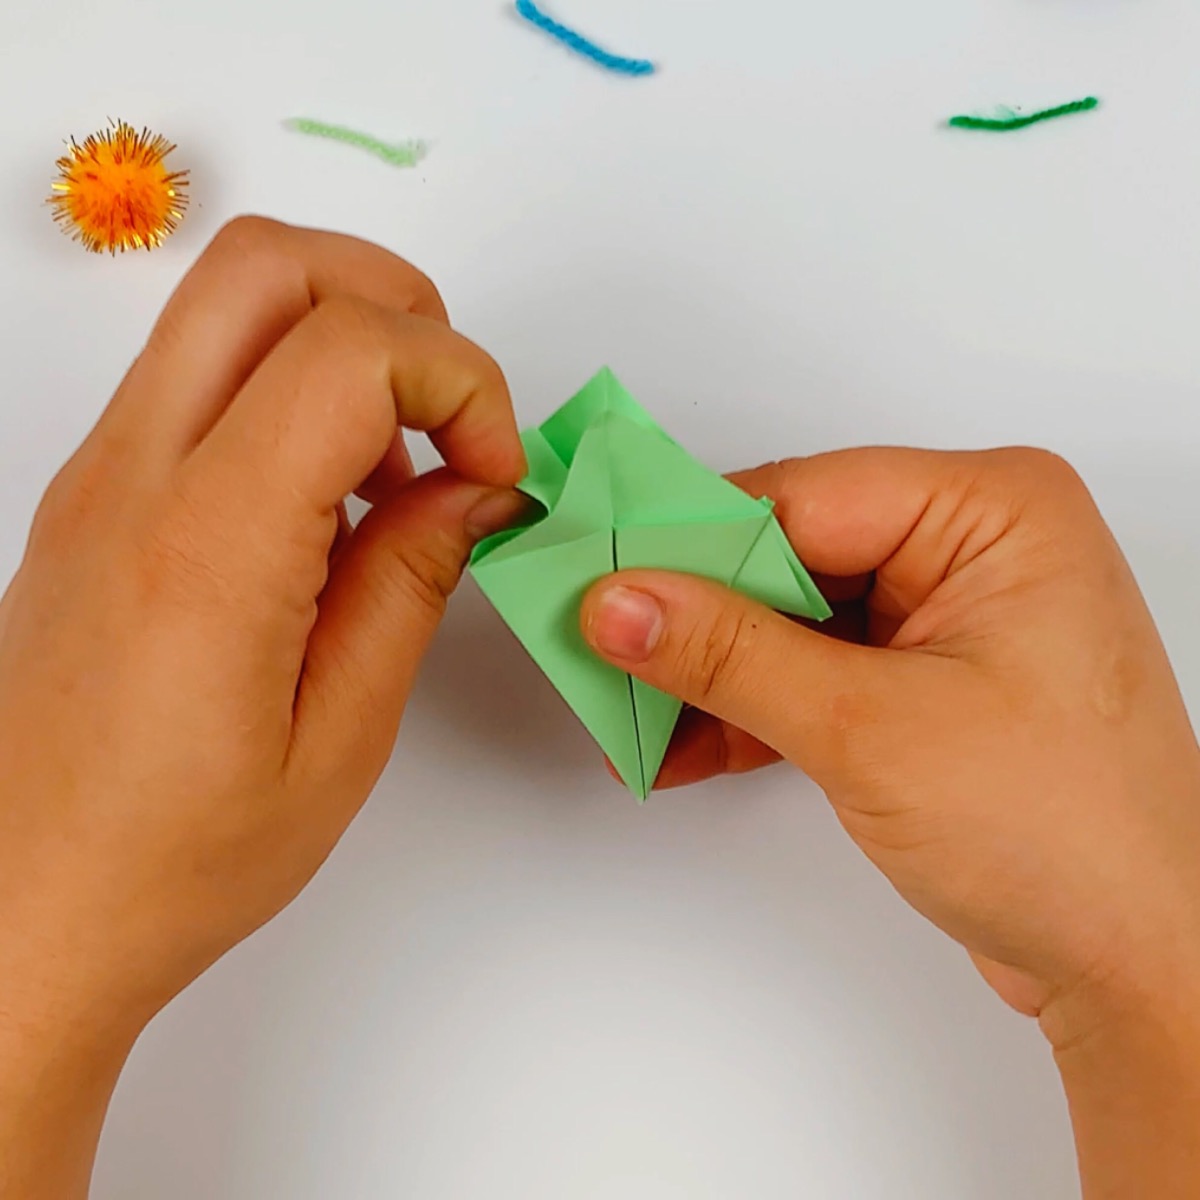
Step 6: Flip the paper over 180 degrees and fold the other two sides in exactly the same manner, so you have a kite. If you are unsure, the video shows the folds you need to make very clearly.
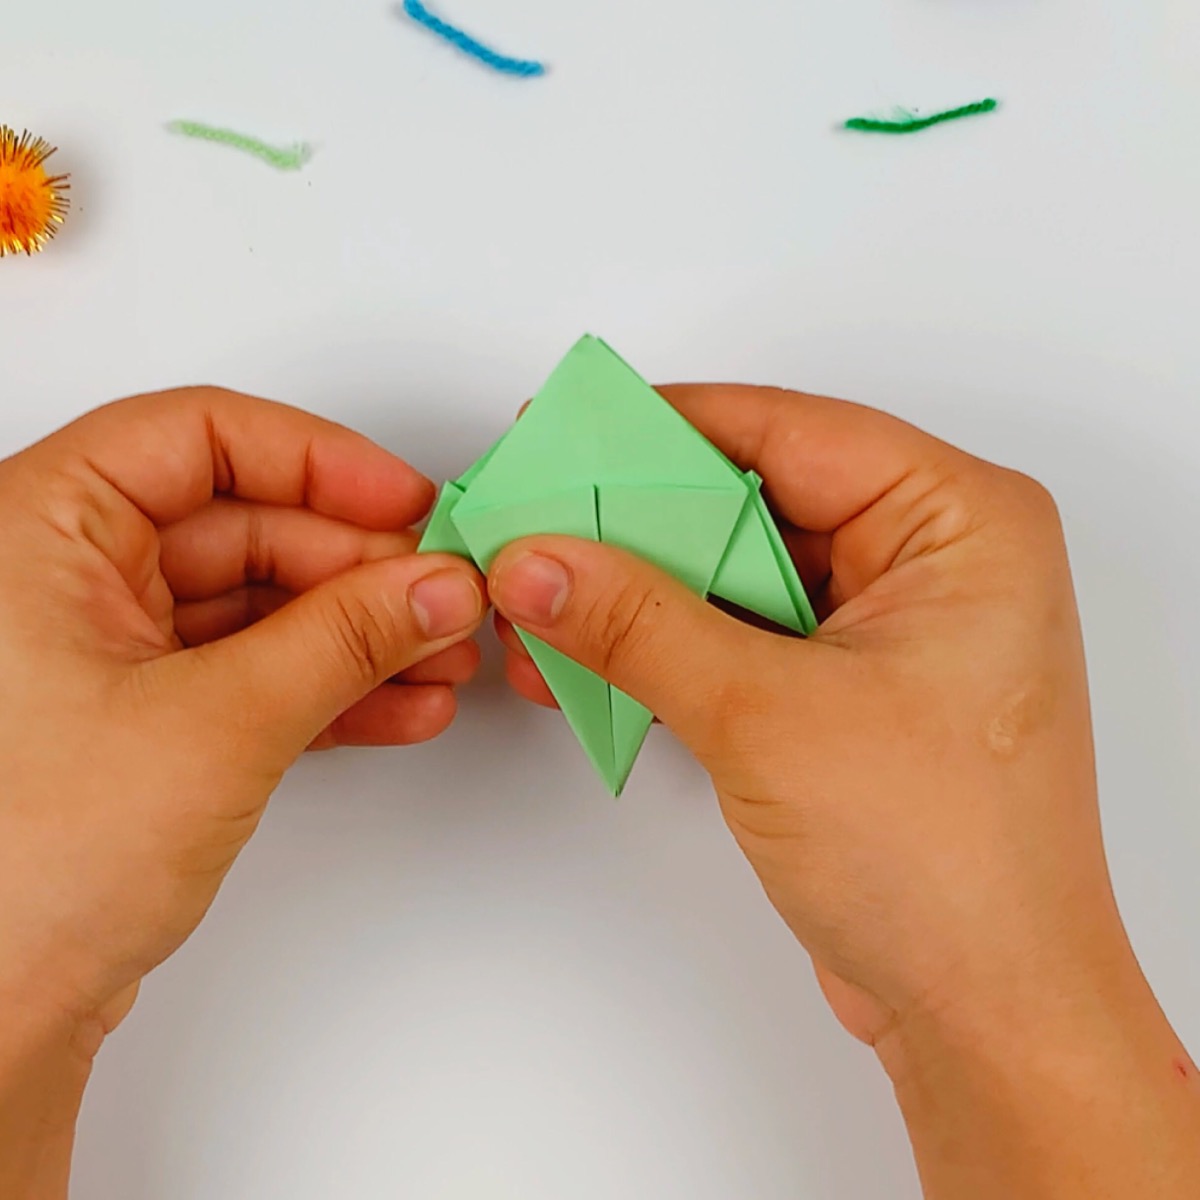
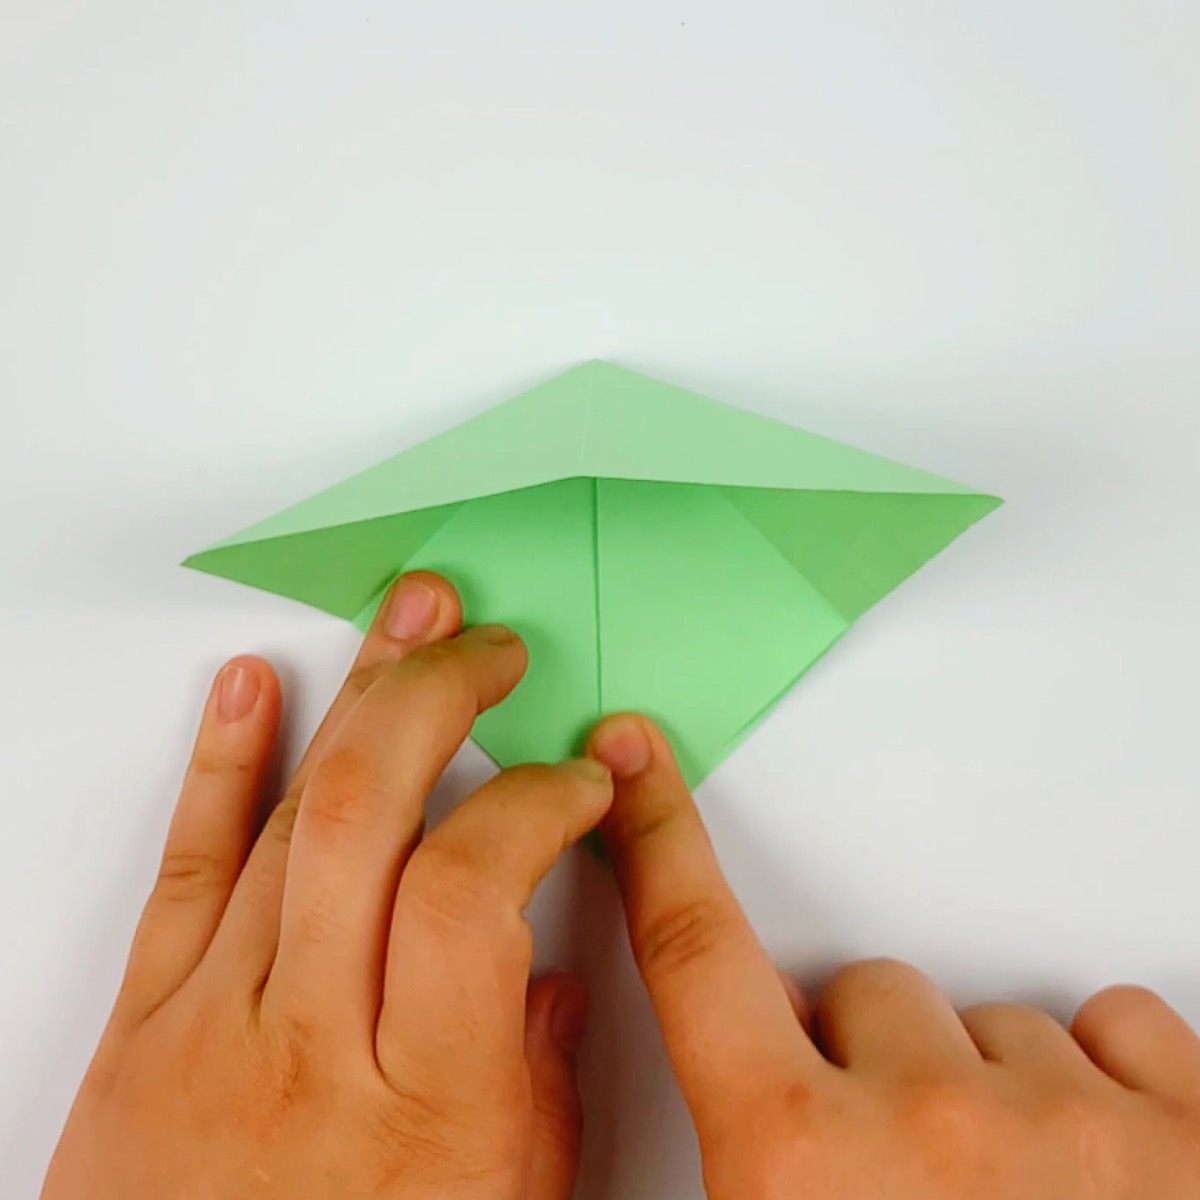
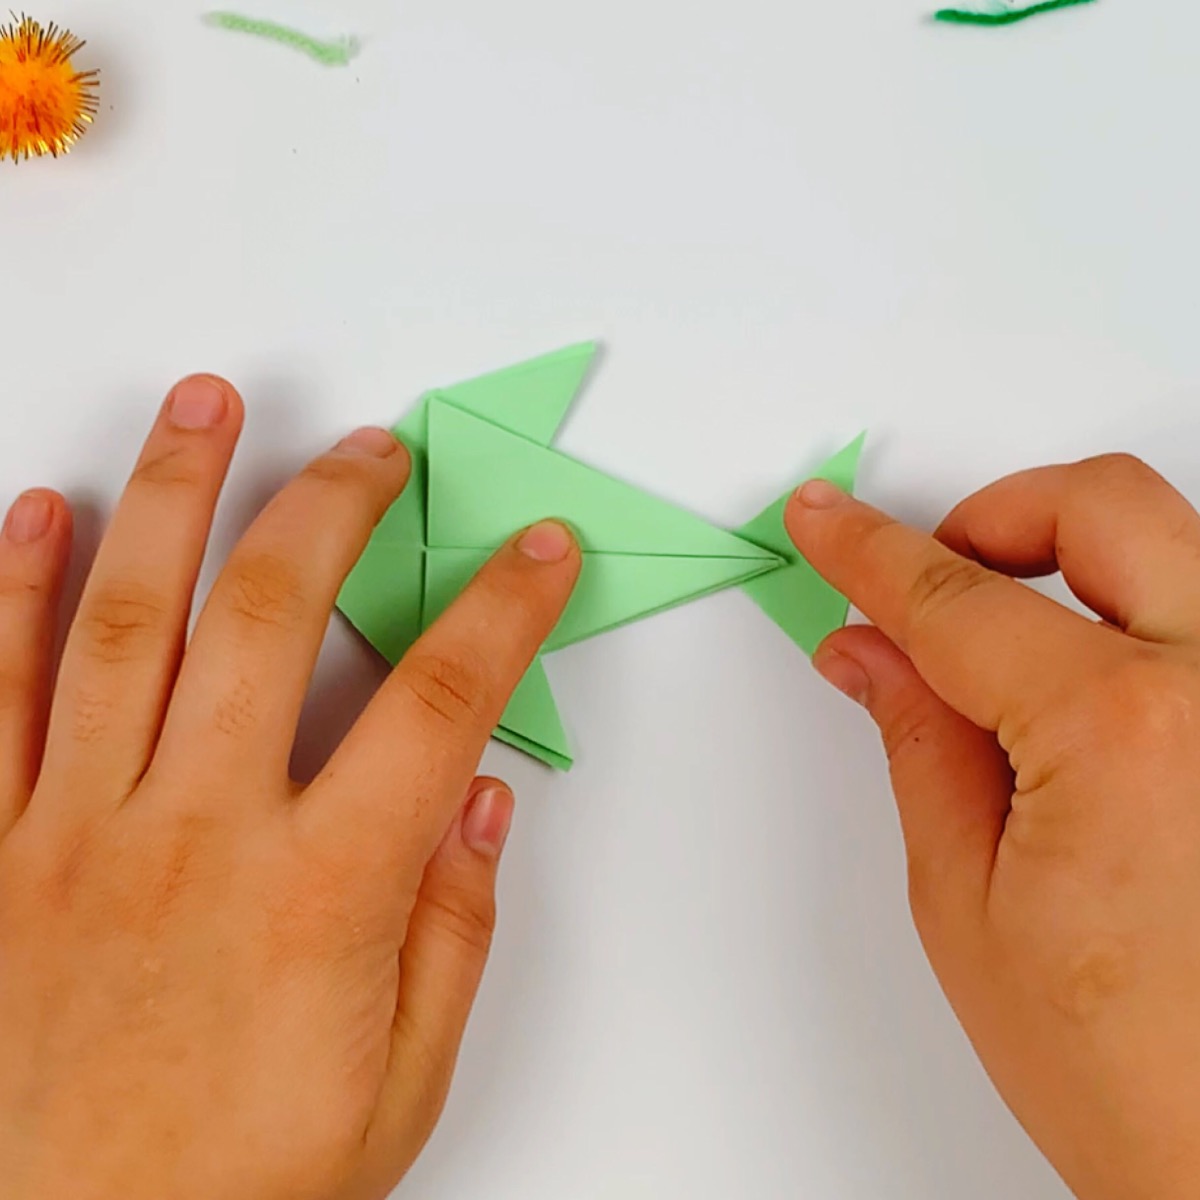
Step 7: Open up the kite shape slightly and fold on the left and right side as shown in the images above. Once done, push flat, and your fish should have fins as shown in the last image.
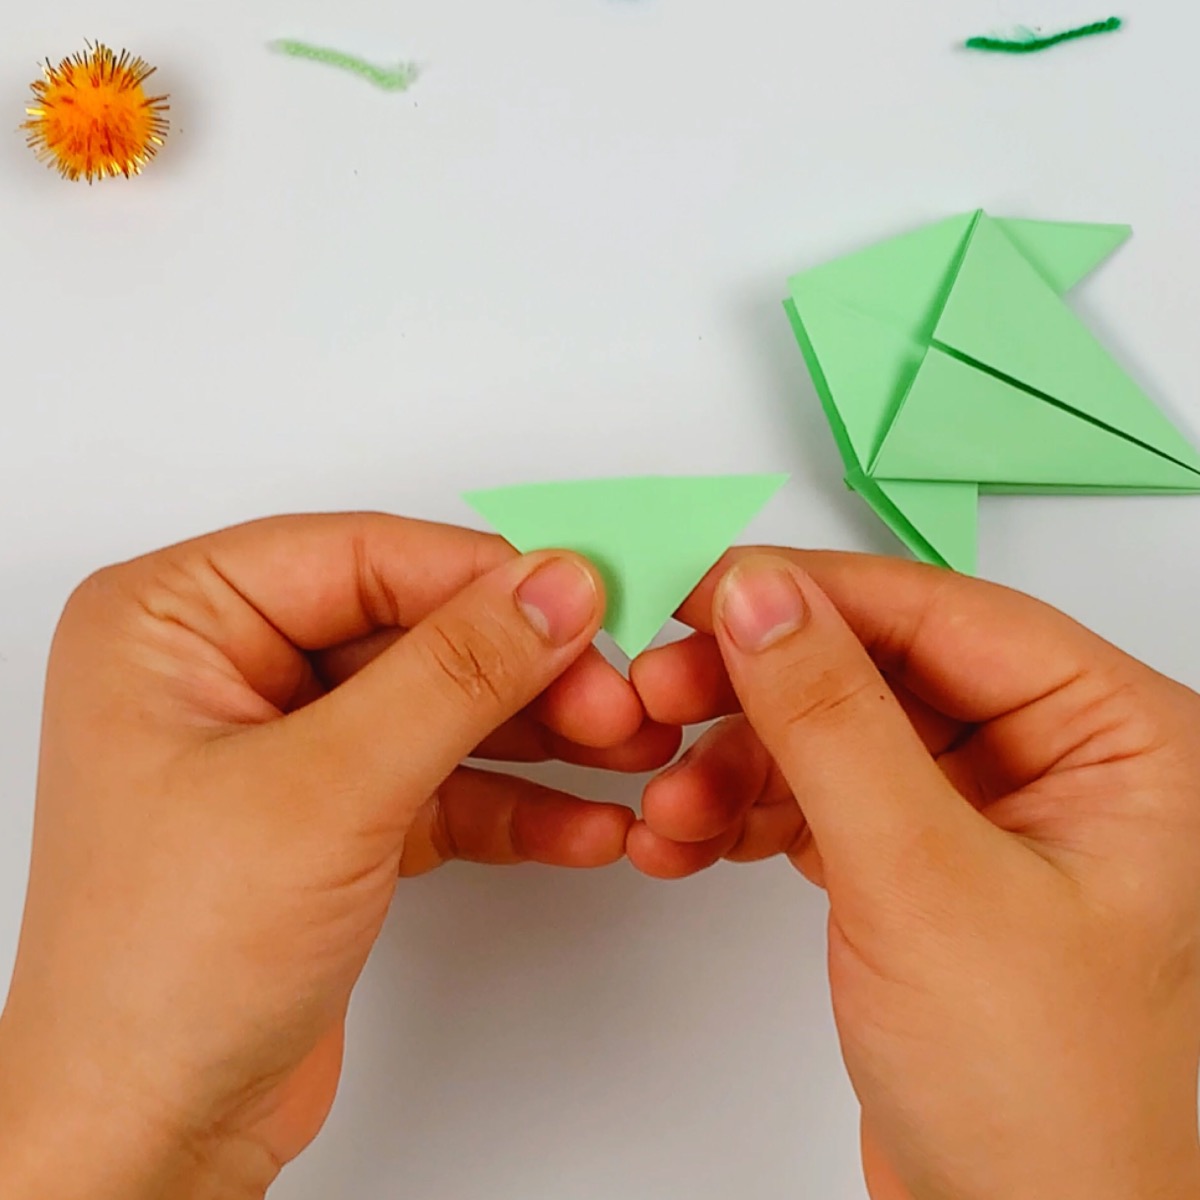
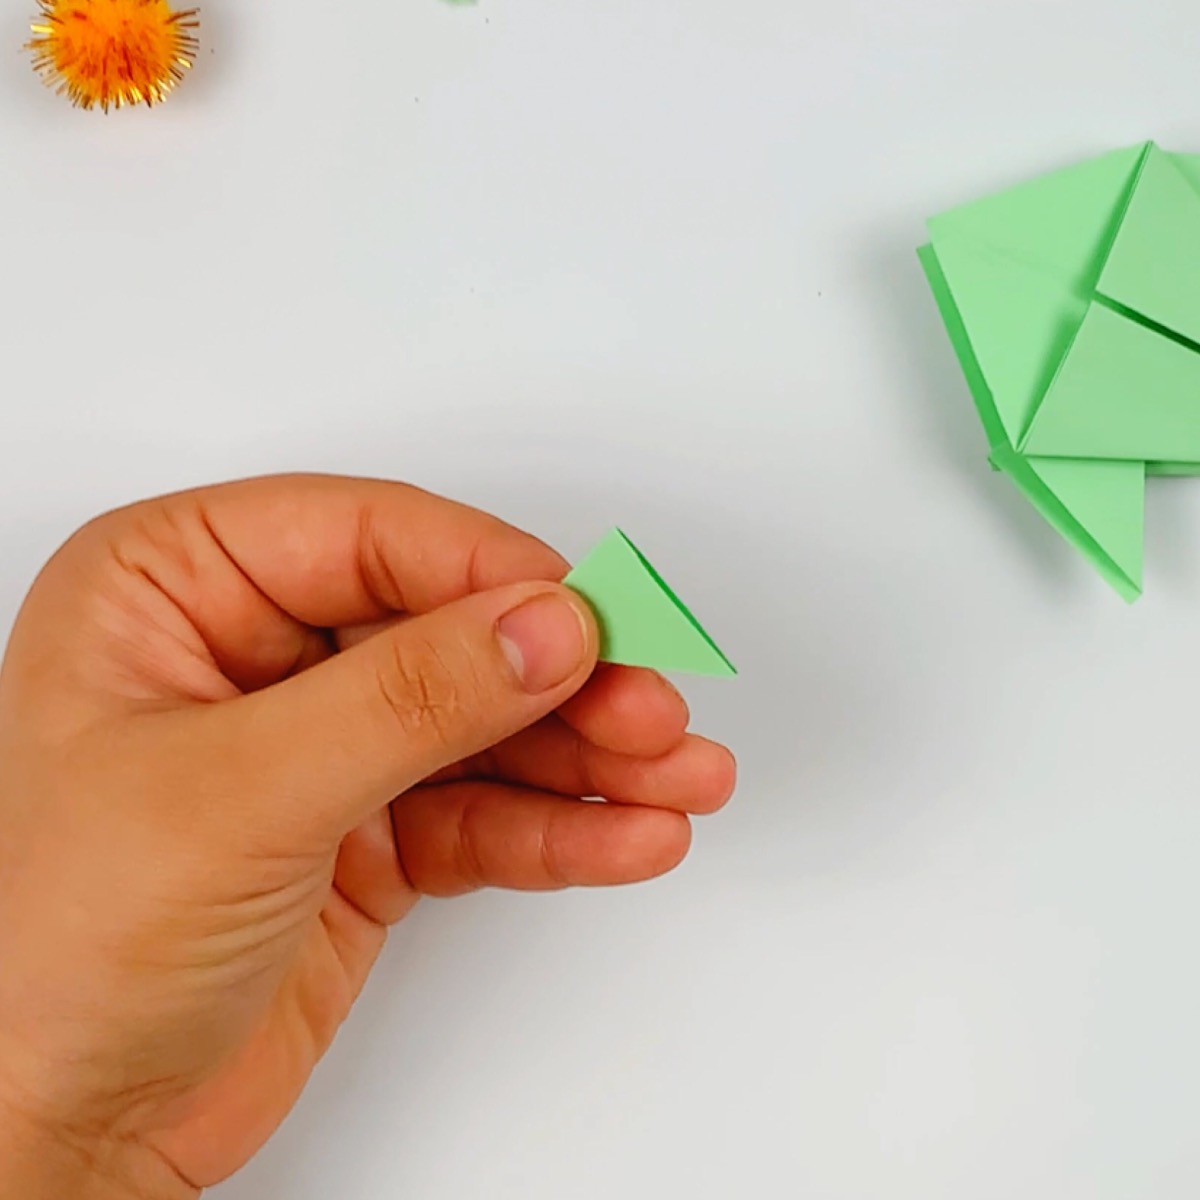
Step 8: Time to make the fish tail! Simple take a smaller piece of paper in the shape of a triangle and fold it as shown in the images above.
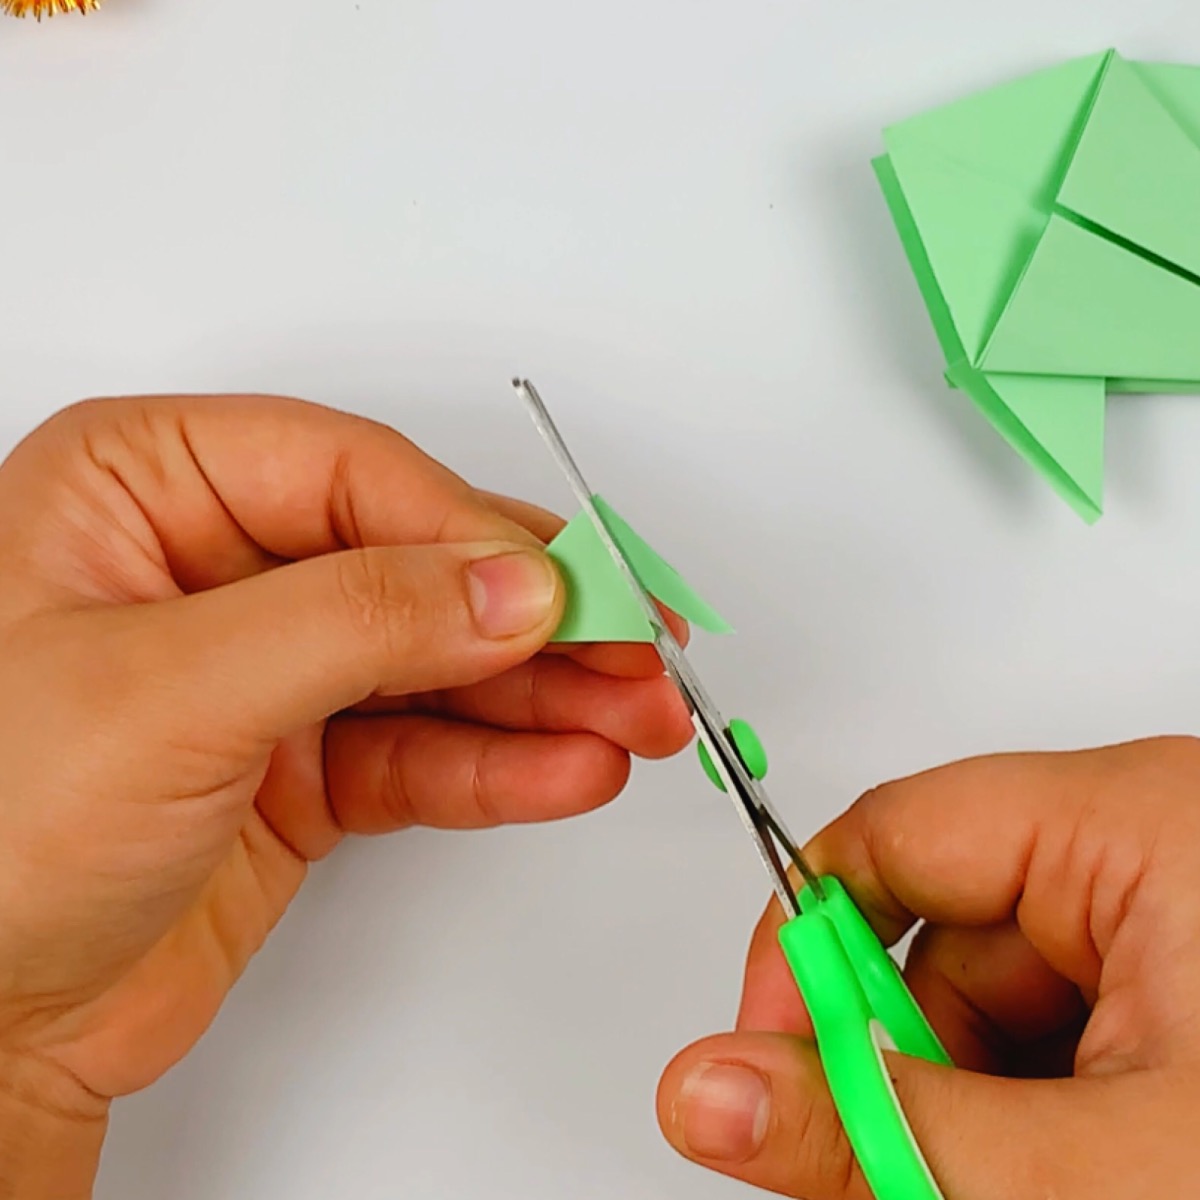
Step 9: Cut it with a slight curve and glue it onto the body of the fish.
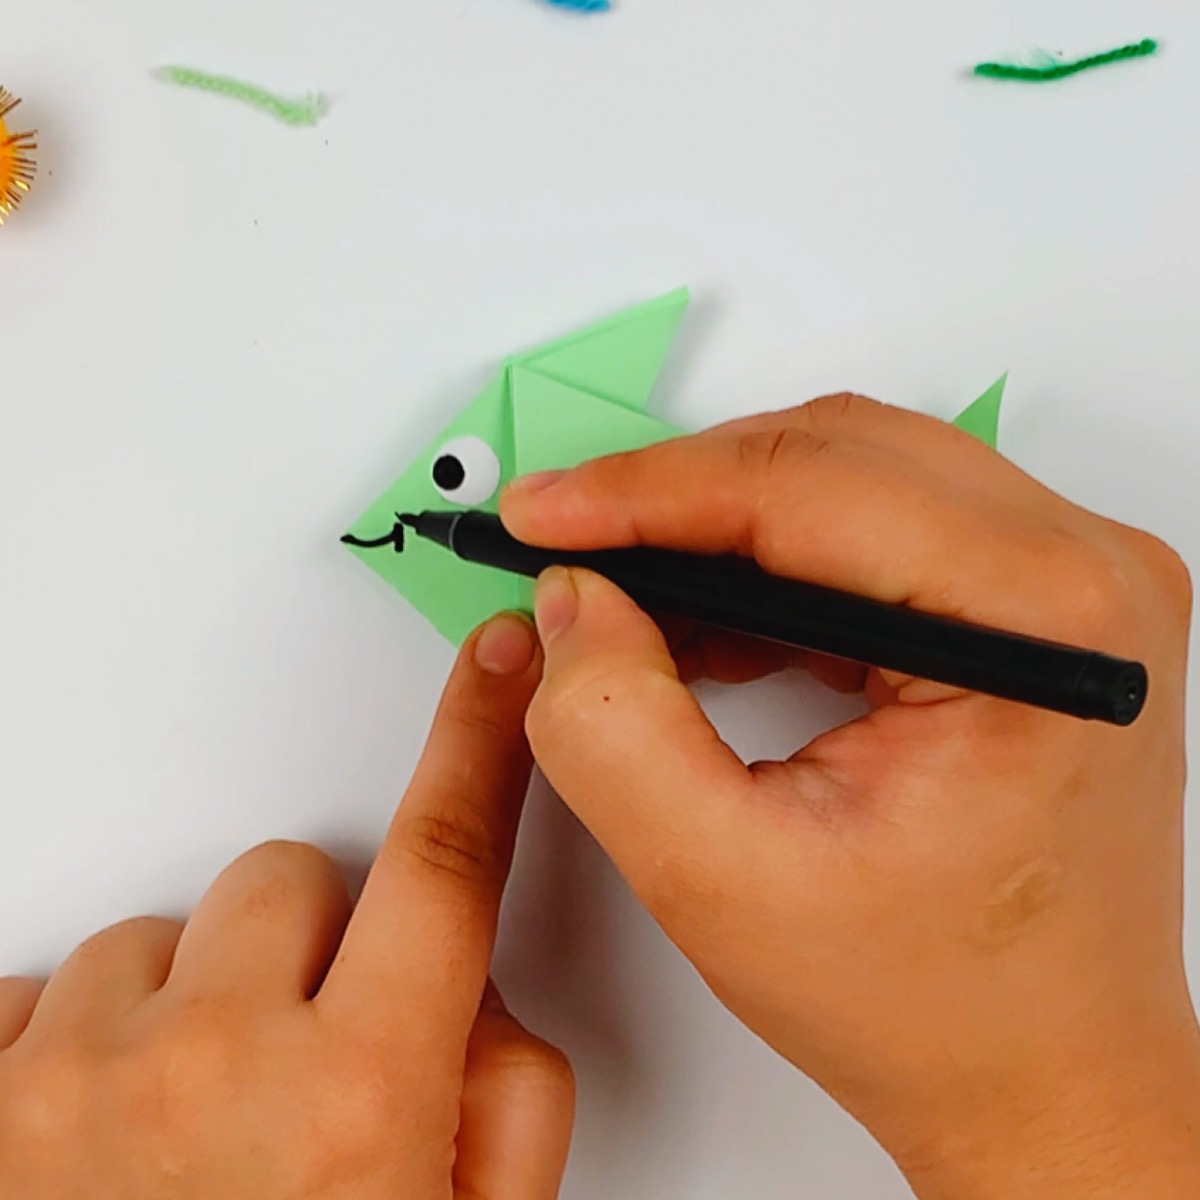
Step 10: It’s time to funky up your fish and decorate it! It will need an eye and a mouth, of course, but you can draw on colorful scales for example.
Here Are Some Other Easy Paper Crafts To Try
- Cat Bookmark
- Hanging Bat Party Favors Craft
- Tissue Paper Color Transfer Wall Art
- Fold A Paper Mayflower Ship {Free Printable}
- Adorable Paper Ghost Craft – BOO!
- How to Make a Paper Spider web
- How to Make Tissue Paper Flowers
- Paper Towel Butterflies
- Paper Flowers
I would love to keep you fully stocked with creative ideas, yummy recipes, fun crafts, and loads of free printables. Subscribe to Skip to my Lou to get new ideas delivered to your inbox. Follow me on Facebook, Pinterest, Twitter, and Instagram for all my latest updates.