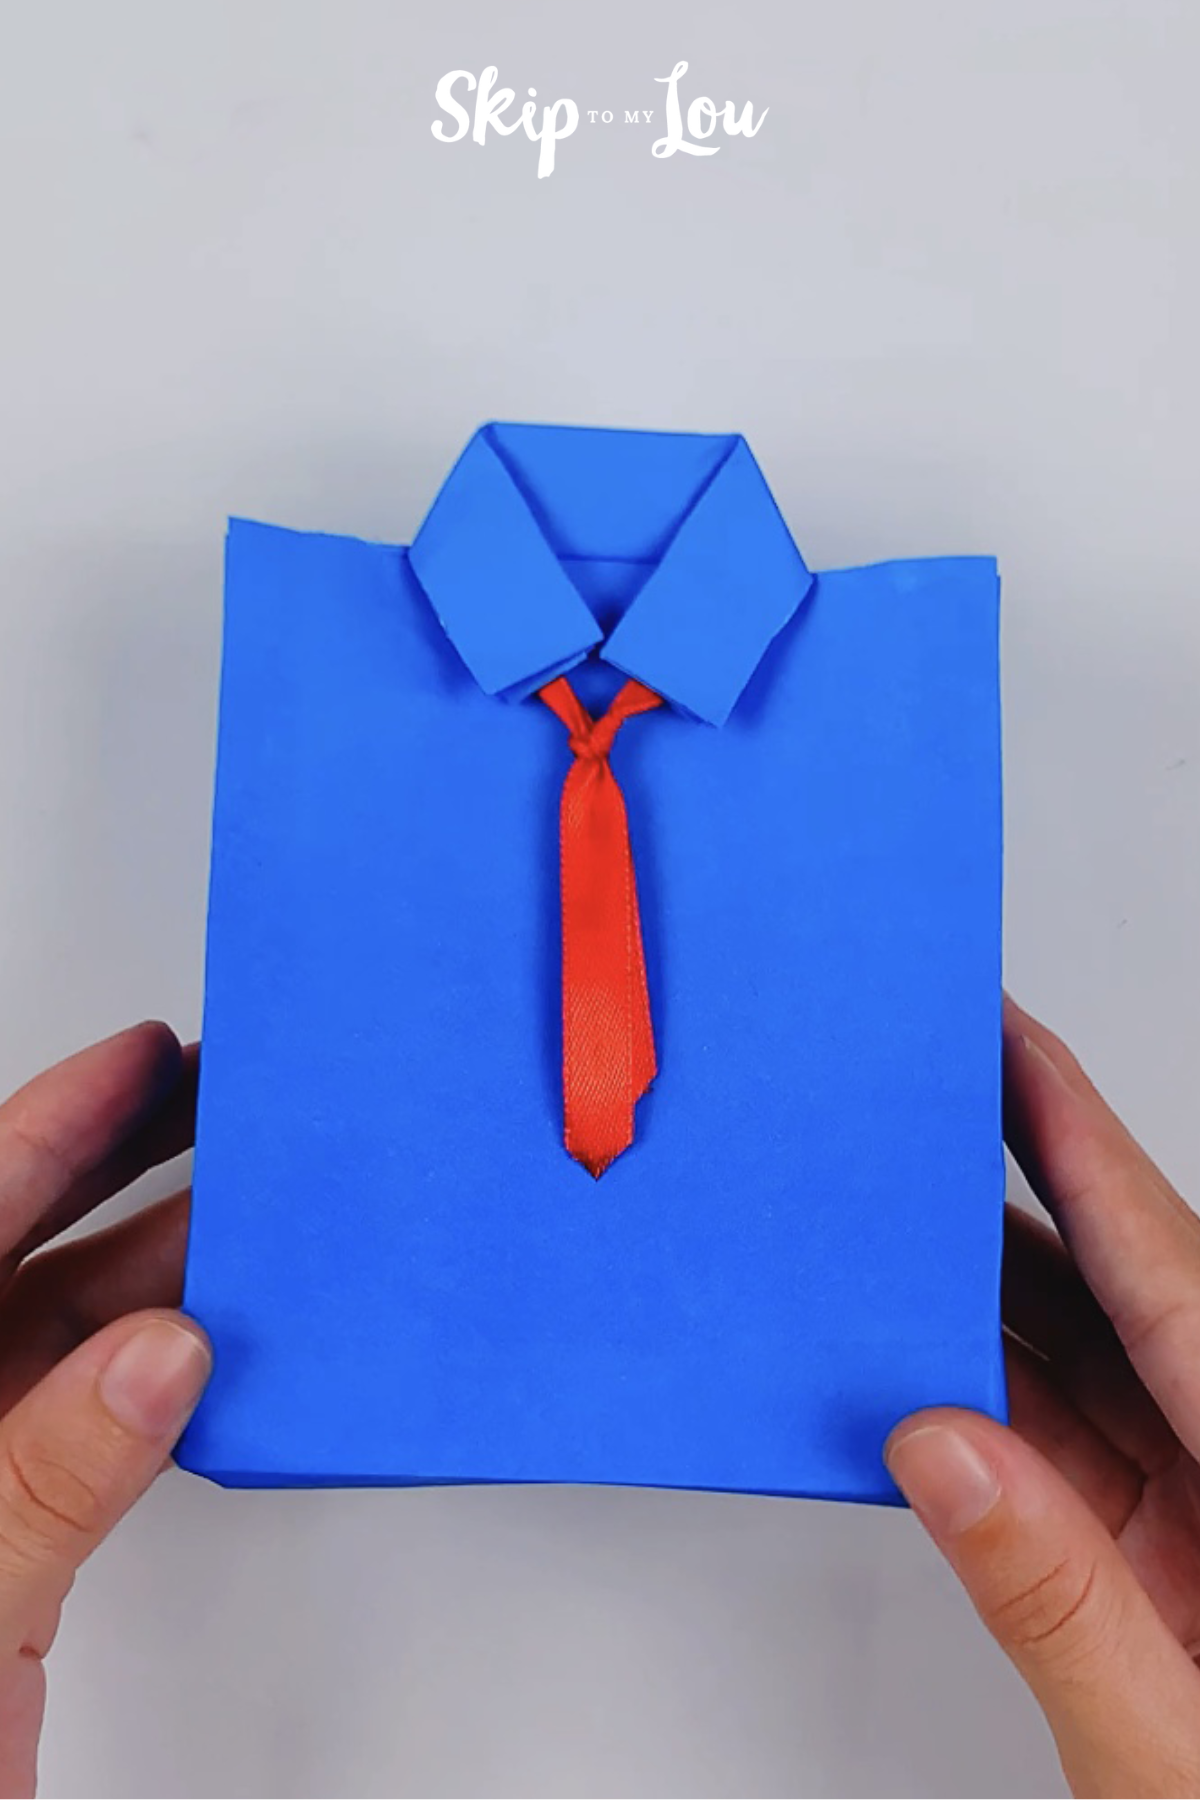
Turn a simple sheet of paper into the perfect Father’s Day gift wrap with this DIY shirt and tie gift bag! It’s a clever and thoughtful way to present small treats or gift cards and makes a great craft for kids to make.
Whether you’re wrapping up dad’s favorite snacks, a little gadget, or a heartfelt card, this fun paper folding project makes the presentation as special as the gift itself.
Related: You can use the same folding technique to create an adorable shirt and tie card too! Just use cardstock and keep the base flat instead of forming a bag. It’s a perfect companion project if you want to include a handmade card with your gift.
Supplies You’ll Need to Make a Shirt and Tie Gift Bag
You only need a few simple materials to create this DIY gift wrap:
- One sheet of letter-size paper (use patterned paper for fun shirts)
- Ribbon or paper strip for the tie
- Scissors
- Tape or glue
- Optional: gift tag, marker for buttons, printable accents
How to Make a Gift Bag That Looks Like a Shirt with a Tie
This paper craft is perfect for turning even a small gift into something big on charm. From printed paper to classic stripes, you can personalize your “shirt” to match the occasion.
Video: How To Fold An Easy Origami Shirt and Tie
How to Fold a Shirt Bag Step by Step
This paper craft is perfect for turning even a small gift into something big on charm. From printed paper to classic stripes, you can personalize your “shirt” to match Dad’s style.
As far as gift ideas go, I think this is the perfect fun origami DIY project for Father’s Day. What could be better than handing dad (or anyone) the cutest origami shirt bag with a special treat inside? Really, this cute DIY shirt gift bag is perfect for birthdays and other party favors and gifts.
Once you’ve found the perfect paper for your origami shirt and tie, you can start the first fold on the paper shirt. The tie shape itself is formed later, using a piece of ribbon.
Remember to watch the video if you aren’t sure what the images are showing you to do.
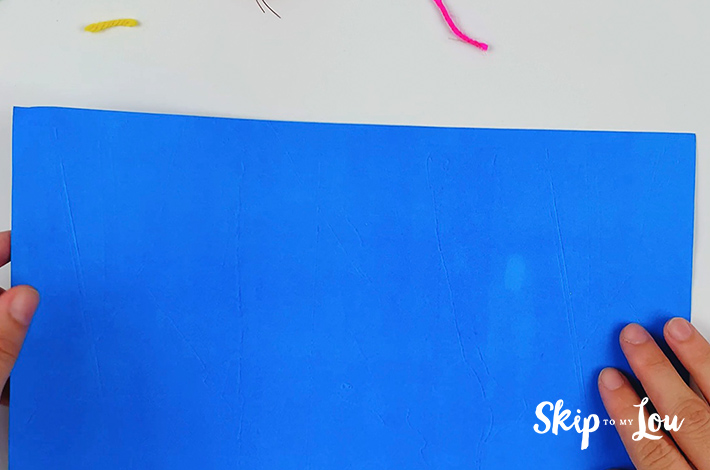
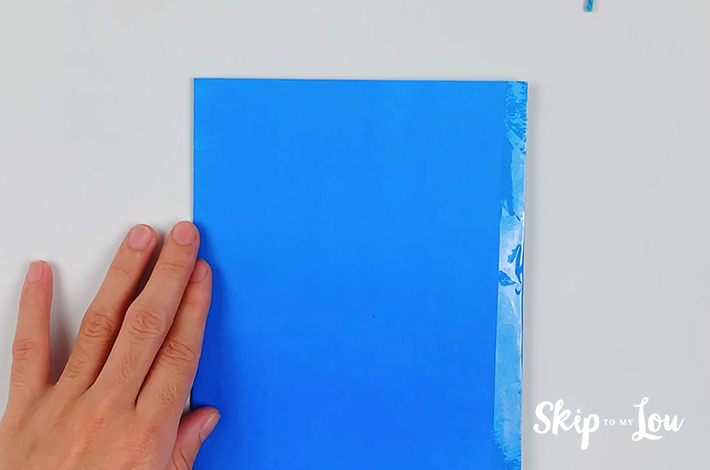
Step 1:
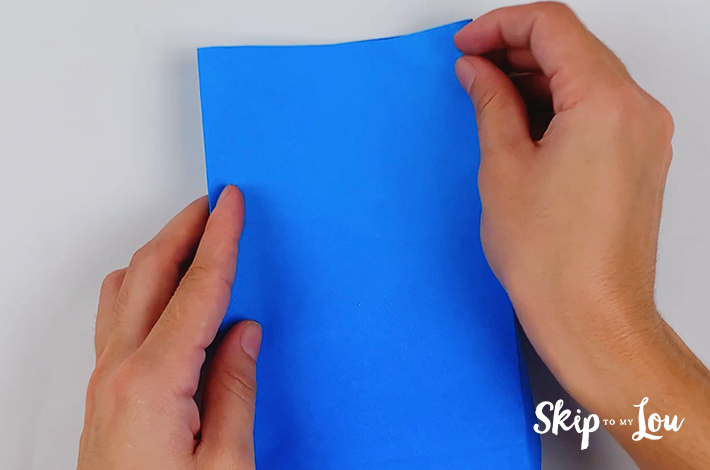
Start by folding your piece of paper in half, forming a center crease. Use the clear tap to secure the flap on the open side.
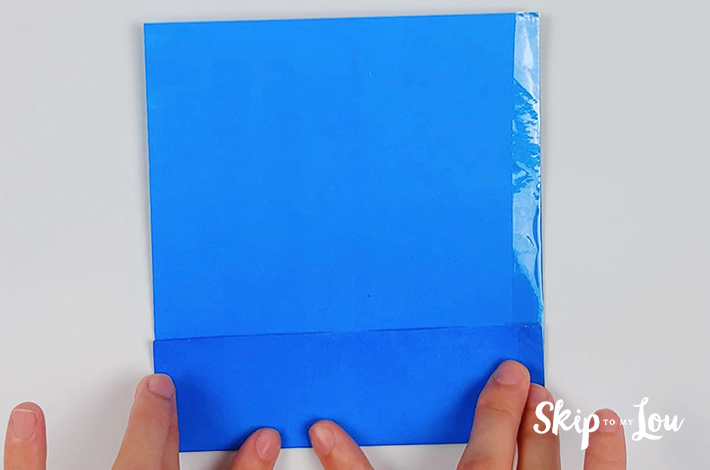
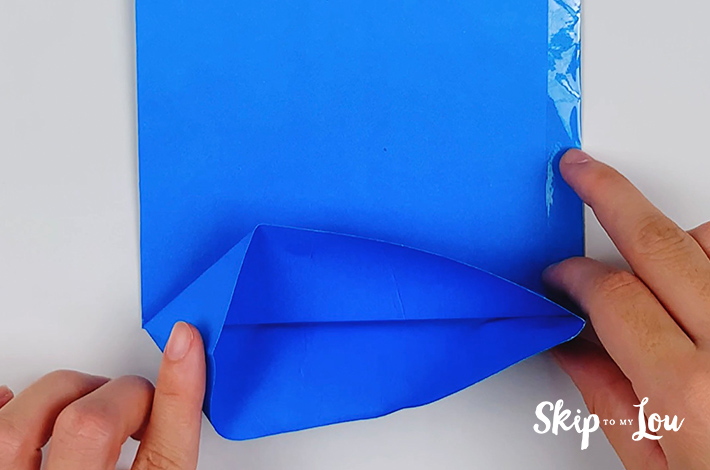
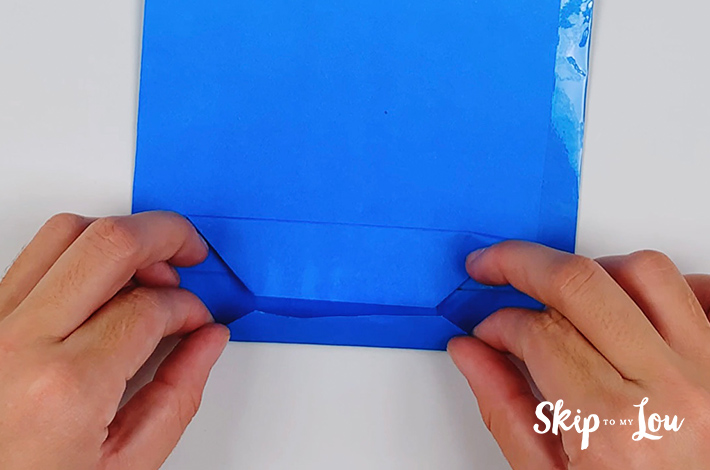
Step 2: Fold the bottom of the paper upwards, as shown in the images above, and then open a small pocket. Starting on the left, push in the center of the paper on a downwards angle.
Step 3: Flatten the paper on the left-hand side as shown in the images above, and then do the same on the right-hand side.
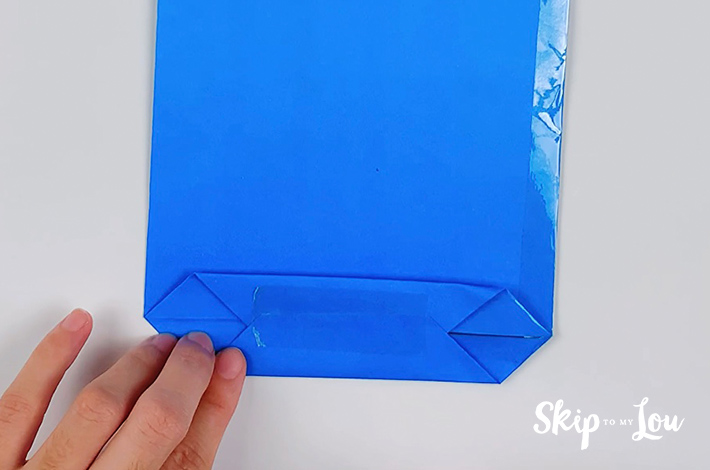
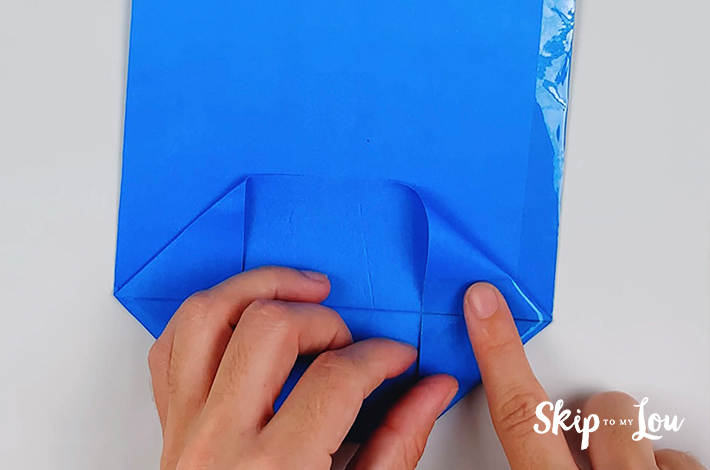
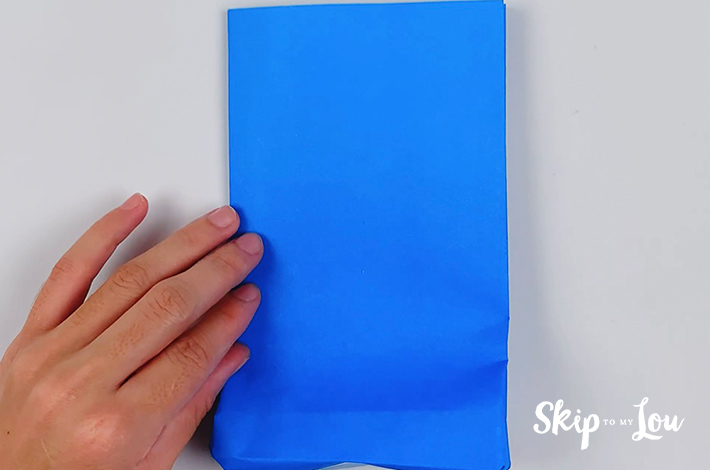
Step 4: Fold the top edge of the top point over, and do the same with the bottom edge. Stick them down using clear tape.

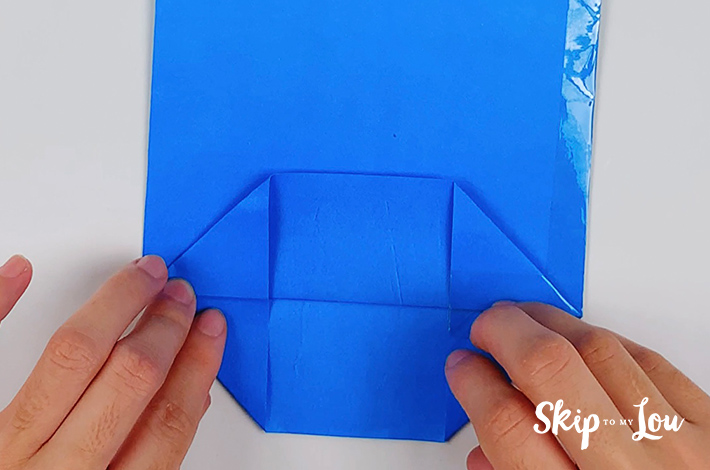
Step 5: Fold both the left side and right side in as shown in the first image above, and then open up the folds while tucking the top part of the bottom section over and flatten out the paper.
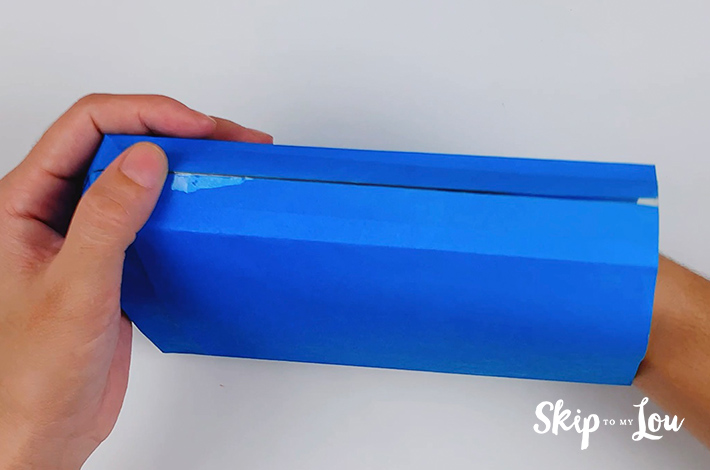
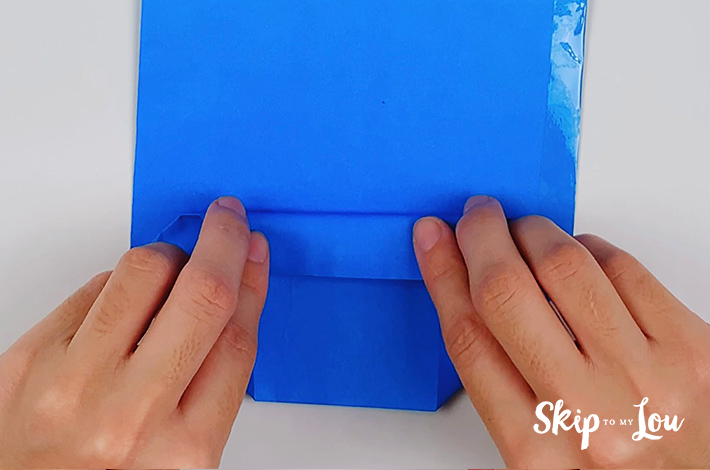
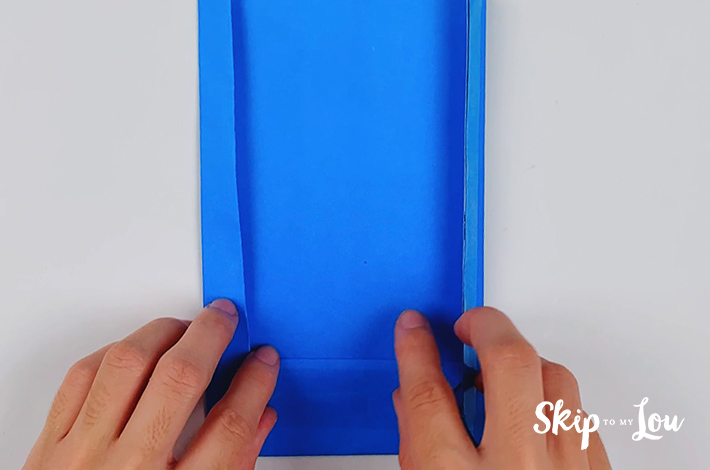
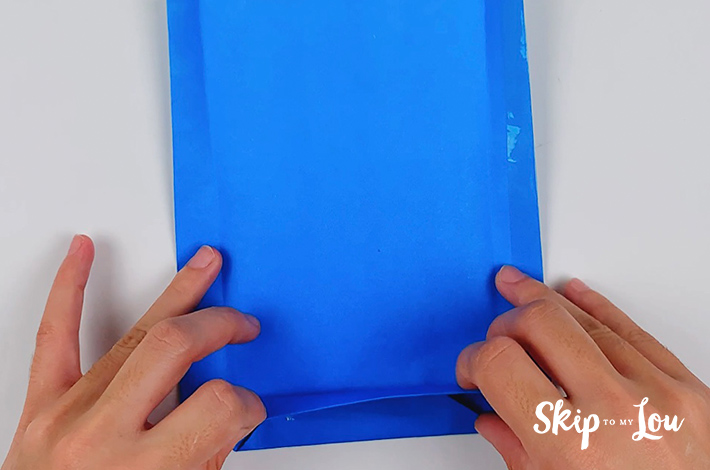
Step 6: Turn the paper upside down or sideways to insert your hand and open up a rectangular box-type shape as seen in the image above.
Step 7: Tuck the crease lines in the sides inwards and push the paper flat again, as shown in the images above. If this is not clear, be sure to watch the video to see exactly how it’s done.
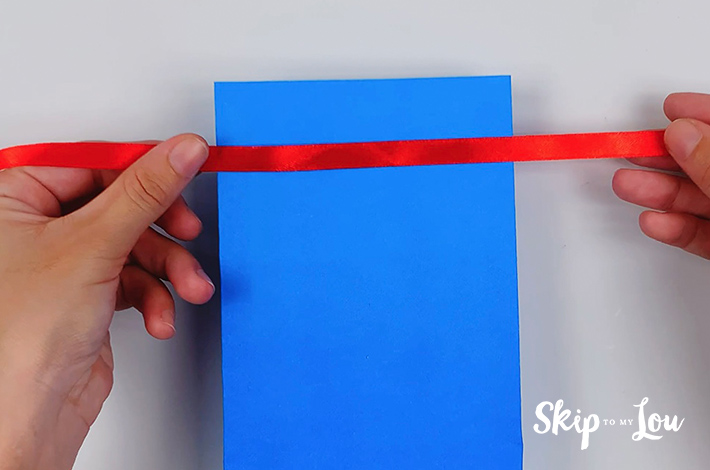

Step 9: Take the ribbon, place it as shown in the images above, and fold the top piece of paper over.
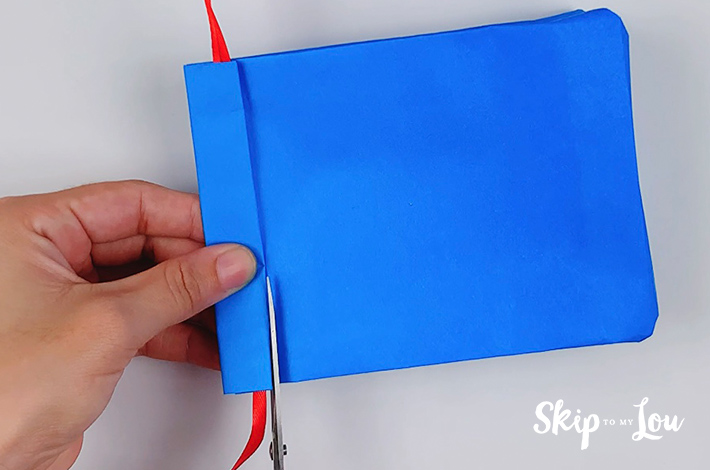
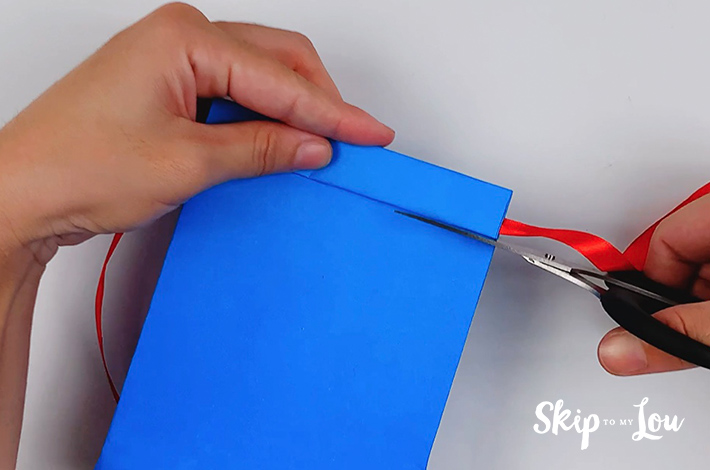
Step 10: Using your scissors, cut two short incisions on the left and right-hand sides of the paper just below the top fold.
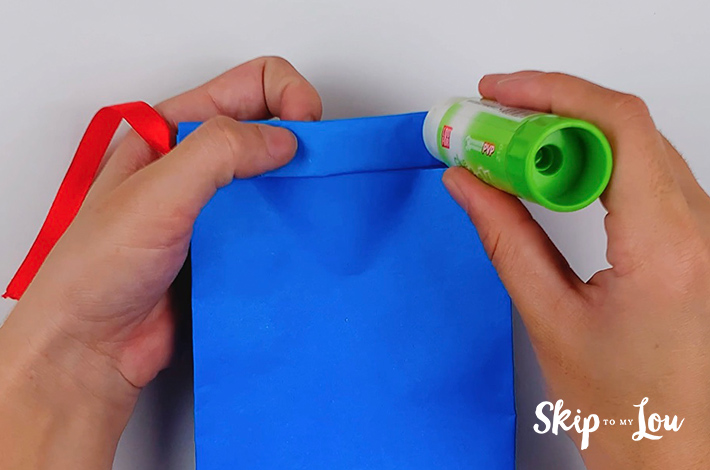
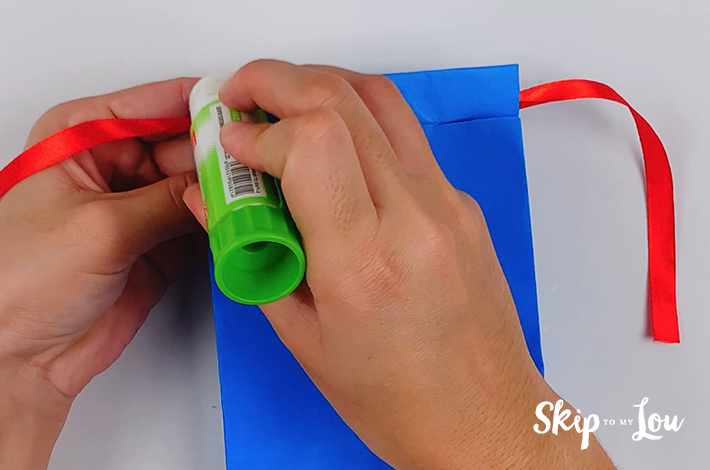
Step 11: Add glue to the top left and right corners.

Step 12: Fold the top left and right sections where you cut them originally to form the shirt’s collar.
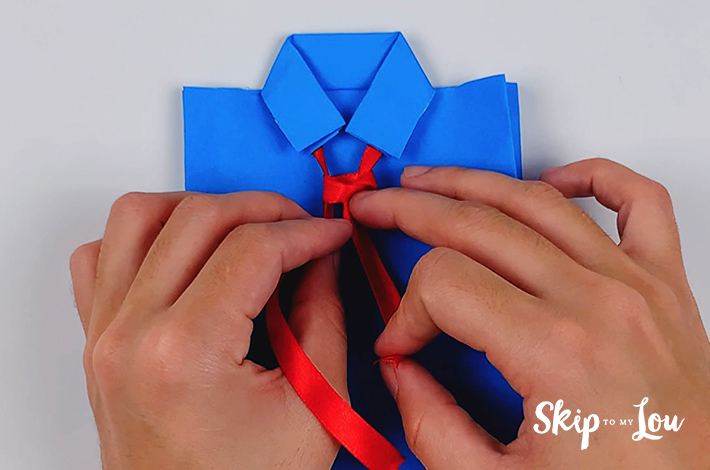
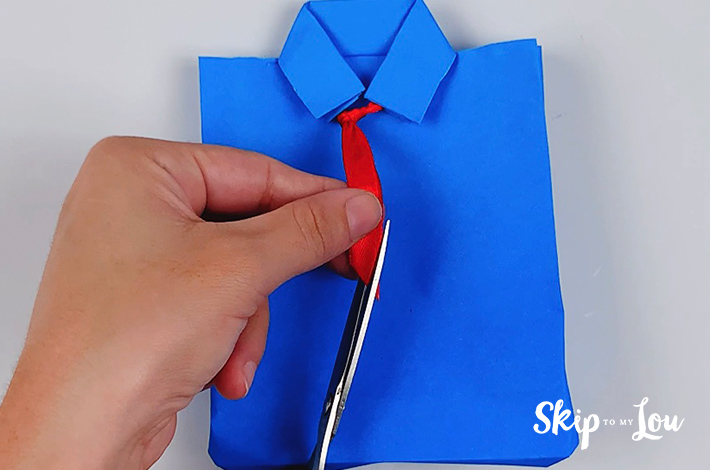
Step 13: Knot the tie near the top and cut the ribbon into a V-shape at the bottom.
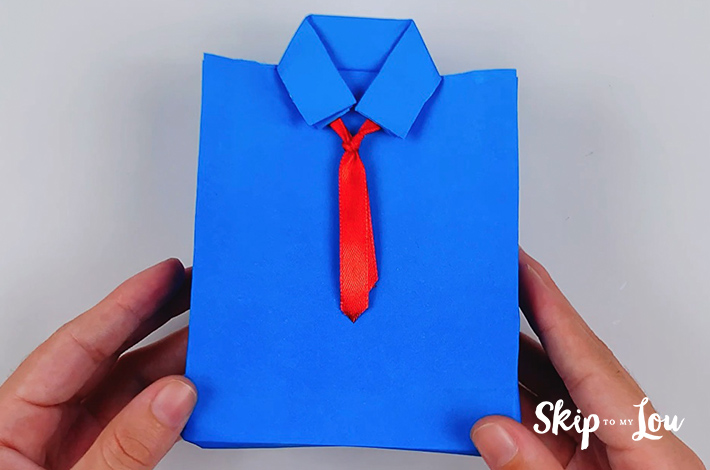
And there you have it—the perfect origami shirt and tie! Turn a simple sheet of paper into the perfect Father’s Day gift wrap with this DIY shirt and tie gift bag! It’s a clever and thoughtful way to present small treats or gift cards and makes a great craft for kids. Whether you’re celebrating Dad, Grandpa, or someone special, this handmade touch adds heart to your gift and is sure to bring a smile. And the best part? With different colors and patterns, this shirt bag works beautifully for birthdays, retirements, or any occasion worth celebrating!
More Fun Father’s Day Crafts to Make at Home
Here are some other fun and free Father’s Day crafts to make Dad feel extra loved:
- Free Printable Father’s Day Cards
Choose from heartfelt or funny designs. - Bottle Tags – Funny and Free
Wrap up Dad’s favorite soda, beer, or cold brew with a printable tag that brings a laugh. - Dad Portrait with Origami Money Bow Tie
Let the kids draw Dad and dress him up with a folded dollar-bill bow tie. - Father’s Day Coloring Page
A sweet printable page kids can color and personalize with their favorite things about Dad. - Gooddad Candy Bar Wrappers
Dress up a full-size candy bar with a wrapper that says “you’re the best” in the sweetest way.
I would love to keep you fully stocked with creative ideas, yummy recipes, fun crafts, and loads of free printables. Subscribe to Skip to my Lou to get new ideas delivered to your inbox. Point your browser to Facebook, Pinterest, Twitter, and Instagram for all my latest updates on social media.


