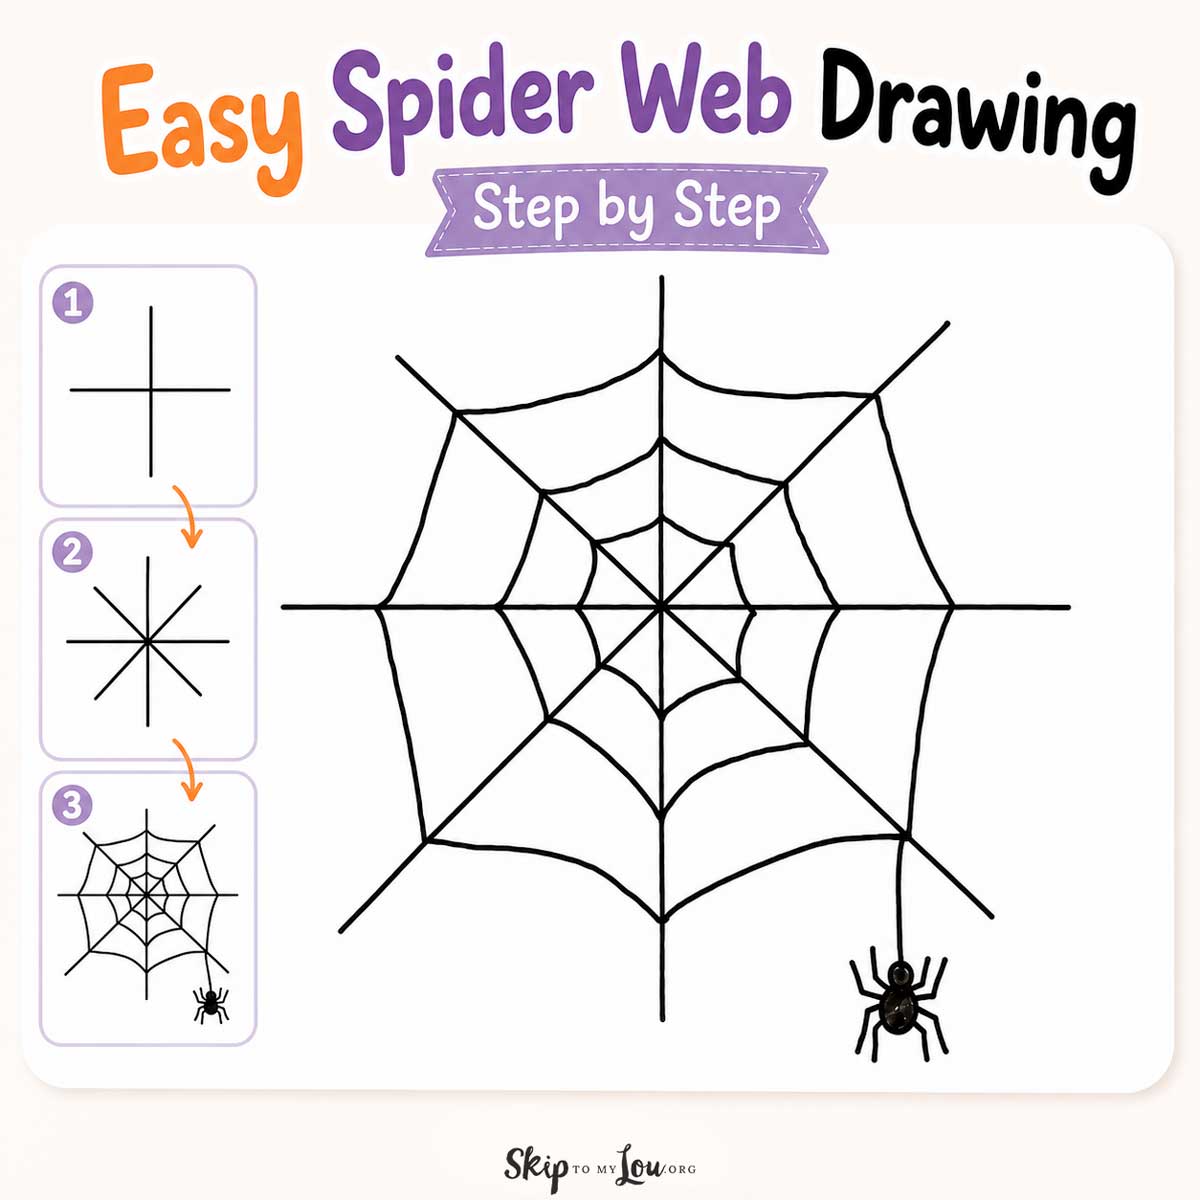
This easy spider web drawing is a fun Halloween art project kids can make with just a pencil, paper, and a few simple lines. It looks impressive when it is finished, but the steps are easy enough for beginners.
In this tutorial, you will learn how to draw a spider web step by step using straight lines and curved arcs. Then you can add a little spider hanging from the web to make it extra spooky and cute.
Print the free spider web drawing guide below and follow along at home, in the classroom, or anytime you need a simple Halloween drawing activity.
How do you draw a spider web?
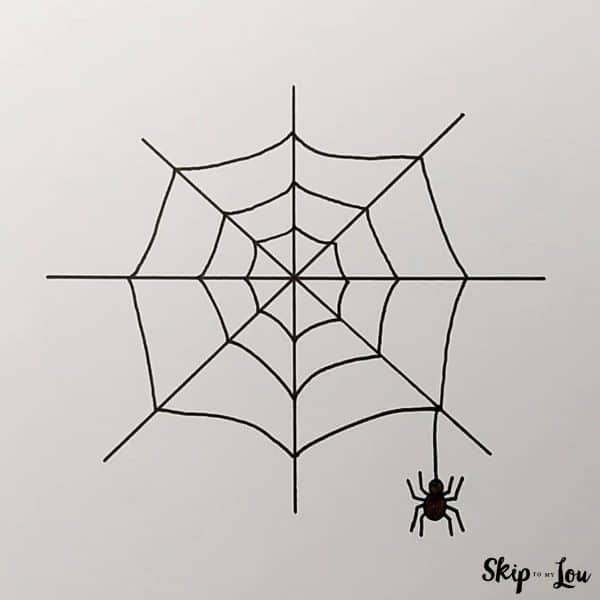
To draw a spider web, start with several straight lines that meet in the center of your paper. Then connect the lines with curved arcs, starting close to the center and moving outward. Add more curved rows until your web is full, then finish with a small spider hanging from one side.
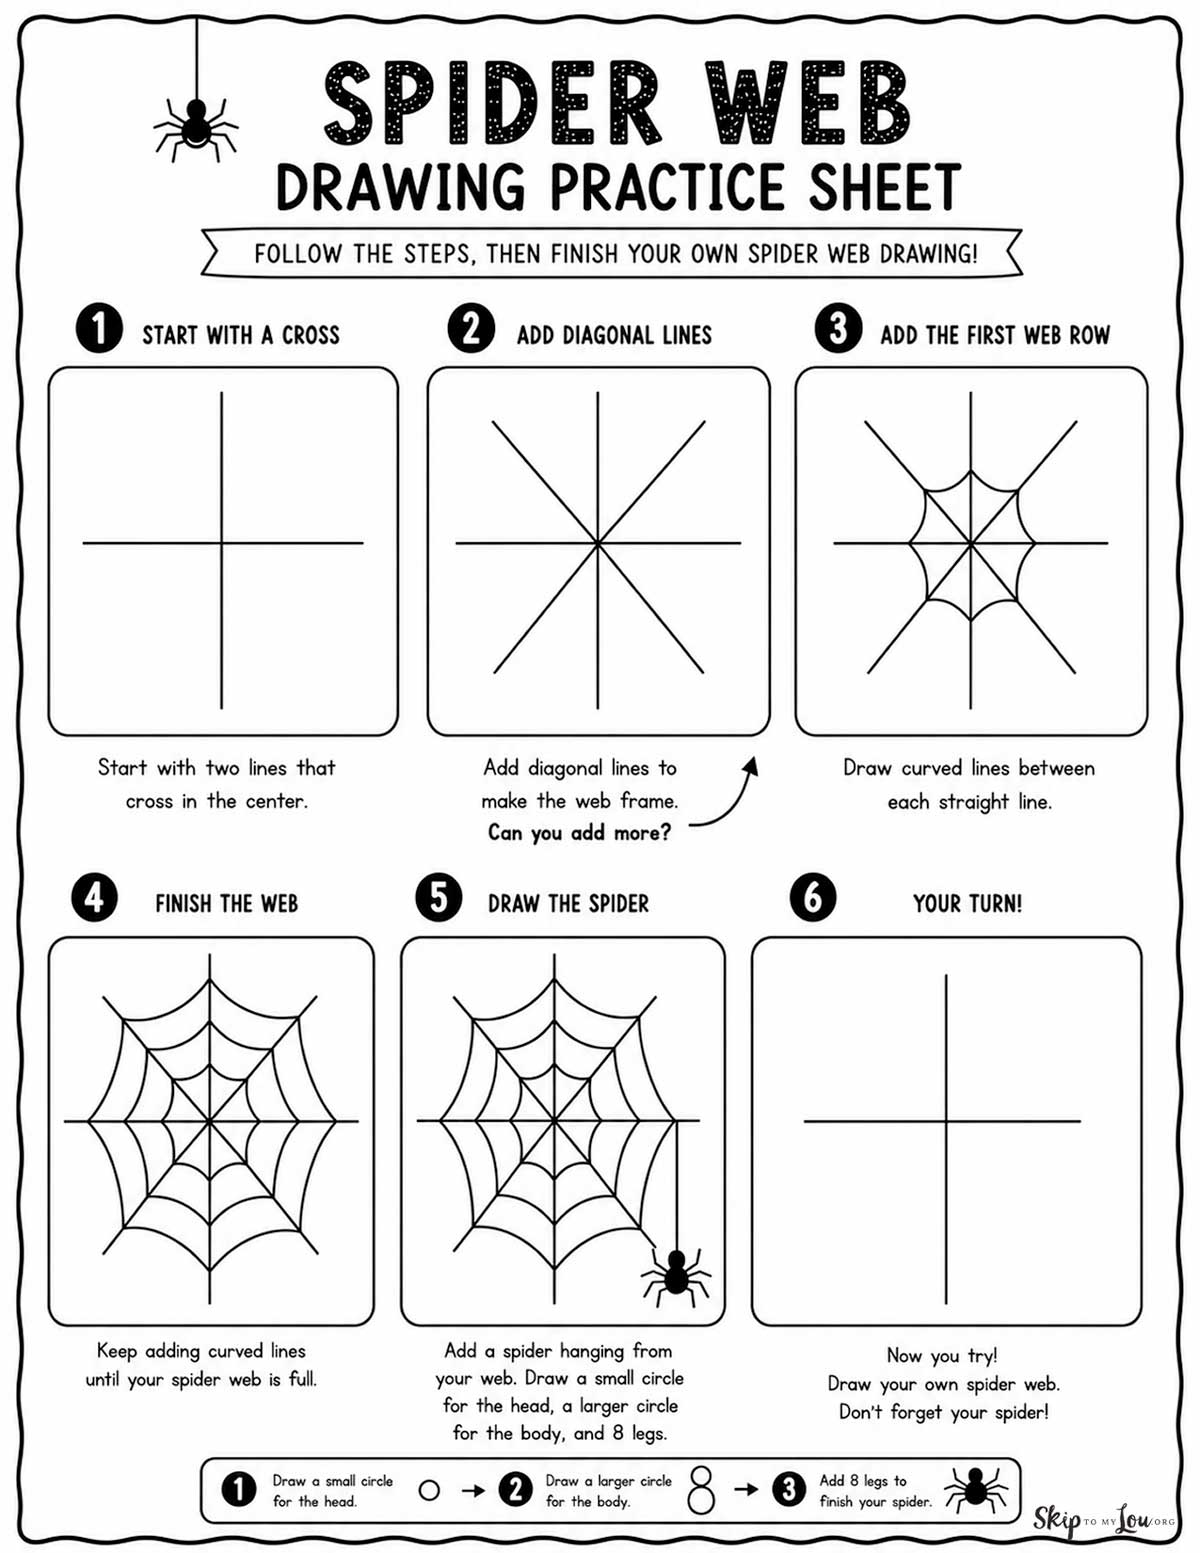
Free Spider Web Drawing Practice Sheet
Print the free spider web drawing practice sheet below and follow along at home, in the classroom, or anytime you need a simple Halloween drawing activity.
Here’s what you’ll need to get started:
Just a few art supplies you probably already have, and you’re good to get started on this simple spiderweb drawing.
- Pencil
- Eraser
- Paper or sketch pad
- Black marker or fine tip pen
- Colored pencils or crayons, optional
Simple Spider Web Drawing Instructions
Follow these easy steps to draw a spider web.
- Draw the web lines.
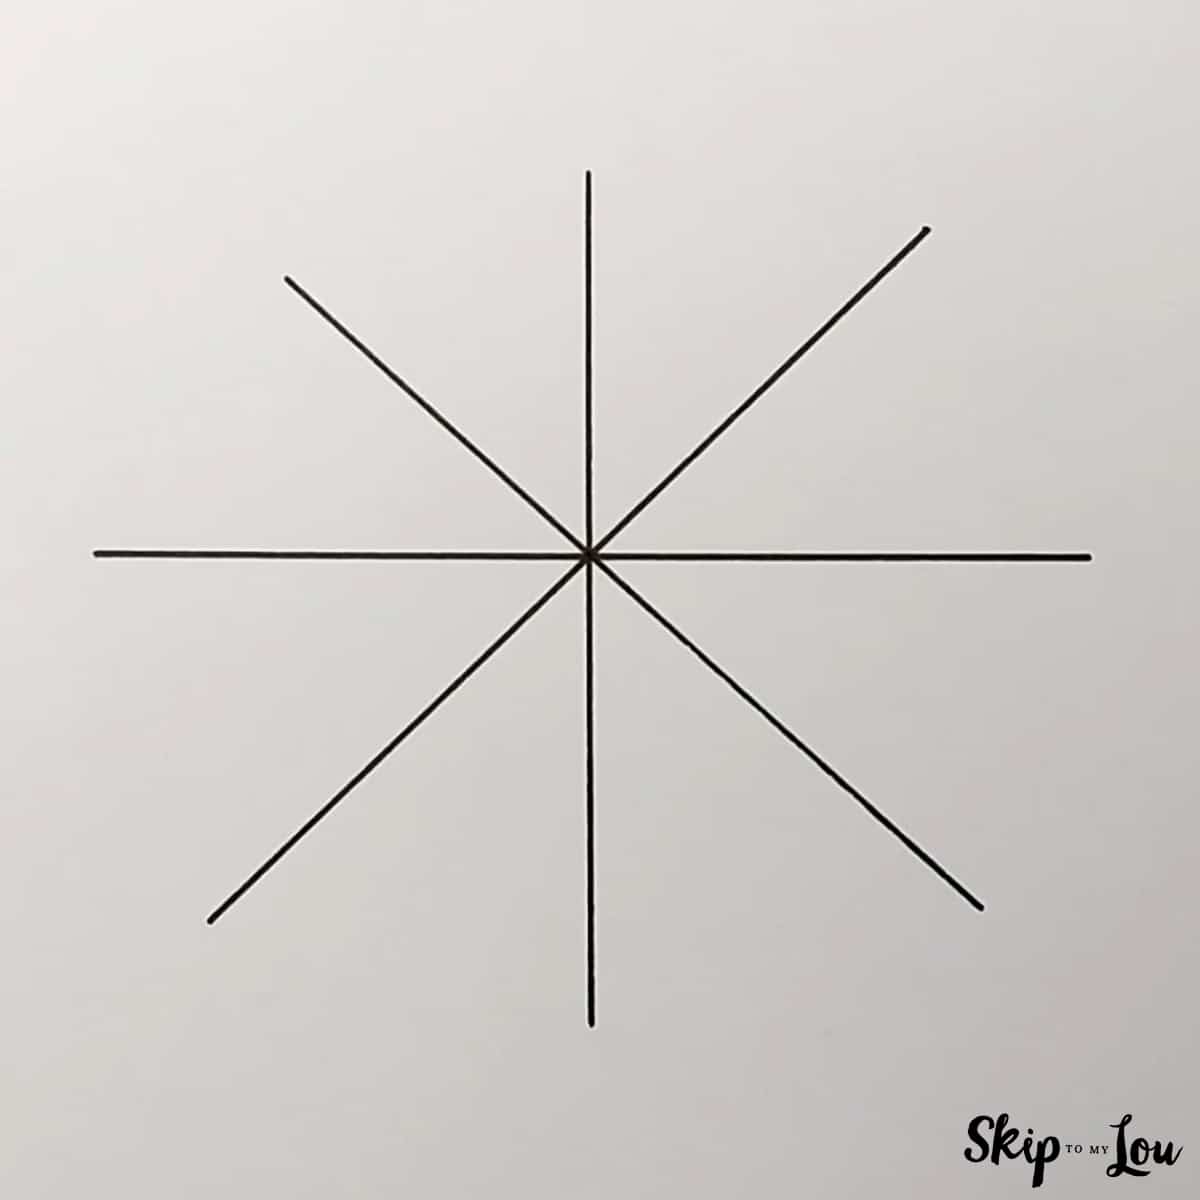
Start by drawing four straight lines that cross in the middle of your paper. Draw one vertical line, one horizontal line, and two diagonal lines. These lines will be the frame of your spider web.
- Add the first curved web row.
Near the center, draw small curved lines between each straight line. Keep going all the way around until you have a full inner ring connecting all the frame lines. - Draw more curved rows.
Continue adding curved lines between the straight web lines. Make each row a little farther from the center. The curves do not need to be perfect. A slightly wiggly line makes the spider web look more natural. Draw the second and third row of webs using the same technique as before. - Finish with a spider.
Draw a small circle for the spider’s head and a larger circle for the body. Fill them in with black marker. Add eight little legs, four on each side. You can also draw a thin line from the web to make the spider look like it is hanging.


Now your spider web drawing is finished! Leave it black and white, color the background, or add bats, pumpkins, ghosts, or more spiders to make it your own.
Watch Someone Drawing This Spider Web
Sometimes it helps to see the steps in action. Watch the video to follow along as the spider web drawing comes together one line at a time.
More Easy Drawing Ideas
If your kids enjoyed this spider web drawing, they might also like these easy drawing tutorials:
More Spider Web and Halloween Fun
If your kids enjoyed this spider web drawing, here are a few more spider and Halloween ideas to try next.
- Learn how to make a paper spider web with just paper and scissors. It is a fun Halloween craft that looks great hanging in a window or doorway.
- Make spider web cookies for a spooky Halloween treat. This easy decorating idea is perfect for parties, classroom treats, or a Halloween baking day.
- For another cute spider craft, make this pom pom spider with a spider web paper plate. Kids will love creating the fuzzy little spider and adding it to its web.
- You can also print these spider coloring pages for more simple Halloween fun. They make an easy activity for classrooms, parties, or a quiet afternoon at home.
- You might also like the Free Spider Cupcake Printable or these Best Ever Spider Cupcakes in 4 Easy Steps for more spider-themed Halloween treats.
For even more spooky, cute, and creative Halloween activities, print these Halloween Coloring Pages and Cute Halloween Coloring Pages. They are perfect for classrooms, parties, rainy afternoons, or keeping kids busy during October.
I would love to keep you fully stocked with creative ideas, yummy recipes, fun crafts, and loads of free printables. Subscribe to Skip to my Lou to get new ideas delivered to your inbox. Follow me on Facebook, Pinterest, Twitter, and Instagram for all my latest updates.