If you feel like you’ve mastered basic crochet stitches, it’s time to elevate your craft with a treble crochet (sometimes called triple crochet stitch). This easy stitch has incredible space and elasticity, making it a great stitch choice for different applications. Thanks to its taller stitches, the treble crochet stitches can be effortlessly crossed over other stitches, allowing you to a large variety of patterns.
In this tutorial, I’ll guide you through the steps to master the treble crochet stitch. It takes a little bit of effort, but I’m sure you’ll get the hang of it sooner than you think. So, grab your yarn and your hook, and let’s dive into the world of these basic stitches!
Where To Use Treble Crochet:
Before we delve into the treble crochet tutorial, it’s important to understand where you can use this stitch pattern. Here are some situations where treble crochet stitches can be useful:
- Decorative Patterns: Treble crochet stitches add elegance and texture to your crochet projects, making them perfect for creating stunning, intricate stitch patterns.
- Tall Stitch Projects: When you need a taller stitch than the double crochet, the treble crochet comes to the rescue, allowing you to achieve the correct height with ease.
- Increases and Decreases: A treble crochet increase and decrease are essential techniques for shaping your crochet work.
- Crossing Stitches: Thanks to its elongated nature, treble crochet stitches are ideal for creating designs that involve crossing over other stitches, providing a unique effect.
So without further ado, here’s an easy way to do treble stitches!
How to Make a Treble Crochet Stitch:
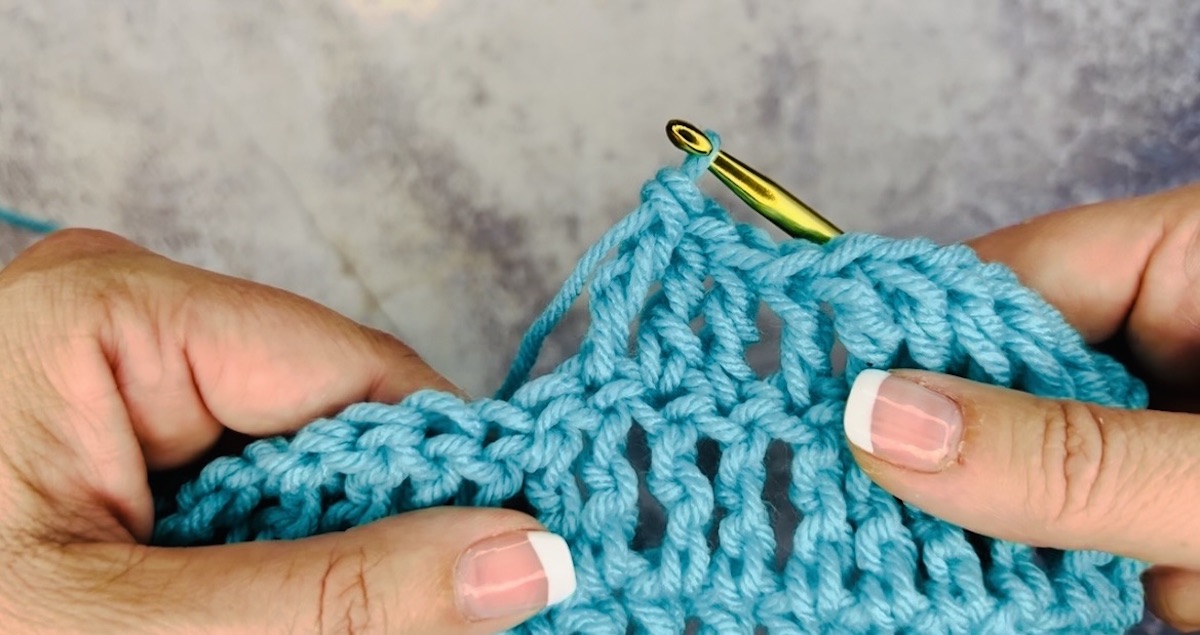
Before starting: Begin by creating a foundation chain (also known as a starting chain). The number of chains should be appropriate for your project, keeping in mind that the treble crochet stitch is taller than the double crochet. To start, make a slip knot at the beginning of the row and then chain the desired number of stitches.
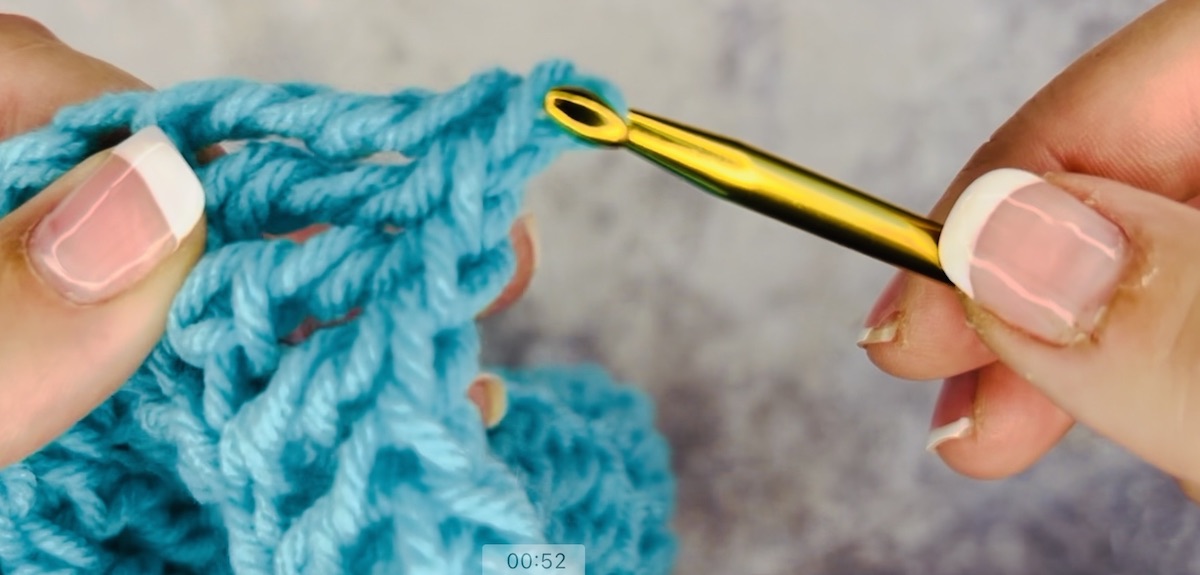
Once you have your foundation chain, locate the stitch where you want to begin your treble crochet. For your first treble crochet stitch, you can usually work into the fourth or fifth chain from your hook, depending on the pattern.
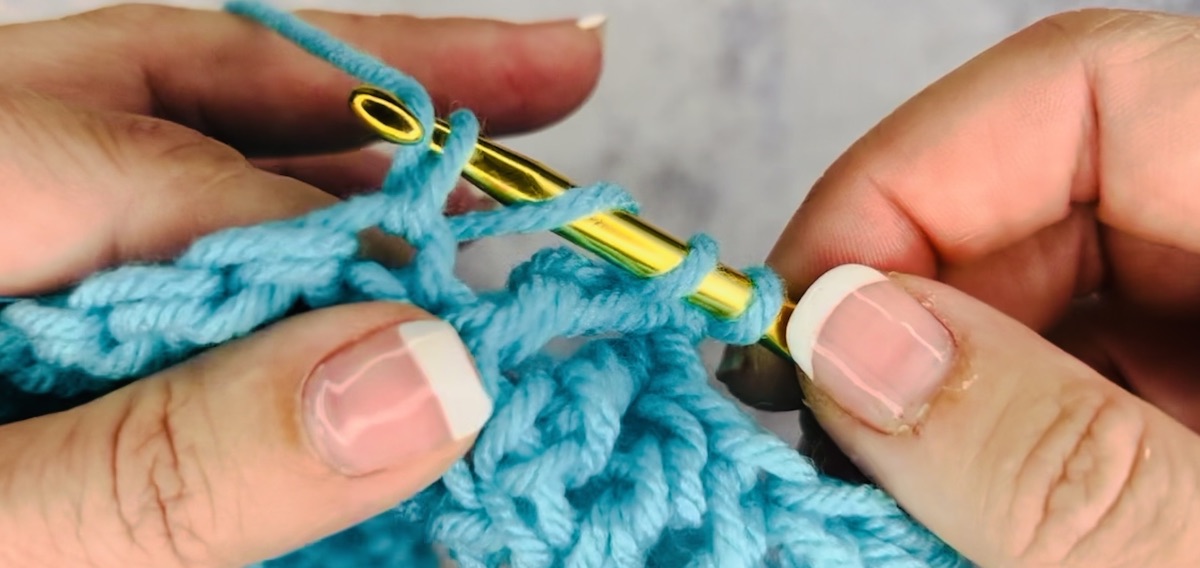
- Wrap the yarn around your hook twice, creating three loops on the hook.
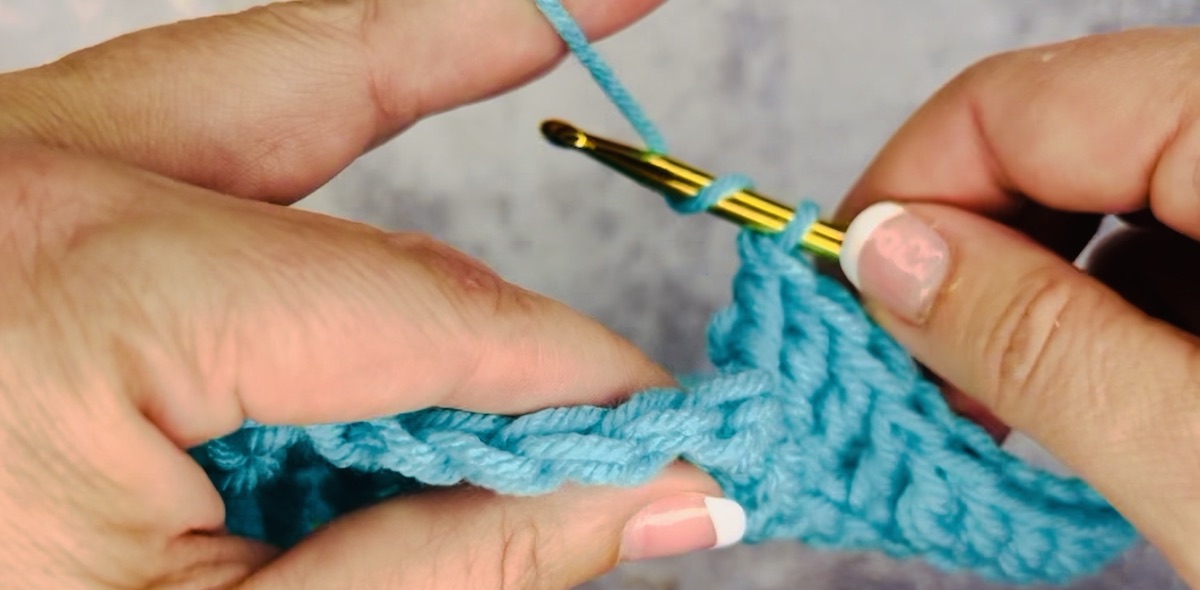
2. Insert hook under the top two loops of the designated stitch.
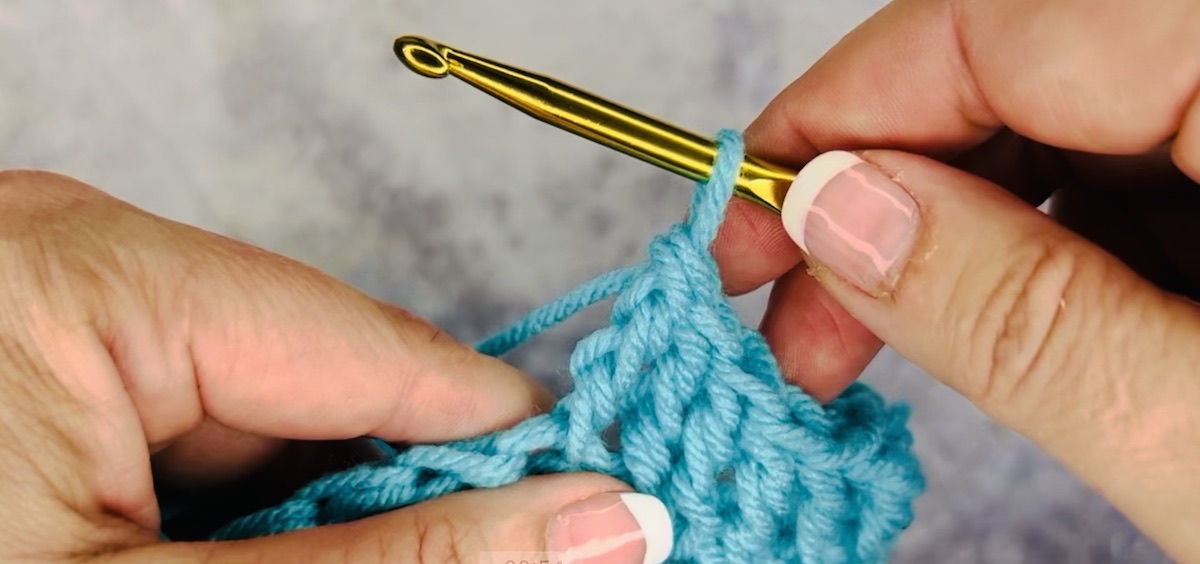
3. Yarn over again and pull through the stitch. You should now have four loops on your hook.
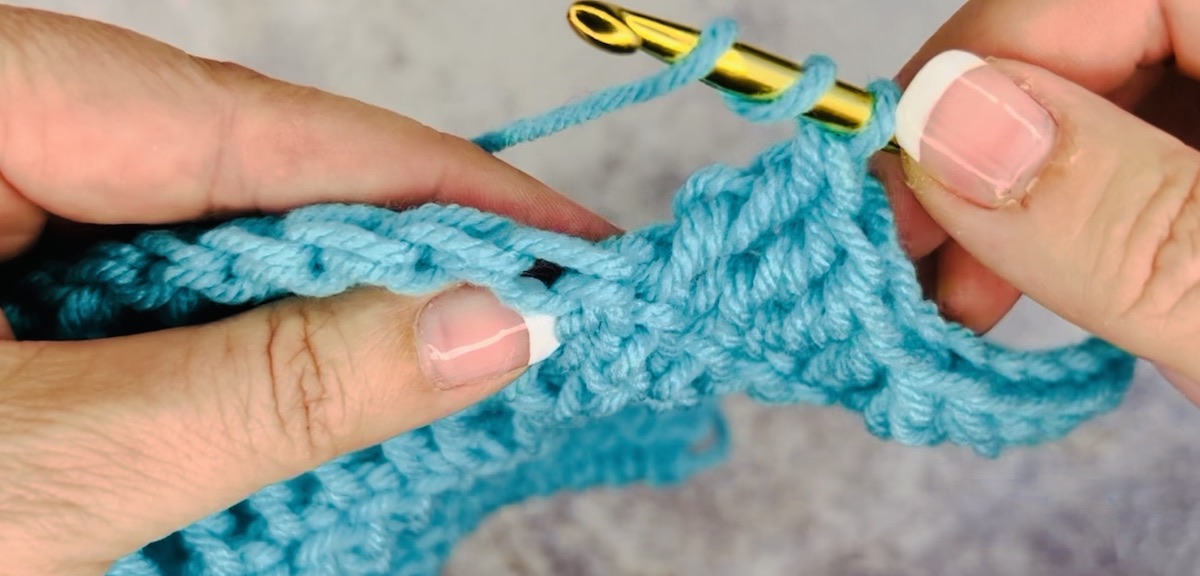
4. Yarn over and pull through the first two loops on your hook. You’ll have three loops remaining.
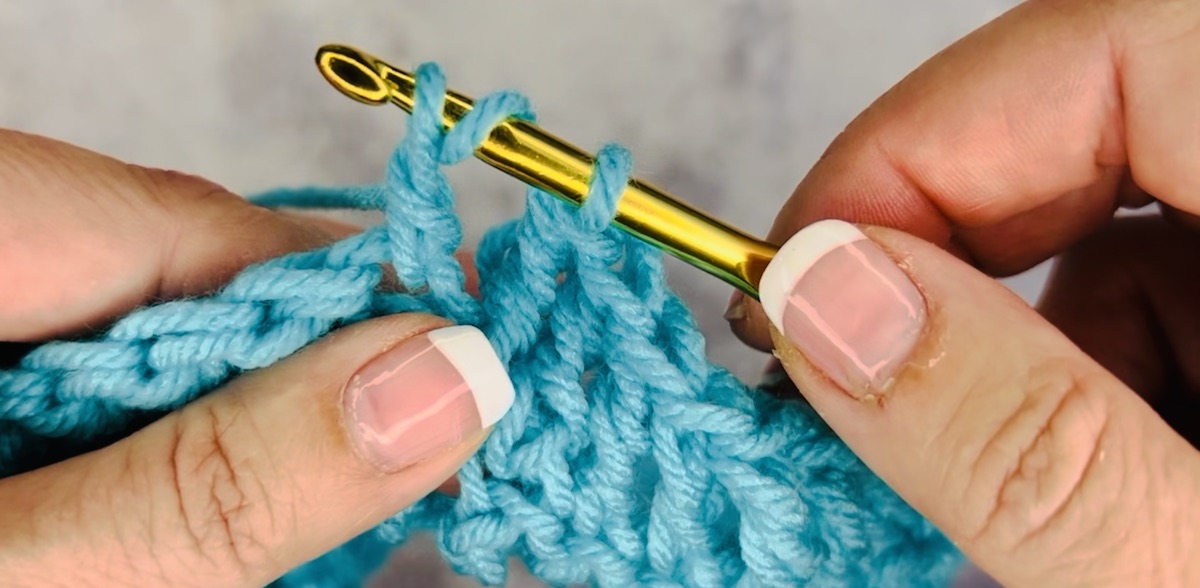
7. Yarn over again and pull through the next two loops on your hook. Now, you’ll have two loops left on your hook.

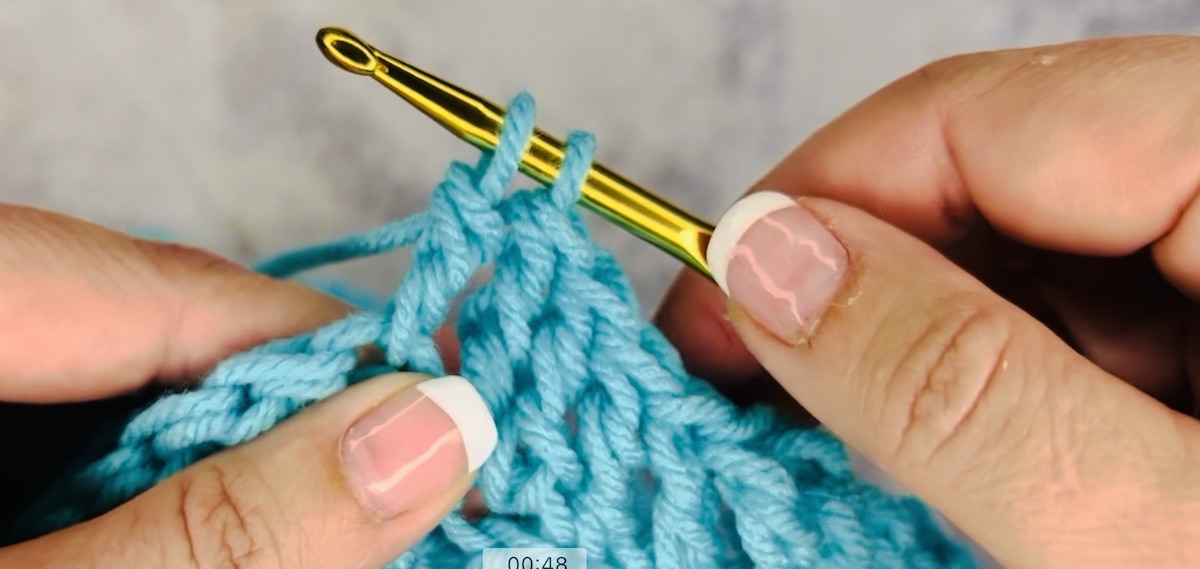
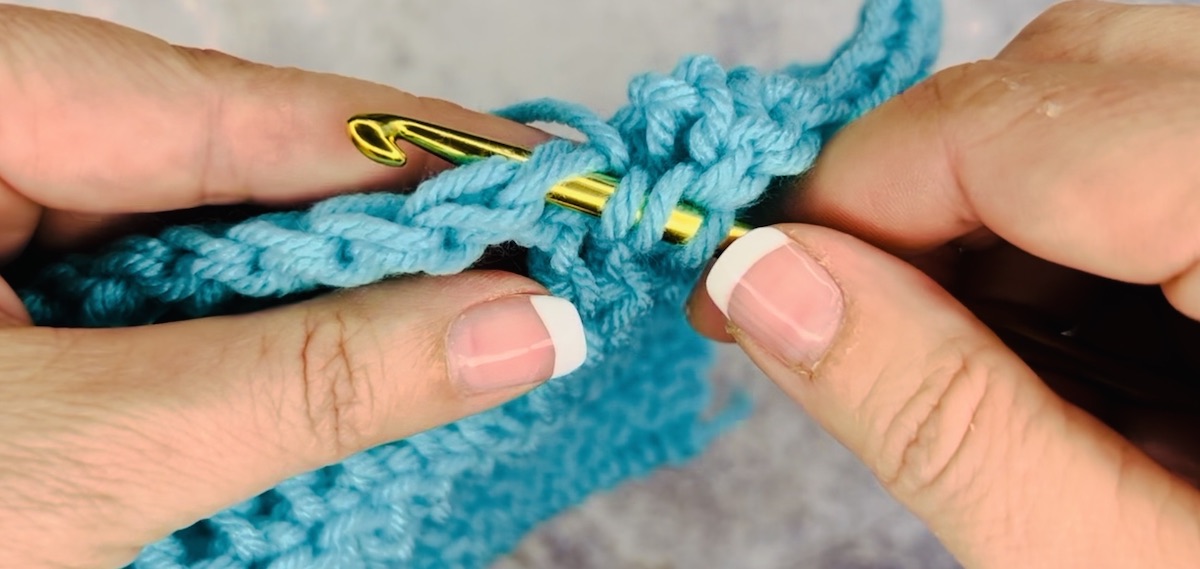
8. For the final step, yarn over one more time and pull through the last two loops on your hook.
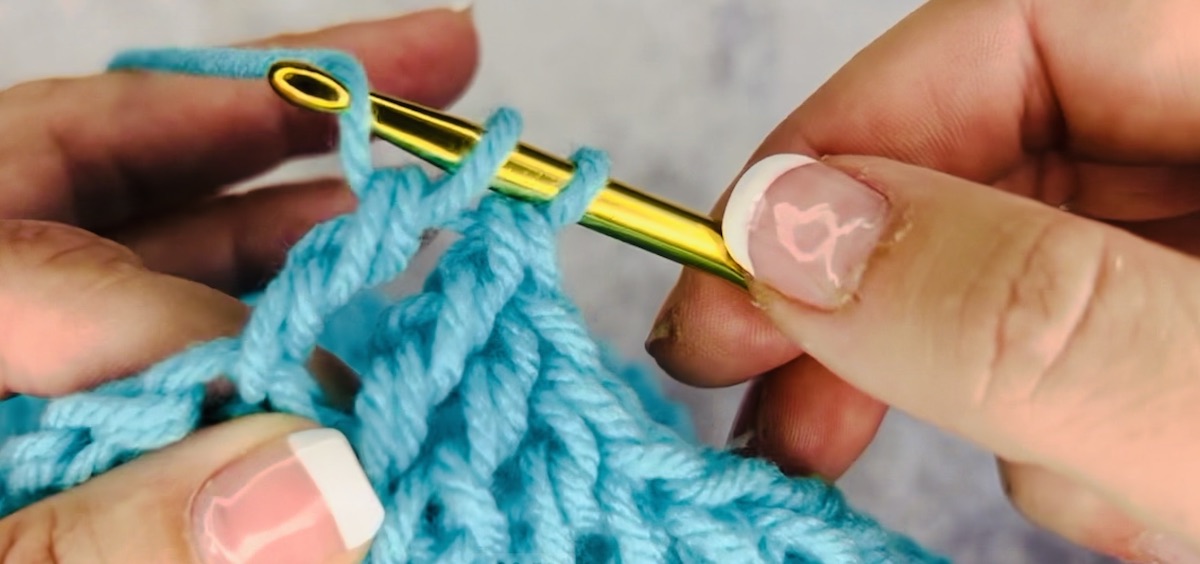
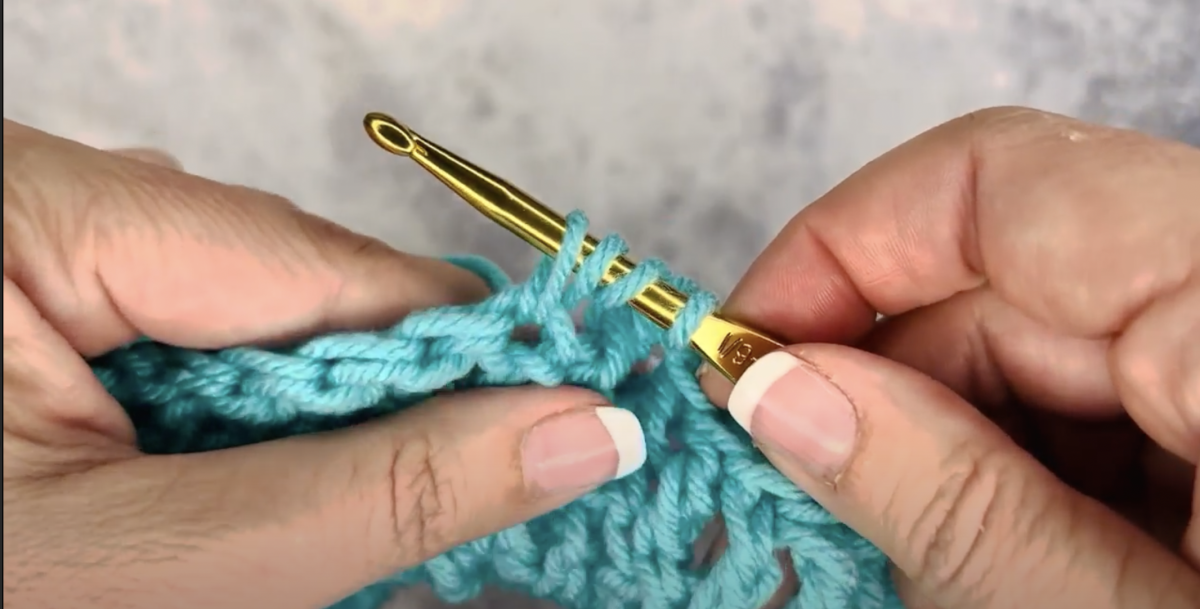
Congratulations! You’ve just created a treble crochet stitch.
Next steps:
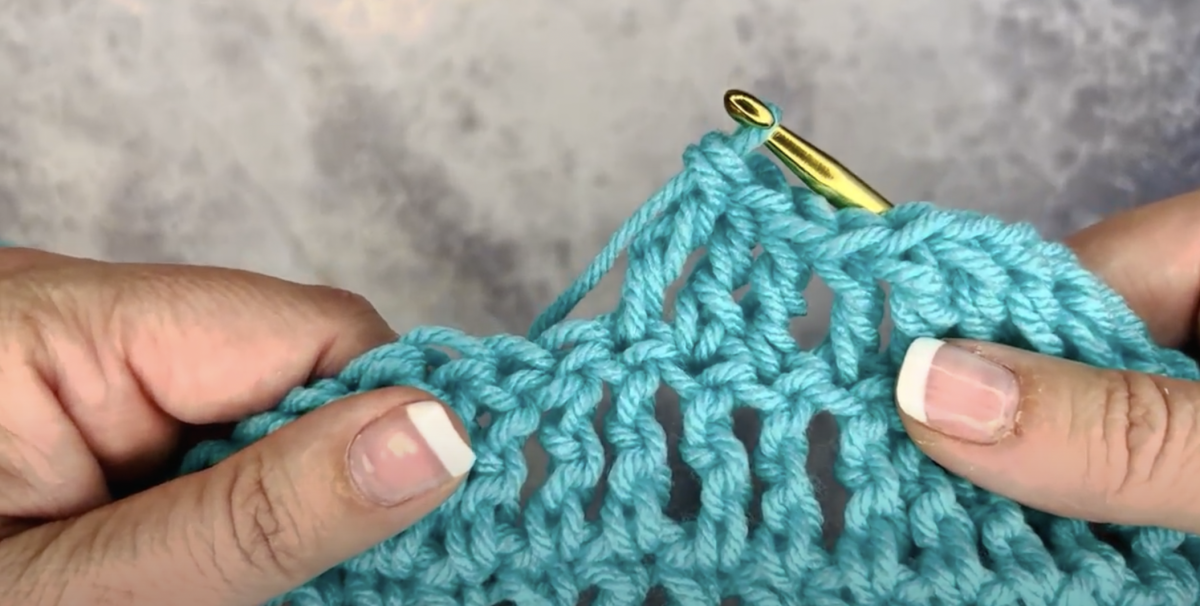
Continue working treble crochet stitches into the desired stitches along the row.
At the end of the row, you can create a turning chain to prepare for the next row. Typically, a turning chain for treble crochet is three chains high.
For the next row and beyond, work your treble crochet stitches into the top of the turning chain or the designated stitch according to your pattern.
That’s it! You’ve mastered the treble crochet stitch. Now, you can incorporate this elegant stitch into your crochet projects, adding texture and creativity to your work. Happy crocheting!
Understanding US Terms vs. UK Terms:
In the world of crochet, terminology can vary depending on your location. It’s important to be aware of the differences between US and UK terms to ensure your patterns and projects turn out as intended. Here at Skip To My Lou, we use US terms.
Now you’re well-equipped to explore a wide variety of crochet patterns and create beautiful projects!
This post contains affiliate links.
My Favorite Crochet Tools
- If you are like me and like to crochet on the go this tote is a stylish way to keep everything you need at your fingertips!
- My MOST FAVORITE tool is these portable scissors that always make it through security and fit perfectly in my hook case.
- A️ yarn bowl is a beautiful way to wrangle yarn while crocheting
- Keep organized with this crochet hooks kit with a case. This 85-piece kit has over 2,500 ⭐️⭐️⭐️⭐️⭐️ five-star reviews.
- Crochet Stitch Dictionary: 200 Essential Stitches with Step-by-Step Photos is the most helpful resource to keep handy!
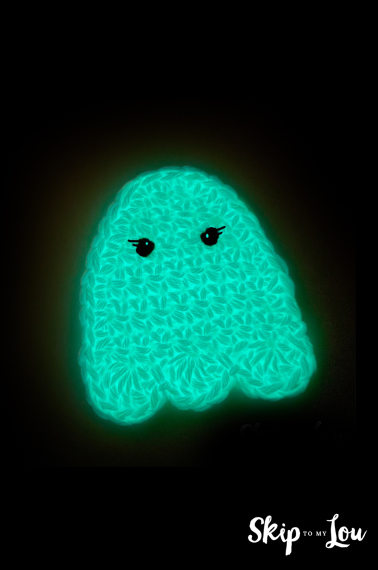
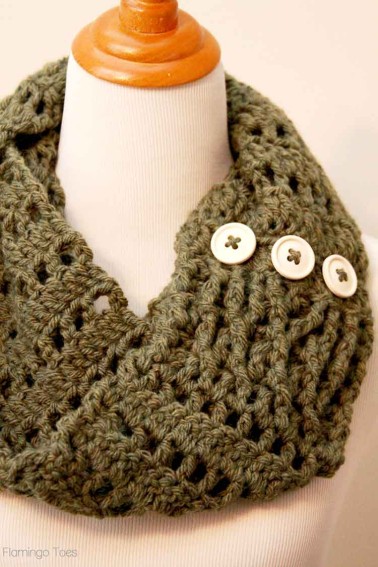
Easy Crochet Projects For you:
- Crochet Sweater Patterns For Everyone
- Crochet Star
- Crochet Wreath Ornament
- Crochet Stitches
- Crochet Baby Blanket Patterns
- Crochet Scarf Patterns
- Crochet Star Free Pattern
Tips and Basic Crochet Stitch Tutorials:
- How to start a chain crochet
- Slip knot
- How to choose the right hook size
- Single crochet stitch
- Double crochet stitch
I would love to keep you fully stocked with creative ideas, yummy recipes, fun crafts, and loads of free printables. Subscribe to Skip to my Lou to get new ideas delivered to your inbox. Follow me on Facebook, Pinterest, Twitter, and Instagram for all my latest updates.