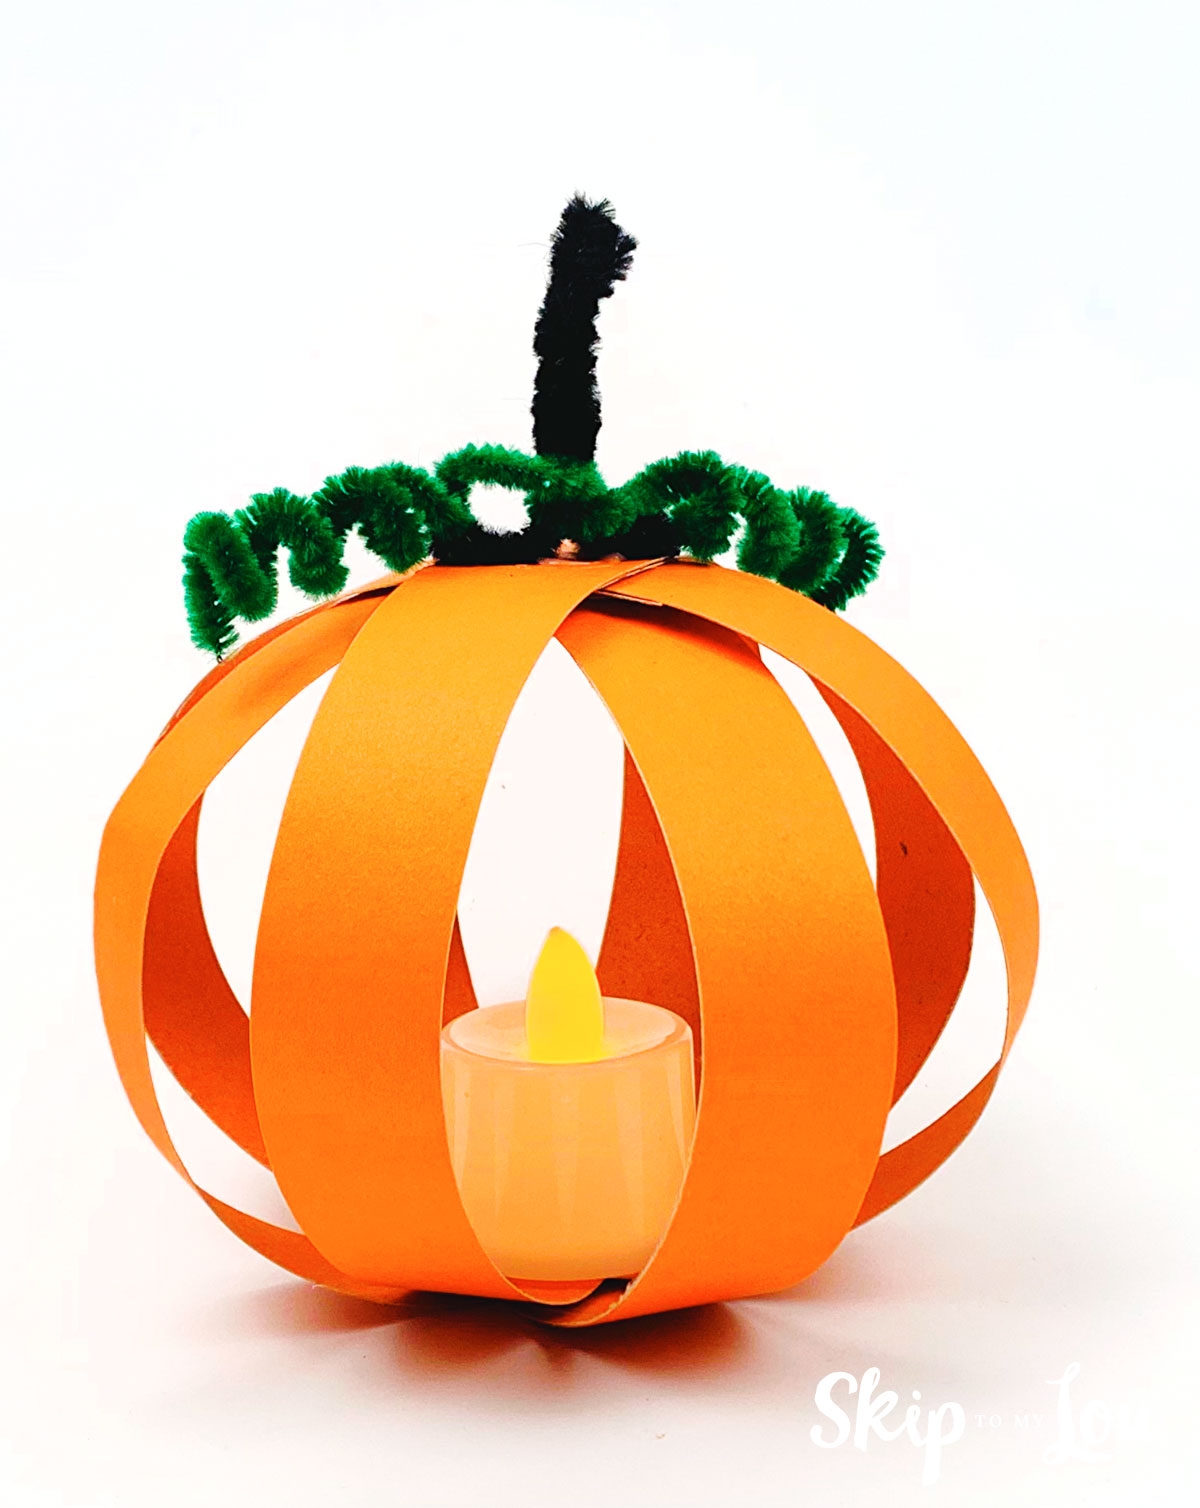
Cute paper pumpkins are a festive way to welcome the fall season! With just a few strips of paper and a chenille stem, you can make adorable pumpkins that bring a touch of seasonal charm to any space. This simple craft is perfect for all ages, making it an ideal project for classrooms, family craft time, or even as a decorative touch for your fall table. Quick, fun, and oh-so-easy, these paper pumpkins are a must-try for autumn!
Related: Fall is such an exciting time of the year for the whole family, so make sure you check out these other holiday crafts including Tootsie Pop Pumpkins, Pumpkin Coloring Pages Fall Coloring Pages, and this cute origami pumpkin.
Paper Pumpkin Supplies
To make this Halloween paper pumpkin, you will need the following supplies.
- Orange paper -regular paper will do. If you’d like to make the pumpkin a little sturdier, you can use orange cardstock. You can also try paper with different patterns or how about glitter papers.
- Glue stick
- Glue gun
- Scissors or paper trimmer
- Pencil
- Craft pipe cleaners
- Battery powered candle light. Please don’t use tealights, the pumpkin is made of paper after all!
Video: Watch How to Make a 3D Paper Pumpkin
Easy Paper Pumpkin Craft Step-by-Step
Let’s get started on making this easy pumpkin craft! If you’re unsure about any steps, just check out the video for a clear, step-by-step guide. Try using different sizes of paper strips to create pumpkins in various sizes—small pumpkin to large! Craft a whole pumpkin patch!
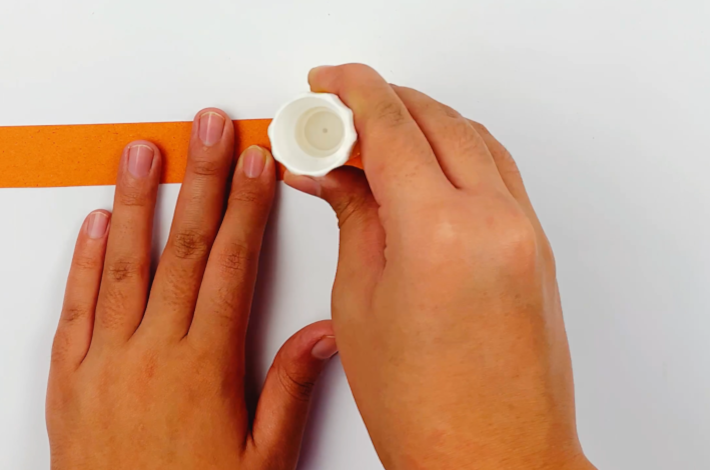
Step 1: Start with a piece of orange paper and cut it into long strips as shown in the images below.

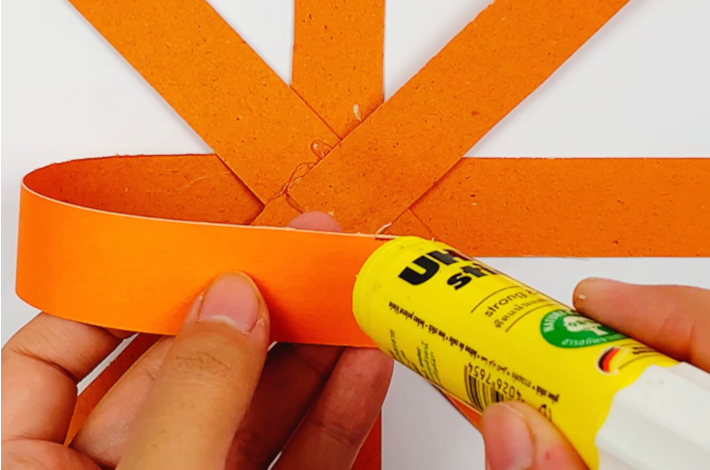
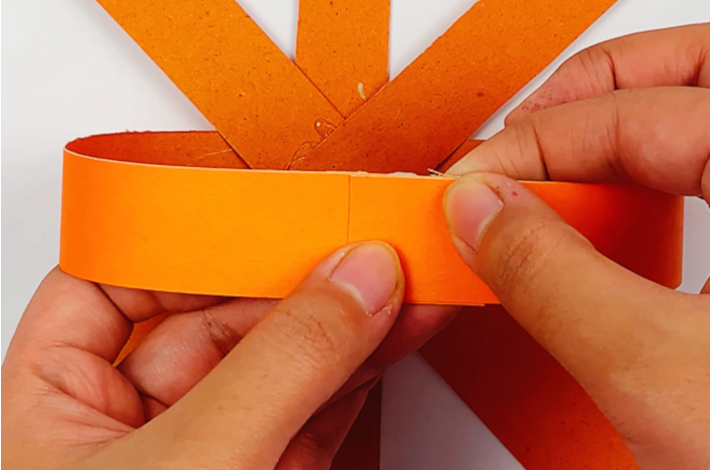
Step 2: Take two strips of orange paper, apply glue, and stick them together to make a longer paper strip.
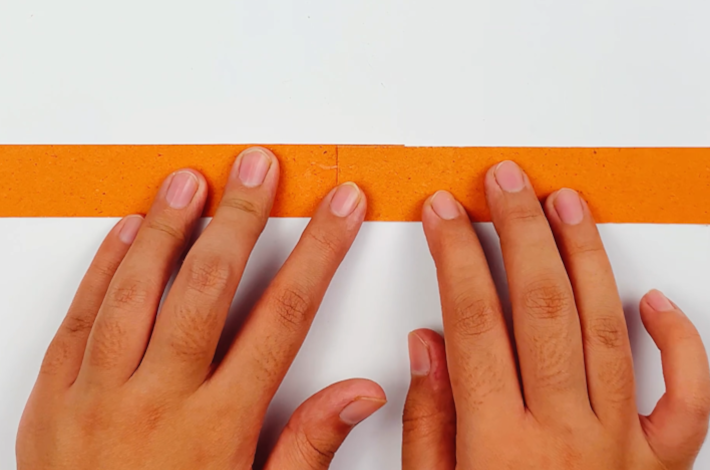
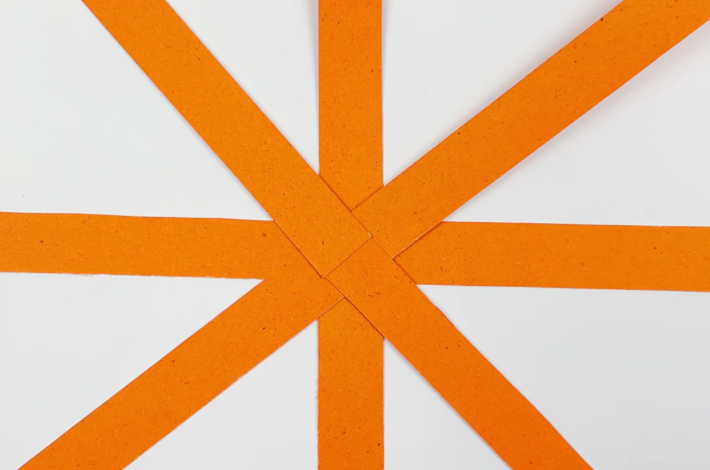
Step 3: Glue the remaining strips in the middle of the first two strips mounting each on top of each other till you have the pattern shown in the image below.
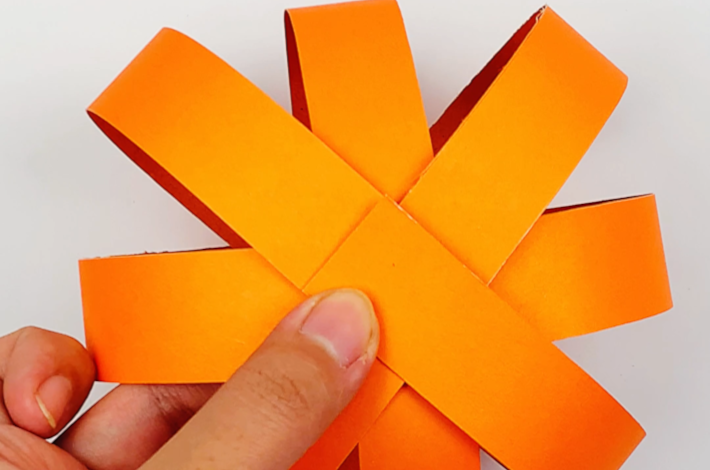
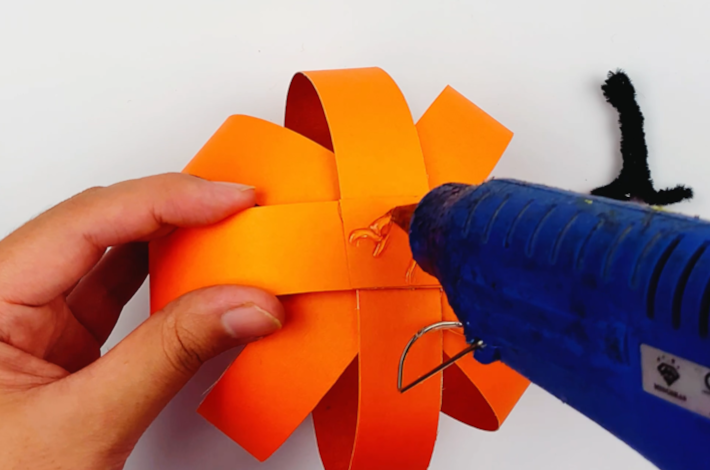
Step 4: Apply glue to the far end of each strip and bend them upwards, securing them in the middle to form the pumpkin shape.
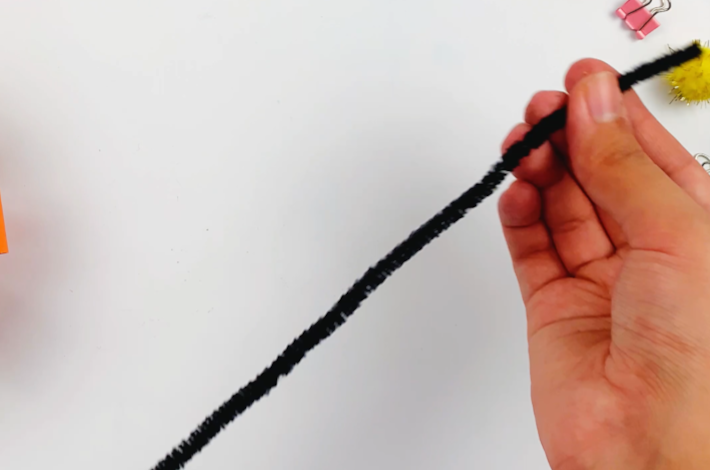
Step 5: It’s time to make the pumpkin stalk from pipe cleaners. Cut off a small section and bend it in half.
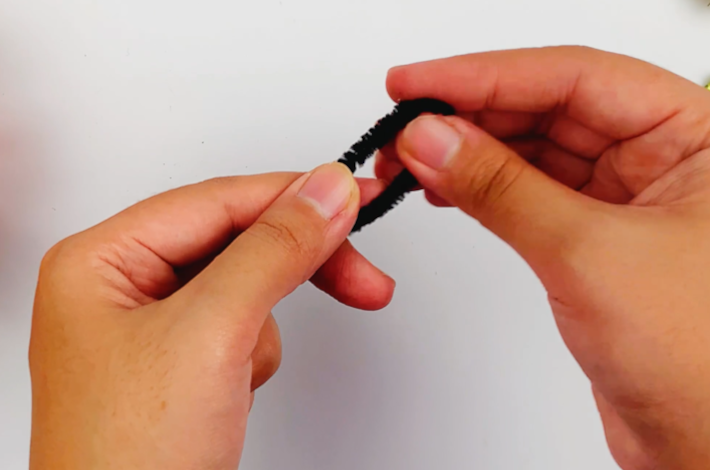
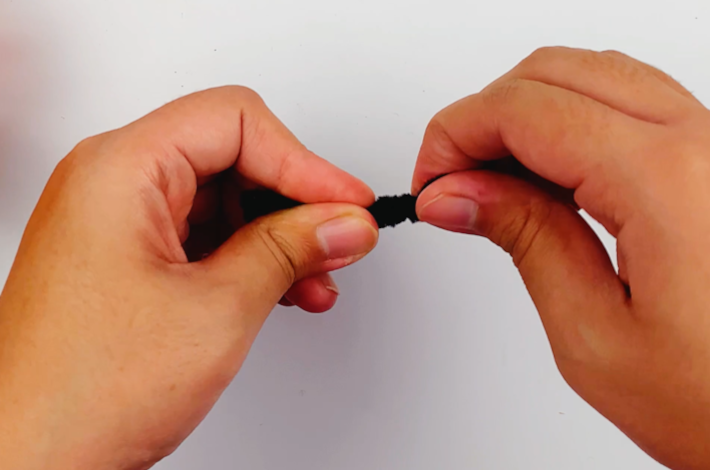
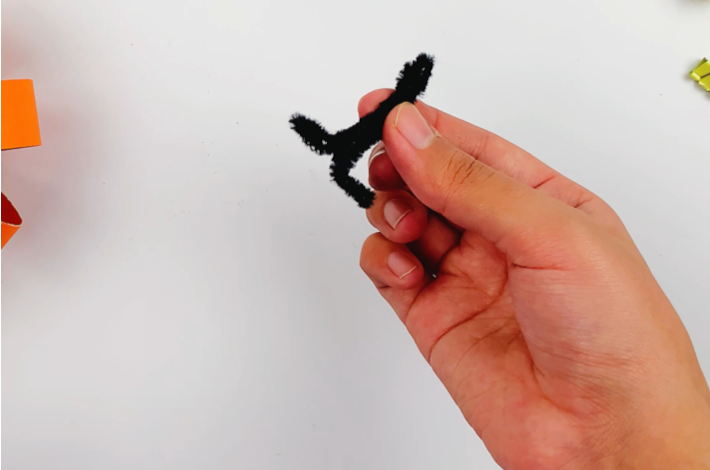
Step 6: Twist the craft pipe cleaner and then bend out the bottom ends at a 90-degree angle as shown in the images below.
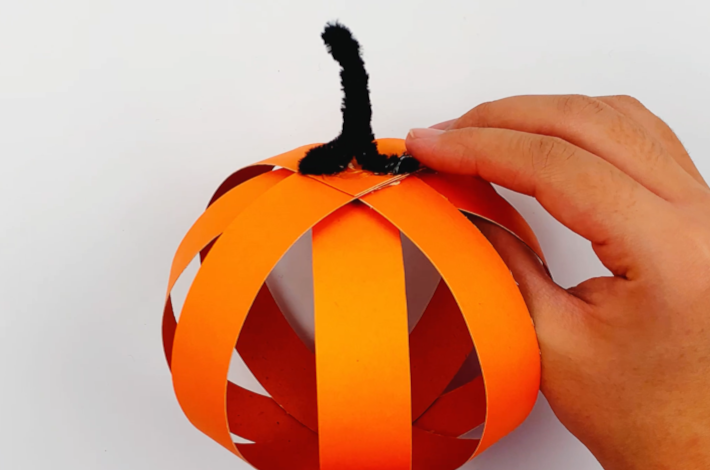
Step 7: Using a glue gun, apply glue to the top of the pumpkin and secure the stalk. Hold it there until the glue has dried sufficiently.
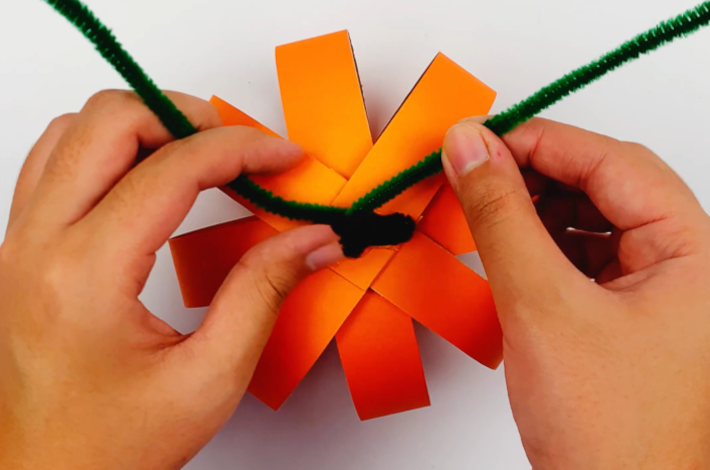
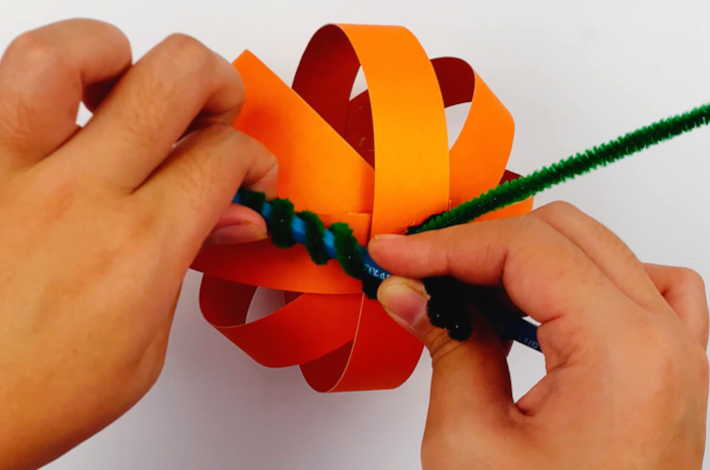
Step 8: Once the glue has dried, take a long craft pipe cleaner and wrap it around the bottom of the stem. Wrap both pieces extending from the stalk around a pencil.
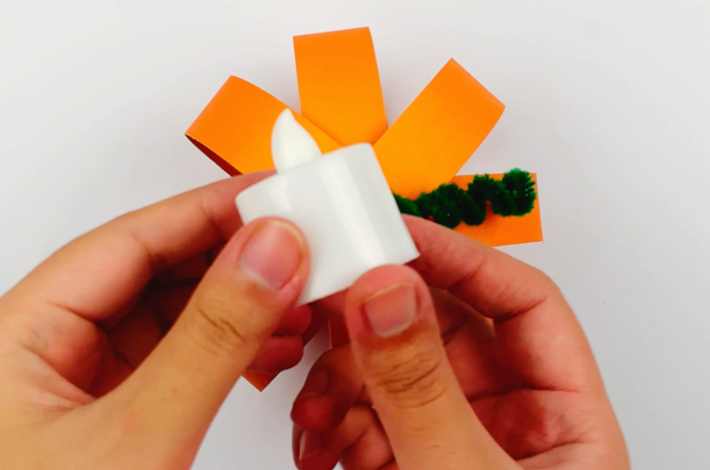
Turn Your Paper Pumpkin Into a Lantern
Simply insert a battery-powered light at the bottom of each paper pumpkin, and voilà—you’ve got charming pumpkin lanterns! These glowing pumpkins make beautiful decor that brightens up any corner of your home all season long. Kids would love crafting these for the Thanksgiving table, adding a warm, festive touch to the celebration.

And there you go – a fun way to decorate for the season!

More Fall Fun for the Whole Family!
Try out some of these Halloween projects!
- Why not make your own cupcake wrappers for Halloween?
- Hanging Lantern Ghosts are a fun decoration for the holiday.
- Pumpkin Crafts
- Pumpkin Template for carving!
- Fun Fall Crafts – such a fun time of year!
- Check out these all things pumpkin crafts
- Thanksgiving Dinner Trivia – so much fun!
- Jack-o-lantern face templates for pumpkin carving
- Make a 3D card with this tissue paper pumpkin craft
I would love to keep you fully stocked with creative ideas, yummy recipes, fun crafts, and loads of free printables. Subscribe to Skip to my Lou to get new ideas delivered to your inbox. Follow me on social media on Facebook, Pinterest, Twitter, and Instagram for all my latest updates.


