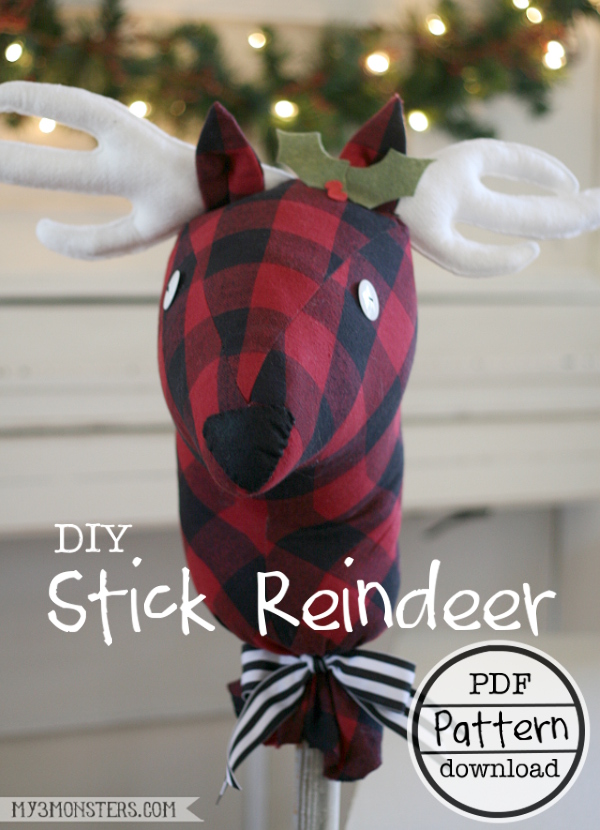
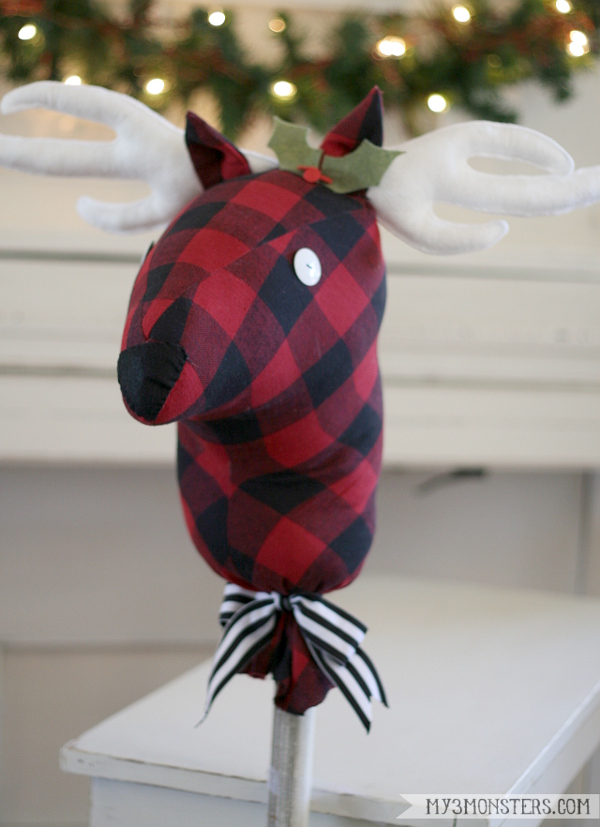
This DIY Stick Reindeer will provide hours of fun for kids this holiday season. It is the perfect gift to make for children.
My kids are teenagers now, but one of their favorite homemade gifts, when they were little, was the Stick Horses I made for them. They rode those things all over the house for months!
Related: Wonderful handmade gift tutorials.
I thought it would be fun this year to give that old favorite a Holiday Makeover and create Stick Reindeer. These would make fun gifts for the kids on your list, or cute decorations for your holiday home.
Gather your DIY Stick Reindeer Supplies
- ¾ yd. fabric for head
- ¼ yd. felt or non-woven, stiff fabric (for antlers)
- Scraps of black, red, and green felt (for nose and holly)
- 2 buttons, approx. 1 ¼ “ (for eyes)
- Wood dowel, at least 1” diameter, cut to the desired length and painted {optional}
- 1-yard coordinating ribbon
- 1 bag poly-fil stuffing
- Coordinating thread
- Hot glue
Let the Horsing around begin! Step-by-Step Instructions for the DIY Stick Reinder
- First, Download and print pattern here.
- Assemble patterns by matching up the small letters in the corners of pattern pages and taping edges together. It is not necessary to overlap the edges of the paper — simply tape pages side by side.
- Cut pattern pieces out of fabric, adding ½ “ seam allowances on the pieces indicated.
- Do not cut the antler pieces out of fabric yet.
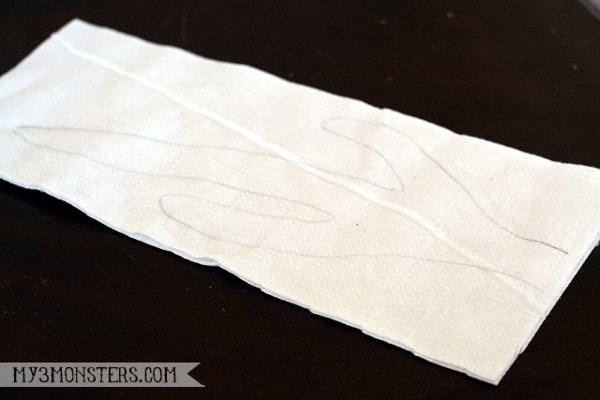
- Fold antler fabric in half so you have a double thickness.
- Cut 2 pieces of antler fabric (each double thickness) large enough to fit the antler pattern piece.
- Trace the antler pattern onto the fabric very lightly with a pencil.
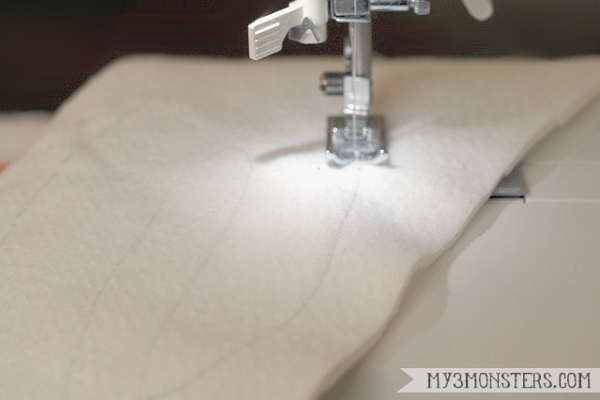
- Stitch through both layers of fabric following the line you traced.

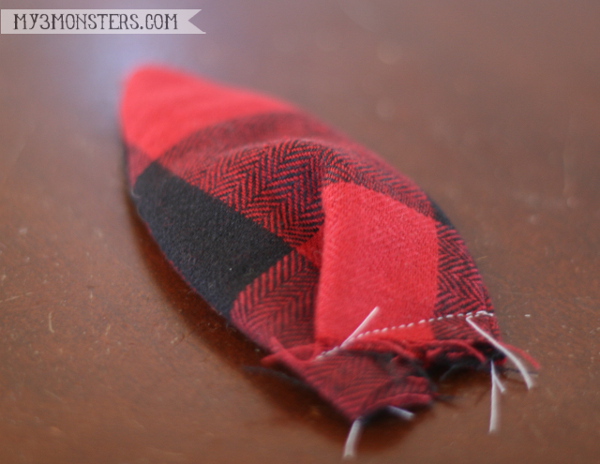
- After stitching, cut out antlers very close to the stitching.
- Stuff antlers by adding a small amount of stuffing at a time and using the eraser end of a pencil to push it way up into the tips of the antlers. Pack the stuffing in so the antlers are firm – this will help them to stand better when the reindeer is assembled. Set aside.

- Place 2 ear pieces right sides together and stitch around longer, slightly curved edges.
- Trim off the point at top of the ear and turn right side out.
- Repeat for the second ear.
- Make a small pleat in the bottom (open end) of each ear and baste across the bottom to hold it in place.
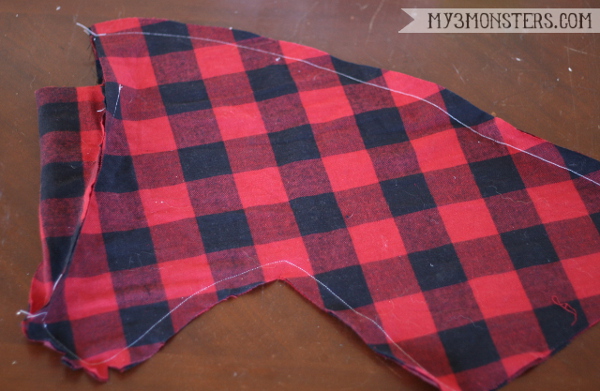
- Attach the face front piece to the headpiece by lining up fabric notches, right sides together, and stitching between notches.
- Repeat for the other side.
- Sew headpieces together by lining up both headpieces, right sides together. Stitch from the lower notch of the face front to the bottom of the pattern piece.
- Then, stitch the top of the headpiece from end to end.
- Trim and clip seam allowances.
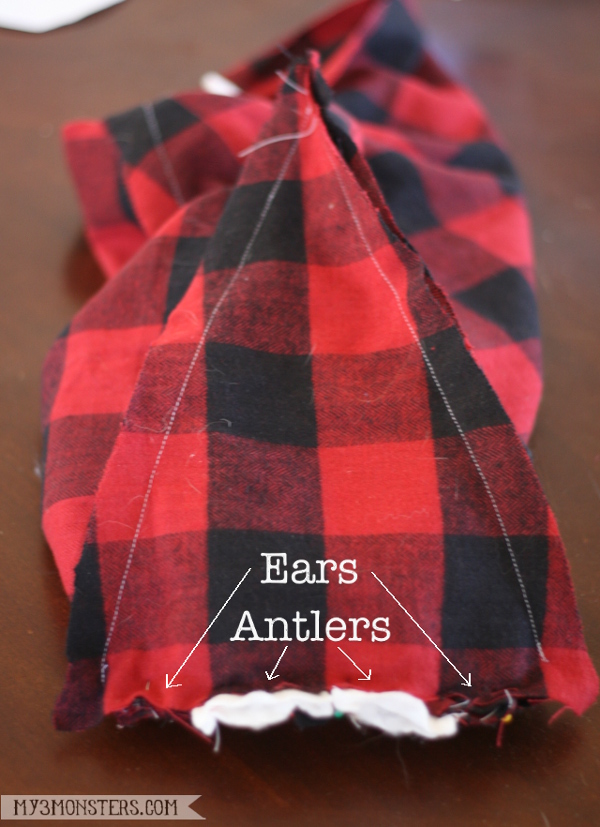
- Add the ears and antlers, and close up the hole at the top of the head. Insert ear and antler pieces into the hole in the head one at a time, making sure they are lined up how you want them to look when finished. {Pin in place across the top of the face front piece, then gently turn head right side out to check placement. Adjust accordingly.}
- With the right sides of the fabric together, pin the top of the face front to the back of the head, matching the notch on the face front to center seam at the back of the head.
- Stitch through all layers and turn right side out.
- Stuff head with poly-fil stuffing to desired firmness. {The antlers will be a little “floppy” at this point. Don’t worry! We’ll take care of that in a minute.}
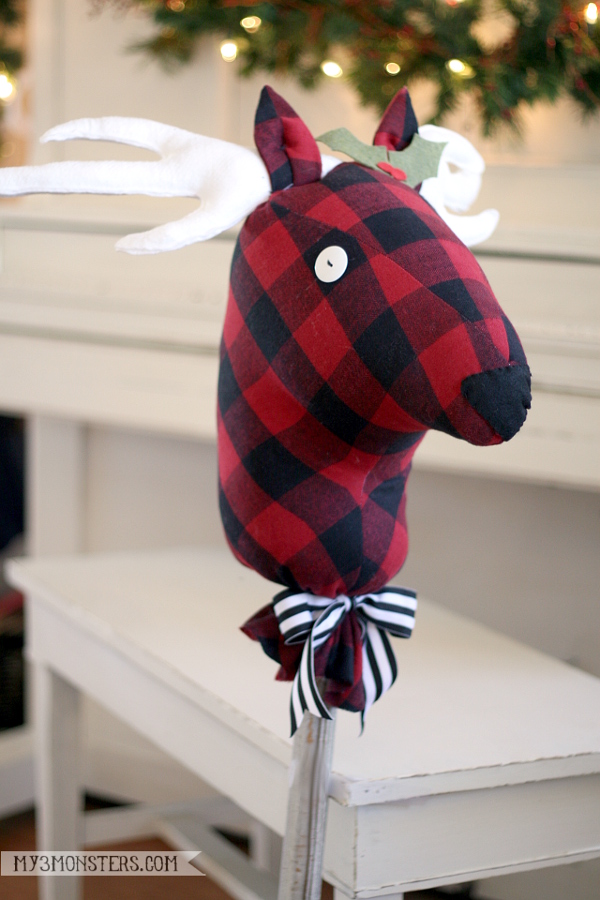
- Insert dowel into the head through the stuffing. Gather fabric at the base and attach it to the dowel using hot glue.
- Tie the ribbon around to cover the hot glue and give it a nice, finished look. {Attach ribbon with hot glue if desired.}
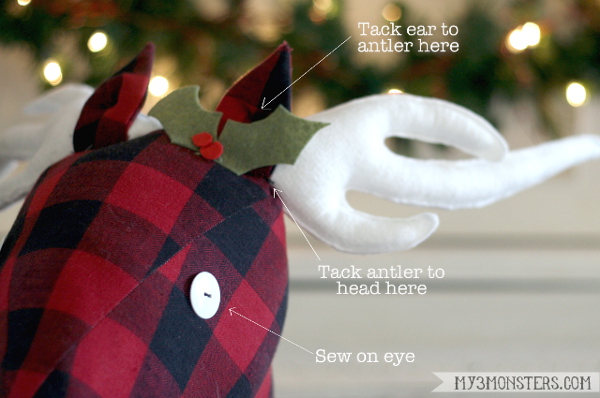
- Now take care of those floppy antlers! Pull each antler to the side slightly and tack the antler to the head at the base of the ear as shown. Then, to make the ear stand up a little, tack the center of the ear to the antler as shown.
- Repeat for the other side. The antlers will still flop a little bit – that’s just the nature of the beast, I guess – but this helps greatly. I really didn’t want to add any wires or anything that might make this less kid-friendly!
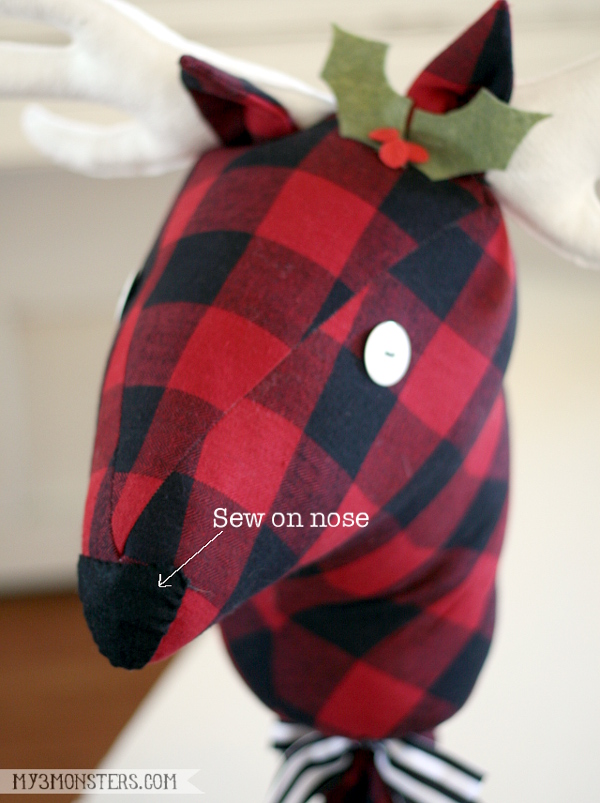
- Add the finishing touches. Pin the nose piece in place and sew it on with a needle and thread.
- Attach button eyes.
- Cut a few holly leaves and berries out of felt and hot glue near one ear, if desired.
Visit Amy From My 3 Monsters for more crafting ideas.
I’m in love with how cute this little guy turned out! I think I’m going to set mine up on a ledge in our house with a vintage red sled and some ice skates to create a sweet little winter vignette.
How cute would this be in a baby’s nursery?! You could even make it out of tan and white polka dot fabric and add a little flower crown around the antlers for a baby girl’s room. The options are endless if you get creative. Happy Holidays, friends!
More Handmade Gift Ideas
- homemade gift ideas. Find all the DIY inspiration you need to create unique and meaningful homemade gifts for everyone on your list.
- DIY Yoga Mat Sling Tutorial is a quick and simple gift that will get lots of use on the way to class.
- DIY Flag Banner There are so many ways to make this darling flag banner and customize it to make the perfect handmade gift.
- DIY Gifts To Sew For Christmas with just a little planning you can give a homemade gift to everyone on your list.
- Crochet Gifts are always appreciated since they are made with love and care.
- If you have a big heart and a small budget this post is for you 18 Handmade gifts under $10.
- Wrap up some amazing Homemade Christmas Gifts for friends and family with these recipes and matching gift tags.
Where did you display your adorable DIY stick reindeer? Or, did your kids take it over and have a reindeer race?
I would love to keep you fully stocked with creative ideas, yummy recipes, fun crafts, and loads of free printables. Subscribe to Skip to my Lou to get new ideas delivered to your inbox. Follow me on Facebook, Pinterest, Twitter, and Instagram for all my latest updates.


I am very disappointed that I couldn’t download this cute reindeer. My two great nephews would have been ecstatic to receive them for Christmas.
Hi Amy, I just love your tutorial for the stick reindeer! Could you please help me understand how to put it together. It seems very confusing to me and I can not figure it out. I know you said to match the letter in the corners, but I am having great difficulty. If you could make it a little clearer, or show a photo of how the pattern looks after it is put together, that would help.
Thanks so much,
Yvonne