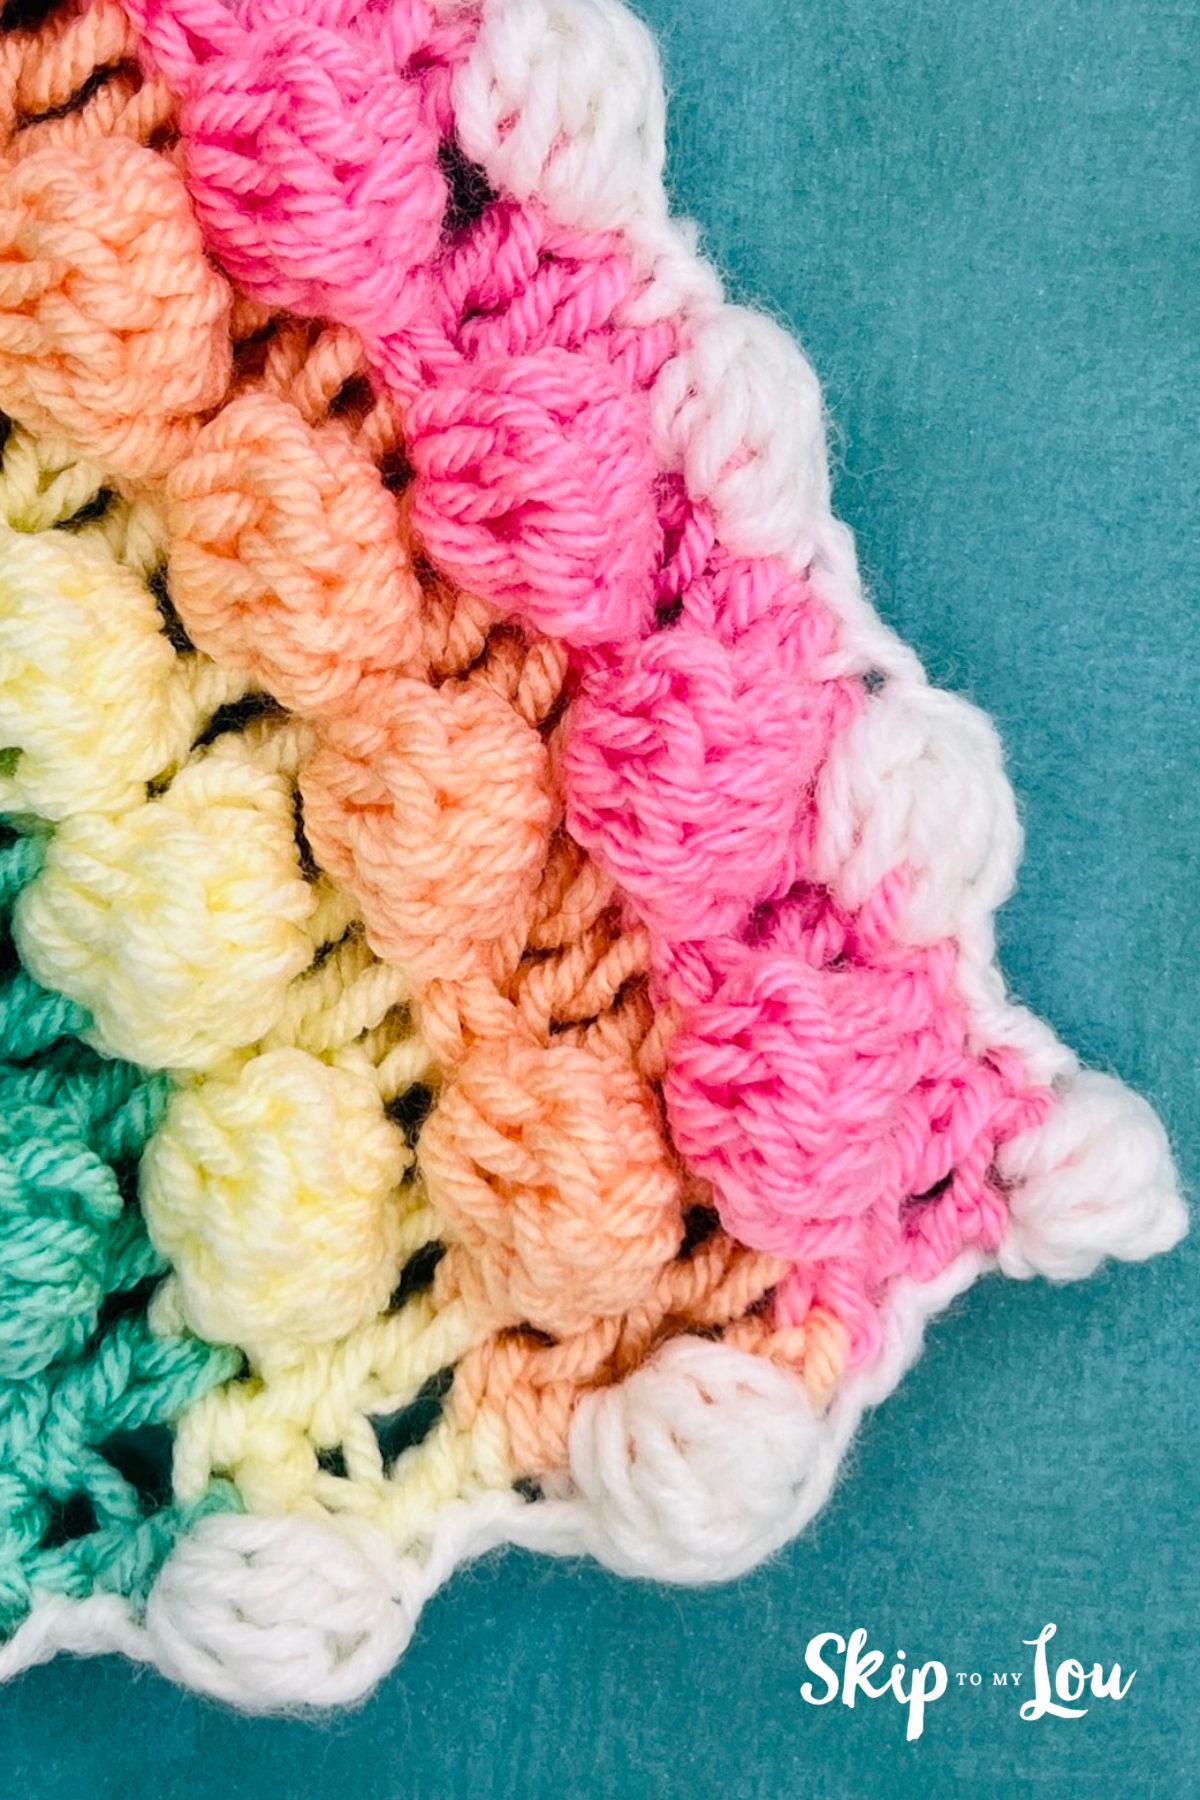
Today, I’m super excited to share with you a fun way to jazz up your creations with a bobble stitch border. Whether you’re working on a baby blanket, a scarf, or a square blanket, this bobble stitch border is a great way to take your project to the next level.
This tutorial is perfect for beginners and seasoned pros alike. All you need is your favorite crochet hook, some yarn in different colors, and a little bit of patience.
So grab your crochet hook and let’s get started!
Related: How To Crochet Bobble stitches
Materials Needed:
- Crochet hook (Here’s a guide to pick the right mm crochet hook size)
- Yarn (choose your favorite color and worsted weight yarn based on what you plan to create)
- Scissors to snip your yarn when finished
- Darning needle to finish off your ends
Abbreviations:
- Ch = Chain
- DC= Double Crochet
- St = Stitch
- Sl St = Slip Stitch
Special Stitch:
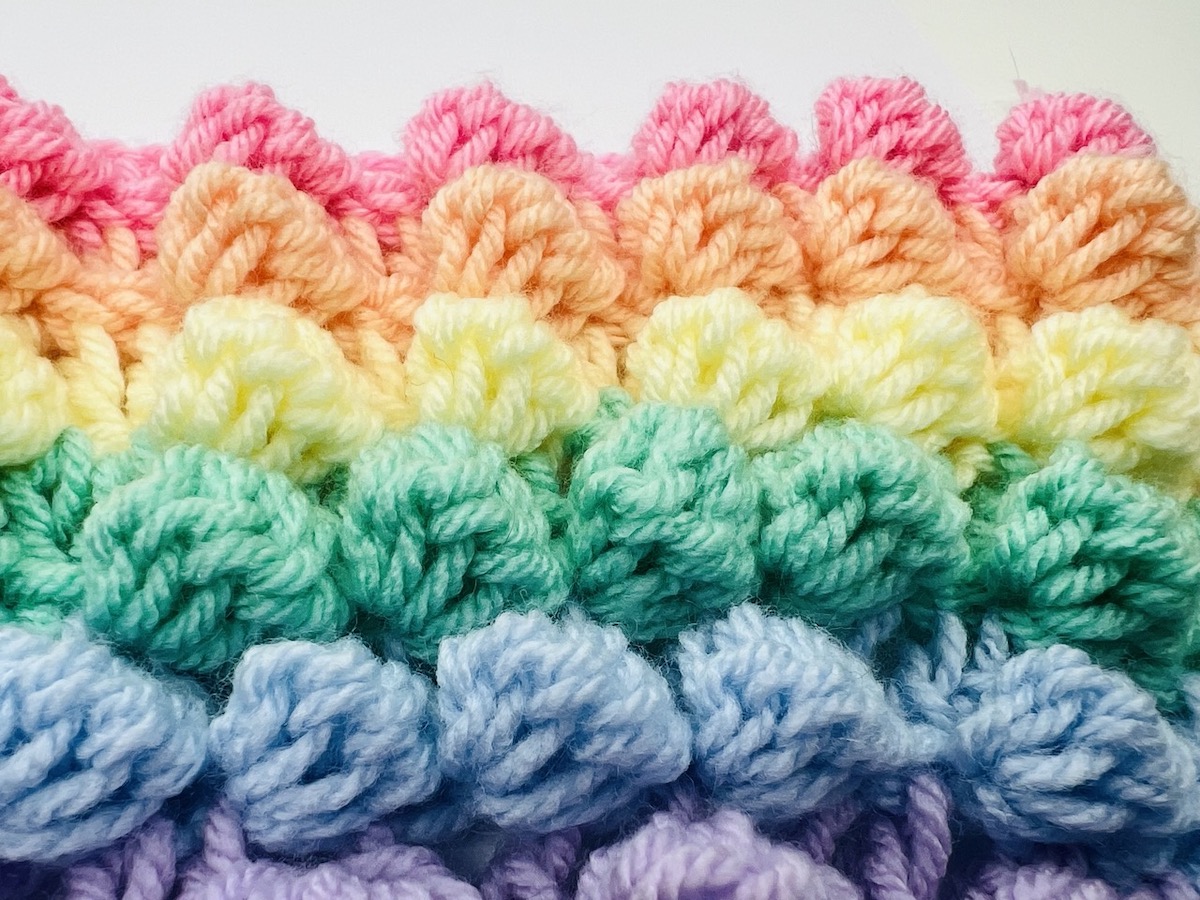
- The bobble stitch is DC5TG= Double Crochet 5 Together: Yarn over hook, insert hook into stitch. Yarn over pull up a loop. Yarn over pull through two loops.
- (with 2 loops still on hook) Yarn over insert hook into the same stitch. Yarn over pull up a loop. Yarn over pull through two loops.
- (with 3 loops still on hook) Yarn over insert hook into the same stitch. Yarn over pull up a loop. Yarn over pull through two loops.
- (with 4 loops still on hook) Yarn over insert hook into the same stitch. Yarn over pull up a loop. Yarn over pull through two loops.
- (with 5 loops still on hook) Yarn over insert hook into the same stitch. Yarn over pull up a loop. Yarn over pull through two loops.
- (with 6 loops still on hook) Yarn over and pull through all 6 loops.
Chain 3.
- Bobble: Working into the first Ch you made- bobble st all into the same Ch.
- Sl st into the next st.
- It is up to you how close you want your bobbles to be on your project. For mine, I spaced them out 5 stitches apart.
- Sl St into the next amount of stitches, you want to space your bobbles.
- Repeat around your project.
- When coming to a corner, the only thing you might need to change is the stitch count you Sl St between bobbles.
- Be sure to create a Bobble in the very corner, and add or subtract sl st between bobbles to make it work.
- Tie off, and weave in any loose ends.
Now that you know how to make this cute crochet border pattern, you’re ready to give new projects a try! I hope this was useful for you and you make beautiful pieces. Happy crocheting!
This post contains affiliate links.
My Favorite Crochet Tools
If you need a tote to pack your crochet projects and for on-the-go work, this tote is a stylish way to keep everything you need at your fingertips!
My MOST FAVORITE tool is these portable scissors. They make it through security and fit perfectly in a hook case.
A️ yarn bowl is a beautiful way to wrangle yarn while crocheting
Keep organized with this crochet hooks kit with a case. This 85-piece kit has over 2,500 ⭐️⭐️⭐️⭐️⭐️ five-star reviews.
Crochet Stitch Dictionary: 200 Essential Stitches with Step-by-Step Photos is the most helpful resource to keep handy!
Easy Crochet Projects For You:
- Easy Treble Crochet Tutorial
- Crochet Stitches
- How to Make a Single Crochet Stitch
- 3 Steps to Do a Double Crochet
- Crochet Scrunchie
I would love to keep you fully stocked with creative ideas, yummy recipes, fun crafts, and loads of free printables. Subscribe to Skip to my Lou to get new ideas delivered to your inbox. Follow me on Facebook, Pinterest, Twitter, and Instagram for all my latest updates.