Let’s build our basic crochet stitches repertoire a little more with the bobble stitch and keep that muscle memory strong. The bobble stitch looks difficult, much like the cluster stitches we’ve worked, but don’t worry, it’s actually a pretty easy crochet stitch! The best part is that we’ll work them together in this tutorial.
Whether you’re a beginner or a more advanced crocheter, the classic bobble stitch will be a great stitch to show off how pretty different projects are. So, grab your yarn and your corresponding mm hook, and let’s get started!
Bobble stitches are a great way to turn out beautiful baby blankets, pillows, and throws. Adding 3D features like the 5-dc bobble stitch provides an extra dimension to ordinarily flat crocheted items. If you want to stitch other beautiful gathered stitches, I’ll share some tutorials at the end of this post.
Now, let’s start our photo tutorial for creating the cutest little stitch, the bobble stitch. It all starts with our foundation chain.
How To Make a Bobble Crochet Stitch: Step-By-Step Instructions
Materials Needed:
-Crochet hook (Here’s a guide to pick the right mm crochet hook size here)
-Yarn (choose your favorite color and worsted weight yarn based on what you plan to create)
-Scissors to snip your yarn when finished
-Darning needle to finish off your ends
Steps:
Step 1: Foundation Chain & Double Crochet Row 1
Crochet bobbles need a foundation chain in multiples of 4 + 3( for turning and height). The number of stitches I used for this sample was 20 stitches +3. To start the first stitch, insert hook in a slip stitch(sl st) to crochet a starting chain. Start here if you need help understanding how to create foundation chain(labeled as ch ongoing) stitches. Insert the hook into the fourth stitch from the hook and do a double crochet(will be further labeled as dc. Get the dc stitches instructions here.) Then place another dc in every stitch until the end.
Step 2: Bobble Row 2
Chain 1 and turn, placing a single crochet(sc) in the same stitch and the next two stitches for a total of three sc stitches. In the next stitch, you’ll do the bobble stitch(will be labeled bbl going forward).

The Bobble
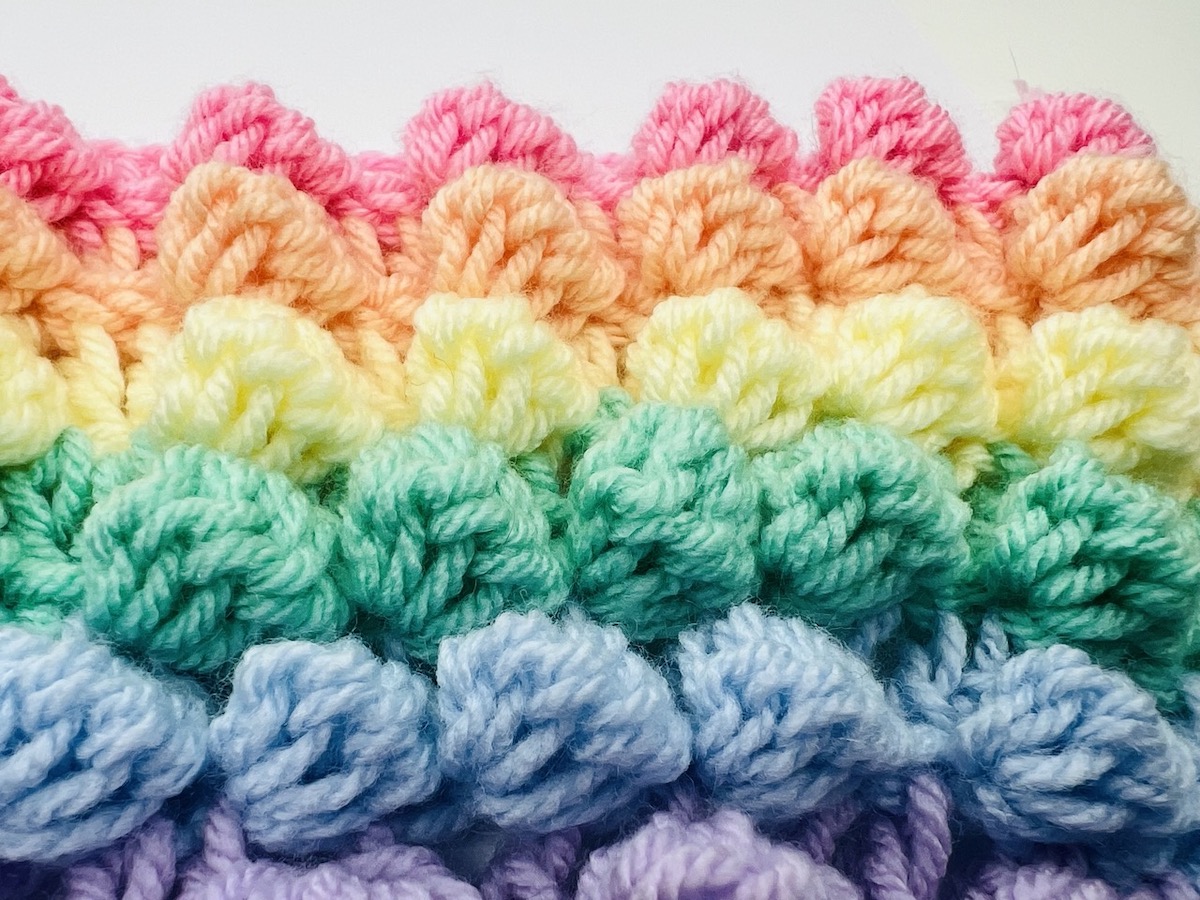
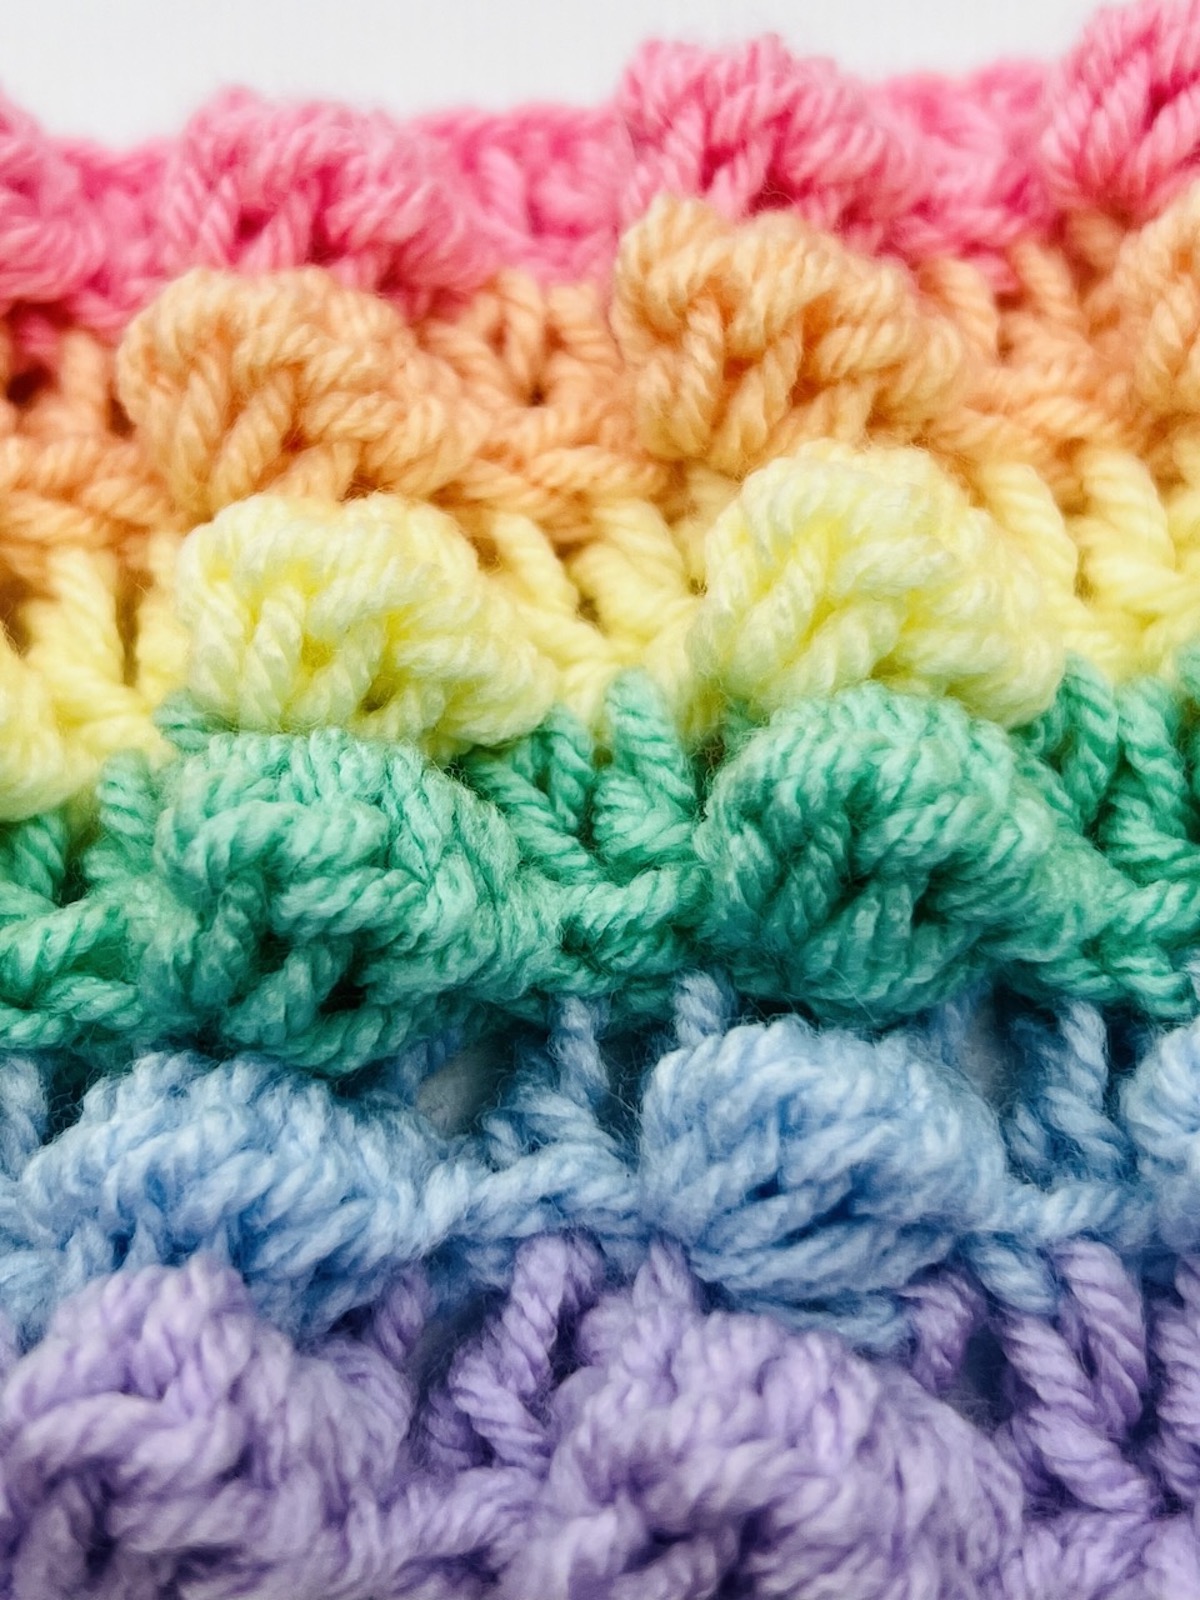
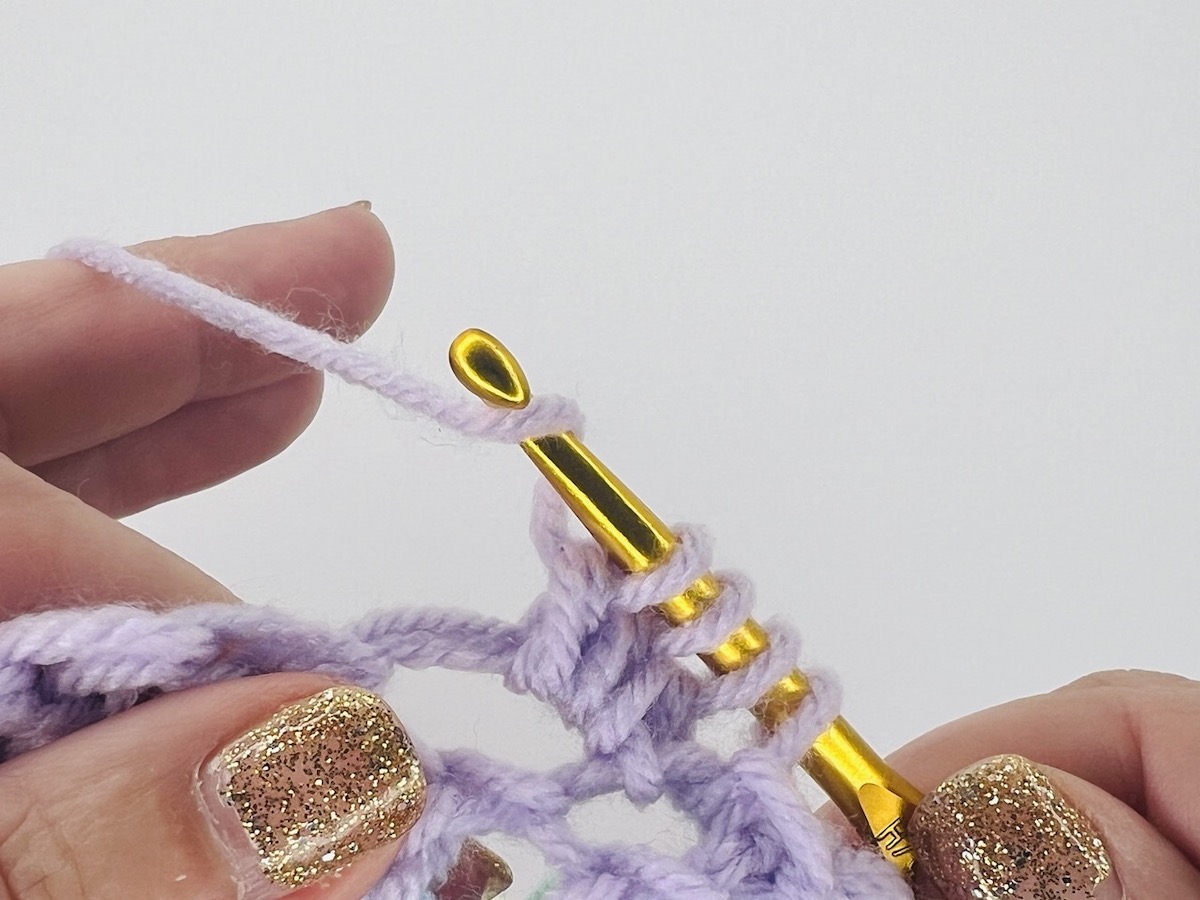
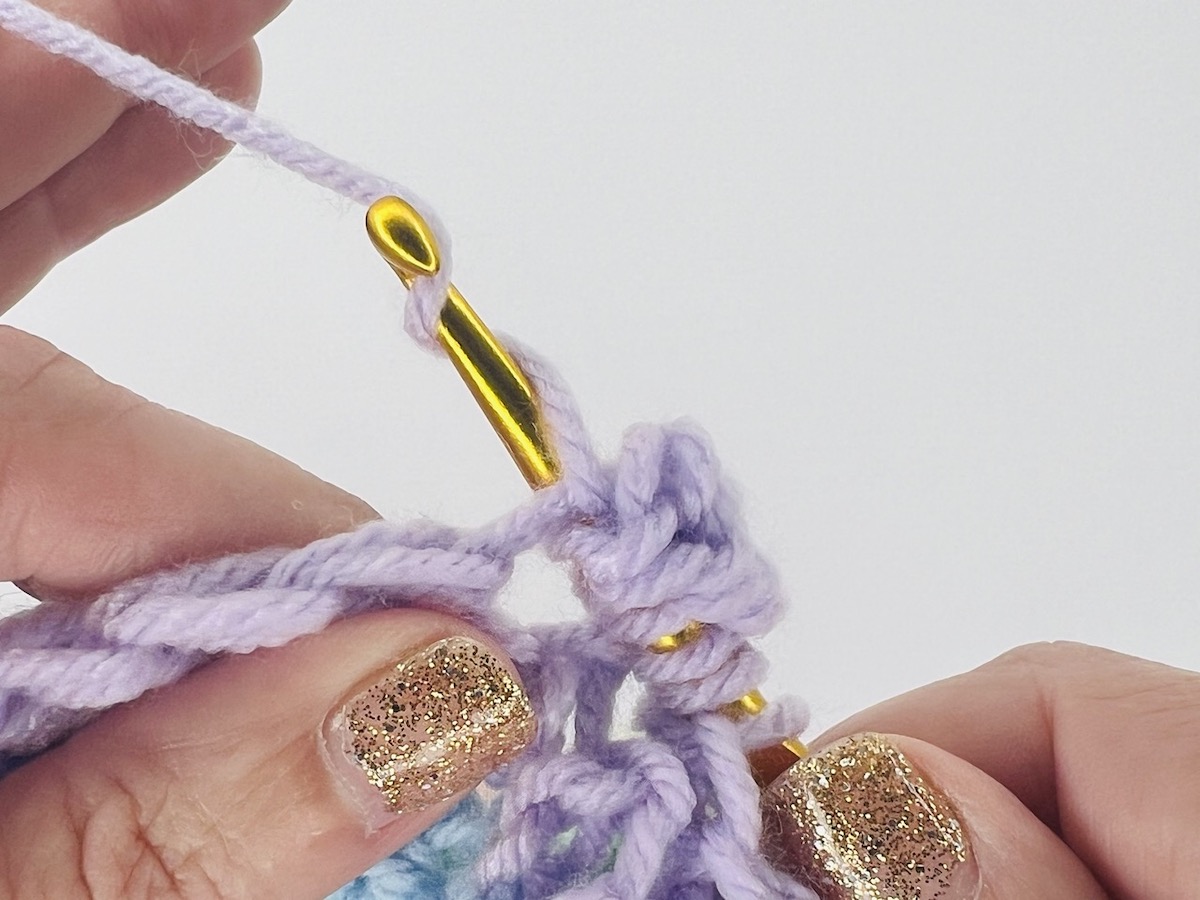
The bbl stitch is 5 dcs partially worked in the same stitch. These are incomplete double crochets attached at the top and bottom of the stitch to create a bobble at the back of your work. To begin, yarn over and insert your hook in the stitch beside the last sc. Yarn over and pull up a loop as you pull back through to the front. Yarn over and pull through two loops. You should have two loops on your hook. Repeat this process until you have 6 loops on your hook. Yarn over and pull through all 6 remaining loops, ch 1 to lock your stitch.
Single crochet in the next three stitches and continue the same way until ending on scs in the last two stitches. Ch 2 or 3 if you tend to have tighter stitches like me (does not count as a stitch) and turn your work.
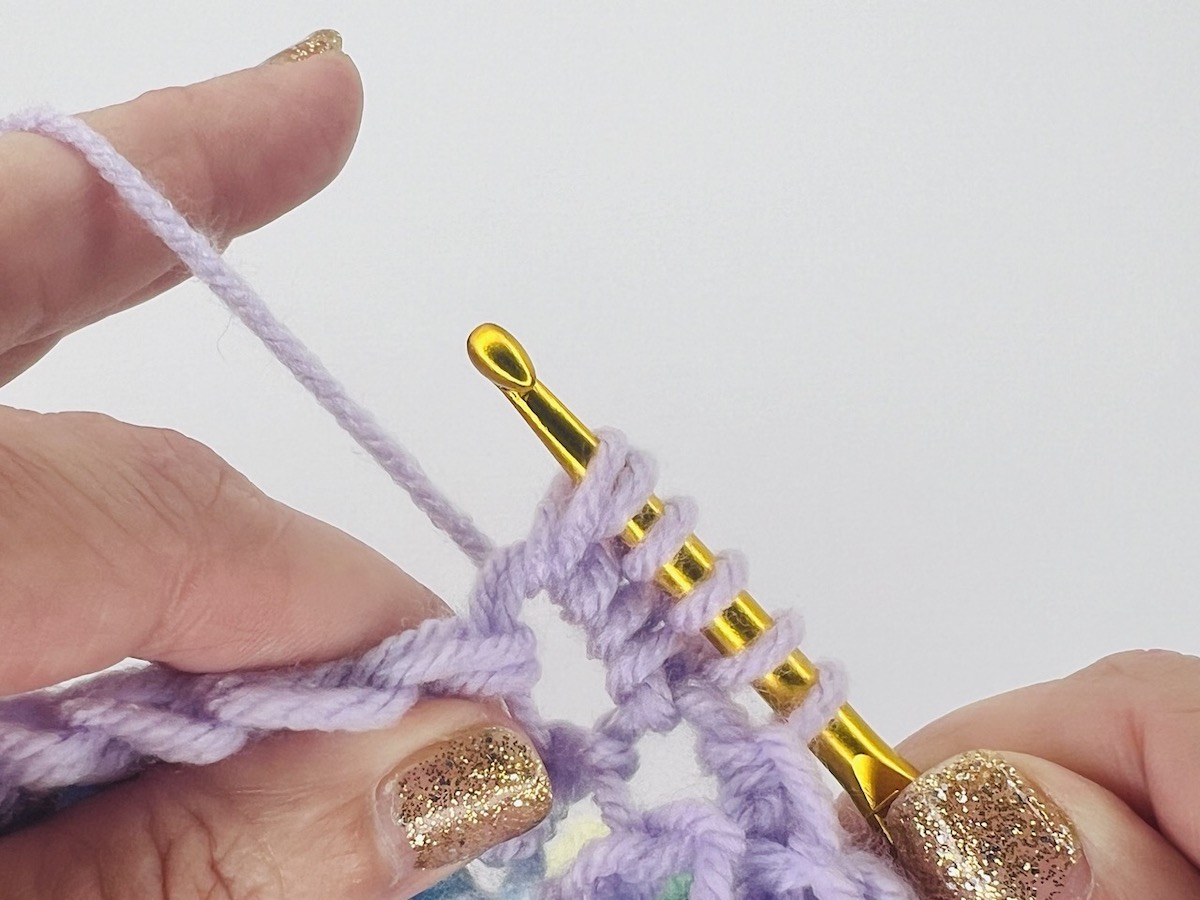
Step 3: DC Row 3
This row is essentially used for dividing so the bobbles will pop and stand out and also for keeping the bobbles all on the wrong side of the work.
After turning your work, start your dc in the same stitch(st) and do a dc in each stitch across until you reach the end, ch 1, and turn.
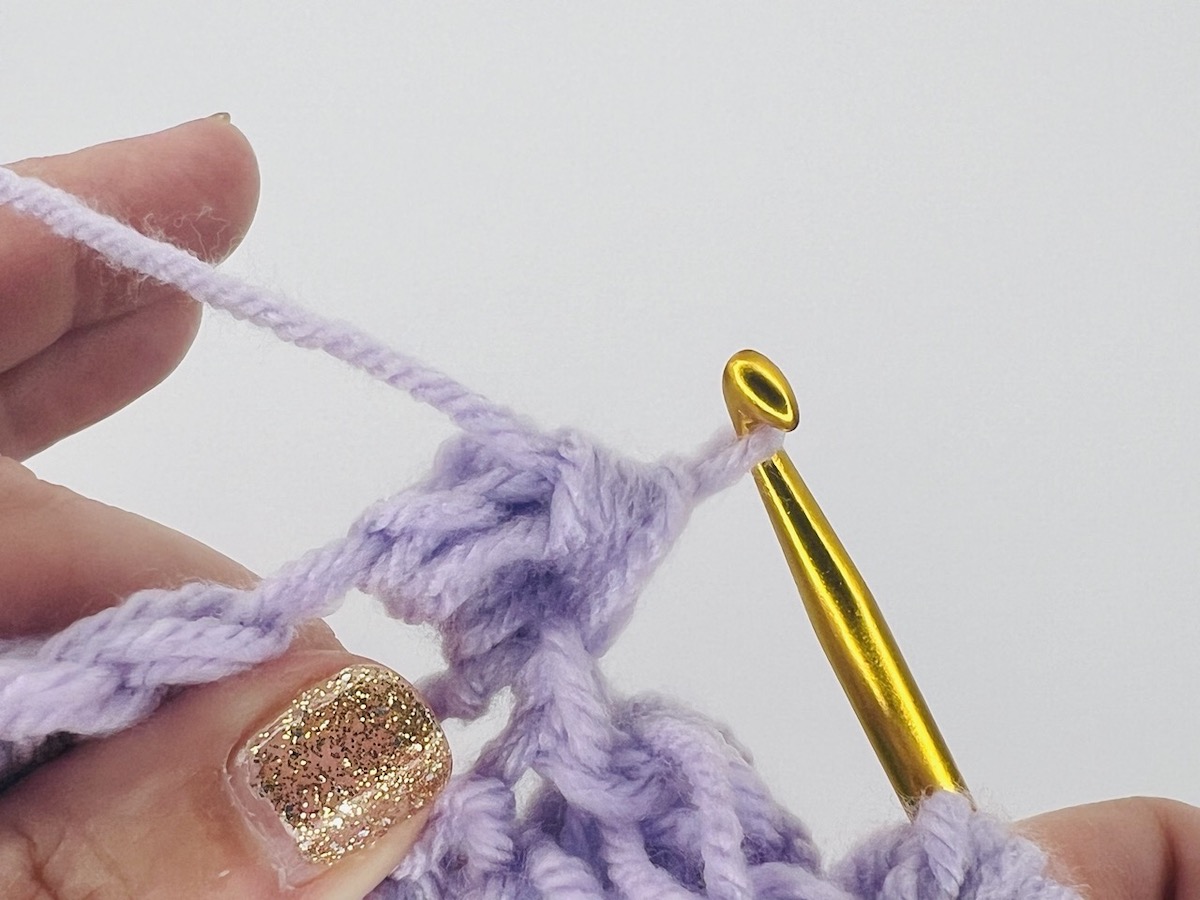
Step 4: Bobble Row 4
Begin row 4 by placing a sc in the stitch you’re in and sc in the next 3 stitches. Do a bbl stitch in the next, then for 3 stitches do a sc, then a bbl st and work in the same manner to end on a sc in the last 4 stitches, ch 3 then turn for your next row. The shorter stitch of the single crochets placed in between are for tightening the bobbles to provide lots of texture.
Step 5: Row 5 Repeat Row of DC
Start the row with a dc in the 1st st and each stitch across.
Step 6: Repeat Steps 2-5
To complete your project and make the gorgeous bbl pattern, repeat steps 2-5 until you reach your desired size.
On your final yarn stitch, end your project ch 1 and cut your yarn, making sure to leave a tail long enough to weave in. Pull the tail through the ch stitch and pull tight, then weave in the end(s).
Crochet stitches, like the beautiful bobble stitch, give you the ability to create more advanced projects in the future. You can play around with different techniques using the bbl stitch, yarn colors, and crochet patterns to create your own unique design pieces.
This post contains affiliate links.
My Favorite Crochet Tools
If you need a tote to pack your crochet projects and for on-the-go work, this tote is a stylish way to keep everything you need at your fingertips!
My MOST FAVORITE tool is these portable scissors. They make it through security and fit perfectly in a hook case.
A️ yarn bowl is a beautiful way to wrangle yarn while crocheting
Keep organized with this crochet hooks kit with a case. This 85-piece kit has over 2,500 ⭐️⭐️⭐️⭐️⭐️ five-star reviews.
Crochet Stitch Dictionary: 200 Essential Stitches with Step-by-Step Photos is the most helpful resource to keep handy!
Easy Crochet Projects For You:
- Easy Treble Crochet Tutorial
- Crochet Stitches
- How to Make a Single Crochet Stitch
- 3 Steps to Do a Double Crochet
- Crochet Scrunchie
I would love to keep you fully stocked with creative ideas, yummy recipes, fun crafts, and loads of free printables. Subscribe to Skip to my Lou to get new ideas delivered to your inbox. Follow me on Facebook, Pinterest, Twitter, and Instagram for all my latest updates.