
Today we have the wonderful art teacher Gail, from That Artist Woman, sharing an easy way to do batik with kids.
Gail writes…

During the school year I needed to find a kid friendly batik idea. I had done wax batik with kids before but it can be a bit difficult using hot wax. It also is not much fun having to iron away the wax with lots of newspaper. I had heard about glue batik with white glue but the results were disappointing. I stumbled on this blue glue idea and I LOVE IT!!!
It is now the talk of the school because it is so user friendly. So lets get started:

You need this type of glue..Elmer’s Galactic Glue. They also sell a non glitter version which I think will work as well just make sure it is the washable blue gel. I got mine at Michael’s but I know they also carry it at Wal-mart. The Elmer’s Washable School Gel Glue (it’s still blue) and it works even better, finer nozzle, easier to squeeze, washes out faster.
I used 5 bottles for 24 kids and we were able to do 3 projects with it.


I cut my fabric to size and I have a layer of wax paper underneath. Draw your image straight on to your fabric with your glue bottle. For the butterfly I lightly penciled in my design first. The pencil marks come off in the wash stage.


When finished let dry completely about 12 hours.

Now you get to add color. Instead of using fabric dye which could wash out the glue prematurely I use watered down acrylic craft paint. You can almost achieve a watercolor like effect with it. I don’t use fabric paint because it costs more and it only has a bit of softener in it. This works better.


Having fun painting (Jeff age 5).
Make sure you use an art shirt to protect your clothes.

When finished painting let dry completely. Depending on the weight of your fabric this might take a few hours.

When dry you need to soak your fabric in a warm (almost hot) water bath. Depending on the fabric’s weight this soak can be anywhere from 10 minutes to 1/2 an hour, (heavier fabrics take longer). I use the bathtub because it works best for a large number of pieces. Don’t worry about the paint coming off you will only get a few flakes of dried color in the water.
To help it along you can also scrub it a bit with a nailbrush.
When the glue is all off the fabric wring out your piece and dry. I use the dryer because I’m impatient and with 24 pieces I wanted it done.


Sew up into your finished project. In this case Jeff wanted a pillow for his room.

This is one of the projects I did with the school for Father’s Day, homemade windsocks. I used very light fabric (polyester lining material) for this one.
We also did a name sign out of heavy canvas for all the kids.
Here is a pillowcase we made for Earth Day.
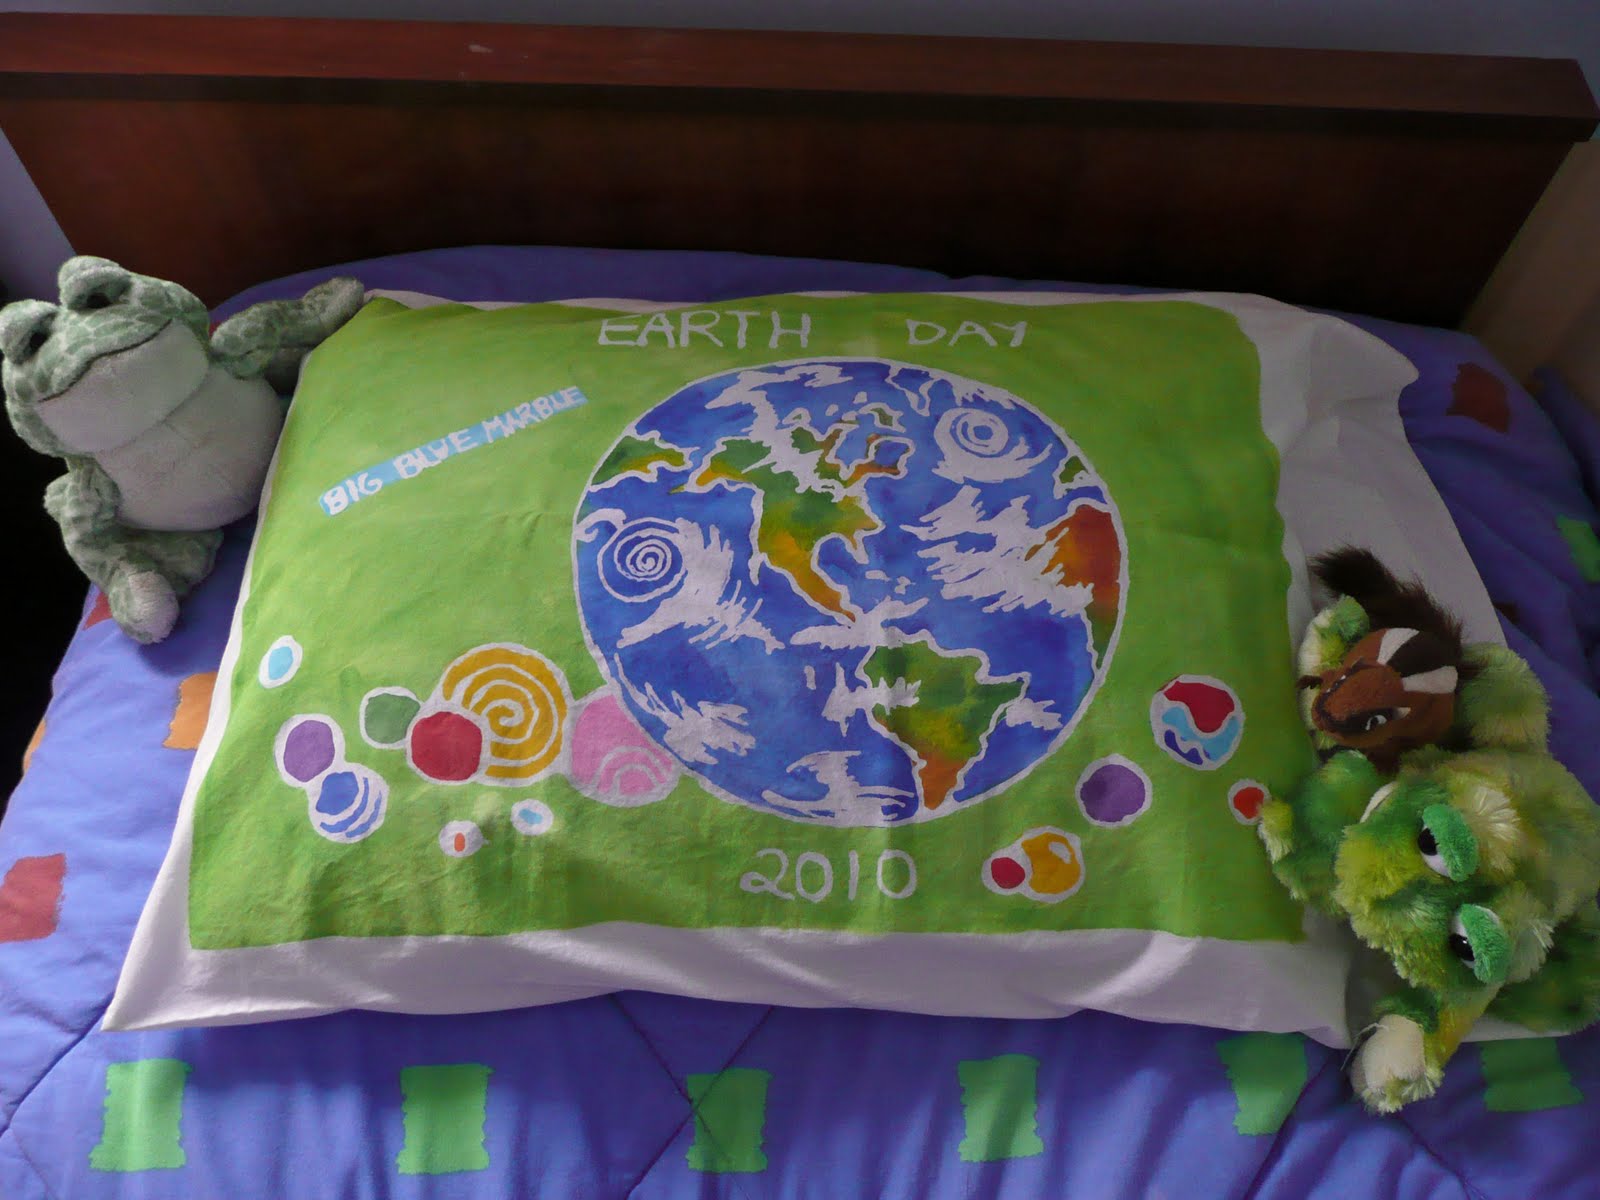
In all cases the blue glue batik worked terrific!! Give it a try the possibilities are endless. You could make flags, banners,tote bags,custom shirts or just a nice wall hanging.
For more art projects visit That Artist Woman!
To see all the projects for Craft Camp go here.


Thanks for a great idea. I helped my 4yo make a very cool batik for Father’s Day. We used fabric paint because I already had some on hand and that worked great too.
What a great idea! I will have to try this with my kids and nieces soon. One question though:
Is this machine washable when done? I’ve never washed fabrics with acrylic paint on it before.
We tried this over the weekend and it worked pretty well. The big problem I had was that I told the kids to draw their image with pencil because I thought the marks would come out later and the pencil didn’t come out! I think I will have to scrub it tonight. The glue works great, though and the ones without pencil look amazing!
This is a great project for kids, and even for adults! What a wonderful discovery! I’m sure it is a lot of fun to make!
Woe, that Earth Day pillow is very cool! Thanks for sharing the technique.
Fantastic, I’m adding this to our homeschool art class line-up. Thanks!
Excellent! Thanks for the how-to!
Wow! I love this idea and can’t wait to try it with my twins! They will love this!
This is so much fun! I can’t wait to try this with my crafty little girls. 🙂
I love this project. I used the same technique on a flour sack towel and it worked great! So many possibilities.
We will have to try this right away. We’ve tried a few “batik” art projects and they have never worked out quite right. Thanks for the tips!
Wow! This is amazing! A great alternative to the old hot wax and Rit Dye method. Such cute pillows from talented kids – love this idea!
i already had her site and these instructions bookmarked. I’m thinking this fall with my GS troop we will do this. Atleast with the older girls if not the whole troop.
What a fabulous, fun project – can’t wait to try it this summer!
Love this idea! Can’t believe how simple (and cheap). I am definitely going to do a few “batik” projects this summer with my kids.