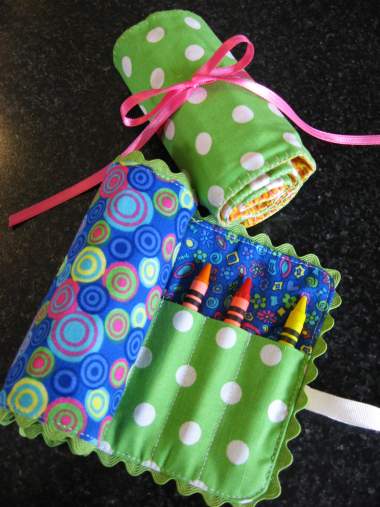
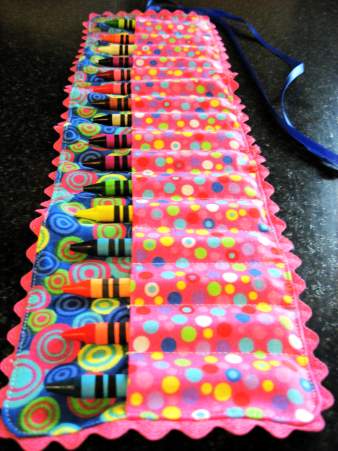
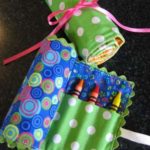
Every parent needs a stash of crayons to help a little one stay busy. This crayon roll is a fun way to keep track of crayons and have them readily accessible. I’ve included easy-to-follow instructions to make this DIY craft super simple, and it is cute enough to give as a gift!
RELATED: These fabric roll organizers work great to hold other things too. Make the pockets more narrow on the make-up brush holder to hold colored pencils or markers.
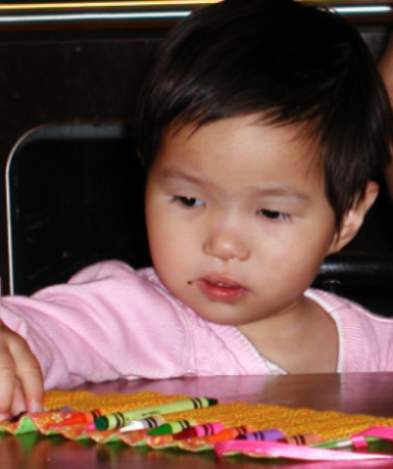
To welcome my new niece home from China on Sunday, I whipped up a crayon roll. I wasn’t able to give it to her in person but my mom said she was mesmerized by all of the crayons and how they slip into their own pocket.
Here are the supplies you’ll need
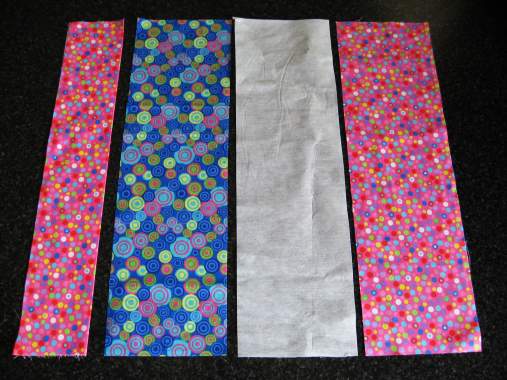
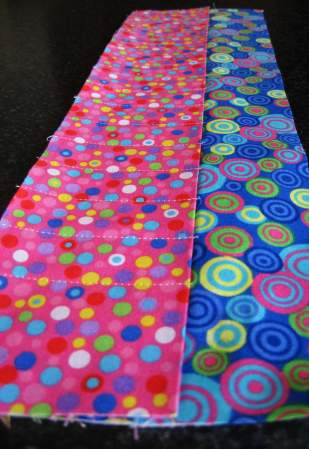
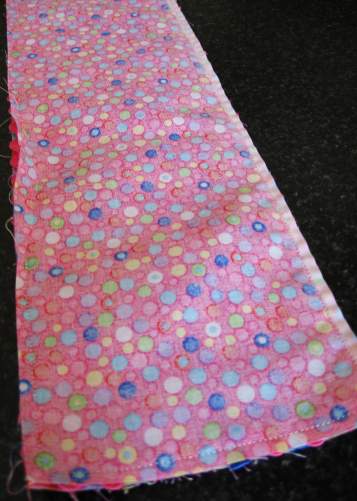
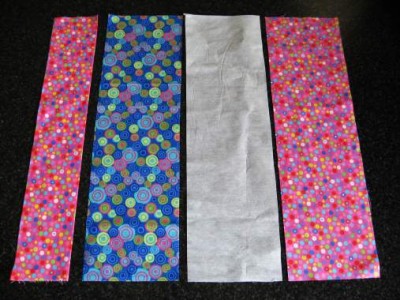
- Two pieces of fabric 5 X 16 1/2 inches (for the outside and inside)
- One 6 X 16 1/2 inch piece of fabric folded in half lengthwise and pressed (for the pocket)
- One piece of lightweight fusible interfacing 5 X 16 1/2 inches
- One package of ric rac trim
- 30 inches of ribbon
- One package of 16-count crayons
TIP: A rotary cutter, ruler and mat make it really easy to cut out these pieces. I love this folding cutting mat that also serves as an ironing board. (affiliate links)
How to Make a Crayon Roll in Five Easy Steps
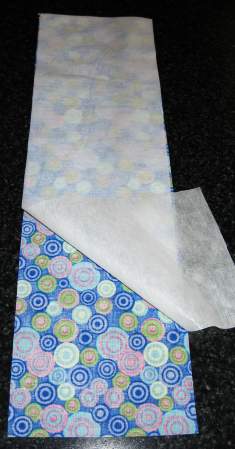
Step One: Iron the interfacing to the wrong side of the 5 X 16 1/2 piece of fabric that you want to be on the inside.
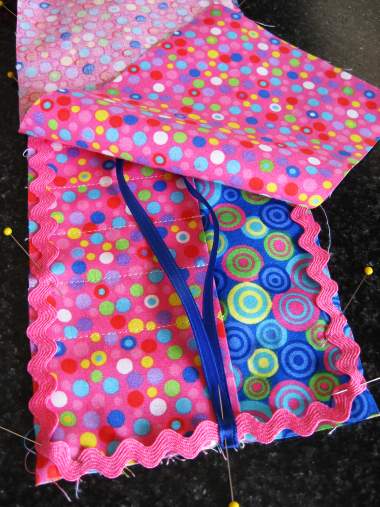
Step Two: Line up the bottom edges of the folded piece and the piece with interfacing and then pin them together. Starting over from the edge 1 1/4 inches sew lines parallel with the edge starting from the top of the crayon pocket, back-stitching at the top to reinforce. Sew the lines one inch apart across the pocket. You will have 1 1/4 inches on each side.
Step Three: If you want to use ric rac, pin it around the edge as shown. Fold the ribbon in half and pin it on the edge.
Note: On the one, I didn’t use ric rac I did a blanket stitch around the edge when finished.

Step Four: Pin the remaining piece of 5 X 16 1/2 inch fabric right sides together with the pocket piece. Sew around edges with 1/4 inch seam. Leave about 3 inches across the bottom for turning.
Step Five: Trim corners, turn, press and topstitch being careful to catch all layers of the opening to close.
Welcome home Faith! We are so happy to have you join our family! How very lucky we are indeed to have you! Do you have a special child in your life that would love to have a fun way to hold their crayons?
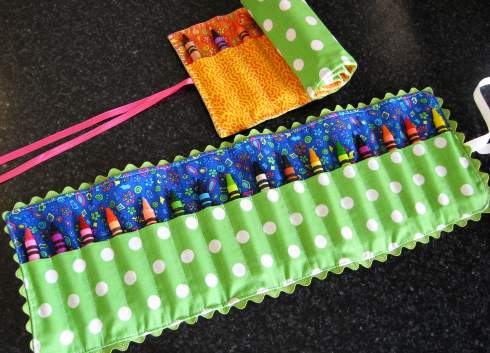
Crayon Roll Variations To Try
Looking for a simpler version? Try this felt holder. It has a lot less sewing and whips up even quicker!

Check out this new closure for the fabric roll

More fun crayon crafts
I think that you like these additional crafts. Your kids will love using up their broken crayons to make fun new shapes, and the felt turkey holder and egg holder is perfect for your holiday kid’s table!
I would love to keep you fully stocked with creative ideas, yummy recipes, fun crafts, and loads of free printables. Subscribe to Skip to my Lou to get new ideas delivered to your inbox. Follow me on Facebook, Pinterest, Twitter, and Instagram for all my latest updates.
How to Make a Crayon Roll Crayon Holder
Equipment
- Pair of Scissors
- Iron
Ingredients
- Two pieces of fabric 5 X 16 1/2 inches for the outside and inside
- One 6 X 16 1/2 inch piece of fabric folded in half lengthwise and pressed for the pocket
- One piece of lightweight fusible interfacing 5 X 16 1/2 inches
- One package of ric rac trim
- 30 inches of ribbon
- One package of 16 count crayons
Instructions
- Iron the interfacing to the wrong side of the 5 X 16 1/2 piece of fabric that you want to be on the inside.

- Line up the bottom edges of the folded piece and the piece with interfacing and then pin together. Starting over from the edge 1 1/4 inches sew lines parallel with the edge starting from the top of the crayon pocket, back-stitching at the top to reinforce. Sew the lines one inch apart across the pocket. You will have 1 1/4 inches on each side.

- If you want to use ric rac, pin it around the edge as shown. Fold the ribbon in half and pin it on the edge. Note: On the one, I didn't use ric rac I did a blanket stitch around the edge when finished.

- Pin the remaining piece of 5 X 16 1/2 inch fabric right sides together with the pocket piece. Sew around edges with 1/4 inch seam. Leave about 3 inches across the bottom for turning.

- Trim corners, turn, press and topstitch being careful to catch all layers of the opening to close

- TIP: A rotary cutter, ruler and mat make it really easy to cut out these pieces. I love this folding cutting mat that also serves as an ironing board. (affiliate links)


Thanks for the tutorial. These are so cute. I posted some on my blog that I just made!
WOw I love this but I ran out of ink to print so I pt in my favorties for later to print
here is my shop take alook
http://www.kraftykrew.etsy.com
http:/www.kraftykrew.blogspot.com
http://www.flickr.com/photos/kraftykrew.com
I made this today too. It is TOO cute and too easy. Thank you SO much for bringing us such cute, easy ideas! I can’t wait to make one for every little one I know. 🙂
Thanks for posting this! I have used this tut a while ago, and will use it again today as a refresher. I will post pictures in my blog and send you a link for show and tell.
Thanks again!
Thanks for posting this! I don’t really have a use for a CRAYON roll, but I’m going on a very long bike trip next summer and so I plan to make a roll similar to this one for my tools! It should be perfect to strap to a rear rack and not be too bulky… thank you!
how cute is this!! Tried to make one tonight and learned alot! Like I’m very out of practice when it comes to sewing! Oh don’t use ric rac with a design on only ONE side and if your ribbon has a print put the desing facing IN!!
Other than that it’s adorable and I’m going to perfect it and make 20 something more for my sons head start class as Christmas gifts!
Love your site too! I’m so glad I stumbled across it. Lots of cute thing I’m dying to try out.
This is most adorable crayon/pencil roll I’ve ever seen! Thank you so much for sharing your pattern. I’m making at least three of them for Christmas! 🙂
I adapted the size & material for making great little makeup brush rolls. The ones I have made so far were in brocade with polyester satin piping & ribbon ties. I used coordinating lycra spandex material for the holder strip as the it ensured a snug fit so pricy brushes don’t slip out when the case is unrolled.
What a wonderful craft! I love this idea. These would make great gifts for Christmas. Thank you so much for sharing the information and directions.
That’s adorable! I am going to try this at Girl scouts with my girls. thnxs for sharing
Hey! Thanks for the fantastic tutorial! I did a review of it at patternreview.com. This will be a great present for many occasions. I know I will make lots and lots of them. Thanks again!
This was very easy to follow and I am so happy with the result. Thanks for sharing your tutorial. I used the triangular crayons that are less likely to snap and they fit just as well. Great post!
Very nice! I love the colors!
~Susan
Your blog is interesting!
Keep up the good work!
This is awesome! Perfect for my kids’ little fingers. In fact, I think the process of pulling the crayons out and putting them back could keep my daughter entertained for a good 20 minutes!
Be sure to stop by KristinMcLane (dot) com to enter a giveaway for a copy of my book.