This drawstring backpack is what Bella and I have been sewing. It looks like a lot of steps but it really does go together quickly and is an easy kids sewing project. You will find it is easier than you think to make one of those string backpacks with this backpack pattern.

It has some similar techniques as my reversible tote bag tutorial. It is a good beginner sewing project for kids. Sharing the gift of sewing is amazing. Don’t miss the Kids Sewing Series. I have tried to have some fun simple sewing projects to get you started.
Drawstring Backpack Supplies
This little drawstring backpack goes together
- two fat quarters (each measures 18″ X 22″), some
- cording (found mine at Lowe’s) and a
- grommet kit. We used a 7/16″ inch grommet. If you used a smaller cord, a smaller grommet might be needed.


Drawstring Backpack Pattern
Fold each piece of fabric so it measures 11″ X 18″.

Cut along the fold so you have four pieces each measuring 11″ X 18″.

Cut a 3 inch strip off the top of each piece (3″ x 11″).

Cut one inch off each of your 3″ wide pieces (3″ x 10″).

Mix the 3″ X 10″ pieces up! So you have one of each kind. So we have a dot and a flower. Place right sides together.

Sew along one side, across the top, and down the other side — leave the bottom open. Repeat for other piece.

Trim corners.

Turn and press.

Press each piece in half. Make sure to line edges up neatly.

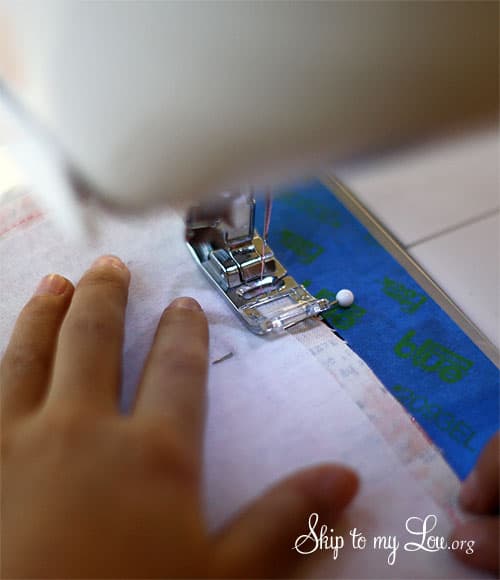
Center one folded piece along the top of each fabric piece. Make sure the folded edge is facing down and top edges match nicely. Machine baste (longest stitch you can make on your sewing machine) along the top to keep it in place.

Place the two pieces of fabric right sides together.

Sew down one side, across the bottom and up the other side. Leave the top completely open.

Place the other two fabric pieces right sides together. Sew down one side, across the bottom LEAVE A 3 INCH OPENING in the bottom middle, then continue sewing along the bottom and up the other side. Leave the top completely open.

Turn the pieces, with the folded piece sewn at the top in, right side out. Slip it inside the other piece. Rights sides will be together.

Sew all the way around the top. This is easiest if your sewing machine has a free arm. Otherwise just go slowly. Make sure edges along the top match.

Turn the whole thing right side through the 3″ opening that was left open at the bottom.

Sew the hole shut and push the lining into the bag.

At each bottom corner measure up 1 inch and over 1 inch and mark.

Cut a hole through all layers of fabric the size of the grommet. Read package directions. I did this part for Bella.

Place large grommet up through the hole.

Place ring on the other side over the grommet.

Place black plastic piece under the large grommet and the tool through to top ring and firmly hammer.

Feed 68 inches of cording through the top pockets. Next, feed another 68 inches of cording through the pocket but go the opposite direction.

Bring the cording through the grommet and tie with a knot. Repeat for the other side.

Tadah! A useful drawstring backpack that is fully lined!
More fun things to sew!
Once you have made your drawstring backpack check out these beginning sewing projects perfect for sewing with kids. We especially love the sewing sheets!
Print and Sew Teddy Bear Sewing Pattern


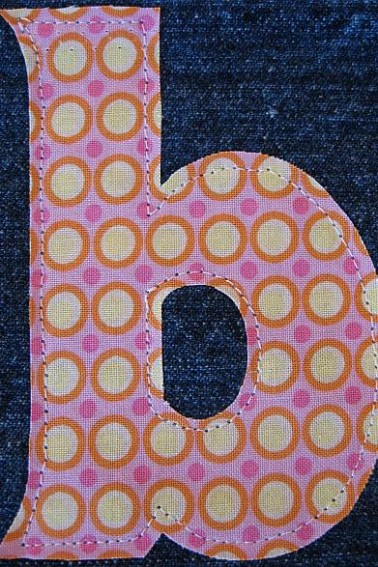
Want to make your sewing project more personal? Try these easy applique monograms with free printable letters.
My Favorite Sewing Tools
I would love to keep you fully stocked with creative ideas, yummy recipes, fun crafts, and loads of free printables. Subscribe to Skip to my Lou to get new ideas delivered to your inbox. Follow me on Facebook, Pinterest, Twitter, and Instagram for all my latest updates.


I love this tutorial!! Thank you for posting it. I made a paw patrol bag for my 5 year old son today, and he loves it. It was so much easier than I thought it was going to be. I can’t wait to make more of these. Definitely bookmarking your website.
Nevermind, I stripped the stitches and found that my machine had an arm. All fixed! Awesome tutorial.
Help! I got to the part where you push all the fabric through the 3″ hole (“Sew the hole shut and push the lining into the bag”), but when I pushed the fabric through, there was nowhere to put the lining as everything was sewn shut. I have read and reread the instructions but I can’t figure out where I’ve gone wrong.
Hi! i was sewing this project but i’m stuck on the part where you attach the lining to the outer part. Please help!
Made one for each of my boys today. They turned out great! Thank you for this tutorial.
Hi! Do you think button holes would work in place of grommets?
This is fantastic, i am going to use this with my textiles class. Thanks for the step by step guide and the pics.
terrific! just finished one and I love it Merci
Just what I was looking for! Love that this backpack is lined, and love the contrast trim cord pockets. Just a couple of questions: What size seam allowance do you use? I made these with a 1/4″ seam allowance, and they came out great, but I didn’t see where the seam allowance is indicated. Also, I was able to figure out that the cord “pockets” should have the contrast fabric facing to the outside when folded and that they need to be attached to the exterior fabric, but it wasn’t immediately clear to me. Did I miss something? The photos were a huge help!
Thank you for the wonderful tutorial! I am grateful that you shared your time and skill.
Thanks heaps…. just what I was looking for… gotta love the internet!
Anjee, Grommets can also be found at fabric stores. The most common brand found there is Dritz.
Hi. Well I wanted to ask that is there any option if I can’t find those grommet nearby where I live?
The such as you examine my head! You seem to realize so much approximately this kind of, such as you wrote the hem ebook from it or something like that. I’m that one could make use of a few percentage to be able to tension the solution household a bit, however as an alternative to which, this can be wonderful website. A fantastic study. I most certainly will undoubtedly come back.
These looks so easy to make and are adorable. I have three girls who would love to make one!
We have been making your lined tote bag since we saw the tutorial 4 years ago. We have made a LOT of them for birthday presents. I was just telling my friend I need to find a pattern for one of those draw sting backpacks that are so popular. Thank you so mush for taking the time to share your knowledge with all of us. I just love your blog.