I like to keep my desk organized, because if I don’t my stationery, and pens and pencils in particular go missing.
Usually, my kids borrow them, but if I have a messy desk, it’s easy for those pens and pencils to get legs and walk away and who knows where they go.
But I found the perfect solution, and it’s going to cost you even a dollar. Today, I am going to show you how to fold your own origami pen holder, perfect for keeping your writing tools right where you need them.
This geometric pen holder can keep a whole bunch of pens and pencils, and if you love to paint, you could even keep your art brushes in it.
It’s a fantastic way to stay organized, and in our busy lives, that’s a good thing. Plus, it’s the perfect Japanese desk decor!

We have a wide range of easy paper crafts and creative activities featuring various paper shapes at Skip to My Lou! These include Fold an Origami Bow Tie in 9 Simple Steps, Folding An Easy Origami Leaf: A Step-by-Step Guide, and Origami Heart Sucker Covers. Be sure to try them out!
Supplies
You will need the following supplies:
- A pair of scissors
- Seven square pieces of colored paper (different colors work best). You can use printable origami paper too, with your own designs already printed on it.
- Glue stick
Video: How To Fold an Origami Paper Pen Holder
Origami Tutorial: How to Fold Your Own Origami Pencil and Pen Holder
This tutorial is perfect for kids and origami beginners to try out. Here is our step-by-step guide. Remember to watch the video if you are unsure of the exact folds to make.
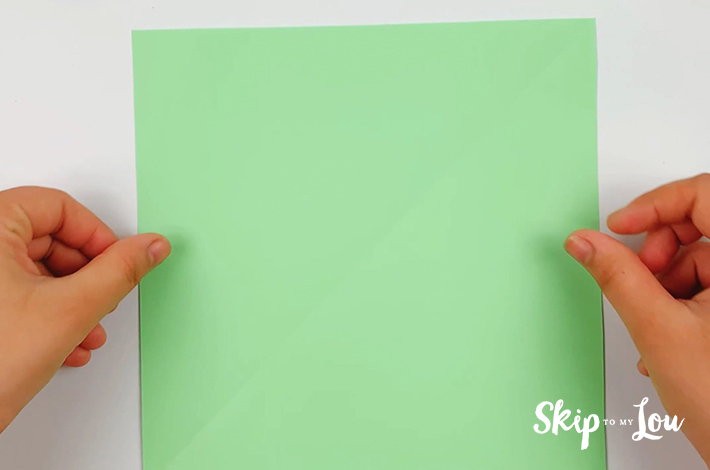
Step 1: You need square pieces of paper to start your paper pen holder. Remember to have a large workspace to fold this origami pen and pencil holder.
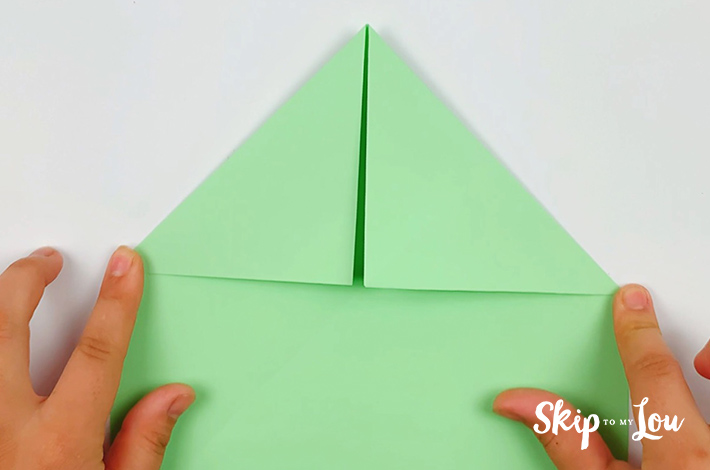
Step 2: Take a piece of paper and start by folding two triangles on the left and right-hand side
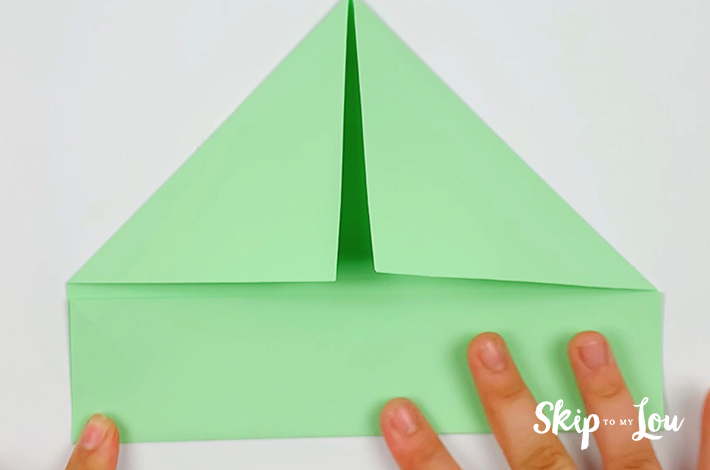
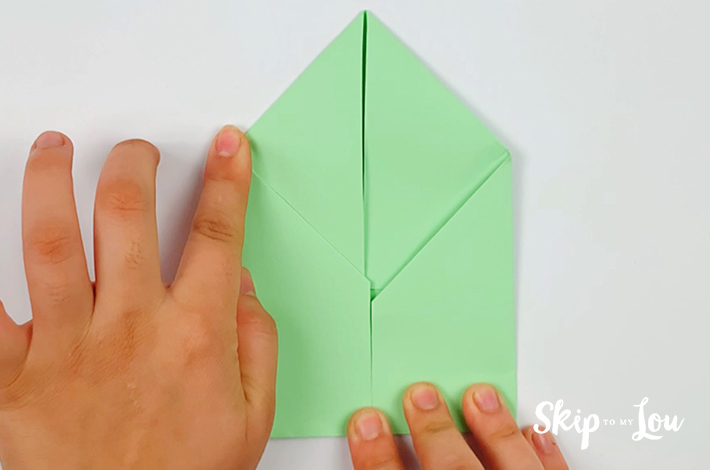
Step 2: Now fold the bottom of the paper upwards to meet the bottom section of the two triangles. You want to leave a little space, however, between the two.
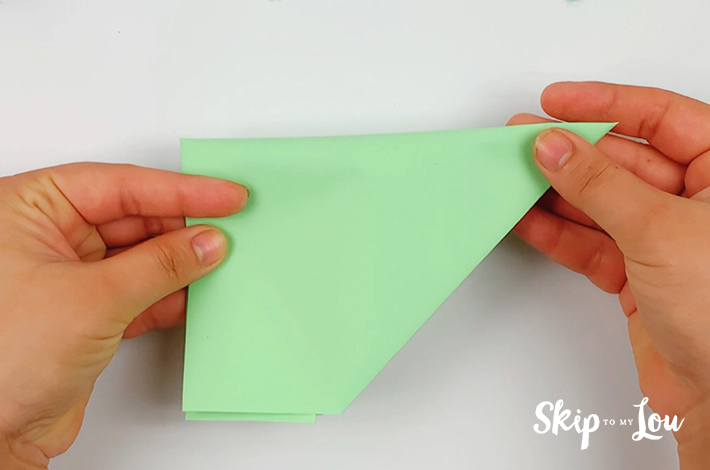
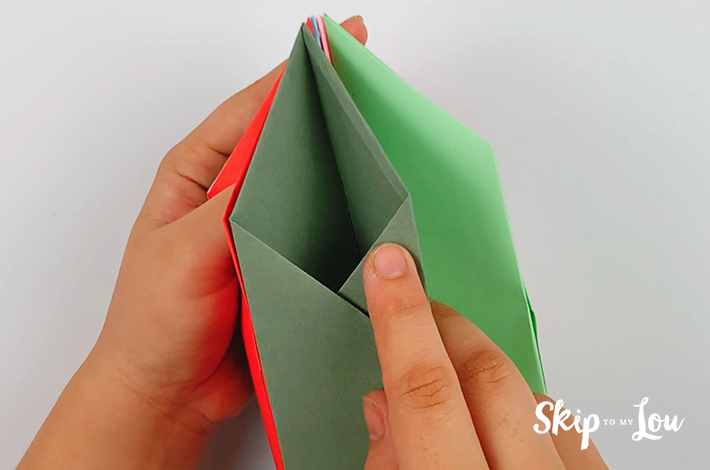
Step 3: Turn the paper on its side and fold it in half.

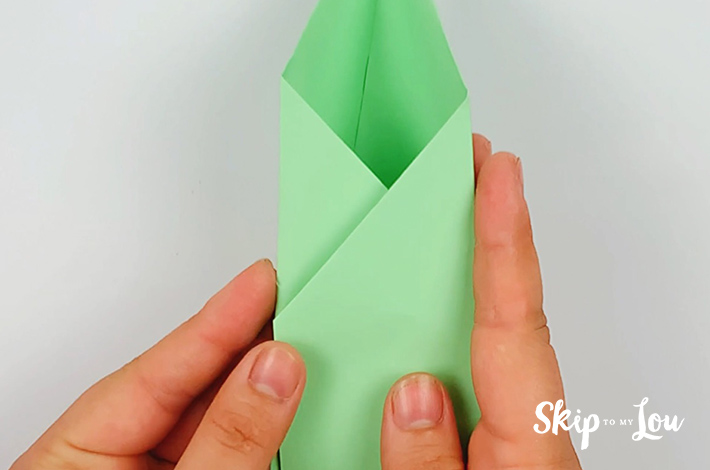
Step 4: Unfold the paper as shown in the image below.

Step 5: Fold the left and right bottom flaps as shown in the image below.
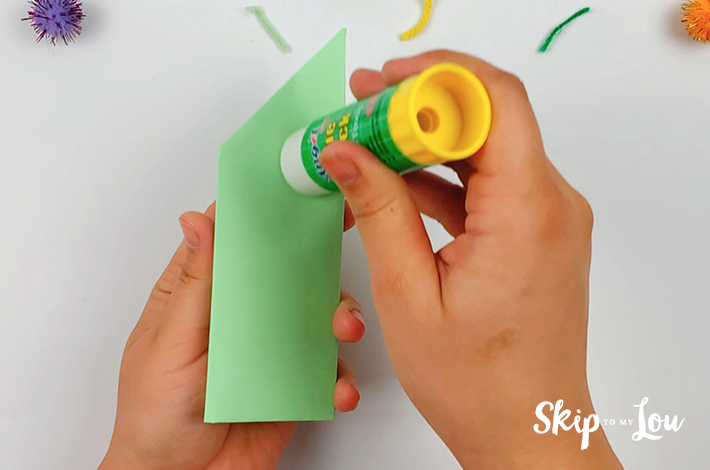
Step 6: Apply some glue and stick together. The flaps should fit into each other and the way to do this is clearly shown in the video.

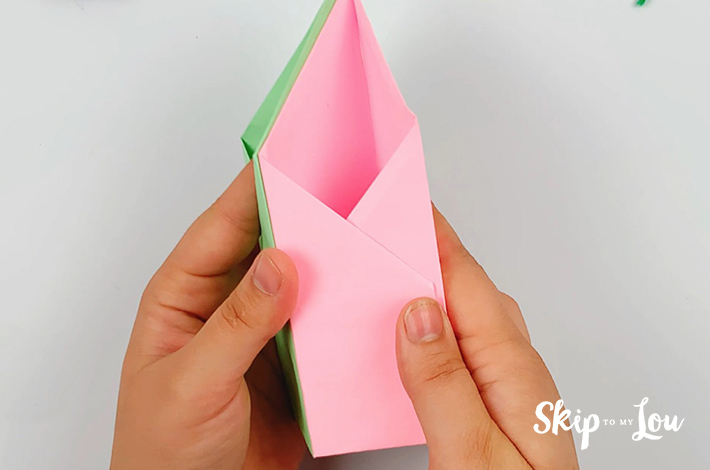
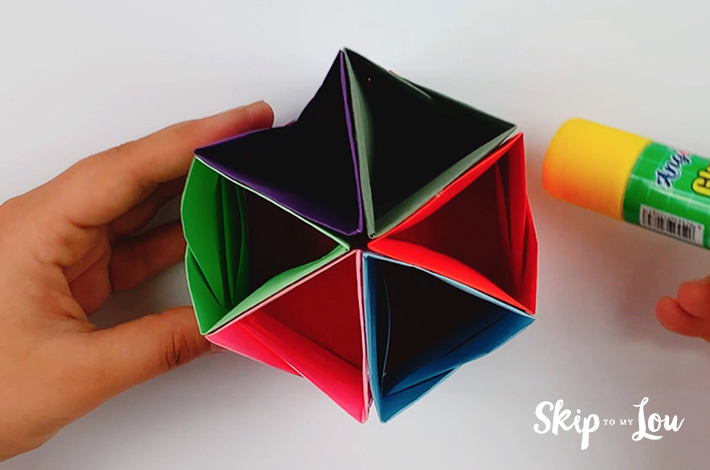
Step 7: You’ve now completed one of six pen holders. Make five more by following the steps above again.
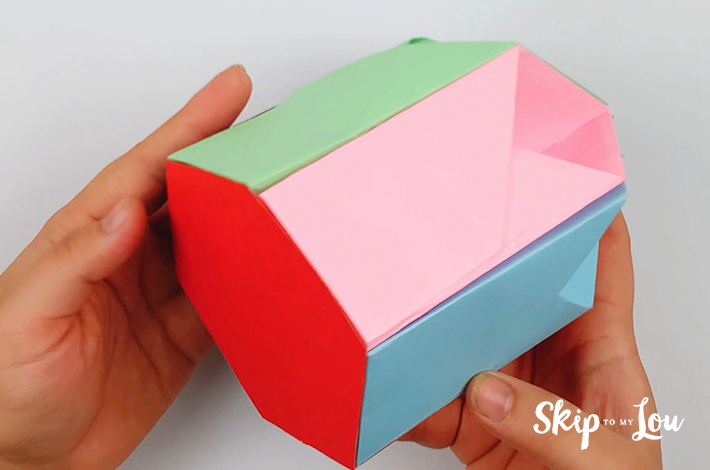
Step 8: Once you have six completed sections, it’s time to glue them all together to form the origami pen holder. Glue one side of each pen holder and stick them together as shown in the images below.
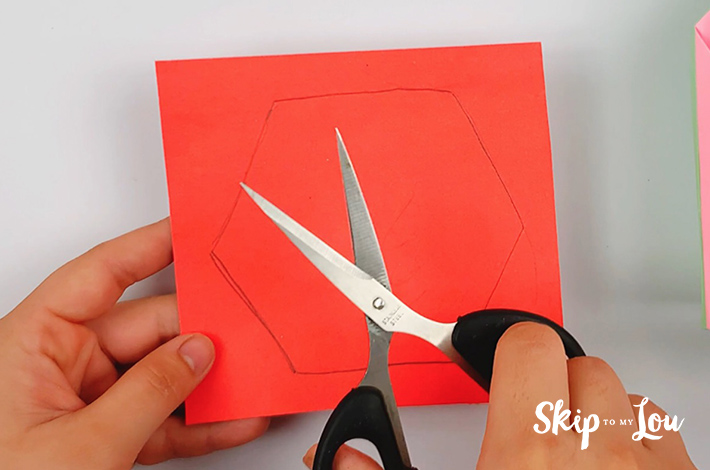
Step 9: It’s time to add some rigidity to your origami paper pen holder. To do this take another square piece of paper, place it on the underside of your glued paper pen holder, and mark out the hexagon shape it forms. Cut the hexagon shape out.
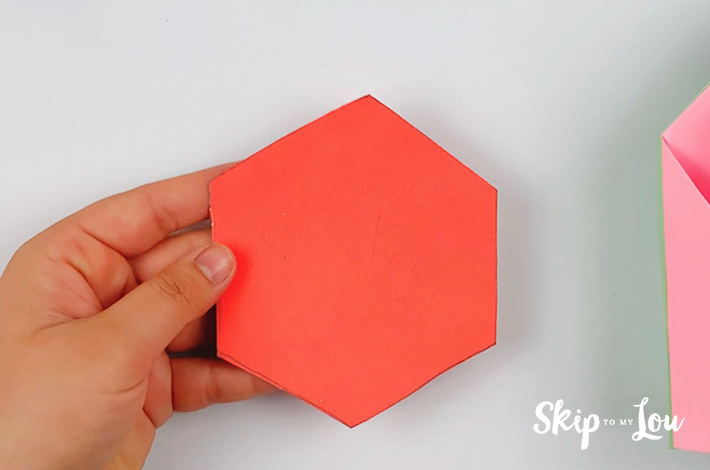
Step 10: Glue the hexagon to the bottom of the origami pen holder.
Step 11: It’s time to add your personal touch with some decorations. You can do this in whatever way you like!

And there you have your own DIY paper pen holder with its beautiful geometric design.
Other Special Paper Crafts Ideas
- Paper Flowers
- How to Make Tissue Paper Flowers
- Adorable Paper Ghost Craft – BOO!
- Tissue Paper Color Transfer Wall Art
- How to Make a Paper Spider Web
- Hanging Bat Party Favors Craft
- Fold A Paper Mayflower Ship {Free Printable}
- Paper Towel Butterflies
- Cat Bookmark
I would love to keep you fully stocked with creative ideas, yummy recipes, fun crafts, and loads of free printables. Subscribe to Skip to my Lou to get new ideas delivered to your inbox. Follow me on social media on Facebook, Pinterest, Twitter, and Instagram for all my latest updates.


