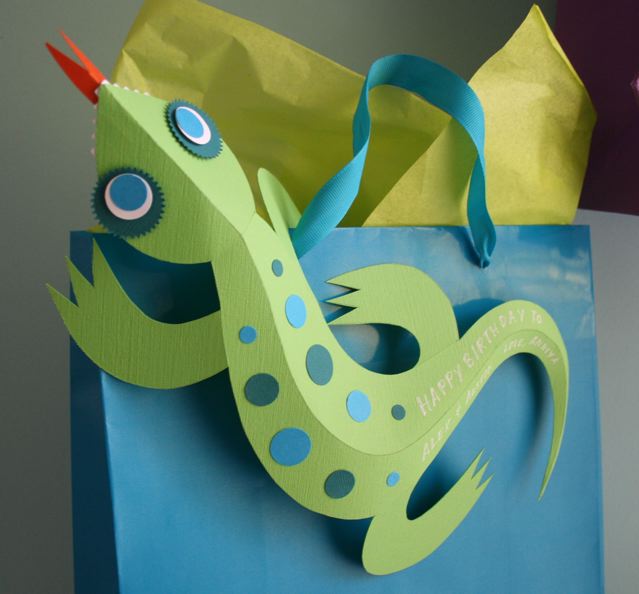
We love 3D paper art at our house and this 3D paper lizard is a fun and artsy craft for kids. The easy lizard template is included and with some brightly colored card stock paper, you’ll have an adorable paper reptile that can be used as a fun gift tag.
If you like working with paper make sure you learn How to Make an Origami Crane.

This papercraft template is tailor-made for older, scissor-savvy kids. It combines the card and gift tag all in one! If you have some birthday parties to attend, this is a sure-fire way to make your gift stand out on the gift table, plus have some crafty fun to boot. As a bonus, the lizard makes a fun paper toy for after the party.
Here’s what you’ll need to make one:

- This PDF Template printed at full size on an 8.5 x 11 inch piece of colored card stock (template is shown already cut out in the photo above)
- Scraps of white and various colors of card stock for the details
- Scissors or craft knife
- Gel glue and a toothpick
- Circle punches of various sizes. I used a standard hole punch, a one-inch starburst, a 5/8 inch circle and a 1/2 inch circle.
- Gel pen or marker for greeting
Plus the following items that are optional but certainly add pizazz:
- Pinking scissors
- Pop dots
1) Cut out the lizard with scissors or a craft knife (if you use a craft knife, BE CAREFUL, and be sure to cut it on a protective mat. You might want to get Mom or Dad involved in this step).
Once your lizard has been liberated from the page, turn your craft knife blade* to the wrong side (not the sharp side) and score along the line that runs down the middle of the lizard, all the way from the nose to the tip of the tail. Then score across the neck, and across where each leg meets the body.
Be careful because that blade is sharp. *No craft knife for scoring? Use the tip of a straight pin instead.

Score with the dull side, not the sharp. You don’t want to do lizard surgery.
2) You are ready to embellish your lizard! Grab a scrap piece of paper from the recycle pile and squeeze a blob of gel glue on it. You will use a toothpick that is dipped in the glue to apply the glue to the small pieces for the next steps.
Tip: You don’t need to cover the entire piece with glue for it to stick just fine. Less is better because you don’t want glue squishing out from under your pieces. Ew.

Hmm. You can’t see the blob of glue on the scrap very well. But trust me, it’s there.
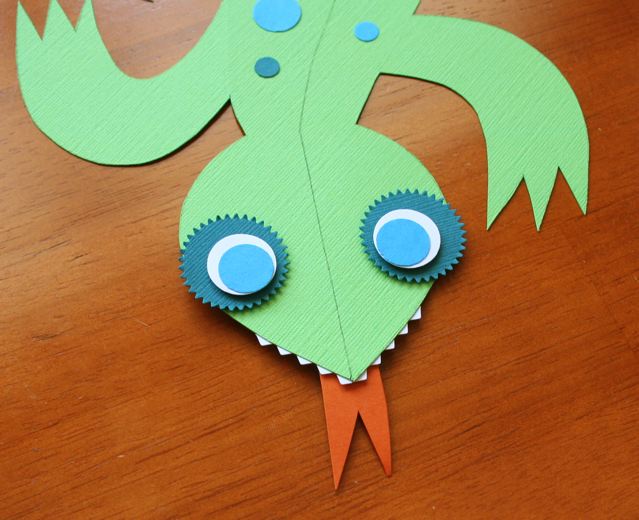
3) Make the eyes. Punch out two larger circles and two smaller circles. I used the 5/8 inch punch for the larger, and the 1/2 inch punch for the smaller. Glue them together like so:

Punch two one-inch circles. I used a starburst, but a plain circle works too. Use a pop dot or a dab of glue to add the smaller eyes to the larger circles like so:

4) Now add the eyes to the lizard’s head with either pop dots or dabs of glue.

5) Punch out different sized circles in various colors and glue them on (using the toothpick method) to decorate your lizard. Be sure to leave some room on the tail to write your greeting:

6) If you have some pinking scissors, cut out a shape like this for teeth and glue it underneath the lizard’s head so that the pointy parts just peek out, then repeat for the other side:

7) Cut out a small rectangle and snip out a triangle from the end to form a lizard tongue and glue it under the head, like this:
8) Summon up your A-Game penmanship and write a birthday greeting along the tail. Be sure to tell them who it is from! There’s room on the other side of the lizard if you’d like to write a note.

9) Now comes the fun, bendy part. Gently crease your lizard all along the curved scoreline. Start from one end and work your way to the other. If it is too hard to bend or it keeps bending in the wrong places, you may need to lay it flat and score it again. Bend the neck and legs along their scores. That’s it! You are done.

10) Now all you have to do is hook the lizard’s top leg over the edge of the gift bag. You can secure the leg inside the bag with a piece of tape if you are worried about it getting knocked off:

How cute are these? One reader asked if you can make these out of construction paper. You certainly can, but the card stock seems to hold the lizard shape better.
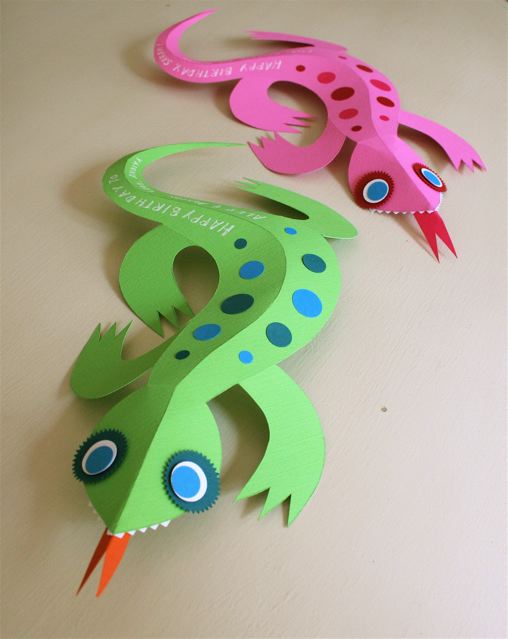
What, you don’t need a lizard gift tag? You can still make a 3D pet lizard and place him/her in a terrarium. Have fun making an environment for your lizard to enjoy by adding moss and rocks. Print the template in different sizes to assemble a whole family of lizards!
Mom and Dad: You can young this craft down for little kids by doing the following:
- Cut out and score the lizard for them, or skip the scoring and keep it flat.
- Let them use markers or crayons to color on eyes and dots/stripes instead of using punched paper.
- Skip the tongue and teeth.
Many thanks to Larissa Holland at mmmcrafts for this adorable lizard 3D paper craft tutorial.
More 3d and papercraft ideas
I would love to keep you fully stocked with creative ideas, yummy recipes, fun crafts, and loads of free printables. Subscribe to Skip to my Lou to get new ideas delivered to your inbox. Follow me on Facebook, Pinterest, Twitter, and Instagram for all my latest updates.


May I please get a lizard template? I am directing Vacation Bible School and our setting is the southwest. Thank you!
The template is in the post. Simply click the link to get it.
Hello
I am a elementary school teacher in Korea.
I want to make the adorable lizard with my students.
Can I get your template?
I will be looking forward to your reply.
Can I have the Lizard Template? Thank you!
i would like the template for lizard
Is it possible to get a printable copy of the 3D lizard, please. I am a Montessori teacher and for International night our class will be presenting Jamaica and lizards are found all over the island.
Thank you,
Nancy Q