Paper crafts are a blast for kids of all ages, and today I’m excited to show you how to make an easy DIY paper bow in just a few simple steps! This paper bow tie is perfect for dress-up days at school, as a fun topper for gifts (like a special one for Dad’s birthday or Father’s Day!), or even as unique decorations for wedding tables or parties. Whatever the occasion, making these snazzy paper bows with your kids is a fun, creative way to add a little extra flair!

Related: Making bows is fun! Try these origami bows.
Supplies
To make this bow, you will need the following supplies:
- Colorful Paper. You’ll need a long rectangle shape. You could even use wrapping paper to make it just a little bit more fun.
- Scissors
- A pen or pencil
- Glue stick
Video: How To Make An Paper Bow Tie
Paper Bow Tutorial: Step-by-Step Instructions
Here are the steps you need to follow to fold an origami bow tie. Make sure you watch the video as well, especially if you aren’t sure of a step.
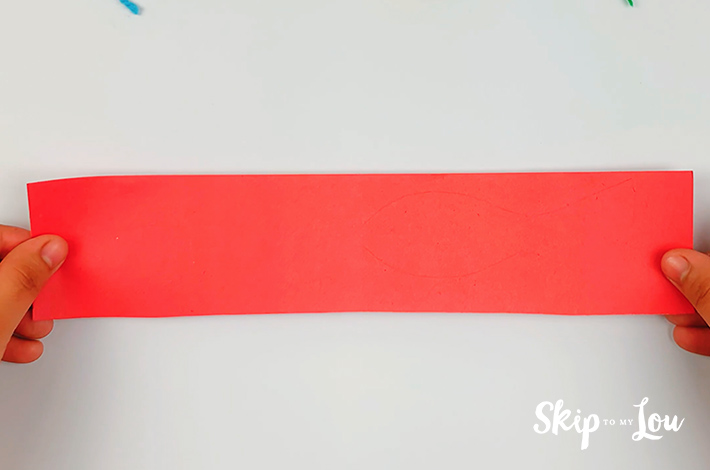
Step 1: Start with a long rectangular piece of paper as shown below, fold it in half, and make a crease.
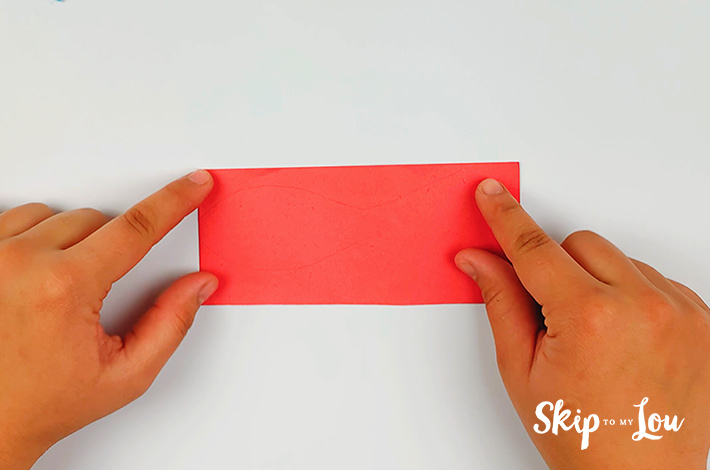
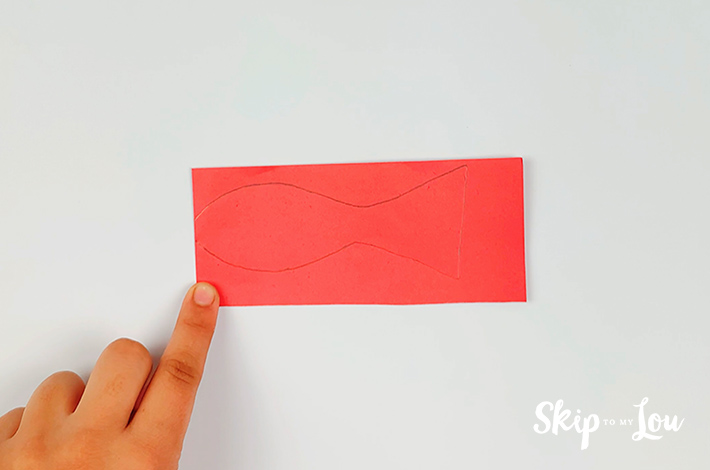
Step 2: Using the full area of the folded paper, draw a fish outline as shown in the images below. This will form the bow tie shape.

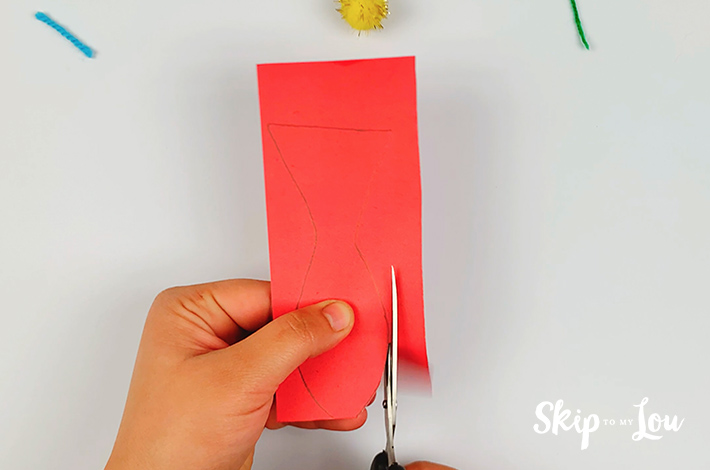
Step 3: Using your scissors, cut out along the line of the fish shape and then open the paper up along the crease.

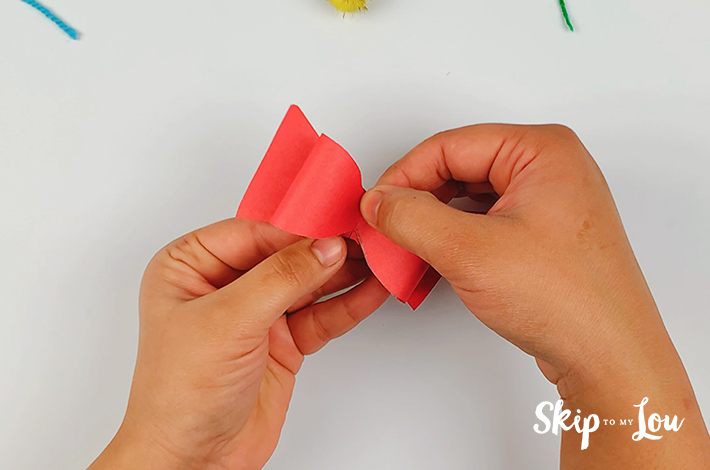
Step 4: Cut two snips on both the right side of the fishtail. Now flip the paper 180 degrees and do the same. When looking at the fish tails, the two cuts will be on opposite ends and not the same ends, so one will be on the bottom on the right side and one on the top on the left side. If you are unsure, please check the video which shows this step clearly.
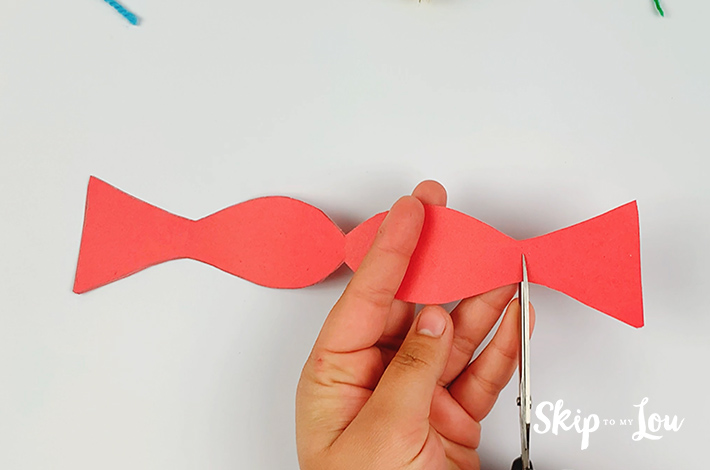
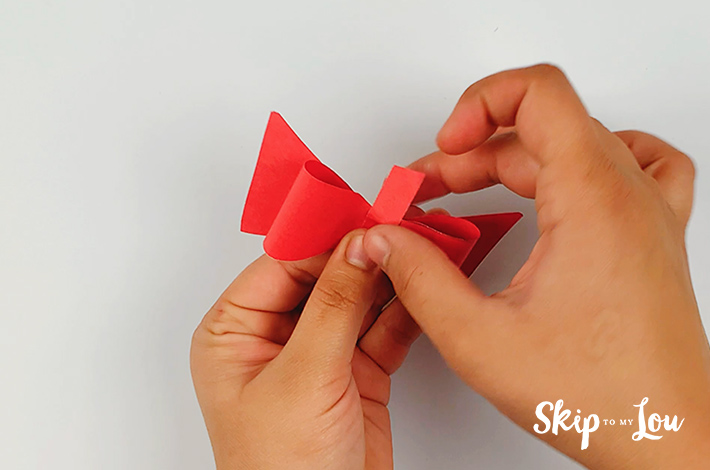
Step 5: Fold the tails towards each other and connect them together as shown in the picture below. Again, the video shows this too.
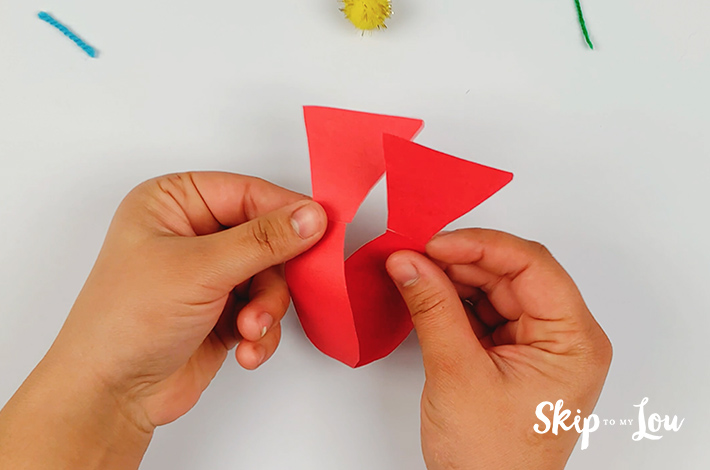

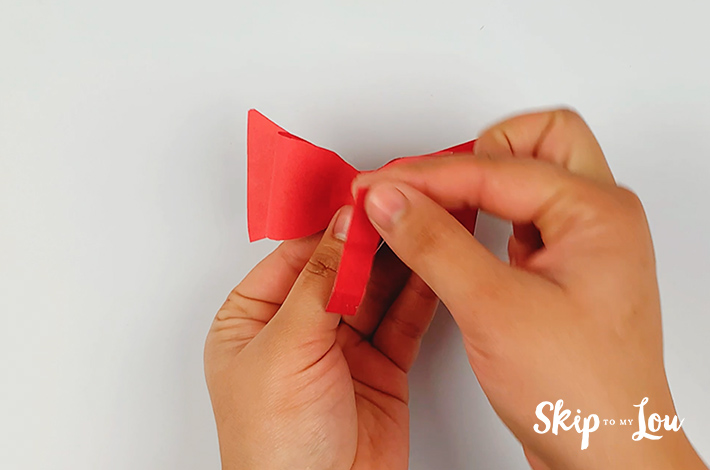
Step 7: Push the middle section (by the crease down towards the bottom section to form the bowtie as shown in the images below.
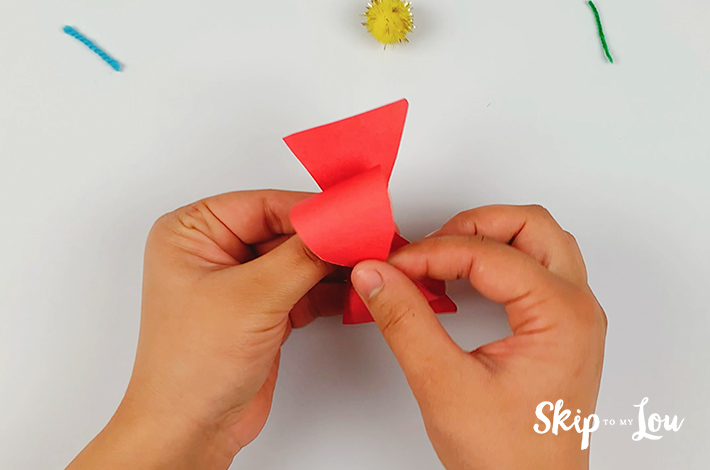
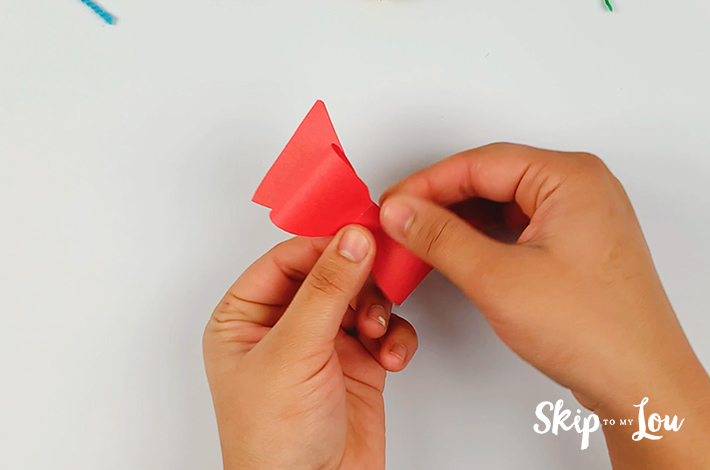
Step 8: Once pushed into place, secure with some glue.
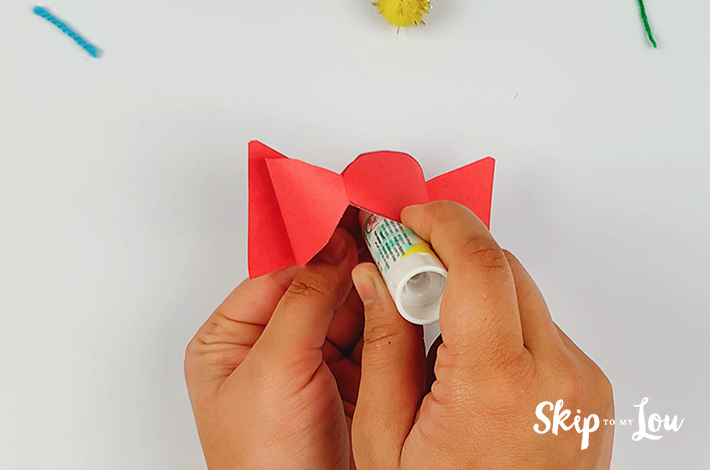
Step 9: Take a thin piece of paper, place it in the middle of your bow and then loop the two ends at the top and the bottom on the back. Glue them in place.

And now you have a beautiful paper bow! These would be perfect for any small gifts and Christmas packages.
Gift Wrapping ideas
- How to perfectly wrap a gift!
- Make a simple origami gift bag
- DIY Reindeer Wrapping Paper
- Make a perfect ribbon bow
- Make a money bow tie
- How to tie a perfect bow for packages
I would love to keep you fully stocked with creative ideas, yummy recipes, fun crafts, and loads of free printables. Subscribe to Skip to my Lou to get new ideas delivered to your inbox. Point your browser to Facebook, Pinterest, Twitter, and Instagram for all my latest updates on social media. Remember to leave reach out to me in the comment section below as well.


