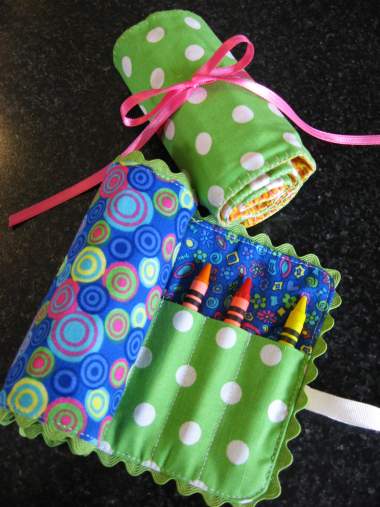
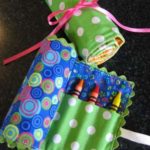
Every parent needs a stash of crayons to help a little one stay busy. This crayon roll is a fun way to keep track of crayons and have them readily accessible. I’ve included easy-to-follow instructions to make this DIY craft super simple, and it is cute enough to give as a gift!
RELATED: These fabric roll organizers work great to hold other things too. Make the pockets more narrow on the make-up brush holder to hold colored pencils or markers.
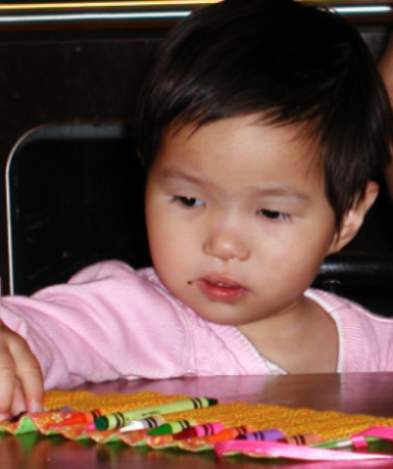
To welcome my new niece home from China on Sunday, I whipped up a crayon roll. I wasn’t able to give it to her in person but my mom said she was mesmerized by all of the crayons and how they slip into their own pocket.
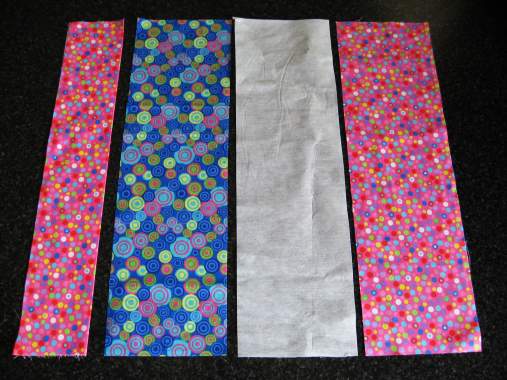
Here are the supplies you’ll need
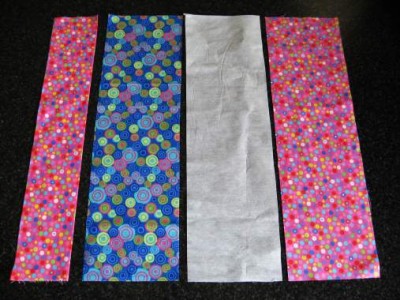
- Two pieces of fabric 5 X 16 1/2 inches (for the outside and inside)
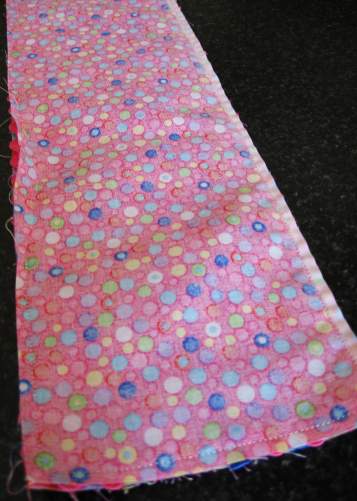
- One 6 X 16 1/2 inch piece of fabric folded in half lengthwise and pressed (for the pocket)
- One piece of lightweight fusible interfacing 5 X 16 1/2 inches
- One package of ric rac trim
- 30 inches of ribbon
- One package of 16-count crayons
TIP: A rotary cutter, ruler and mat make it really easy to cut out these pieces. I love this folding cutting mat that also serves as an ironing board. (affiliate links)
How to Make a Crayon Roll in Five Easy Steps
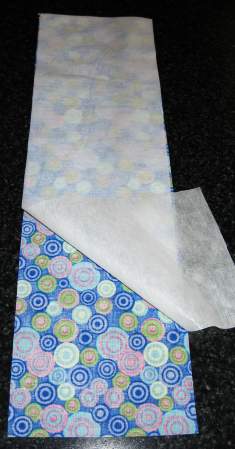
Step One: Iron the interfacing to the wrong side of the 5 X 16 1/2 piece of fabric that you want to be on the inside.
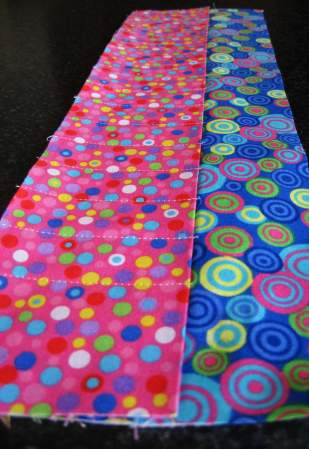
Step Two: Line up the bottom edges of the folded piece and the piece with interfacing and then pin them together. Starting over from the edge 1 1/4 inches sew lines parallel with the edge starting from the top of the crayon pocket, back-stitching at the top to reinforce. Sew the lines one inch apart across the pocket. You will have 1 1/4 inches on each side.
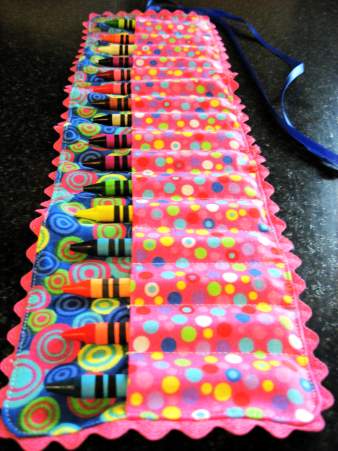
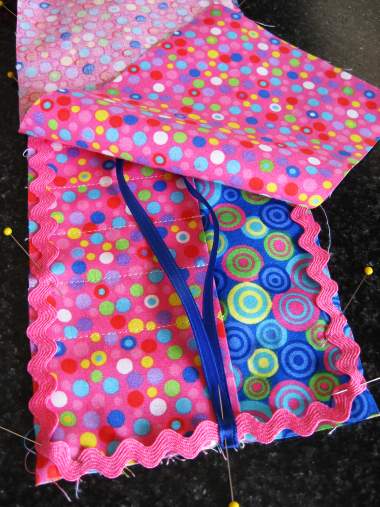
Step Three: If you want to use ric rac, pin it around the edge as shown. Fold the ribbon in half and pin it on the edge.
Note: On the one, I didn’t use ric rac I did a blanket stitch around the edge when finished.

Step Four: Pin the remaining piece of 5 X 16 1/2 inch fabric right sides together with the pocket piece. Sew around edges with 1/4 inch seam. Leave about 3 inches across the bottom for turning.
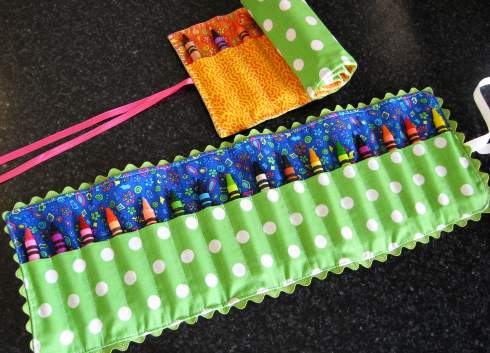
Step Five: Trim corners, turn, press and topstitch being careful to catch all layers of the opening to close.
Welcome home Faith! We are so happy to have you join our family! How very lucky we are indeed to have you! Do you have a special child in your life that would love to have a fun way to hold their crayons?
Crayon Roll Variations To Try
Looking for a simpler version? Try this felt holder. It has a lot less sewing and whips up even quicker!

Check out this new closure for the fabric roll

More fun crayon crafts
I think that you like these additional crafts. Your kids will love using up their broken crayons to make fun new shapes, and the felt turkey holder and egg holder is perfect for your holiday kid’s table!
I would love to keep you fully stocked with creative ideas, yummy recipes, fun crafts, and loads of free printables. Subscribe to Skip to my Lou to get new ideas delivered to your inbox. Follow me on Facebook, Pinterest, Twitter, and Instagram for all my latest updates.
How to Make a Crayon Roll Crayon Holder
Equipment
- Pair of Scissors
- Iron
Ingredients
- Two pieces of fabric 5 X 16 1/2 inches for the outside and inside
- One 6 X 16 1/2 inch piece of fabric folded in half lengthwise and pressed for the pocket
- One piece of lightweight fusible interfacing 5 X 16 1/2 inches
- One package of ric rac trim
- 30 inches of ribbon
- One package of 16 count crayons
Instructions
- Iron the interfacing to the wrong side of the 5 X 16 1/2 piece of fabric that you want to be on the inside.

- Line up the bottom edges of the folded piece and the piece with interfacing and then pin together. Starting over from the edge 1 1/4 inches sew lines parallel with the edge starting from the top of the crayon pocket, back-stitching at the top to reinforce. Sew the lines one inch apart across the pocket. You will have 1 1/4 inches on each side.

- If you want to use ric rac, pin it around the edge as shown. Fold the ribbon in half and pin it on the edge. Note: On the one, I didn't use ric rac I did a blanket stitch around the edge when finished.

- Pin the remaining piece of 5 X 16 1/2 inch fabric right sides together with the pocket piece. Sew around edges with 1/4 inch seam. Leave about 3 inches across the bottom for turning.

- Trim corners, turn, press and topstitch being careful to catch all layers of the opening to close

- TIP: A rotary cutter, ruler and mat make it really easy to cut out these pieces. I love this folding cutting mat that also serves as an ironing board. (affiliate links)


How on earth do you keep your rick rack so even. It always screws up bad for me. I positively love your post and your photography. :}
Love this crayon roll. I can’t wait to try it.
This is so cute. What a charming homemade gift for any child.
I just wanted to let you know I posted a link to this tutorial on my blog.
http://culdesacmom.blogspot.com/2010/12/top-10-projects-from-online-tutorials.html
Thanks for your hard work!
Thanks for this pattern. I had been wanting to make these for a while but could never figure out the measurements. I’ve actually been able to make and even sell quite a few. Thanks again!
AliceB, Why not take a picture of crayons, print them on card stock and cut them out and place them in the holders. It’ll get the point across!
Thanks for this great tutorial!
This is a really adorable and easy project. I plan on making some to fit markers, colored pencils, sharpies and crochet hooks. Everyone in my family will have one. Perfect gift for anyone. I’ve made 2 crayon rolls in as many days. I used a shoe string instead of the ribbon on the first one. I didn’t like that closure. I made a second one and used an elastic hair band. No tying, just wrap it over the top and it stays closed. Much easier for little hands than tying a ribbon.
I am looking for plastic/mock crayons to use in the sample “Crayon Roll” I show — I sell a different version of Crayon Rolls at a local Crafter’s Market.
Does anyone know a company that makes them? I already checked with Crayola. Thanks.
My friend asked me during a playdate today if I could sew a crayon roll for her son. I had the perfect fun boy fabric in my scrap stash to make him one and one for my son. I’ve already completed one and will have the second one done real soon. So simple yet so functional! Love it!
Your fabric choices are colorful and the bric-a-brac edging is creative. If I were to make a crayon roll, I would not use the plastic tie holder as pictured in your last photo because of the choking hazard. It seems to me that sewn-on velcroe would be a better choice.
Hey, that’s an awesome idea, thank you so much! I’ve got a little niece who’s going to visit us soon and I was wondering what gift to prepare for her. I love this crayon carrier, I hope to be able to make one just as beautiful as yours.
This would go great with a coloring book sized tote to fit the book and crayon roll. Thank you !
wondering if I can make and sale this crayon roll?
Hi! I love your blog and this tutorial. I made a marker roll this weekend and I linked to your tutorial from my blog. hope you don’t mind! http://kasonad.blogspot.com/2010/03/marker-roll.html
I also have made something like this, but placed silverware in the different pockets to use for a baby shower.