This post is in partnership with Adobe Photoshop Elements 2018. All opinions and ideas are my own. I love sharing things I use in my everyday life with you!
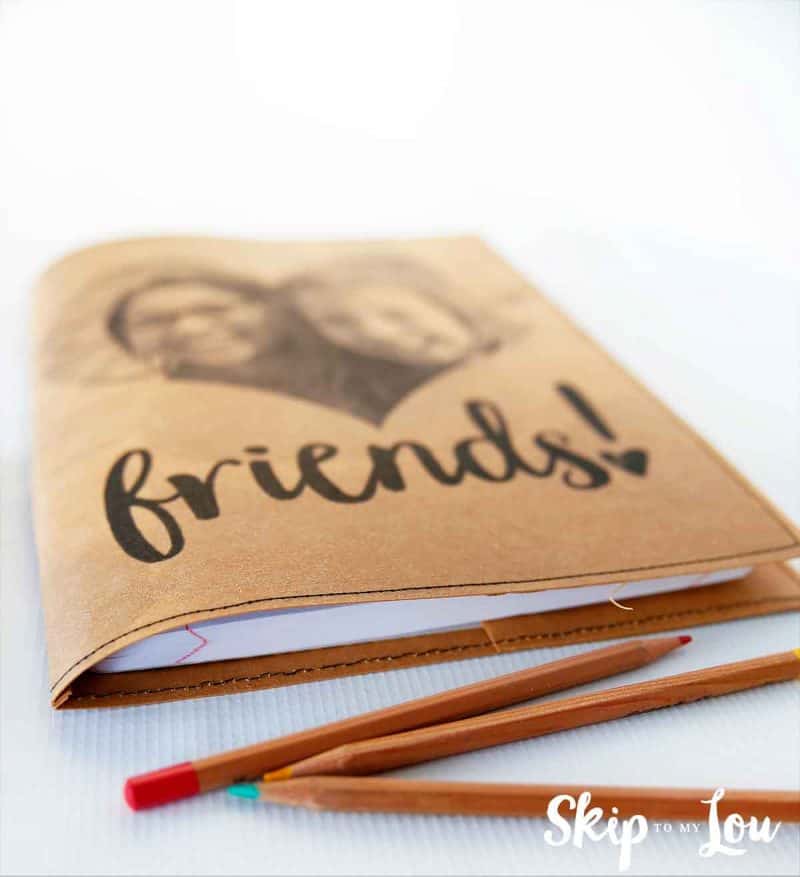
You won’t believe how easy it is to make a DIY Printed Notebook Cover. In just a few steps you can have a notebook cover embellished with a photo. I will even show you how to make a shape overlay on your photograph. These notebooks are a hit with both teens and adults. They would also make a useful handmade gift. Gather up some photos and let’s go!
Turn a regular composition notebook into a work of art!
DIY Printed Notebook Cover Supplies
- Computer
- Photoshop Elements 2018 (download your free trial here)
- Printer
- Kraft-tex paper fabric
- Sewing machine
- Thread
- Needles (Some sewing machines will require a heavy duty needle. I used an all-purpose needle.)
- Scissors or Rotary Cutter and Mat
How to make a DIY printed notebook cover
Cut three 8 1/2″ X 11″ pieces of fabric paper
Using Adobe Photoshop Elements 2018, customize the cover of the notebook with a photo and words. In this quick video, I will show you how easy it is to add a fun shape and words to a photograph using the Shape Overlay Effect Guided Edit. Adobe Photoshop Elements 2018 offers many Guided Edits that provide step-by-step instructions to make it easy to give your photos amazing effects.
How to create a shape overlay in Adobe Photoshop Elements 2018
Choose Guided and then choose Fun Edits.
Choose a shape from the menu on the right side.
Next, choose the outside effect around the heart. Follow the prompts to choose the outside and inside effects for the heart. There are many options to choose from. Notice the slider tool on the right. This tool allows you to adjust the intensity of these effects.
Add type to the photo by selecting Quick. Grab the type tool in the menu on the left side and type words onto the photo.
Using the edits, two fonts can be combined to add a heart to the exclamation mark.
When finished select Print, and for this project choose actual size 8 1/2 X 11″. Select, Center Image on the page. Place the fabric paper in the printer and print. This fabric paper is amazing! It feels like leather. It will provide a durable cover for our notebook. Don’t forget to grab your Adobe Photoshop Elements free trial so you can try it out!
How to sew up a fabric paper notebook cover
Print the photograph onto one sheet of the paper, leave one full page plain and, cut one piece in half lengthwise.
Clip the two 8 1/2″ X 11″ pieces right sides together. Sew along the edge. I used a stitch length of 3.
TIP: Don’t pin the fabric, it will leave holes. Clips work great to hold the pieces of paper together.
Open the paper with wrong side facing you. Clip the paper halves to each side.
Sew all the way around the edge.
Slip the composition notebook inside the cover.
The composition sized notebooks fit perfectly.
So simple to make a cool notebook cover! You will love how easily you can edit your photos with Adobe Photoshop Elements 2018 to make something so meaningful and useful!


Thank you for sharing this great project. I’m looking forward to making one. I just shared with a FB quilting group!