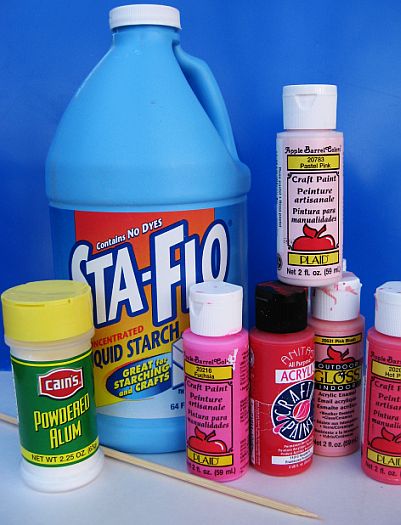
To make this fun and easy marbleized paper you will need: 1/2 tsp alum (helps paint adhere to the paper), 2 cups liquid starch, liquid acrylic paints, a long wooden skewer , a 9 X 13 pan and white copy paper cut to fit the inside your pan. You can change up the size of the pan, just keep the proportions of starch and alum the same. The starch should be 1 to 2 inches deep in your pan.
How to make marbleized paper
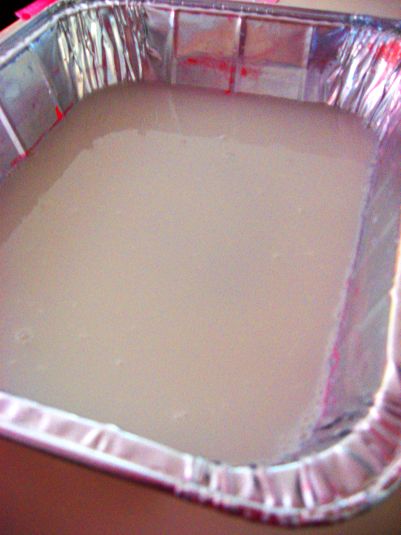
Pour 2 cups of liquid starch in the pan then add 1/2 tsp alum stirring until mixed.
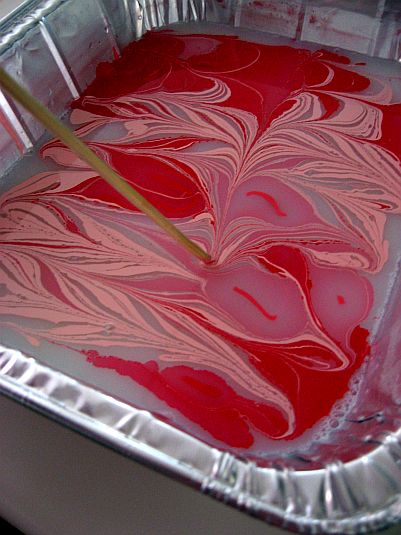
Gently drop acrylic paint on the surface of the starch. Some paint will sink to the bottom- do not worry. Try not to use too much paint. For best results choose light and dark colors that go together. It will take some experimenting to know how much paint works best for you. Brands of acrylic paint differ in consistency. If after several tries you have trouble with the paint not staying on the surface, try adding a drop of water to your paint.

Take the wooden skewer and drag the paint through the starch. Continue dragging the skewer through the paint until you get a design you like. You might try other tools like a fork, feather or comb besides the skewer. Really the fun of this activity is watching the paint swirl around making different designs. There is no right and wrong. Enjoy the experimenting. We were mesmerized —- we hope you will be also!
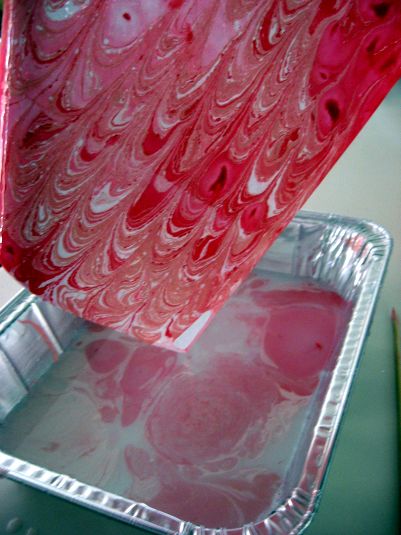
Lay your piece of paper on top of the starch. Allow it to sit for a couple of seconds.

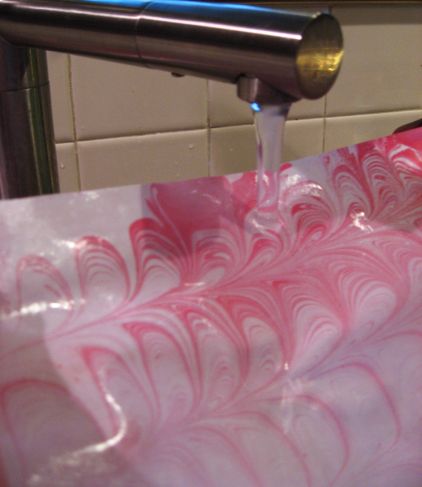
Lift the paper out of the pan and allow the starch to drip off the paper
Rinse the paper under running water removing any extra starch. This does not change the intensity of the colors (the below photo is a different piece of paper paper from the above photo)
After the paper has been rinsed, lay it out to dry. It will take about two hours for the paper to dry. When the paper is completely dry, iron on medium setting until the sheets of paper are flat.
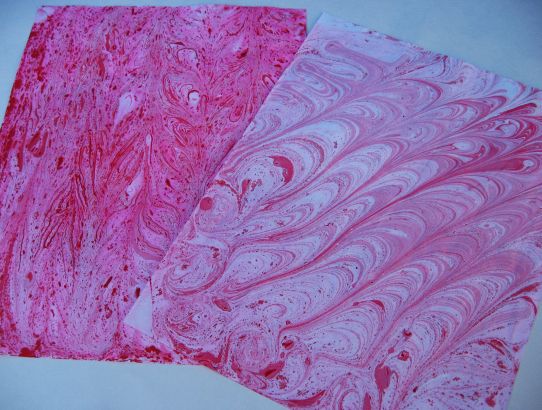
You may find that you can print two sheets of paper before adding more paint to the starch. In the photo below, the bottom piece of paper was made first. We then used our skewer again making a different design and put on another sheet of paper.

In the photo below we had too much paint on our starch so we went ahead and made a print then changed up the design and then made another. If you feel that you have made a lot of prints and your starch is too full of paint, just pour it out and start again.
The possibilities of what to do with your paper are endless—- cover pencils, a book or a box, make note-cards, bookmarks or a picture frame etc.
For another fun activity try painting rocks.
Have fun!


Do you think this project would be appropriate for a 3.5 year old? Thanks!
Great tutorial Cindy, thanks for taking the time out to post it.
FYI, I used it as a reference on a recent paper marbling tutorial I did myself a week or two ago, figured it might be a a good resource for some of your readers… http://www.ibookbinding.com/blog/marbled-paper-bookbinding-tutorial-and-photo-gallery/
Keep up the good work and again, many thanks!
~ Paul
I did this with my daughter and neighbor today, and while they came out ok, I really was hoping for more color on the paper. I searched around the internet and found a few different methods. More than one mix the 2 tablespoons alum in 2 cups water, and have you coat the paper with alum and let it dry first, then iron. Then you go ahead and do the colors on the fabric starch and lay the paper on top. I haven’t tried it yet, but thought the process might help some people. Also, for those of you having difficulty finding liquid starch, I found it at Walmart. (But it wasn’t there when I went back.) If you can’t find liquid starch, you can use carageenan powder mixed with water.
Yes Amber you can!