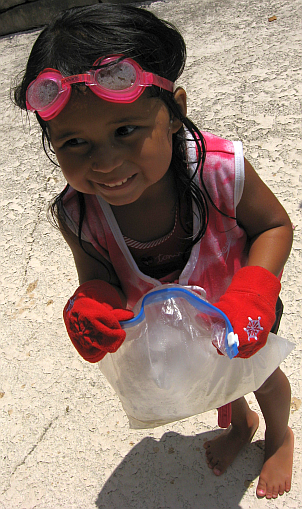
Ice cream in a bag is the perfect summer activity to keep kids cool and entertained! Grab a bunch of kids and have some fun!
Did you know you can also make bread in a bag? It is another kid pleasing recipe.
Please note -It was very hot when we made this so it took about 15 minutes to freeze. I would think if it had been cooler it would have frozen quicker!

How to Make Ice Cream in a Bag Ingredients
For each individual you will need:
- milk or half and half (I have seen where you can even use flavored coffee creamer)
- vanilla extract
- sugar
- bag of ice
- rock salt
- quart size Freezer resealable plastic bags (could use smaller pint size bags)
- gallon size Freezer size resealable plastic bag Zip-loc type bag
- a hand towel or winter gloves to keep little fingers from freezing

It was near 100 degrees today so it took about 15 minutes to freeze. I would think if it had been cooler it would have frozen quicker. Since it took longer we had a bit of trouble keeping the kids interested ——so the moms were left holding the bag!

Ice Cream in a Bag Recipe
This recipe is for vanilla ice cream. If you prefer chocolate ice cream keep reading. The recipe below for ice cream in a can works in baggies too.

Ice Cream in a Bag
Equipment
- freezer bags
Ingredients
- 1/2 cup milk or half and half I have seen where you can even use flavored coffee creamer
- 1/2 teaspoon vanilla
- 1 tablespoon sugar
- ice
- 1/4 cup rock salt
- 2 quart sized Freezer Zip-loc bags could use smaller bags
- 1 gallon Freezer size Zip-loc bag
- a hand towel or winter gloves to keep little fingers from freezing
Instructions
- Mix the milk, sugar, and vanilla together in one of the quart sized bags. Seal, removing as much air from the bag as possible. Place this bag inside the other quart-sized bag, remove air and seal (double bagging to prevent leaking and ensuring success). Put the two bags inside the larger gallon sized bag along with the ice (we filled the bag with ice and then about 1/4 cup rock salt. Remove air and seal tightly. Wrap the bag in the towel or put your gloves on, and shake, shake, shake.
Notes
Nutrition
Tips for Making Homemade Ice Cream in a Bag
- Be sure to remove air from bag and seal. Double check to make sure bags are sealed tightly.
- Rinse the small bag before eating or be careful when removing from the larger bag to keep it salt-free.
- We added toppings (chocolate syrup, mini chocolate chips, M&Ms, broken Oreos, pretzels and peanut butter cups) right into the bag and began eating! Yum —-We had plenty of participation for this!
- Please note -It was very hot when we made this so it took about 15 minutes to freeze. I would think if it had been cooler it would have frozen quicker!

This delicious treat can also be made in coffee cans.
How to Make Ice Cream in a Coffee Can
1/2 cup sugar
1 1/2 tsp vanilla
3 tbs chocolate syrup
Place the ice cream mixture in the smaller coffee can and seal lid with duct tape. Place the smaller can in the center of the larger can. Pour the ice and salt around the smaller can.

Put the lid on the larger can and place a piece of duct tape around the lid to make sure it is really secure. Roll the can around outside for about 30 minutes.

Again it was so hot that we had to refill the ice and salt in the can about half way through! Our kids weren’t too crazy, so we did just fine leaving the duct tape off after we refilled the ice. Rinse smaller can before serving.
Everyone agreed the chocolate ice cream was our favorite.

If you don’t want to shake the bag my son thought he found a clever way to make his ice cream while getting his job done! Check out the can tied up with duct tape and rope to the back of the mower!

In case you want to know, this does not work. It is not long before the can gets a hole or is run over! We finished this batch up in the freezer! Oh BOY!

If you are looking for more boredom busting ideas check out all our kid’s crafts and activities to keep kids active and entertained this summer!


Love the ice cream recipe ideas. I can do this with my grandchildren. Thank you.