After hearing about the recent closure of Picnik, I have been looking for another easy way to make photo collages. I can’t wait to try this one…
Hello lovely Skip to my Lou readers were excited to be here today from Smitten Blog Designs! We’re excited to share a little blogging tip that can add some beauty and variety to the look of your blog. Photo collages offer a unique and beautiful way to capture an event and tell a story. Have any of you wondered how to make a photo collage? Well, you are in luck because we’re going to show you a completely free and simple way to bring your photos to life using Google’s Picasa program.

Step 1: Download Google’s free program Picasa: https://picasa.google.com/
Step 2: Import your Photos and Create the Collage:
Import the photos you would like to use by opening Picasa and selecting the Import button in the upper left hand corner. You can import the photos from a folder on your computer, or even directly from your camera.
Once you have imported your photos, select the photos you would like to use for the collage by holding the down the Ctlr button and clicking each photo you want to use.

Once you have the photos you would like to use, click Create on the menu at the top and select “Picture Collage” on the drop down menu.
Step 3: Select the Layout of your Collage.

Your photos will then automatically be assembled into a draft collage which can be edited to any layout and size you want! This can be done while making sure you are on the Settings tab, clicking the arrow button next to the initial layout. I personally prefer the Mosiac layout but there are many others including Picture Pile and Frame, etc.
The Page Format section offers you the choices for size. An important note: if you plan on printing your collage, you will need to be sure to select the same printing size you are planning on. If you are only planning on putting the collage on your blog, you will be able to re-size it on your blog any way you would like so the layout size is less of a concern.
You can also add Grid Spacing (you can see it there under the layout style). The Grid Spacing, (also known as adding gutters in digital scrapping) is a way to space the pictures with a colored border (usually white) and create a more uniform feel as seen below in the finished collage.
To change the actual arrangement of the photos, simply click and drag a photo to the place you want it to go. The photos will automatically change places. You can re-arrange the photos as many times as you would like until you are happy with the way it looks.
If you are finding that you simply aren’t happy with the way the photos are being arranged and/or sized, try selecting a different collage size and Picasa will automatically re-format your collage for you.
If you would like to add additional pictures, simply click the Clips tab (next to the settings tab). This will allow you to go back to the library and select more photos/images you want to use. Once they are highlighted in blue simply click the green plus sign and they will be added to you collage. Remember, you can add several at once by holding down the the Ctrl key.
You can see here I added one of the scrapbook pages from our Christmas kit. I will be adding text on top of it in just a sec:

When you are happy with the way it looks, simply click the “Create Collage” button in the lower left hand side of the screen.
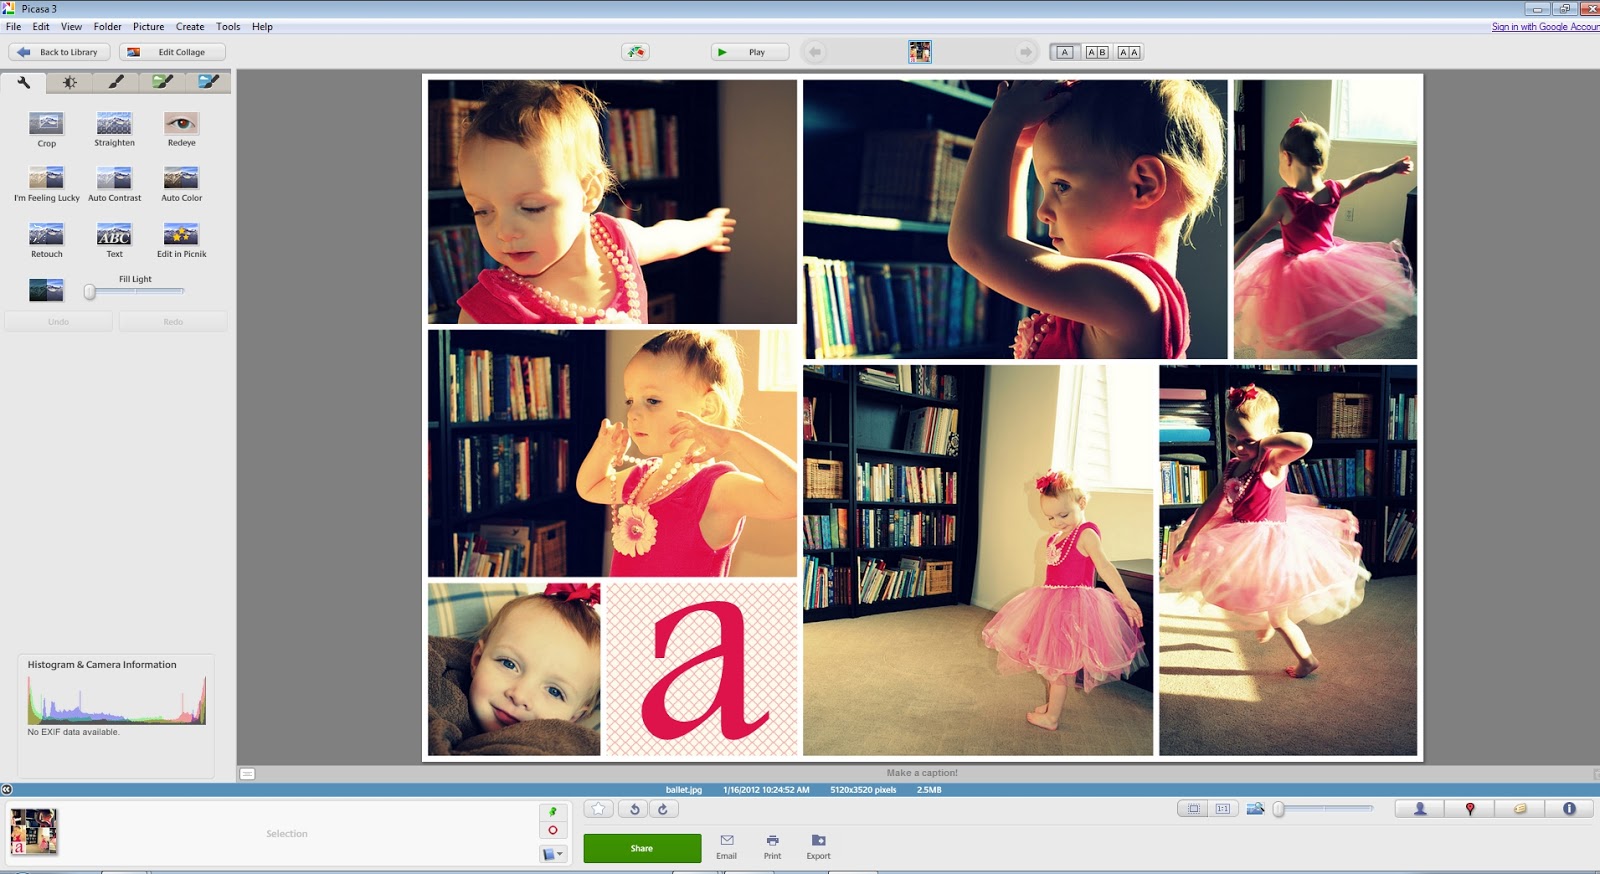
Step 4: Adding Text or other Edits:

The collage is now added to my Picasa library and I can add text and make any other changes I want to. On the Wrench tab (basic edits tab) I click the Add Text button. There you can choose your font, the size and color you want the text as well as where you want to place it. In this example I’m choosing an initial so I want it to be especially big (bigger than the font default sizes). Click on the text until you get the circle around the text and then pull on the orange button to scale it to your desired size.
Step 5: Ta Da! The collage is now finished!! Now simply go the File drop down menu and select Save As to save the collage in the place that is the easiest for you to find. I prefer my desktop until I blog it and then I save it in my collage folder.
We hope you enjoyed this tutorial and find making collages a wonderful way to beautify your blog posts! 🙂


Thanks for this! I made my first collage and added to my blog. So exciting. I had been looking for a free photo editing program so you solved that problem for me. I appreciate it!!
Thank you so much for the tutorial. I have used collage but learned a few new tips. Thanks How to Create a Collage Photo Instantly
Like a tiny island in the middle of the vast ocean, Burley Mountain is a narrow rib of rocks jutting out of a vast green sea of trees. On a rare clear day, the view is wondrous, encompassing snow-covered meadows and Washington’s southern volcanoes. The trek from the valley floor to the lookout is extremely arduous. The route follows a steep and narrow forest road. Near the top, snowdrifts make routefinding difficult and even dangerous. However, if you reach the top, you can spend one or more nights in the old Burley Mountain Lookout and spend the days skiing over the ridge crest. (Advance reservations are required to stay at the lookout.) Avalanche potential: moderate
Hi, Neat post. There is a problem along with your site in internet explorer, would test this?
IE still is the market leader and a big section of other people will leave out your magnificent
writing due to this problem.
This didn’t work. ‘Picture Collage’ was greyed out. The only option was to ‘make a movie’. I am reaching the end of my life and I don’t want to spend the rest of it trying to find a simple way of making photo montages.
The search goes on.
Thanks so much for the tutorial! The instruction is clear and well presented. Now I can make some collages for my blog from the huge pile of photos we took this year.
Thanks for the post. The instruction is very clear. Now I can make some cottages from piles of photos we took this year
Thank you for the how to! I was looking for a easy way to add text and collage photos together for my blog. This post has been a big help!
I really like using Picasa for collages using my instagram photos. I’m finding that some of the tops of the pictures are cut off, resulting in heads being cut off. Is there a way to fix this?
Thank you for thls tutorial. My daughter is making a photo collage for her husband
and we only downloaded Picasa a day ago – we’ve already lost a collage she’d spent a lot of
time on and 5 minutes before I had told her to save it!! Thanks again.
I’ve been wanting to make collage, now i know how to do it. I’ve been using Picasa but haven’t noticed this option. Thank you for the tutorial.
Thank you!! Have been wondering how to make these and this makes it seem very do-able. Thanks for the tutorial!
im trying to make a photo collage for a present for my mom! this was alot of help!