
Head on over to According to Kelly for a crafty gift. A Southern Fairytale has a yummy edible gift.

What is the traditional present that everyone opens on Christmas Eve? Pajamas. Here is a tutorial on how to make a pillowcase nightgown from fabric, not a pillowcase, for your kids, grand kids, niece, or anyone! Use holiday fabric or just her favorite licensed design.
Materials needed for size 10-12 girls Nightgown:
- 1 yard 45″(or wider) or 1 1/2 yard 44″ fabric for body
- 8″ of 45″ or wider fabric for top edge
- thread
- 1 yard 1/2″ wide elastic OR 1 1/2 yards ribbon.

Fits a size 10/12 girl.


Materials needed for size 10-12 girls Nightgown
This is the supply list for a size 10-12 girl’s dress. Finished garment measurements are: 34 inches long and 22 inches across with 8 inch armhole length.
- 1 yard 45″(or wider) or 1 1/2 yard 44″ fabric for body
- 8″ of 45″ or wider fabric for top edge casing
- thread
- 1 yard 1/2″ wide elastic OR 1 1/2 yards ribbon.
How to Easily Make Different Sized Dresses
This shape is so simple, adjusting to make larger or smaller sizes is very simple. Add or subtract 1/2″ or so for each size larger or smaller, taking into account height. Finished
How to Make a PillowCase Style Dress
Using a pillowcase is a great way to upcycle pillow cases. The best part most of the sewing is started for you. You just add a casing at the top for ties and you can make a dress in minutes. The downside is that your child needs to fit the pillowcase measurements.
Let me show you in three easy steps how to use fabric to make a pillowcase style dress. It is perfect for bigger girls. You can even make this darling doll dress with the same style.
TIP: Before you start prewash fabric, dry and press. While it is tempting to skip this step, you don’t want the dress to shrink after it has been sewn.
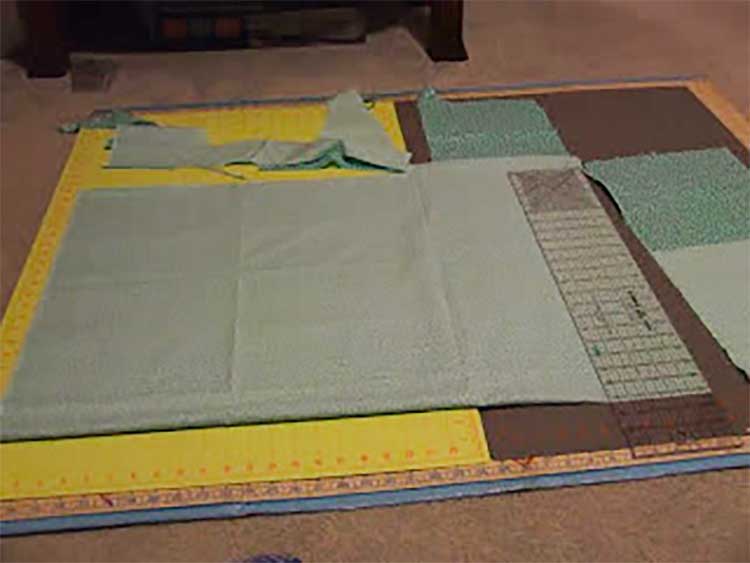
- Cut a rectangle 22 1/8″ x 33 5/8″ out of the folded fabric.you can round up or down. Finished piece should measure 44 1/4″x 33 5/8″ when unfolded.

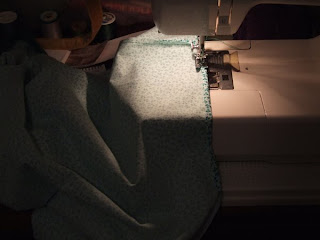
- The second piece of fabric is added to the top to make a casing for the elastic (ribbon or cord). Place it next to the length of the first peice to match the length and folded edge next to folded edge and then cut it to allow for the width of the elastic with ‘gathering space’ x 2 and then add 1/2″ seam allowance. (I only use 1/4″ seam allowances- if you are not experienced in sewing I recommend you use the standard 5/8″ s.a. Added up it would be 1 1/4″ s.a. onto the width of the casing, not 1/2″.) My elastic is 1/2″ wide. My casing is 2 1/4″. I allowed a lot of gathering space. Sew ‘right sides together’.
- 5)Iron upwards toward casing.
- 6)Turn under raw edge of casing 1/4″if this is the size of s.a., or 5/8″ if that is the s.a. you are working with. Stitch.
1)I found a piece of fabric that looked like it would fit my daughter well- make sure there is space for the body AND the arms to go through.
2)I cut a rectangle out of the folded fabric. 22 1/8″x33 5/8″ you can round up or down. (44 1/4″x 33 5/8″ unfolded fabric measurement)
3)I found another fabric to add to the top as the casing for the elastic. You can use ribbon or cord, too. I put it next to the length of the first peice to match the length and folded edge next to folded edge and then cut it to allow for the width of the elastic with ‘gathering space’ x2 and then add 1/2″ seam allowance. (I only use 1/4″ seam allowances- if you are not experienced in sewing I recommend you use the standard 5/8″ s.a. Added up it would be 1 1/4″ s.a. onto the width of the casing, not 1/2″.) My elastic is 1/2″ wide. My casing is 2 1/4″. I allowed a lot of gathering space.
4)Sew ‘right sides together’. 5)Iron upwards toward casing. 6)Turn under raw edge of casing 1/4″if this is the size of s.a., or 5/8″ if that is the s.a. you are working with. Stitch.
7)Mark your armhole length down the sides. Fold your s.a. around armhole and iron. Stitch. Stitch side seam. *On the folded side of gown, mark the line to cut down the side from the top. Fold over about 1/4″ around armhole and use a wide sitch (zig-zag) to ‘enclose’ the raw edge. I forgot to do this step BEFORE sewing the casing down. Boy, that was annoying! 8)Fold the casing in half and pin. 9)Stitch next to edge. (HINT: I use a wide decorative stretch stitch because it hides imperfections in stitching straight.) 10)Finish the bottom by folding it 1/4″ and folding it one more 1/4″ so it is rolled inside its self. Pin if necessary or just stitch as you roll. 11)Use a safety pin to move the elastic or ribbon through the front and back casing. You may want to put 2 ribbons through so you can tie them at the shoulders to look cute, but my experience is that they quickly come untied.
12)Keep the elastic ‘too long’ until you fit it. Add length to overlap elastic and cut. Add cute decorations, flower shapes, pockets, anything you want- just make sure it’s still comfortable to sleep in!


hi
It’s a good post.Thank you for sharing. nike free http://www.freerun-onlineshop.org/
Cool idea! Great for warm weather places. I love that elf cape too. And I have to say I am in LOVE with your nursing shawls. They are so elegant and beautiful.