This vintage doll quilt tutorial shows you how to make a quilt for beginners. A baby quilt is a great place to start when learning how to quilt and this is a sweet handmade gift for a little girl and her new doll. It goes together quick and easy!
Be sure to look at all of our wonderful handmade gift ideas. There is something for everyone on your list! And, if your American Girl doll needs some new clothes, here is a free pattern for an easy 18 inch doll dress.
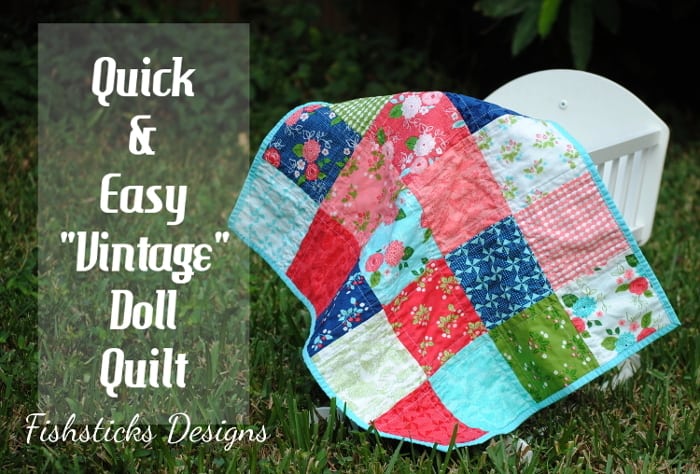
Hi, there, sewing friends! This is Bonnie Ferguson from Fishsticks Designs. I’m excited to be back this year to share another holiday sewing project. This project will be sure to put a smile on the face of that little one on your list who loves parenting a baby doll. If you’re new to quilting, this is a perfect first quilt! (You can do it!!) If you’re an experienced quilter, this is a quick and simple project.
Vintage Doll Quilt Tutorial
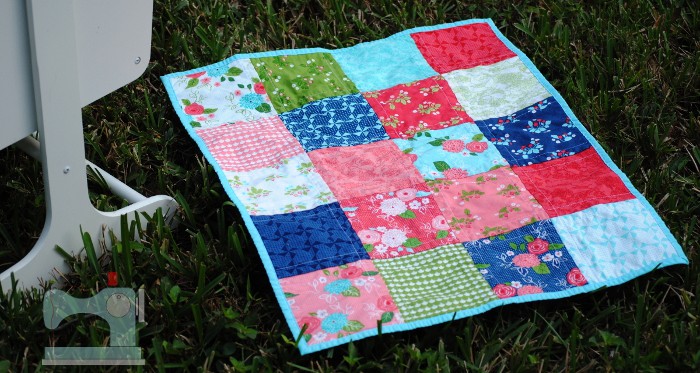
The finished size of this quilt after washing and drying is approximately 17 1/2″ X 21 1/2″. Let’s get started!
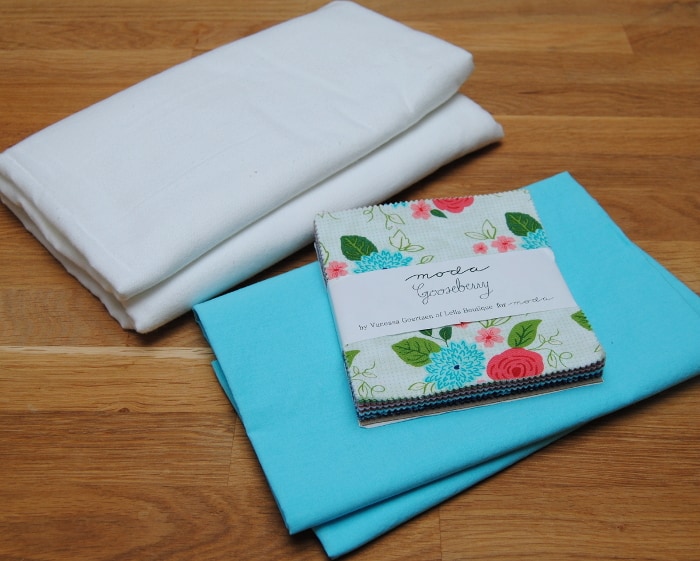
You’ll need one charm pack (or 20 – 5″ squares of quilting cotton), 3/4 yard of cotton quilting fabric for the back and 3/4 yard of unwashed 100% cotton flannel which you’ll use as “batting”.
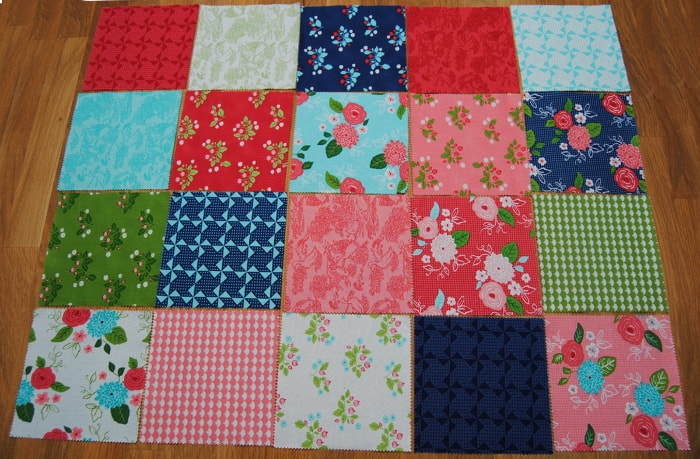
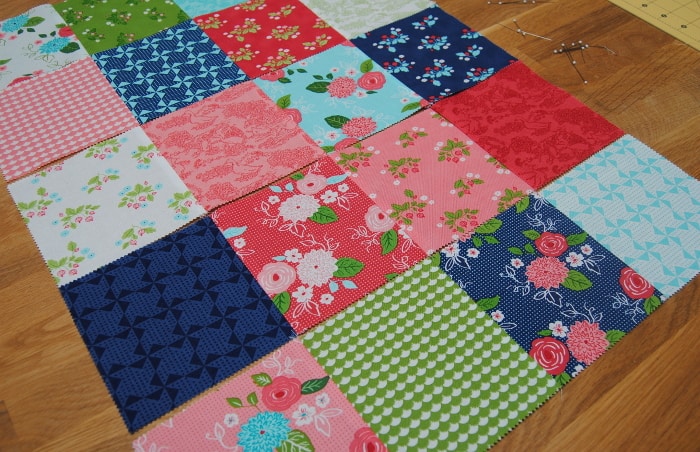
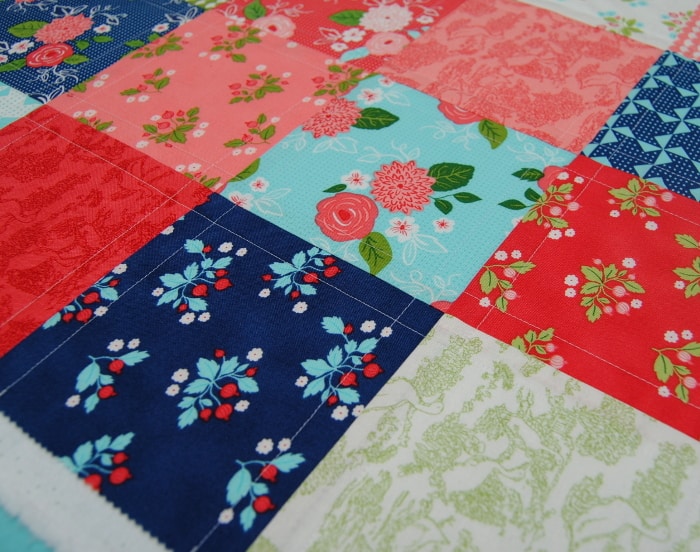
Start by choosing 20 squares and laying them out into 5 rows of 4 squares.
Sew each row of four squares together using 1/4″ seam allowance. (Be careful to keep your seam allowance consistent for nice straight rows.)
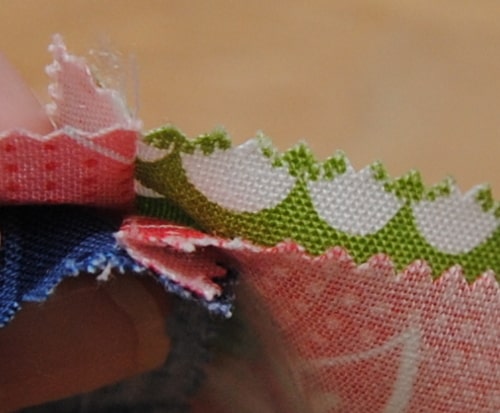
Before you sew the rows together, try this trick for getting your squares to line up nicely: alternate the direction you press your seam allowances on each row. Press the seam allowances to the right on the first row, then to the left on the second row, the right on the third and so on. Alternating the direction that you press will allow you to nestle the seams against each other when you pin. Nestling those seam allowances together will help keep the corners lined up nicely.
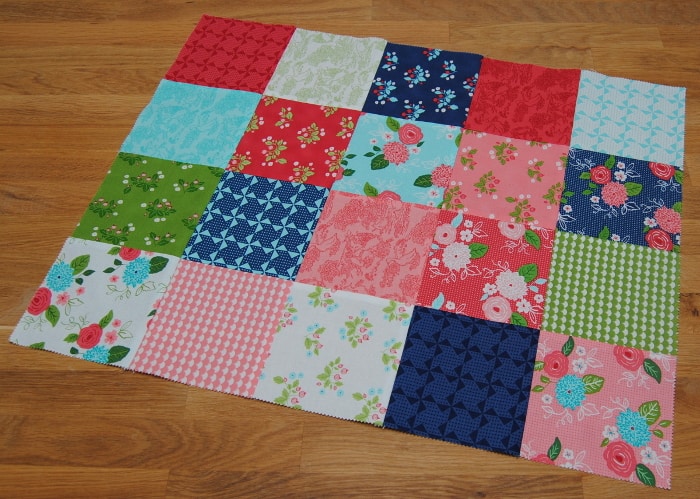
Sew your rows together using 1/4″ seam allowance. (Be sure to line up the squares and pin well before sewing each row to the next.) Press the seam allowances to one side.
Now you’re ready to create your “quilt sandwich”. Place your ironed backing fabric right side down (wrong side facing you), layer the unwashed cotton flannel on top of the backing and, finally, place your quilt top on the very top with the right side facing you. (Your flannel should be a little bit bigger than the quilt top, and your backing fabric should be at least 1 1/2″ wider than the quilt top on all sides.)
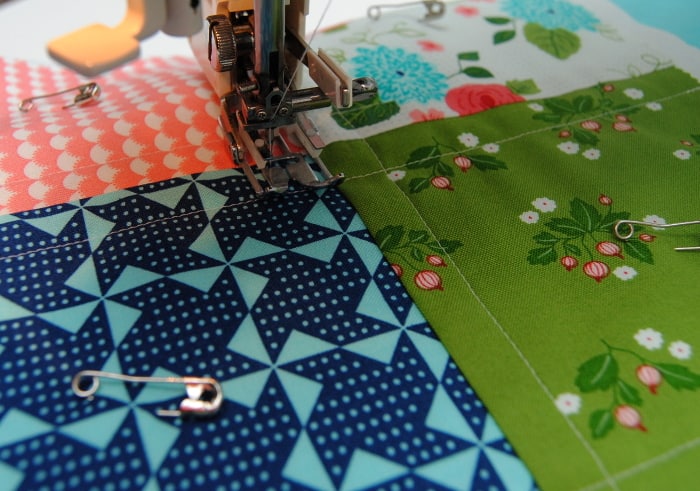
Smooth everything down nicely with your hands. Use safety pins to baste your quilt for quilting. I placed one safety pin in the center of each block.

Pro Tip: If you have a walking foot for your machine, put it on now. (The walking foot helps to guide fabrics through evenly from the top and the bottom while you’re sewing. This is a big help when you’re sewing multiple layers that might shift while you stitch.) I stitched straight lines about 1/2″ on each side of the seams the long way, then I stitched straight lines the same distance along either side of the seams running perpendicular.
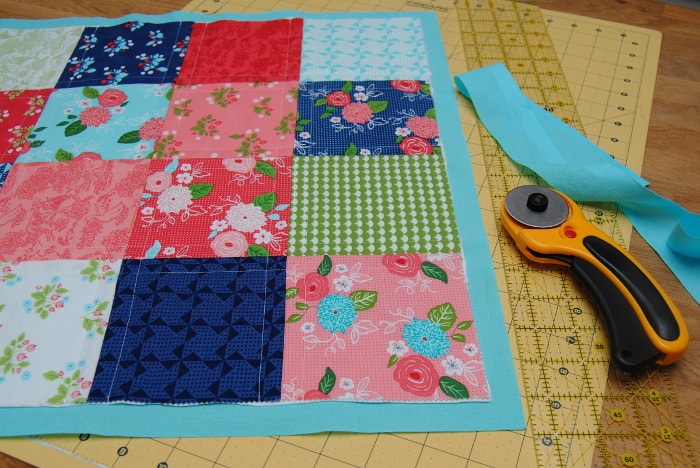
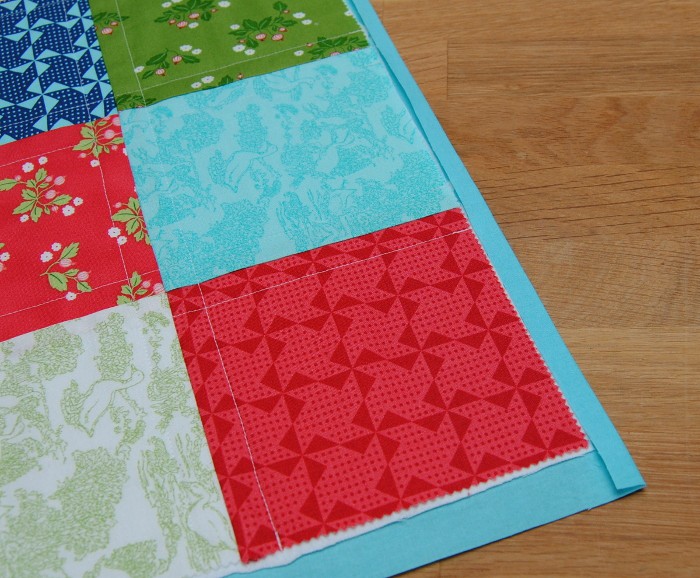
Carefully trim the flannel “batting” even with the edge of the quilt top. Don’t cut the backing fabric yet.
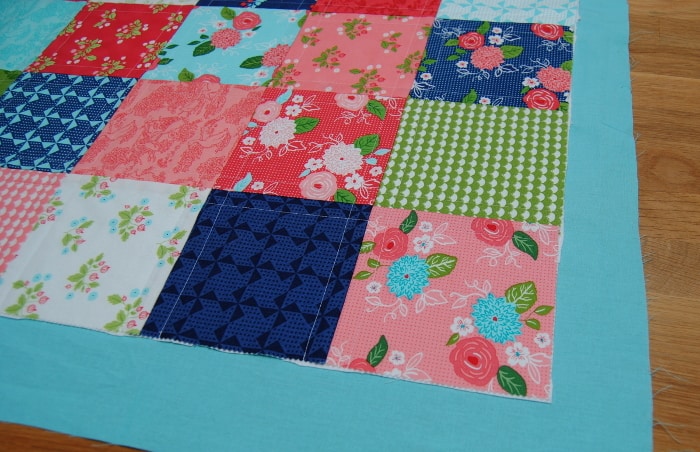
Measure and trim the backing to 3/4″ along all four edges.
Begin making your binding by folding the edges of the backing in 3/8″ on the short edges. The raw edge of the backing should meet the raw edge of the quilt top. Press well.
Fold the short edges in 3/8″ again, enclosing the raw edges of the quilt top inside. Press and pin.
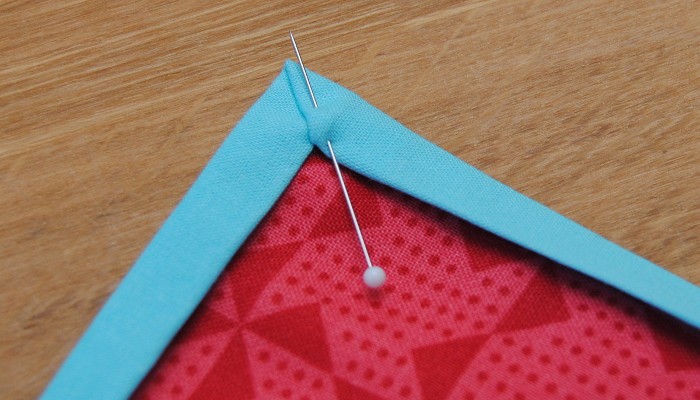
On each corner, fold in a triangle at 45 degrees, as shown, and press.
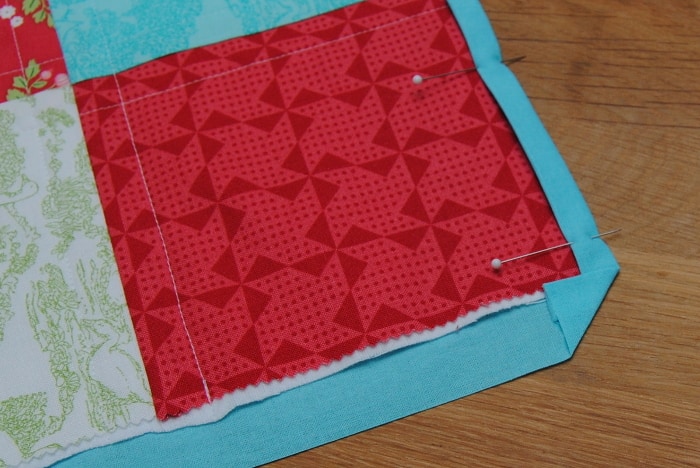
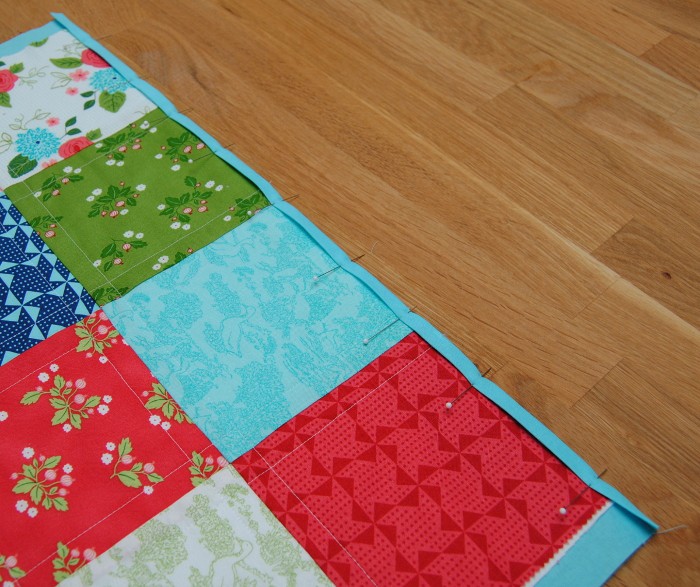
On both long sides, fold the binding in 3/8″ so that the raw edge meets the raw edge of the quilt top and press. Fold the corners over as shown.
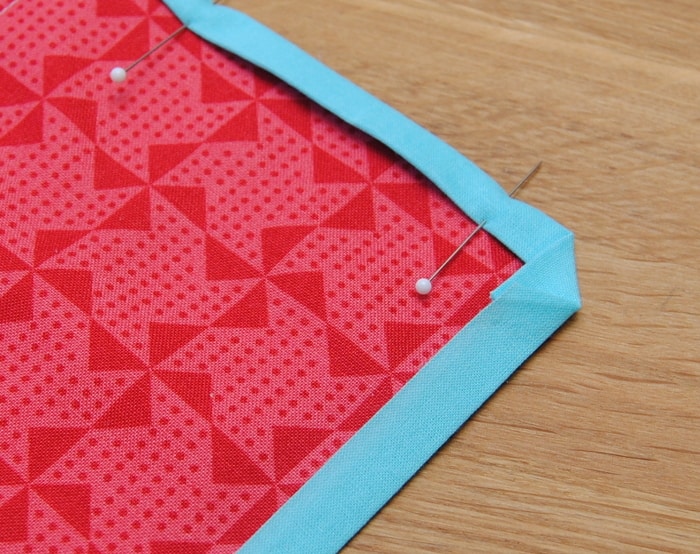
Fold the binding on the long sides over 3/8″ again, hiding the raw edges inside and creating a miter on each corner. Pin in place down both sides.
Your binding should now be pinned all the way around and ready to stitch.
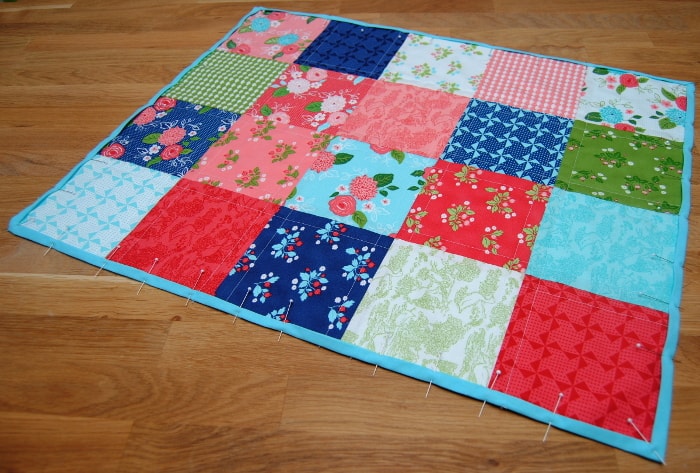
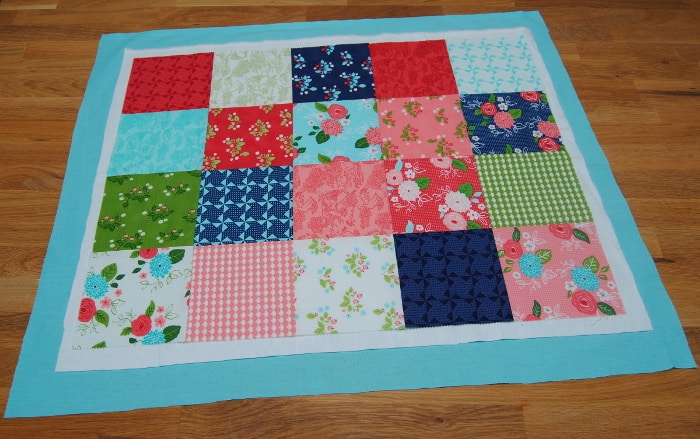
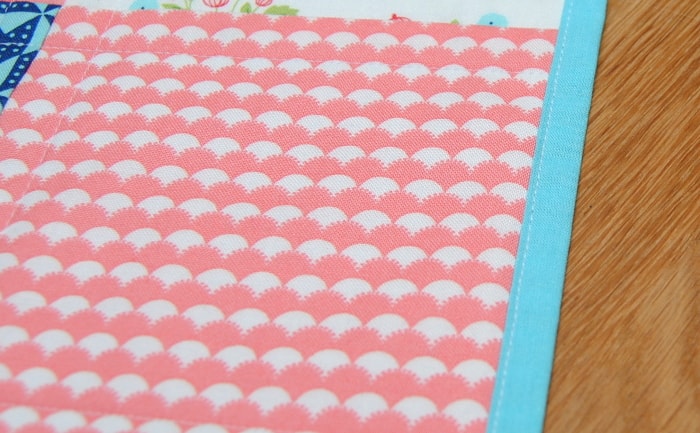
Topstitch just inside the edge of the binding all the way around.
Now, just wash and dry your quilt to give it that crinkly, vintage look.

Wrap it up and give it to a dolly who needs some love!

Thanks to Bonnie Ferguson from Fishsticks Designs for showing us how to make a quilt in such easy steps. I certainly hope that you will give this project a try. Leave me a comment on what projects you would like to learn how to sew! I would love to hear from you.


Hi…. I haven’t made this yet but I am going to very excited thank you!!
Should you wash the backing fabric first? Also why don’t you wash the flannel?
Thanks for the Vintage Doll Quilt tutorial. I am making a quilt for great grandson and have to send twin great granddaughters something in the box. This doll quilt should make them happy!!!!