Hi guys!!
I’m Andrea from Knitty Bitties and I’m so happy to be here today with you as part of the Bake Craft Sew Along!
I blog over at knittybittiessews.com where I spend my days drinking iced tea and sewing my heart out. Every now and then I venture out to the kitchen to bake up a little treat, which I then eat and then have to go for a run. It’s a vicious circle, but I love sweets too much to stop it! Make sure you pop over to my blog for a chance to enter our SEW Amazing Giveaway!!
Enough about me, let’s get onto the fun!
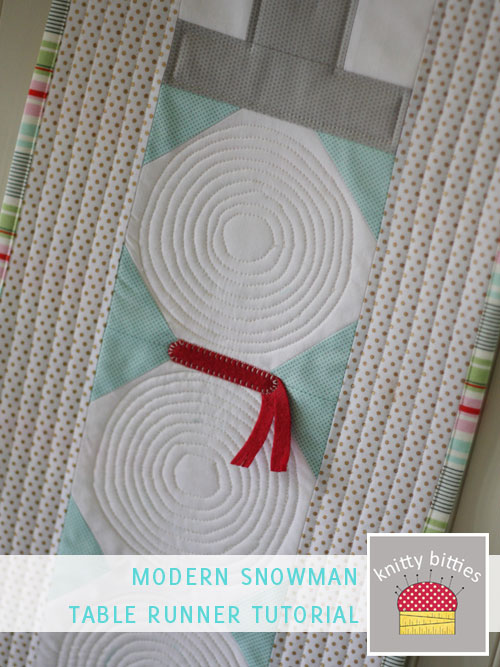
Modern Snowman Table Runner
Finished Size:: 12.5″ x 30.5″
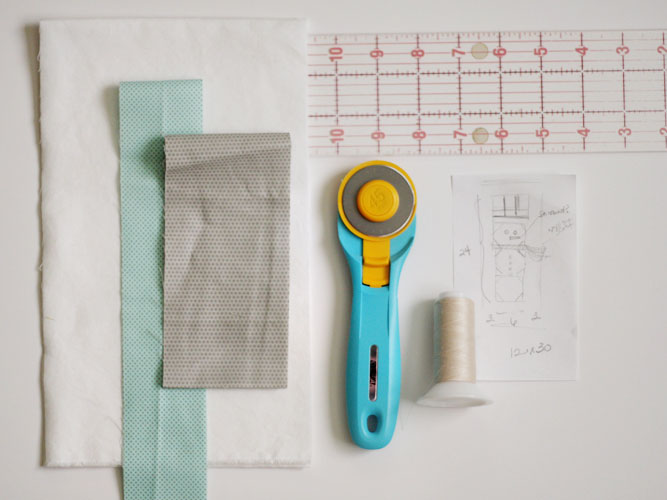
SUPPLIES NEEDED::
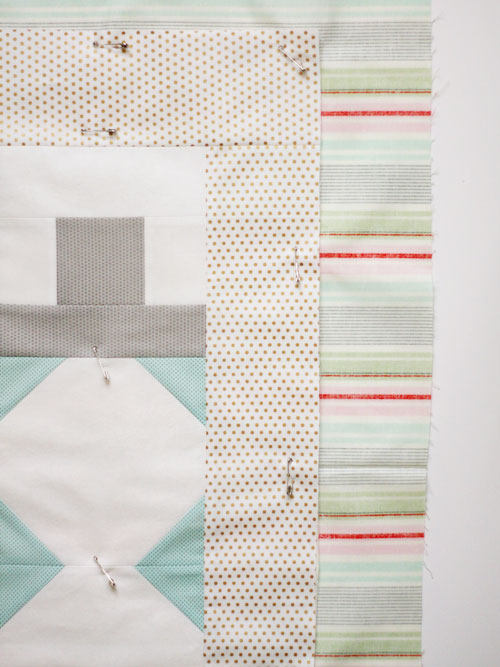
I created this table runner from scraps and fabric on hand. I realize not everyone is blessed with the gift of hoarding fabric … so, if you need to go purchase your fabric, you’ll need these larger cuts, which will be cut down as listed below. You will have left overs of all your fabrics, there by starting you on your journey into hoarding fabric!
If shopping for fabric:: 2 Fat Quarters (accent fabric & top hat fabric) ~ 1/4YD white fabric & border fabric ~ 1/2YD backing fabric ~ batting
- Snowman blocks (makes 4 blocks)::
- {4} 6.5″ x 6.5″ & {2} 3″ x 3″ & 2.5″ x 6.5″- white fabric
- {6} 2″ x 2″ & {6} 2.5″ x 2.5″ – accent fabric (aqua w/ tiny grey dot)
- 2″ x 6.5″ & 3″ x 3″ – top hat fabric (gray w/ gray dot)
- Border:: 1/4 YD (white w/ gold dot)
- Backing:: 1/2 YD (multi-color stripe)
- Batting:: 12.5″ x 30.5″
- Felt, Coordinating Thread
CUTTING INSTRUCTIONS::
- Cut white fabric, accent fabric & top hat fabric as listed above for the snowman blocks
- Cut border fabric into (2) 3.5″ x wof (width of fabric) strips
SEWING INSTRUCTIONS::
{a 1/4″ seam allowance is used unless noted otherwise}
Make {3} snowman body blocks /
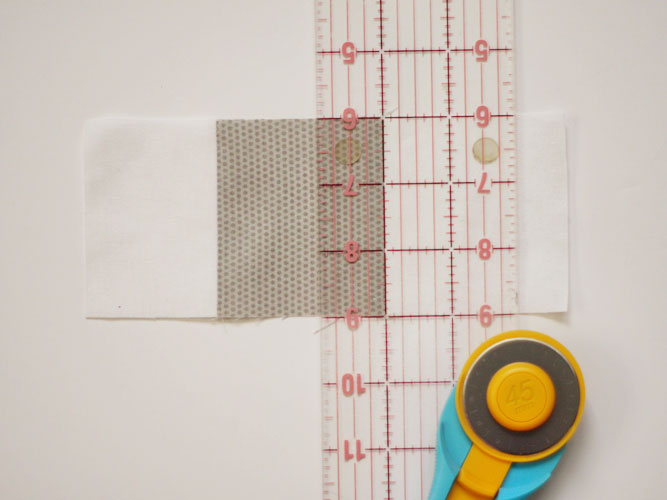
Begin with one of the 6.5″ white squares. Place {4} of the 2″ accent squares right side down in each of the white squares four corners.
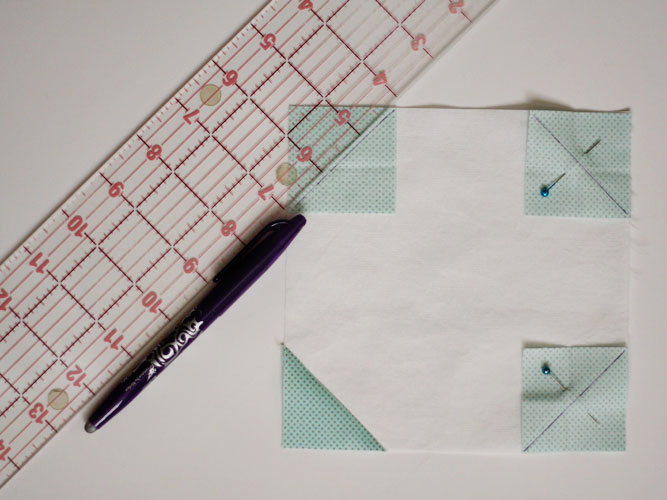
Using a fabric marking pen, draw a diagonal line across two points (as shown above) of the accent squares and pin in place. Repeat for remaining {3} accent squares. Sew on the line you drew, back stitching at the beginning and end.
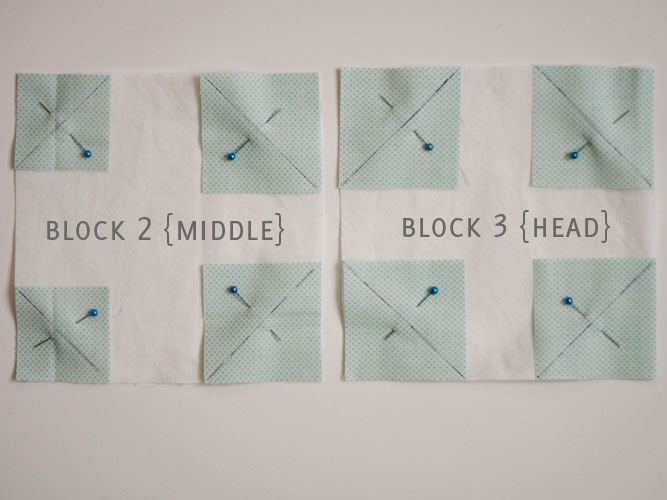
Repeat for remaining 2 snowman body blocks EXCEPT the second snowman body block will use {2} 2″ accent squares & {2} 2.5″ accent squares (put the same size squares on the same side, NOT diagonal from each other) & the third snowman body block will use {4} 2.5″ accent squares. The difference in accent square sizes is to give the look that the snowman’s body is getting gradually smaller.
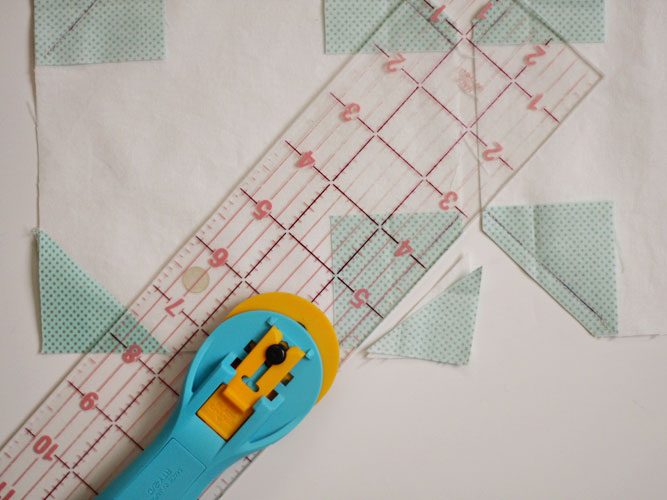
After all three snowman body blocks have been sewn with accent squares, trim the accent squares to 1/4″ seam allowance (SA) as shown above. Repeat for all corners on all three blocks. Iron your accent triangles open with seams toward the outside of the block.
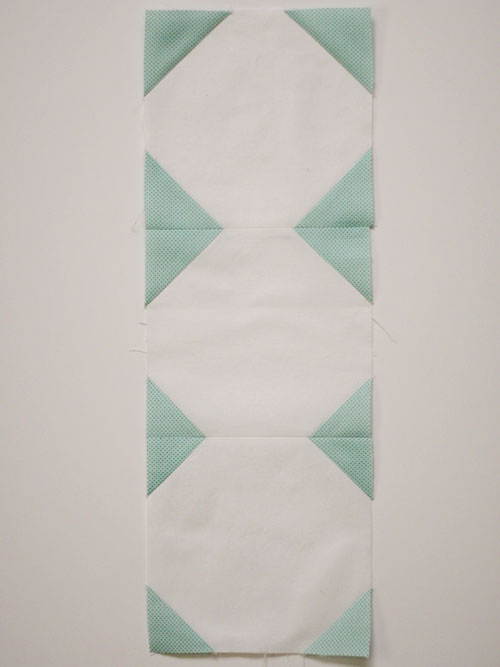
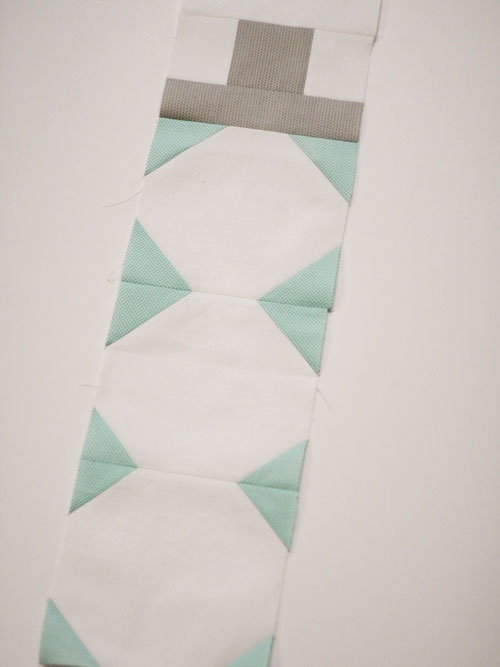
Sew three snowman body blocks together, matching up same sized accent triangles (hint: the block with the two sizes of accent triangles will be in the middle).
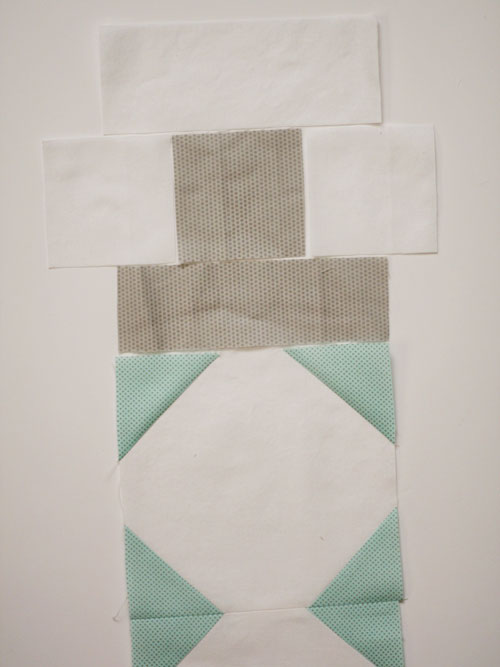
Make snowman top hat block /
Begin with the remaining cuts of white fabric & top hat fabric. Arrange as shown above.
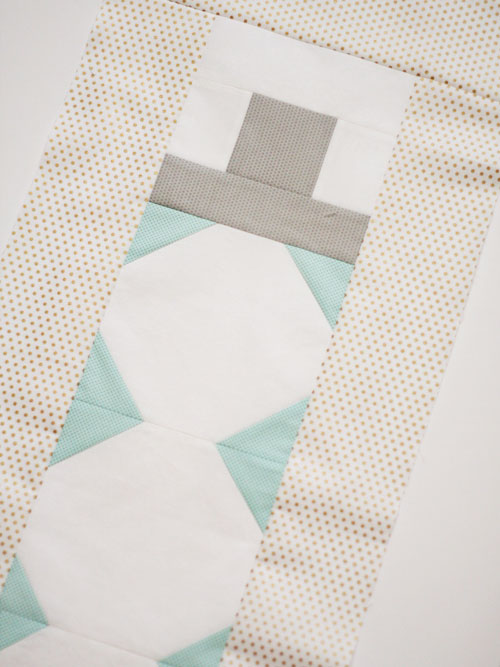
Sew the middle strip together first and press seams open. Trim the white squares down to 2″ on each side of the top hat fabric square as shown above.
Sew the ‘brim’ of the top hat fabric onto the middle strip you just finished. Iron open pressing seams toward the brim. Sew the remaining white strip to the top of the now finished top hat and press the seams open. You’ve just finished your last snowman block!
Now, sew all {4} snowman blocks together to complete your snowman. Press seams open.

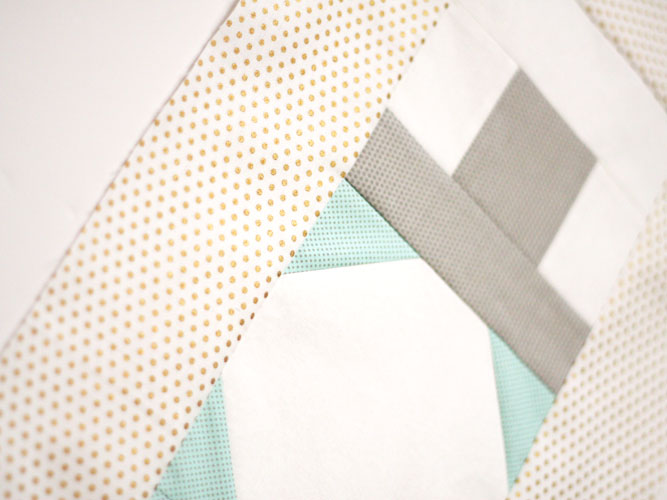
{Ahhh, those shimmery gold dots … can you tell I have a thing for polka dots?!?}
Add border fabric /
Starting with one of the long sides, place one of your border strips right side together with your snowman. Using 1/4 SA sew on the border. Press seam open and trim off the extra border fabric (SAVE this fabric, you’ll use it for one of your short sides!!). Repeat for remaining long side. Using the two excess pieces of border fabric, repeat the same steps for the short sides. Whaa-laa, you now have a table runner top!
Make a Quilt Sandwich, Quilt & Bind /
To finish your table runner, you’ll need to make a quilt sandwich. Start with your backing fabric right side DOWN, then center your batting so that there is at least a 2″ border of backing fabric on all sides. Finish your sandwich with your table runner top right side UP. Pin in place using curved quilting pins.
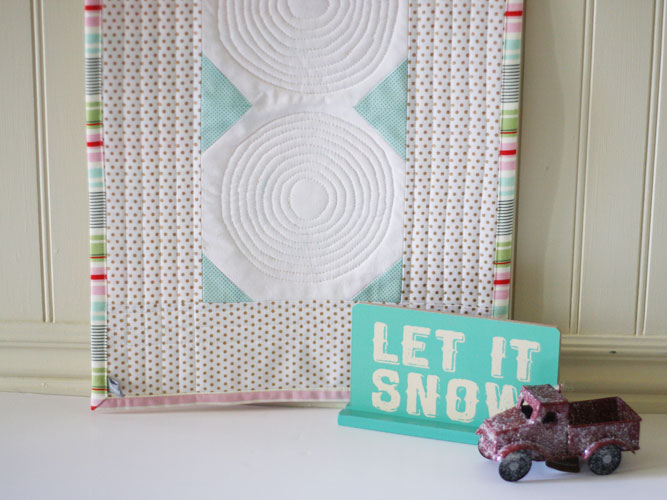
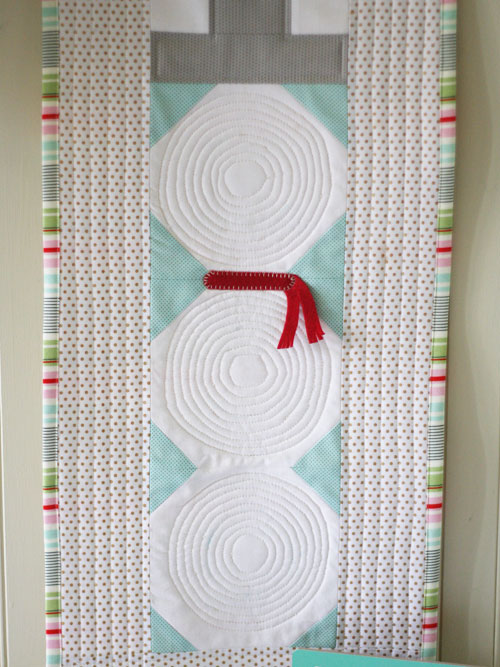
Quilt as desired. I experimented with circular quilting on the snowman body pieces and straight line quilting on the border and top hat. The world is your oyster … quilt however you fancy! Okay not however you fancy, don’t quilt beyond your table runner top onto the backing fabric.
Finish the table runner by trimming your backing fabric to an even 1″ border on all four sides. This will create your cheater binding (tutorial found here) to finish your table runner.
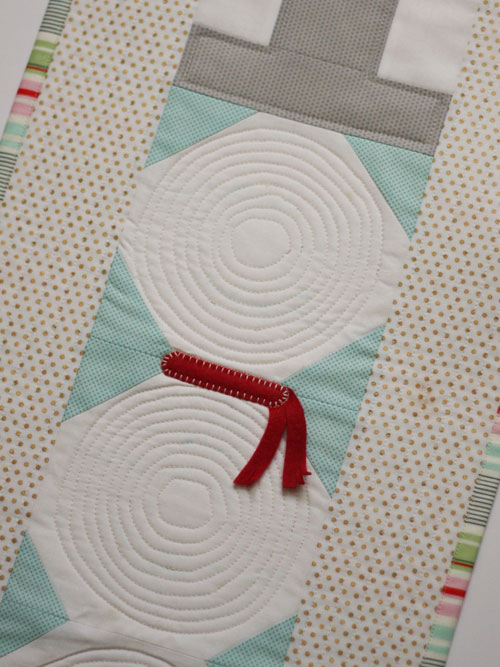
Almost done … while I wanted to keep this table runner looking very fresh and modern, I couldn’t resist adding one more ‘snowman’ detail … a red felt scarf. I just free hand cut the scarf to size and then used a blanket stitch to attach it to my table runner.
Do you love it? I sure hope so!! It’s a quick and easy one day project that you can admire on a daily basis all the way through February {or at least that’s how long those snowy days stick around in my neck of the woods}!
You can follow my glamorous life on:: Instagram / Pinterest / Facebook / Twitter
You can find a whole lotta happy tutorials like this one on my blog, knittybittiessews.com.
If you love to sew then you won’t want to miss a day of sewn handmade gift ideas. According to Kelly is featuring gifts that can be crafted and A Southern Fairytale is sharing recipes perfect for making edible gifts!
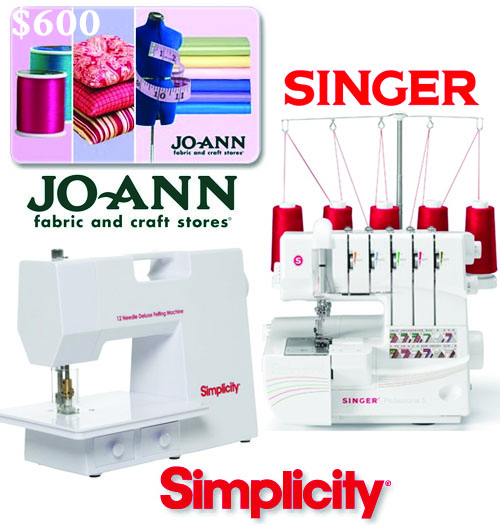
SEW Amazing Giveaway worth over $1000
Stop by Knitty Bitties for more sewing inspiration and to enter the SEW Amazing Giveaway today (you get a new entry everyday)! I am giving away more than $1000.00 worth of sewing goodies! You won’t want to miss this!


Great idea for this fall! Thank you
Hi Andrea! I miss new product in your shop – don’t forget those of us that still love your shop!! Runner is adorable : )