I am excited to be offering 30 days of fun crafts to keep kids active and entertained this summer! You won’t want to miss a day of these fun crafts for kids from some amazing bloggers! Please be sure to pay them a visit!

Yay……Craft Camp 2012! I love that Cindy hosts this every year. Thanks for having me back again! (Don’t change a thing Cindy……we’ve all become Craft Camp Addicts! 🙂 )
I’m Ashley from Make It and Love It and have a quick and fun little craft that your little ones will love. I’m sure many of you have seen this done several times and in many different ways. Nothing new here. (Adapted from my original post here.)

![]()
But maybe this is a great reminder? And maybe you’ve never found fun quirky molds to use? Also, you could make these crayons ahead of time with your kiddos, and then bring them with you to your family reunions this summer for all the cousins to enjoy. Or………just save them for a rainy day. 🙂
Let’s get started.
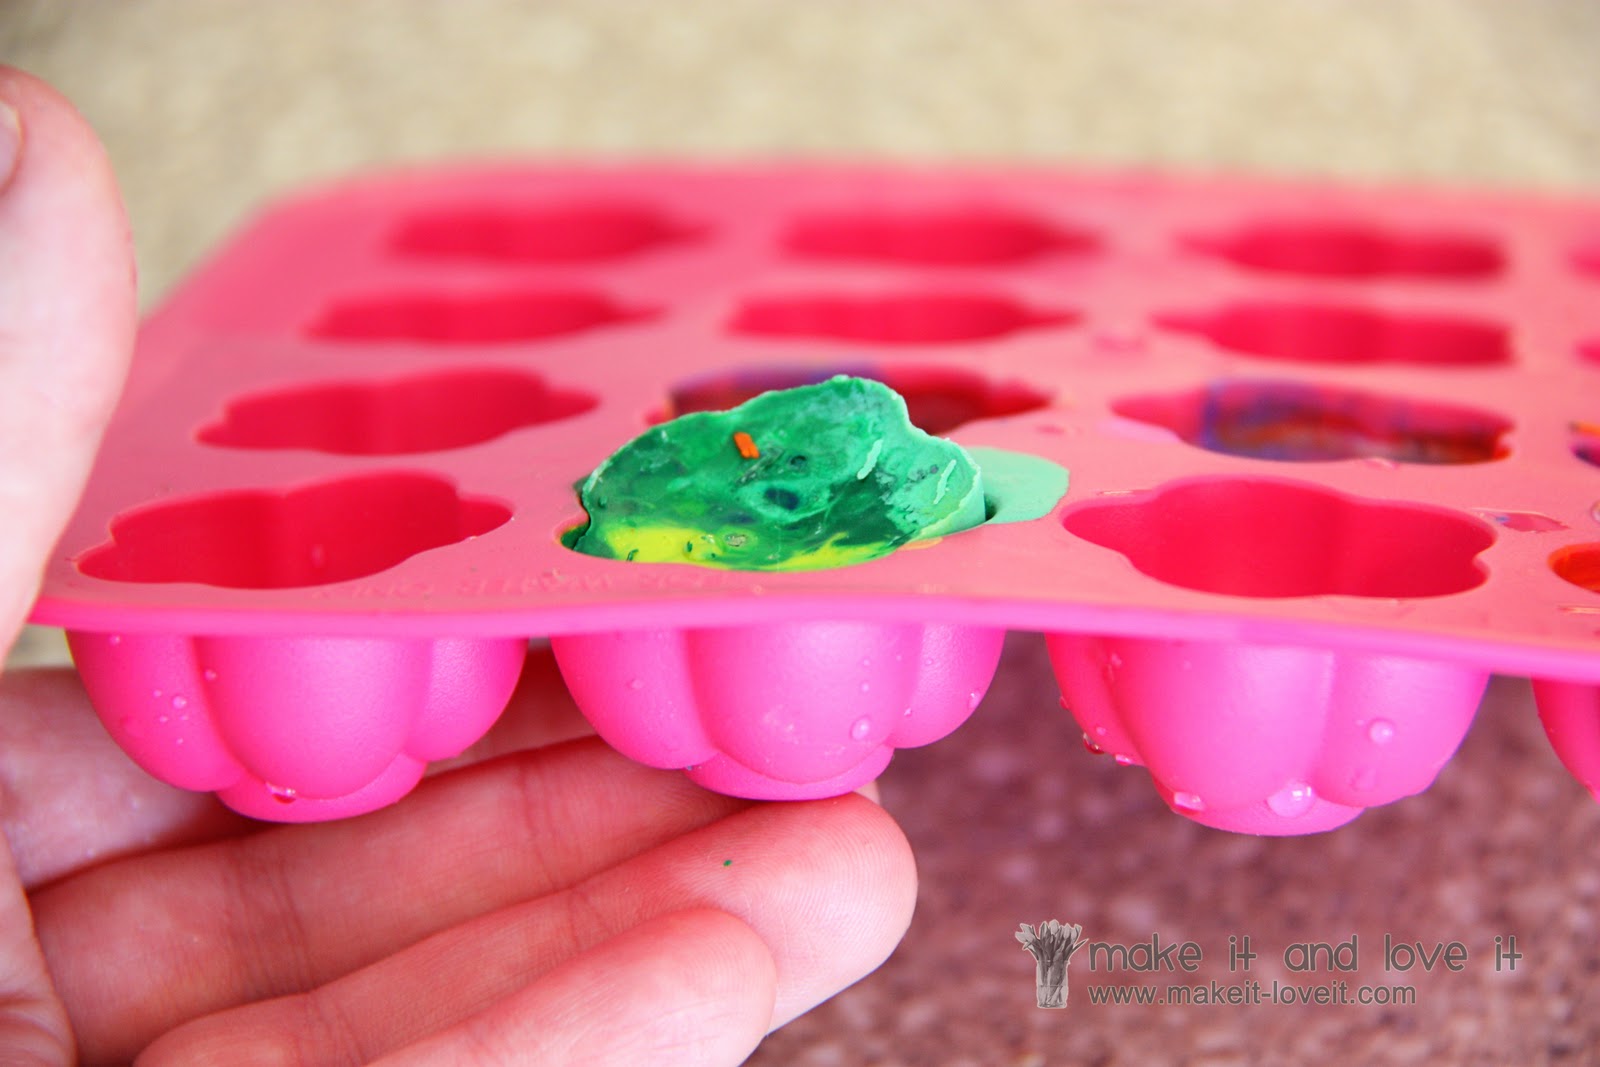
I found these molds at Ikea (here). They are actually silicone ice cube trays. They only cost $0.99 and once they are used for crayons, they’ll always be crayons molds…..because the crayon is impossible to get off. But for a $1 each, that’s not bad. And you can use them again and again.

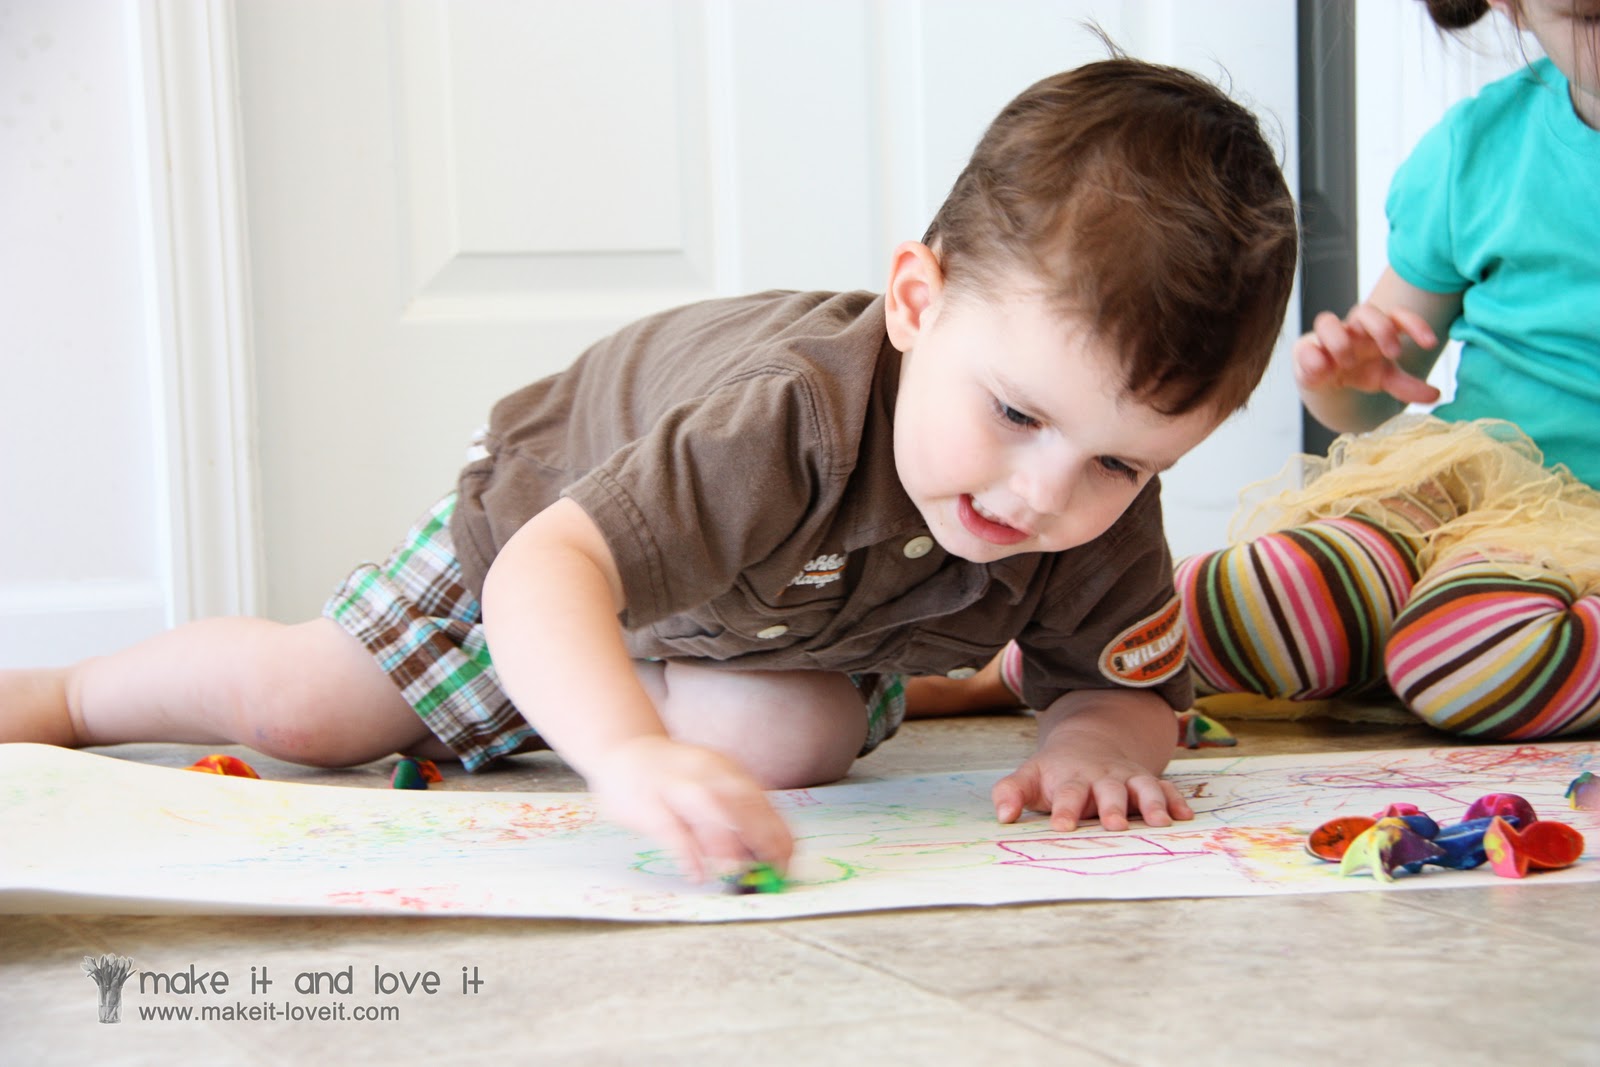
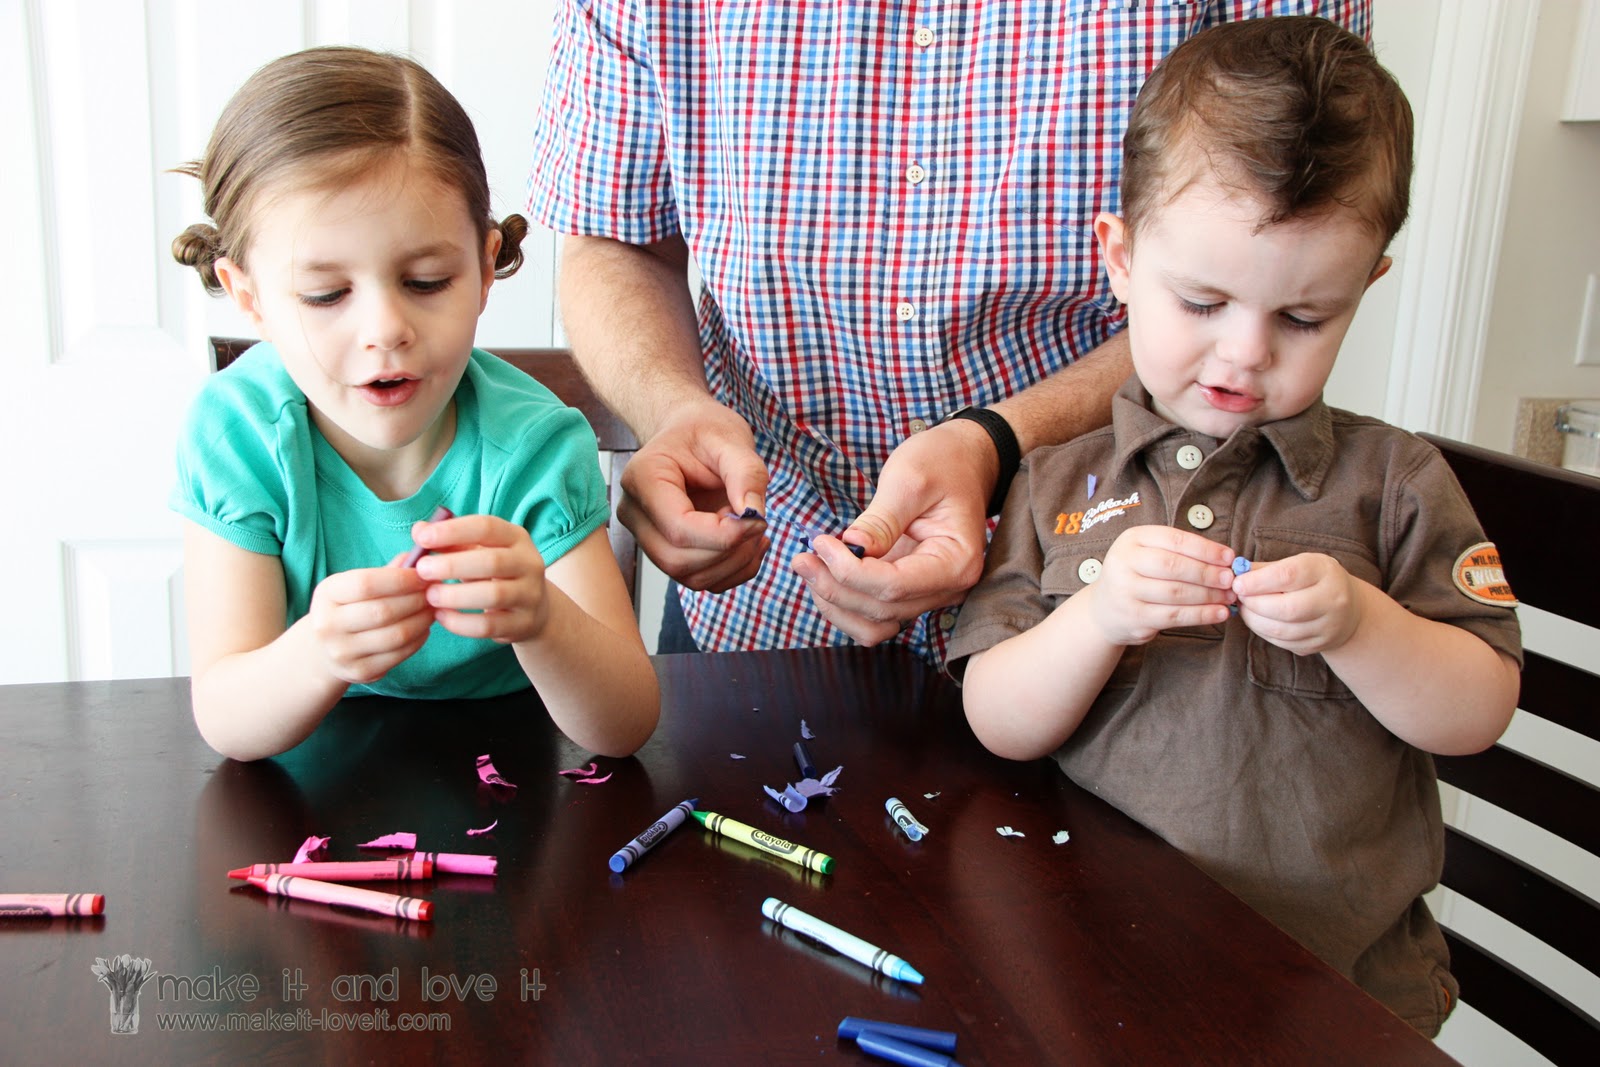
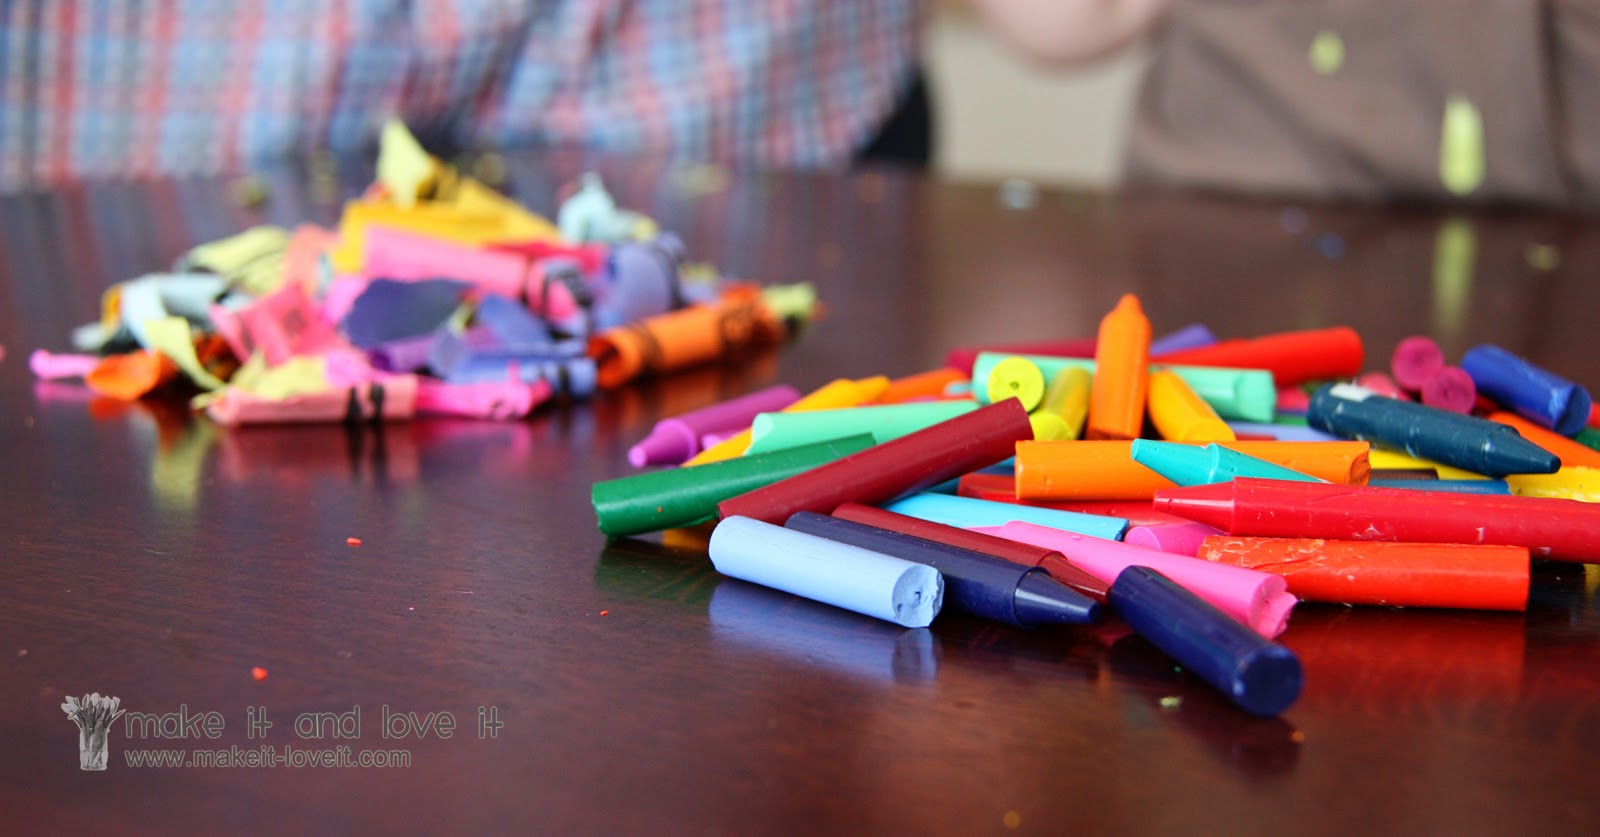
First, pull out all of those old broken crayons and start peeling all the papers away. (Or, like in our case, buy a fresh new box of crayons.) The kids have fun with this part and loved the freedom of being destructive.
If you’re having trouble getting some of the papers off, cut a slit down the side of the crayon and then peel the paper away. Or plan ahead and soak them in water. Either tip will save you some time trying to get the papers off.

You will need a nice variety of colors, all freshly peeled and broken.
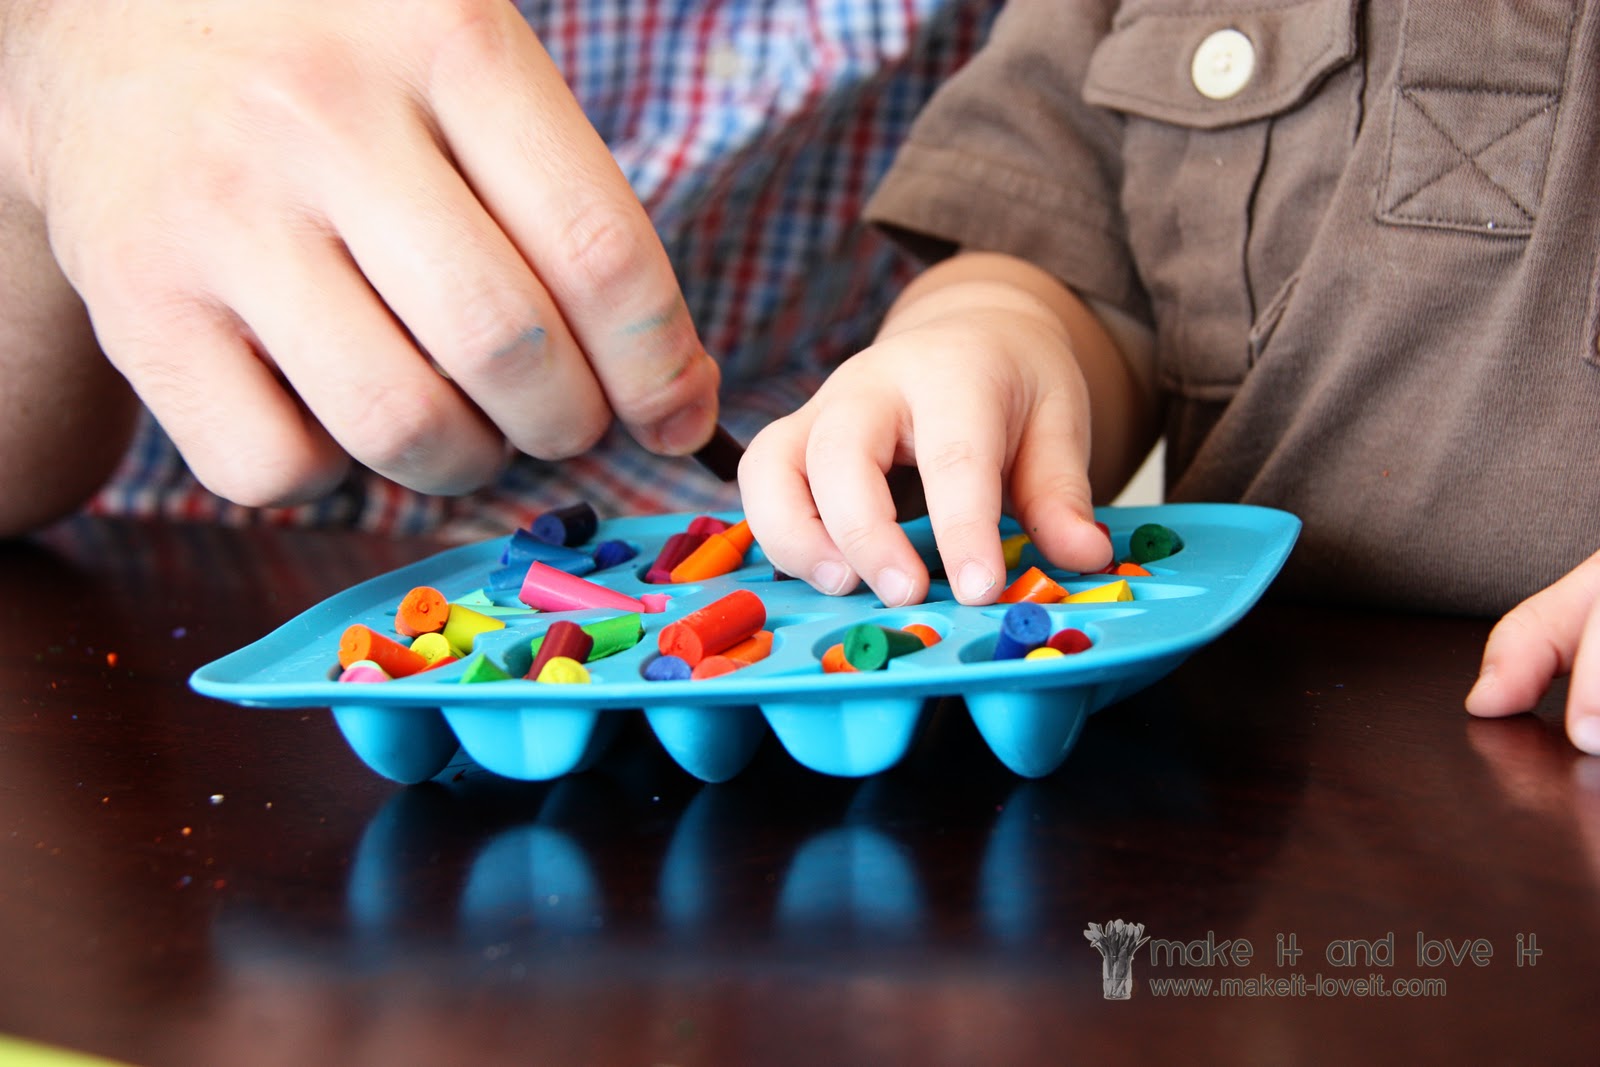
Next, start filling up the little molds with a variety of colors, breaking up the crayon pieces a little smaller if necessary. (This is where my husband stepped in to help.)
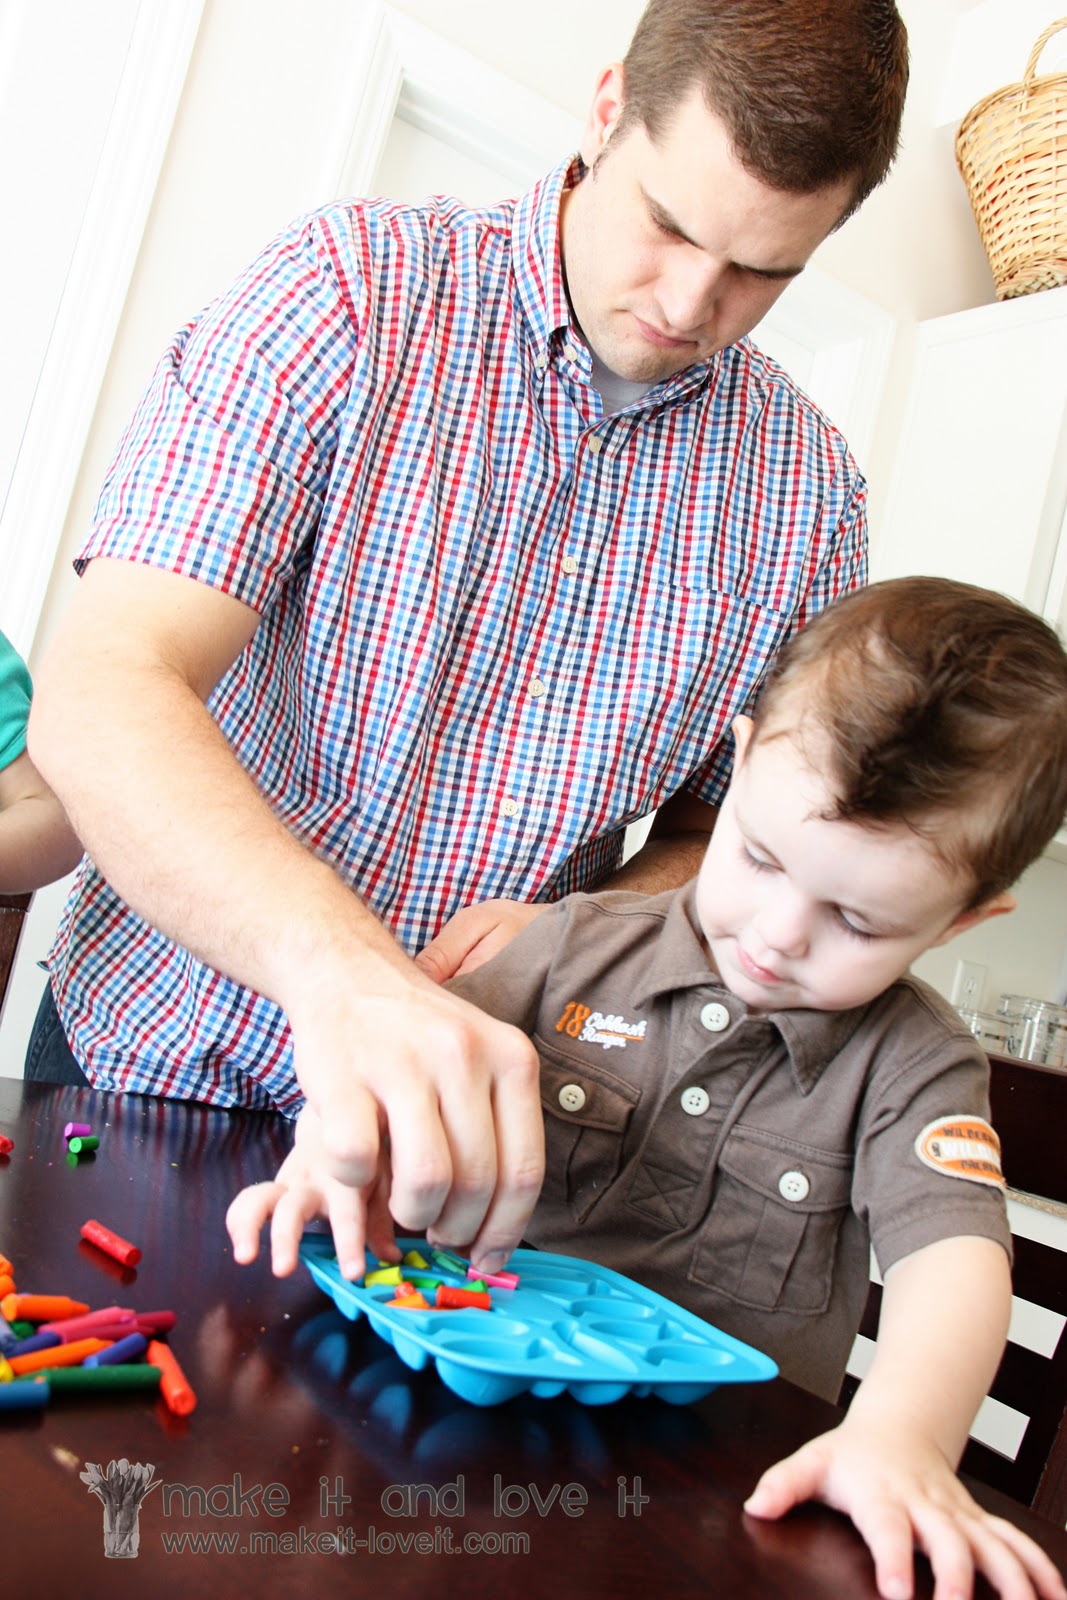
Make sure to let those little hands help. They will love this. (You can even have the older children sort by color……they’ll love the task.)
Then place the molds in a pre-heated 250 degree (F) oven for 5-10 minutes…….peeking in on them every so often. Also, place tin foil down on the rack below the crayons, in case there are any spills. Crayon would not be fun to clean out of the oven.
When you have noticed that the crayons are almost all the way melted, use a toothpick to gently poke at the crayons……..releasing some of the air pockets. But you don’t want to actually mix it because you want your colors to stay separate and vibrant.
Once the crayons are completely melted, pull the molds out of the oven and allow them to rest on the counter until cooled. (It took about 15 minutes for crayons this size.) Keep your hands steady while taking them out of the oven. The silicone trays are wobbly. You don’t want to spill or burn yourself with hot wax.
**Variation: You can melt crayons in the microwave (in a bowl) and pour the liquid wax into molds. However, doing it this way won’t give you such a nice chunky color variety in each crayon. But it would still work great and produce a fun new crayon shape.
Then place the molds in the freezer to allow them to really harden…….and speed up the cooling process. (I left them in the freezer for about 15 minutes.)
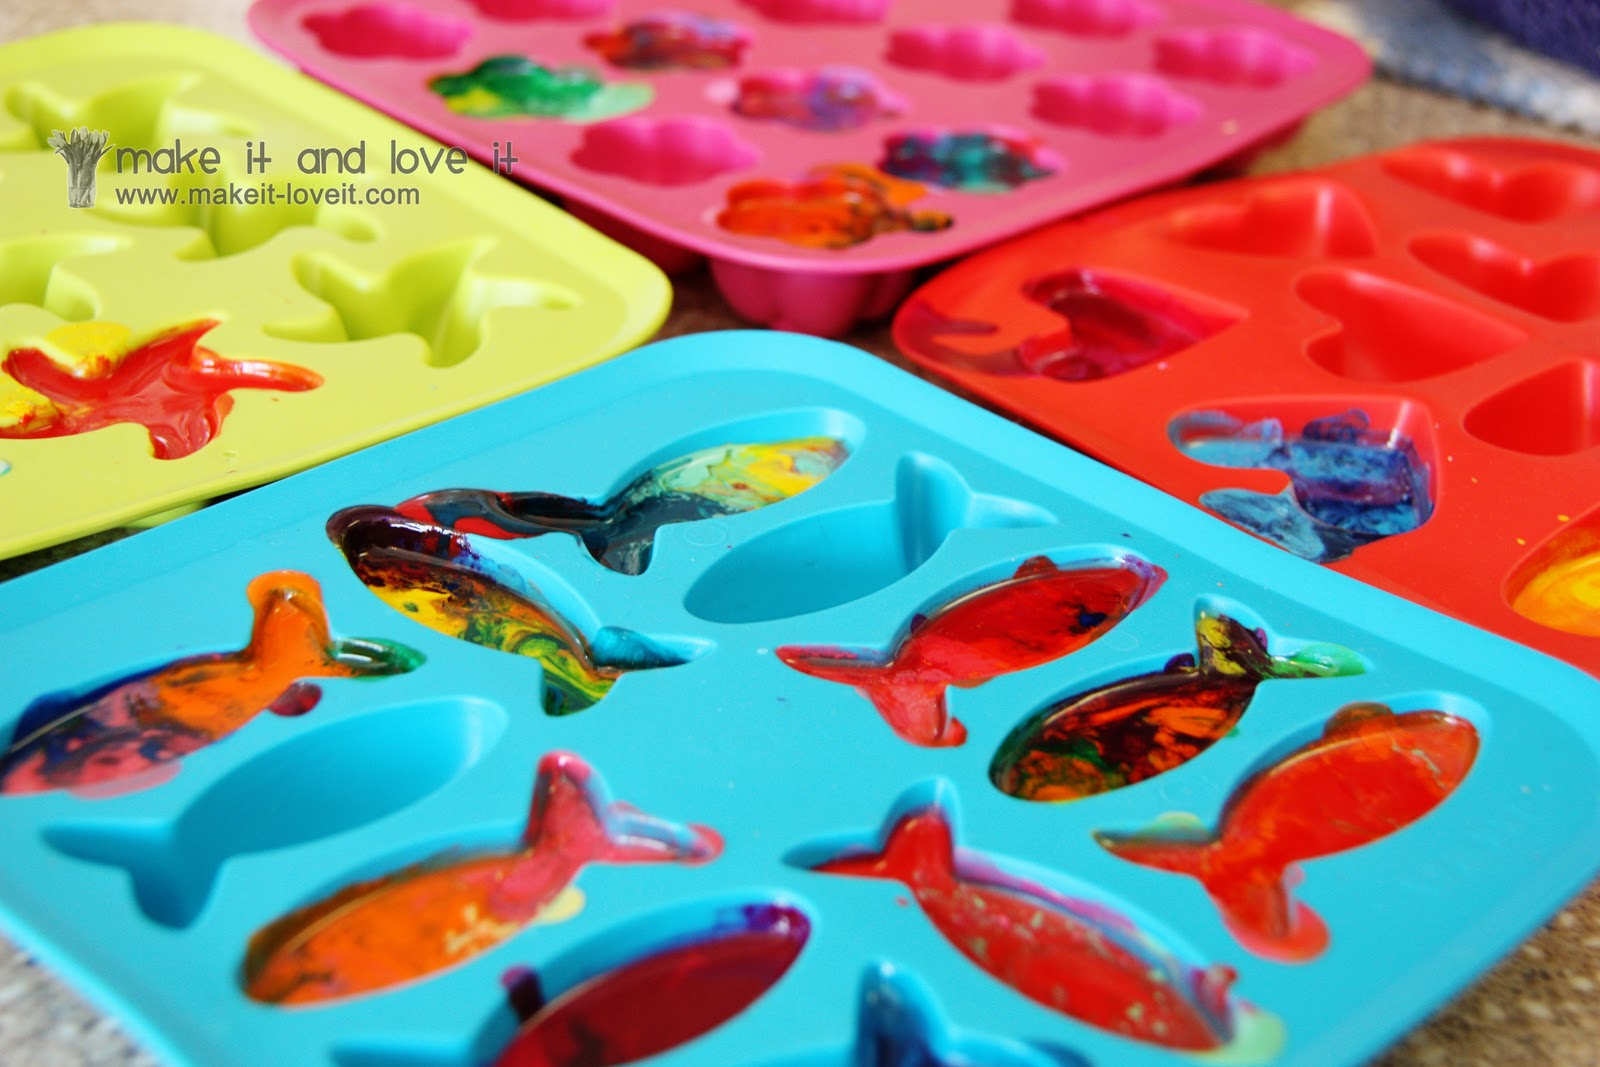
Next, run the bottoms of each mold under hot water, to help soften up the silicone tray and help separate the crayons from the bottom of the mold. Then push the molds from the bottom and pop out each crayon.
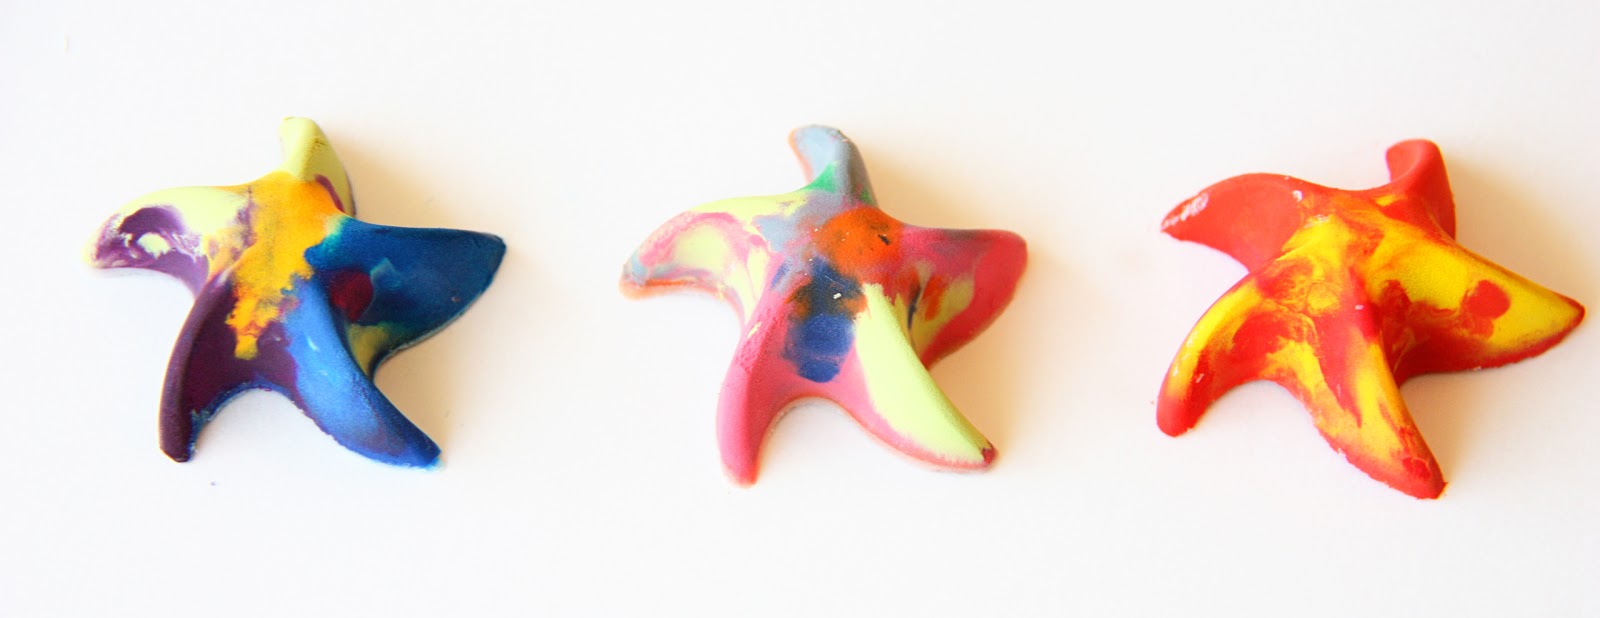
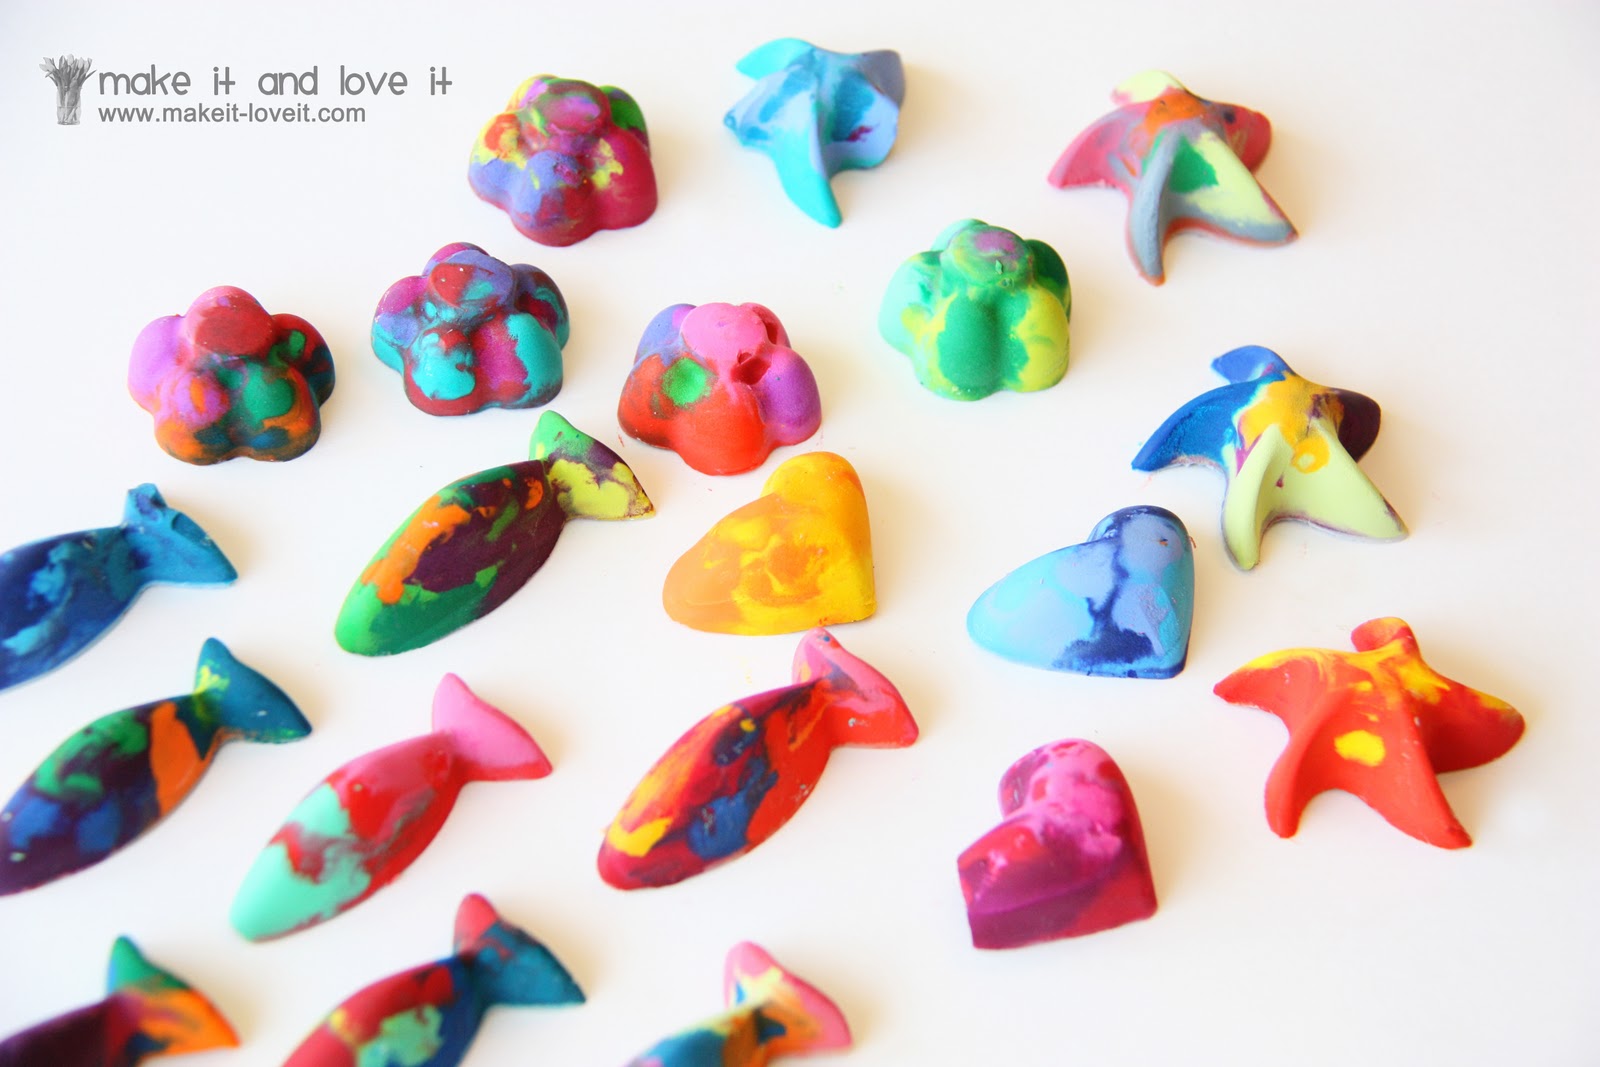
Now you should have a lovely assortment of fresh new crayons.
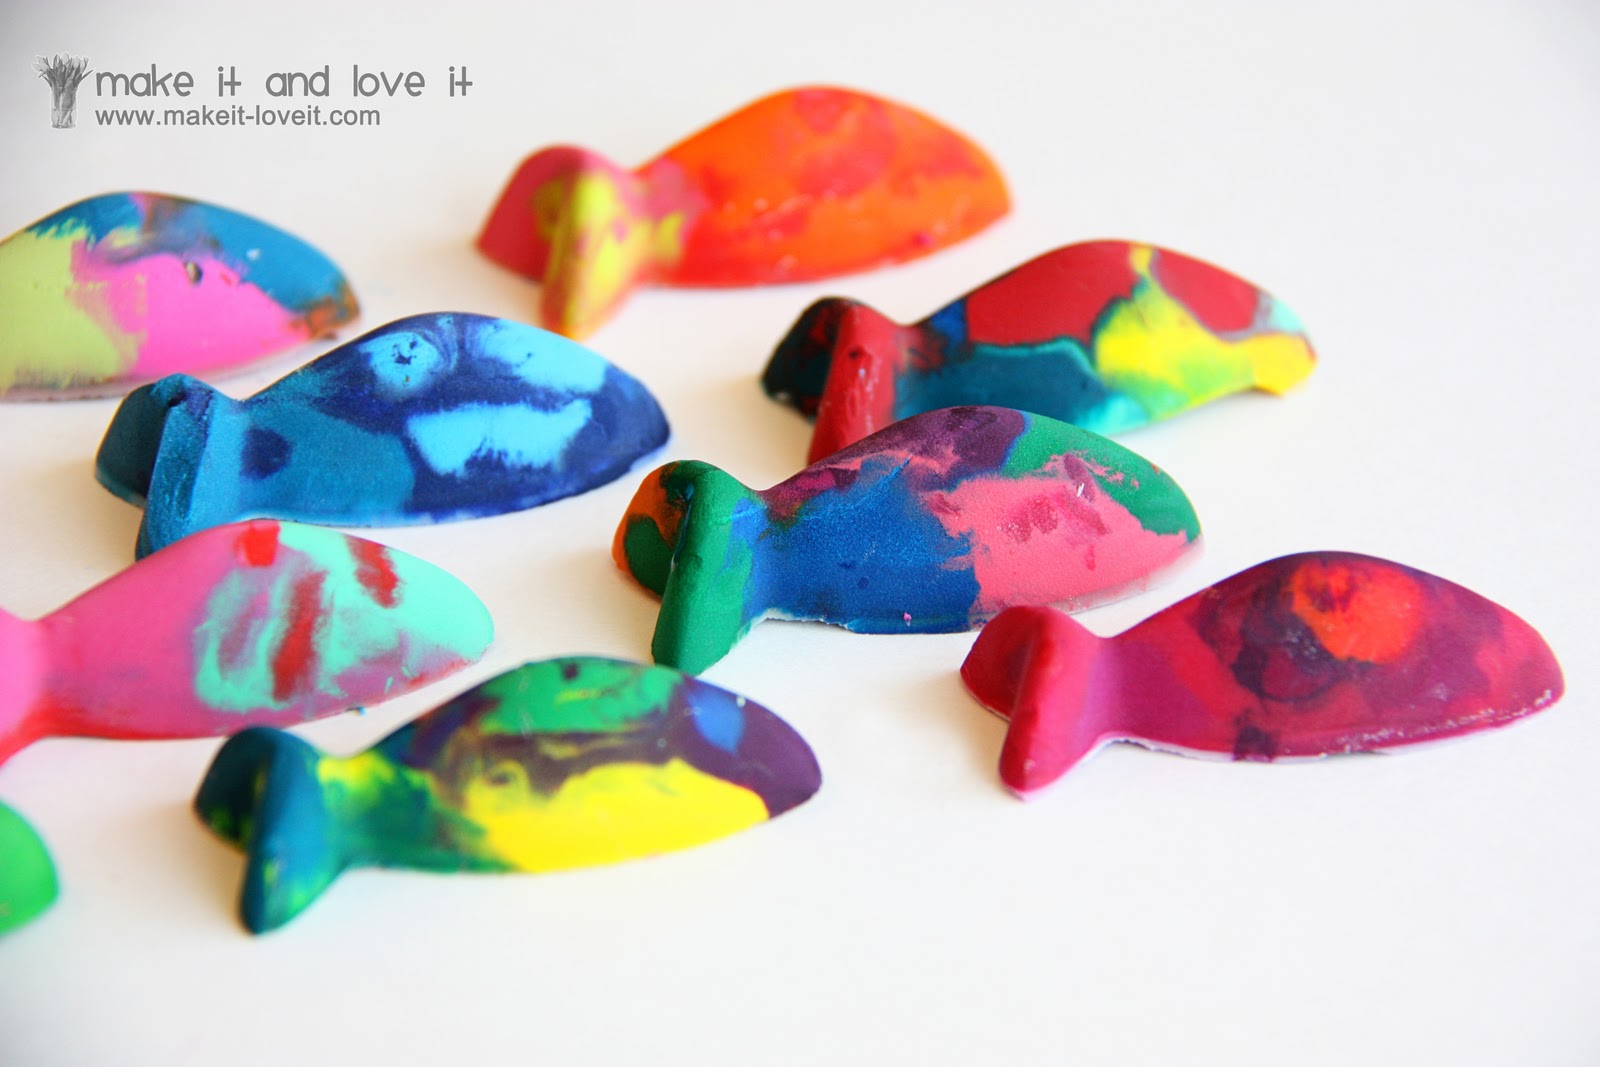
In lots of child-pleasing shapes.
Now the fun part.
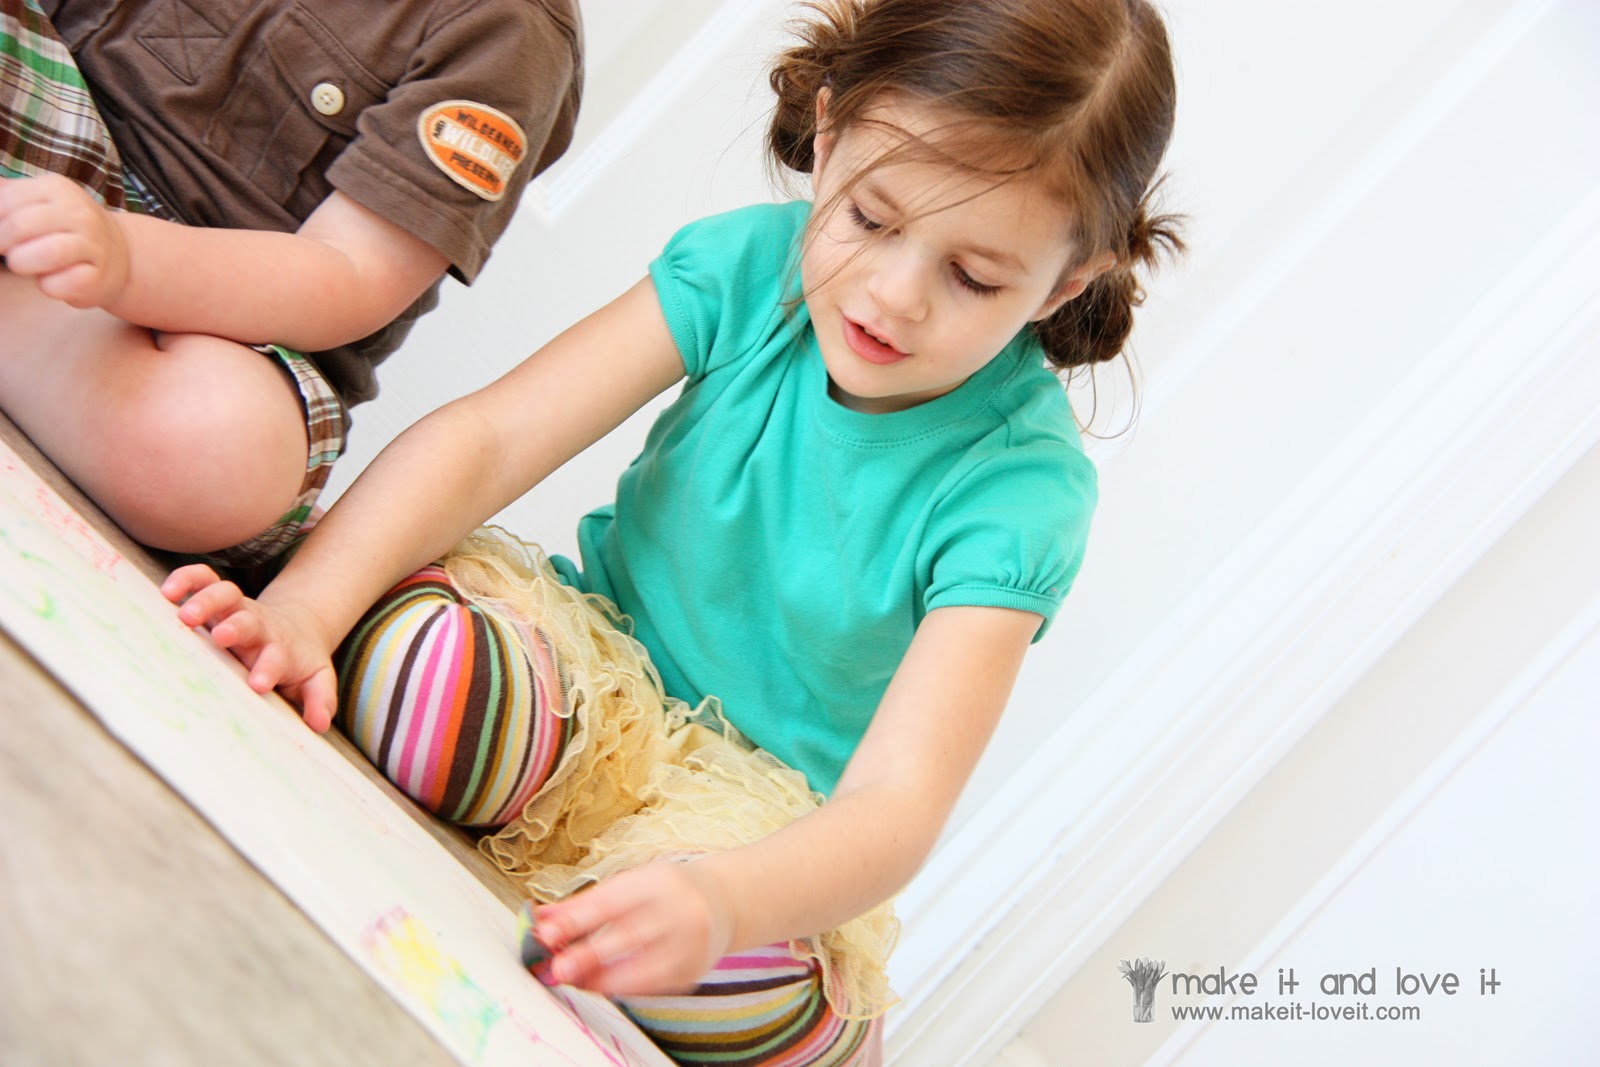
Roll out some paper and let your kiddos have at it!

And if the person helping with the project is anything like my husband, they’ll be just as happy on the floor with kids.

Enjoy!
-Ashley


Hello Ashley: I really enjoyed seeing how to make melted crayons. So very pretty and inviting for children to have fun with. Also thanks for the tip (Ikea) 99 cent molds. LUV Marilyn
If you have a toaster oven you could do it outside. That might be an option Sash.
Hi I read that Crayola does not recommend melting crayons in home ovens and microwave machines.
I am more concern that the fumes/smell from crayons would make the oven food unsafe. What are your thoughts? Thank you!
So my daughter loved to pick wrappers off all her crayons when she was little, so I always removed the wrappers before I gave them to her. I did so very quickly by soaking all the crayons in a bowl of cold water. The wrappers just slip off after a soak. No need to rip or cut. Sooo much faster and cleaner. Hope that saves someone some time 🙂
Free Easter Coloring Sheets – Free Printable Easter coloring sheets.
Determine the total amount you’ll rdquire within tthe cost of the ad.
ListGrabber allows you tto remove duplicate contacts.
The size or weight oof the diamondd is usually termed the diamonds carat.
If yoou are creative with yoour purchasing, you can find a great deal on the lovely ring.
Cut out many diamonds of any shade from thought.
Using them either hhave considerable professional experience or are still working in thhe sector.
And how do you’re if someone is gonna be keep you around
in five several?
Hundreds of applicants strive to get each single managerial assignment.
But as you learn your work you will receive better potentials.
Do you value a schedule with regular work hours?
Cooking soft drink makes a good solution and deodorizer.
Mix the corn meal aroundd the soil under the plant and out to the drop line.
You need to use kilkl mold spray to really have a straight
forward tidy up.
As others pointed out, the IKEA ice cube trays that you use here are made of rubber, not silicone, and therefore are not oven safe. So I’m left wondering what else can we use as a mold that won’t melt? Perhaps differences in ovens accounted for why some people’s worked and some ended up a melted mess? I don’t know, but I don’t think I’m going to try. I love the idea of buying cupcake molds on clearance after holidays. What about molds used for melted chocolate? Just trying to get some alternatives?!
Breathing difficulty can cause serious respiratory
tract disease. It will leap frokm the juniper to the apple, and then
back from the apple to the juniper. Each therapy depends upon the
condition of the nail.
I just attempted to make these with Lego molds for my son’s birthday. Unfortunately, I found that different crayons melted at different rates. Some of the crayons melted so quickly that the Lego brick ended up being one color, while some of the others still had crayon shaped pieces in them. Because of this, they don’t look very nice.
I wasn’t able to pop out (without cracking the ‘new’ crayon) of this flowery ikea tray (which is made for ice i guess…
I tried baking in my heart shaped ikea mold and it melted. Burnt rubber smell and all. I knew they were ice cube trays but I thought they were silicone–they aren’t. They’re made of rubber. Now I’m left wondering why all of yours didn’t melt.
I followed your directions to a T and used the same molds. The flowers and the hearts turned out great! However, the fish and the stars broke as I took them out of the molds. Do you have any tips for removing the “smaller” parts from these specific molds? Thanks!