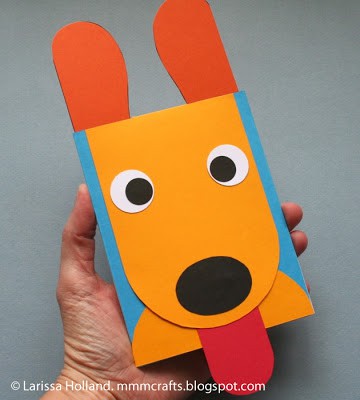
This Puppy Ears Card is an adorable card that is easy to make and a delight to open! Kids will love making and giving this fun 3D pop up card. Drop it in the mail, and it is double the delight for a kid who likes to get their own mail!
If you are looking for other kids’ crafts. You might like these paper towel butterflies.
Puppy Ears Card
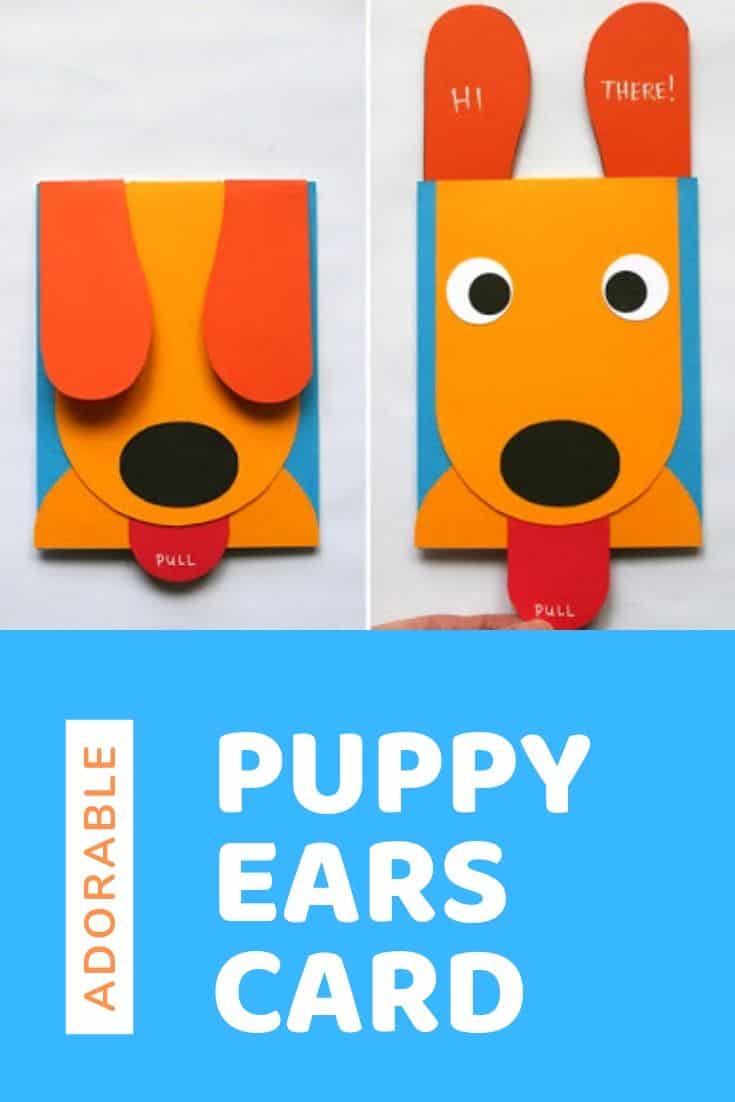
Let’s make a silly, flappity-eared puppy card that has a tongue pull tab! It’s just the thing to make to say Hi to friends you miss, or just give to someone who could use some puppy love. Are you ready?
Gather your materials! You need:
- Letter-sized sheets of white, blue, yellow, orange and red card stock
- Scraps of white and black paper
- Tacky Glue
- Scissors and/or craft knife (Remember the craft knife is sharp! Be careful!)
- Circle punches in 1 inch and 5/8 inch sizes
- Ruler
- This Puppy PDF
- Printer

Get Started
1) Download the PDF template, open it, and follow the directions on the template to print on your card stock.
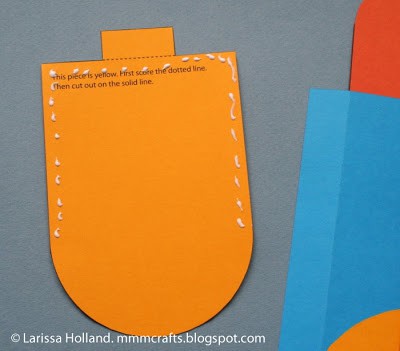
2) Score and cut out all the pieces as directed on the template. I use a
ruler and the back of my craft knife* (not the sharp side) to score. You
can also use a table knife to score. Keep the extra uncut pieces to make a card
in opposite colors later!
*Get a grown-up involved if you are using a craft knife. It’s sharp!
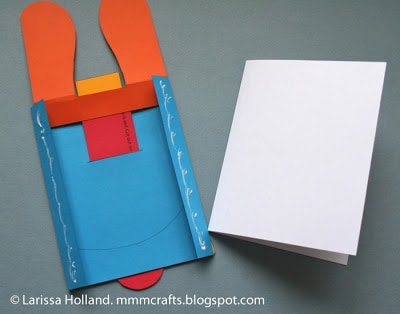
3) Cut the white piece of card stock in half so that you have two pieces
that are 5.5 x 8.5 inches. Fold them in half. You’ll use one for this
card and have an extra to make another card later.

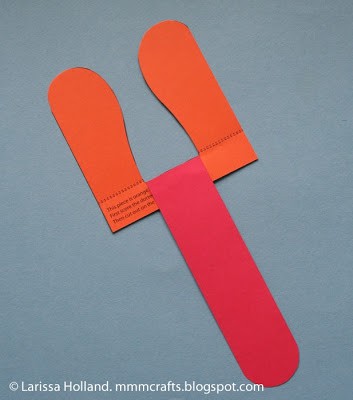
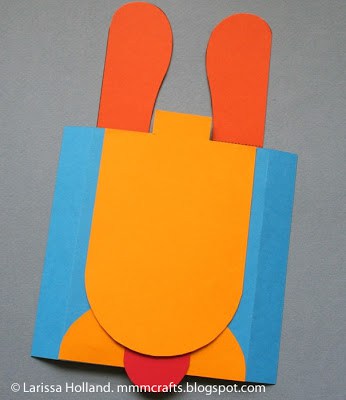
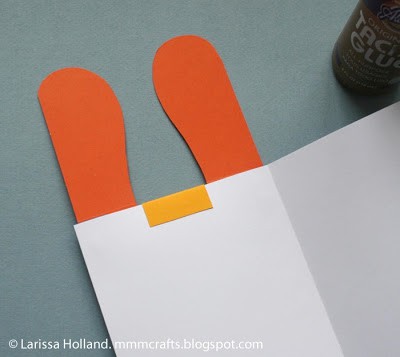
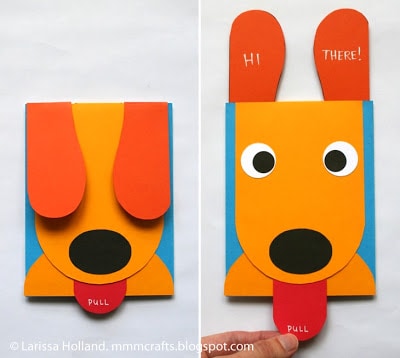
4) Glue the tongue to the earpiece. Note the writing is facing up on the ears and facing down on the tongue.
5) Glue the semicircle to the bottom of the blue piece, flush with the bottom edge. Note the text is face down on both pieces.

6) Feed the tongue through the slit from the back.
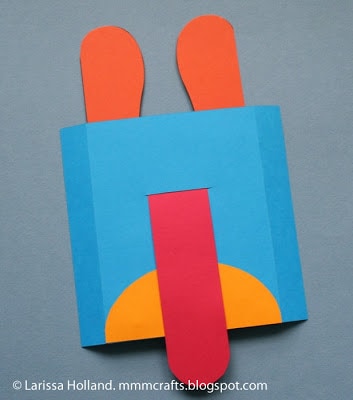
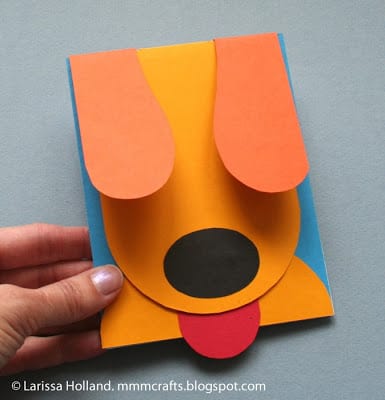
7) Put glue only on the top and sides of the text side of the head and center it flush against the top edge of the blue.
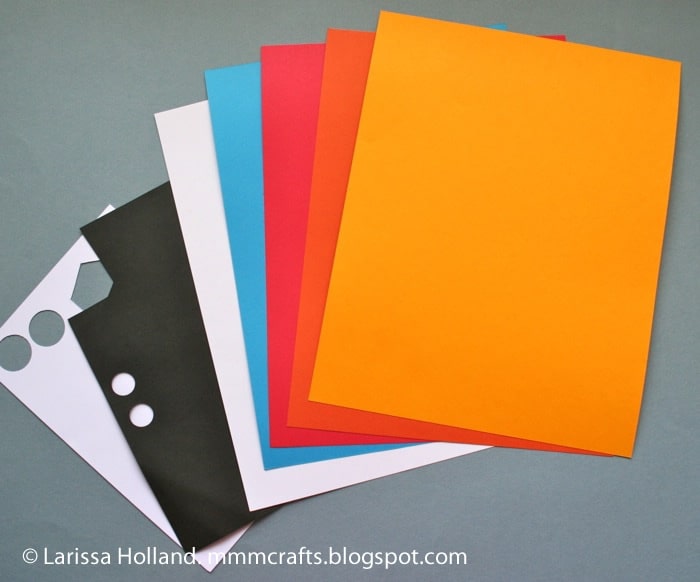
8) Punch two white 1-inch circles and two black 5/8 inch circles. Make eyes by gluing the black onto the white. Then glue the completed eyes on, being sure they are in a spot that is hidden by the ears when they are folded down.
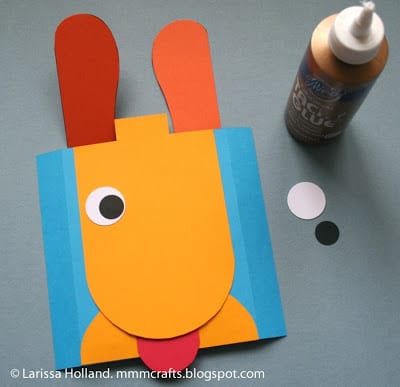

9) Use a template piece to trace a nose on black paper with a pencil. Cut it out and glue to the face.
10) Fold over the blue side flaps toward the back and crease them well.
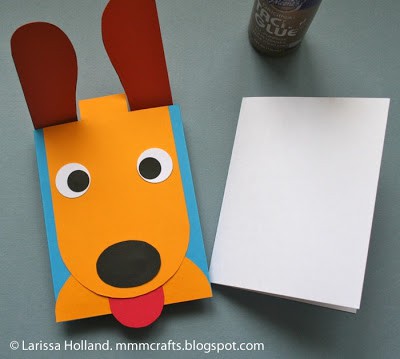
11) Add glue to the back side of
each flap, then glue to the front of the card you made in step 3. It’s easier to add the card to the back of the puppy instead of the other way round, but be sure you have the card opening on the correct side.
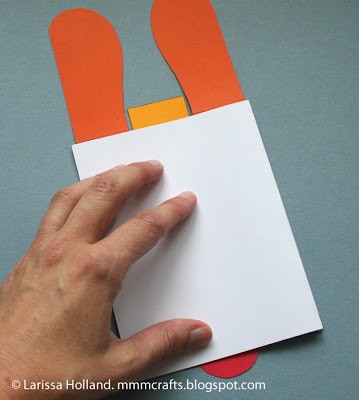
12) Open the card and fold over the yellow flap between the ears and glue it to the inside cover of the card.
13) Test the ear action! Pull the tongue down and watch the ears flip up! Push the tongue back inside and the ears can fold back down.
14) Using a gel pen or thin magic marker (not a permanent marker – those may bleed through
your paper), add the word “PULL” to the lower part of the tongue that shows
when the ears are laying down. Add a message to the inside of the ears if you like, for example:
Here are a few more projects
I would love to keep you fully stocked with creative ideas, yummy recipes, fun crafts, and loads of free printables. Subscribe to Skip to my Lou to get new ideas delivered to your inbox. Follow me on Facebook, Pinterest, Twitter, and Instagram for all my latest updates.


What a wonderful, ingenious card. Can’t wait to make it for one of my grandsons. Thank you SO much for sharing this wonderful tutorial with me.
Hi there, You’ve done an incredible job. I will
certainly digg it and personally recommend to
my friends. I’m sure they will be benefited from this site.
Your way of telling the whole thing in this piece of writing is in fact good, every one be able to effortlessly be aware of
it, Thanks a lot.
It’s the best time to make some plans for the
future and it is time to be happy. I’ve read this post and if I couuld I
wanjt to suggest you some interesting things or tips.
Perhaps you could write next articles referring to this article.
I desire to read more things about it!
I read this post fully regarding the difference of most recent and previous technologies,
it’s awesome article.
Hello my friend! I wish to say that this post is awesome,
great written and include almost all significant infos.
I would like to see more posts like this .
Thank you so much for the template! I just made this for my sister and it turned out great. The only trouble I had was that the dotted lines didn’t appear on my printed templates, but that was easy enough to figure out. Perhaps it was because I selected ‘black only’ for printer ink?
I made this card for my boyfriend for his birthday. We recently got a dog and this was perfect to wish him from both of us 🙂
I’m going to make this for my great grandbabies. Thanks.
Hello, I loved this card on sight, and decided to make it for my little great grand daughters birthday, but I cannot get the ears to fold back down once they have popped up!!! any suggestions please??
Hi
what a cute idea.
Love the design and am trying to use the idea for an Easter Bunny from your pattern! Thanks so much for sharing!
Thanks for sharing this super cute tutorial!
what a cute card!! thank you so much! Using this as a Christmas card for my parents from the dog! Very clear instructions!!! Thanks again!!!!
Thank you so much for sharing the template to this adorable card. I can’t wait to make it.