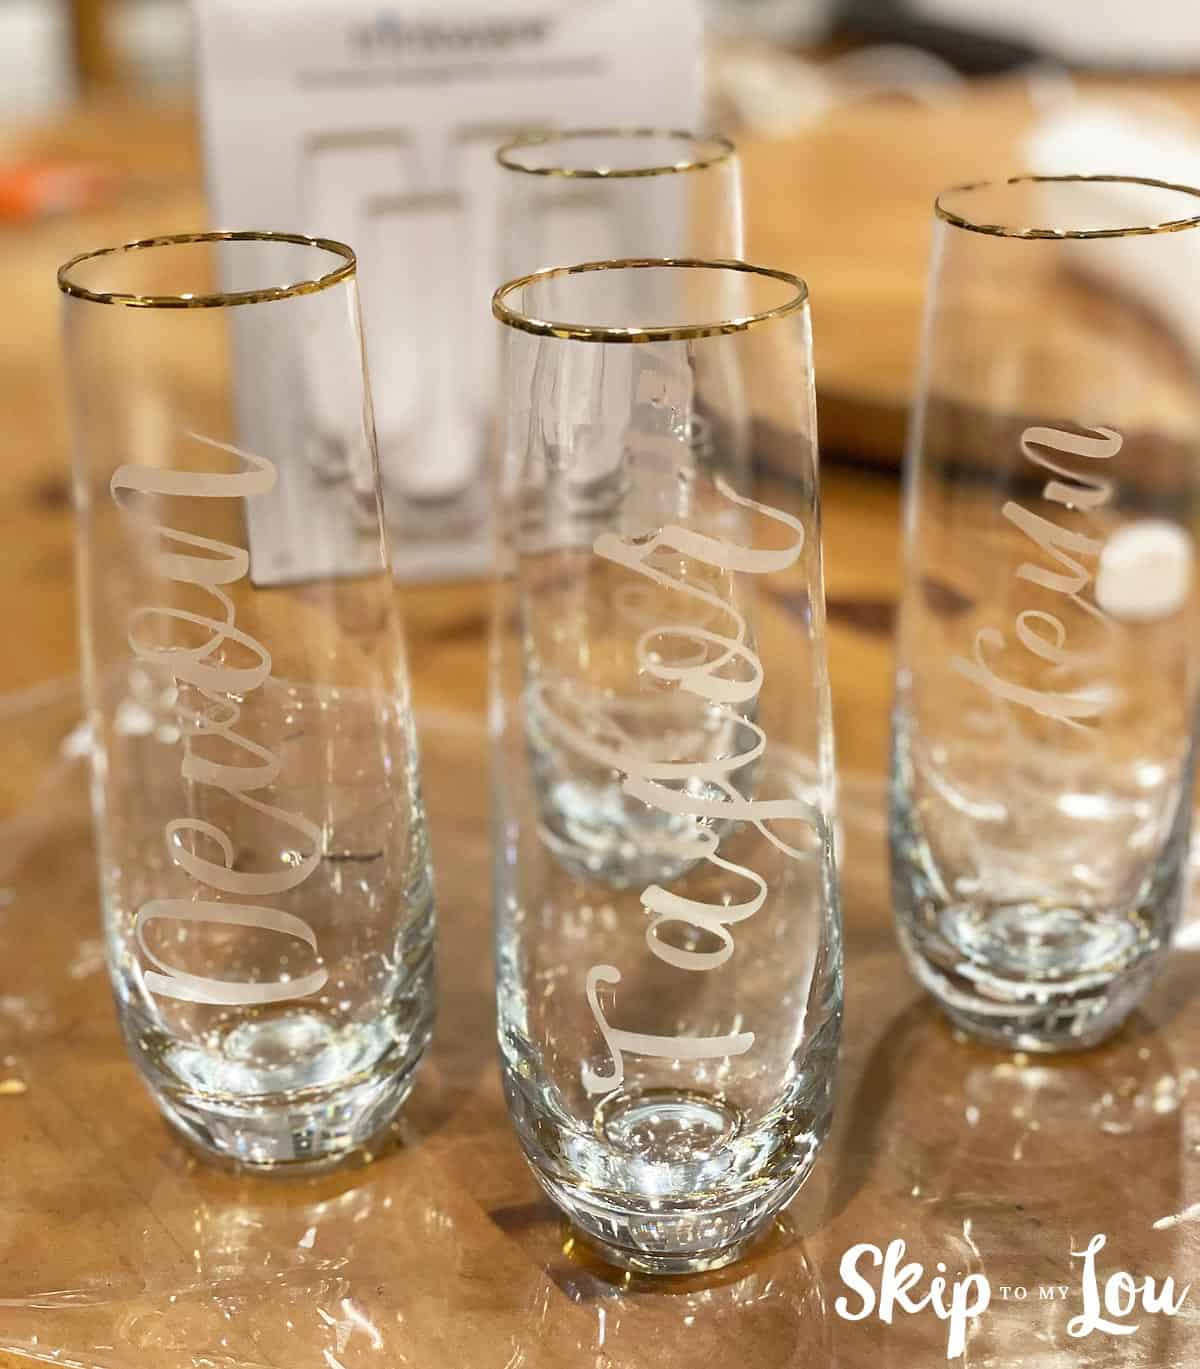
Looking to personalize the glassware in an easy way for your next special occasion? You are at the right place. Simply use my step-by-step tutorial on how to etch glasses and create these beautiful wine glasses that make great gifts!
Even if it’s your first time trying glass etching projects, once you get the hang of it, I’m sure it will become one of your favorite crafts to do whenever you have a special event coming up. Happy crafting!
Related: Anniversary Gift ideas are a handy reference to keep so you will be in the know about what to give on those special occasions. End of the Year Teacher Gifts has you covered on what teachers really like.
There are different etching methods in different complexity levels, but for this crafting project, we will be trying a simple one. Glass etching cream does the heavy lifting in this project! The only fancy machine you need is a cutting machine like a silhouette machine to make the adhesive stencil. No fancy cutting machine? Never fear! With contact paper, an x-acto knife and a steady hand, you can create your own stencils.
Etch glasses with these Supplies and Materials
he materials and supplies are listed below. Most of these are probably already at home or you can get them at your local Dollar Tree. Also, plan on using etching cream in a well-ventilated area.
- Your preferred piece of glass: drinking glasses, jars, or even Pyrex that you want to etch
- Glass cleaner or isopropyl alcohol (to remove any dust, dirt, or fingerprints from the surface of the glass.)
- Paper towel or lint-free cloth
- Gloves to protect your hands when using etching cream are very important.
- Small paintbrush or palette knife
- Etching cream
- Painter’s tape or washi tape (for securing the border of the stencil)
- Cutting mat
- Stencil vinyl or contact paper if you do not have a cutting machine
- Scissors or X-acto knife
- Silhouette or Cricut machine
Procedure for etching glass
- First thing is to clean any residue from the glass surface using glass cleaner or isopropyl alcohol and a lint-free cloth.
- Design your stencil and create it.
- Weed or remove the letters.

3. Draw a grid on top of the vinyl stencil to help you place it correctly on the glass item. You want to leave room on all sides of the stencil so the etching cream only touches the inside of the stencil.

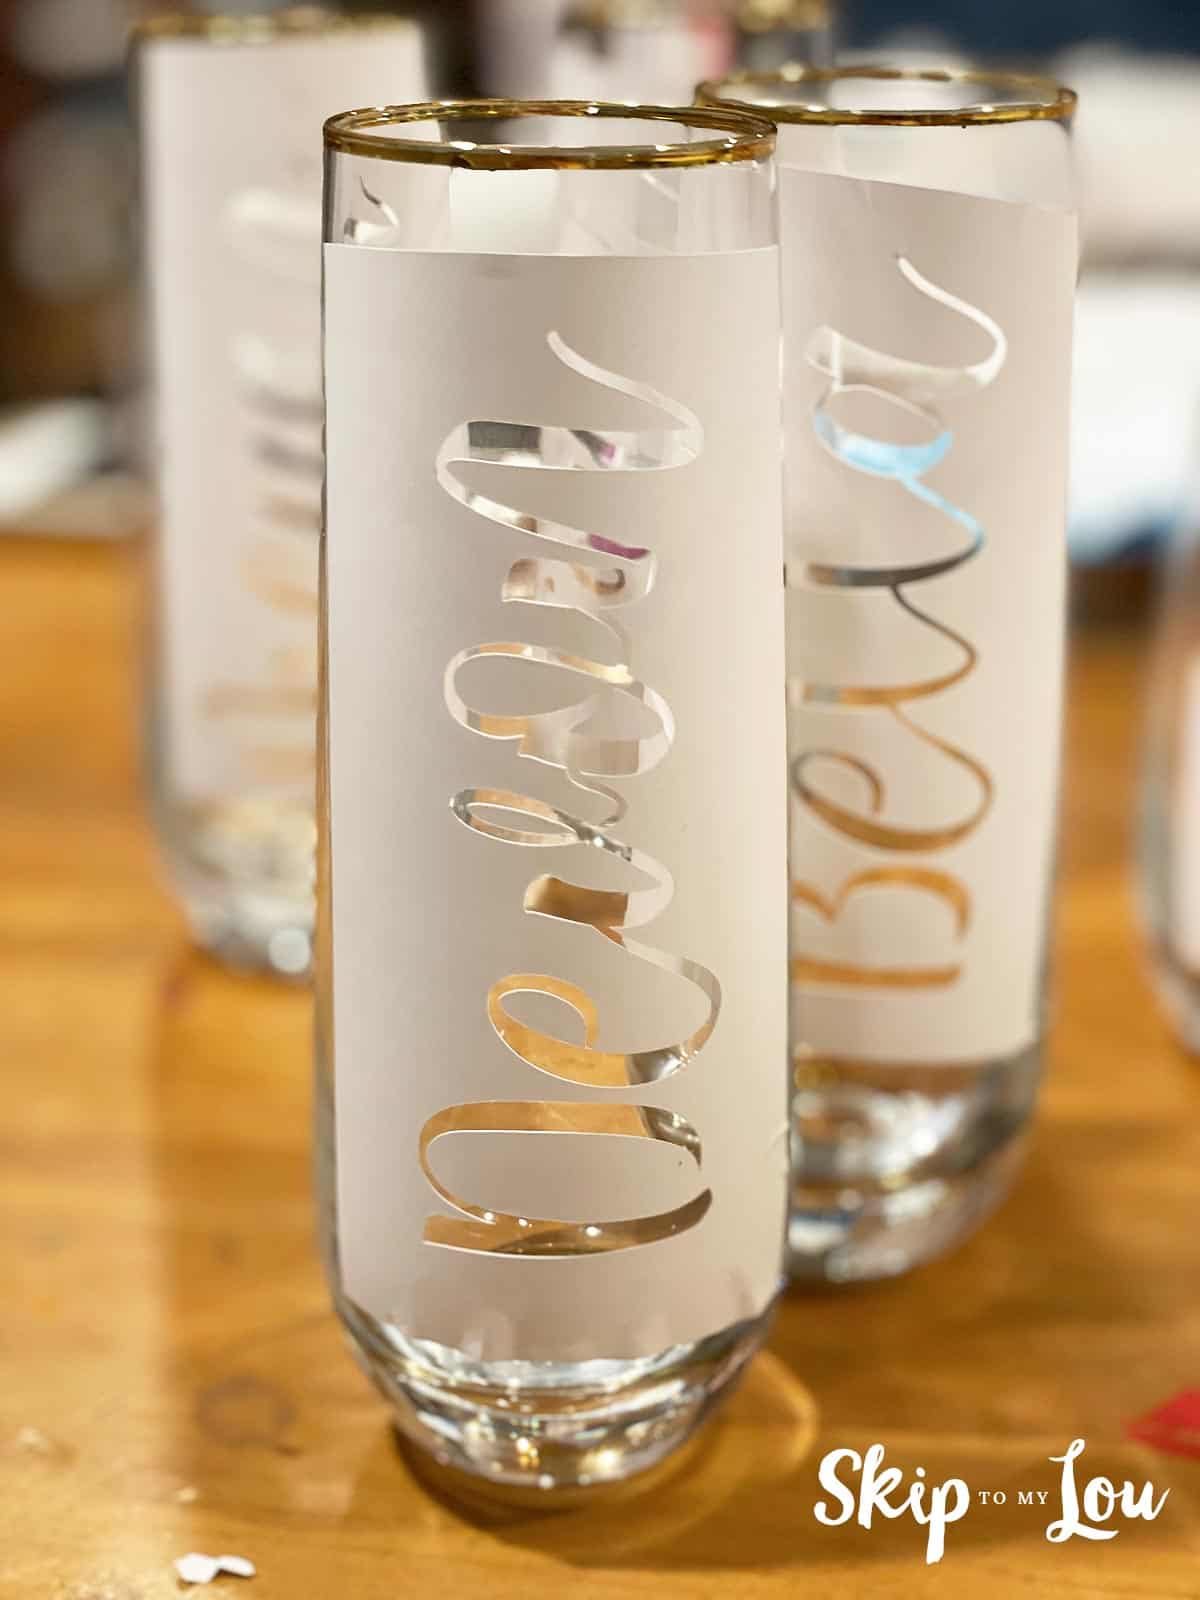
4. Cut the stencil design down to size using the grid lines. Peel the backing off the adhesive vinyl and smooth to remove any wrinkles or air bubbles. Remove any fingerprints at this time. Use painter’s tape or washi tape to secure the borders of your stencil at this time.
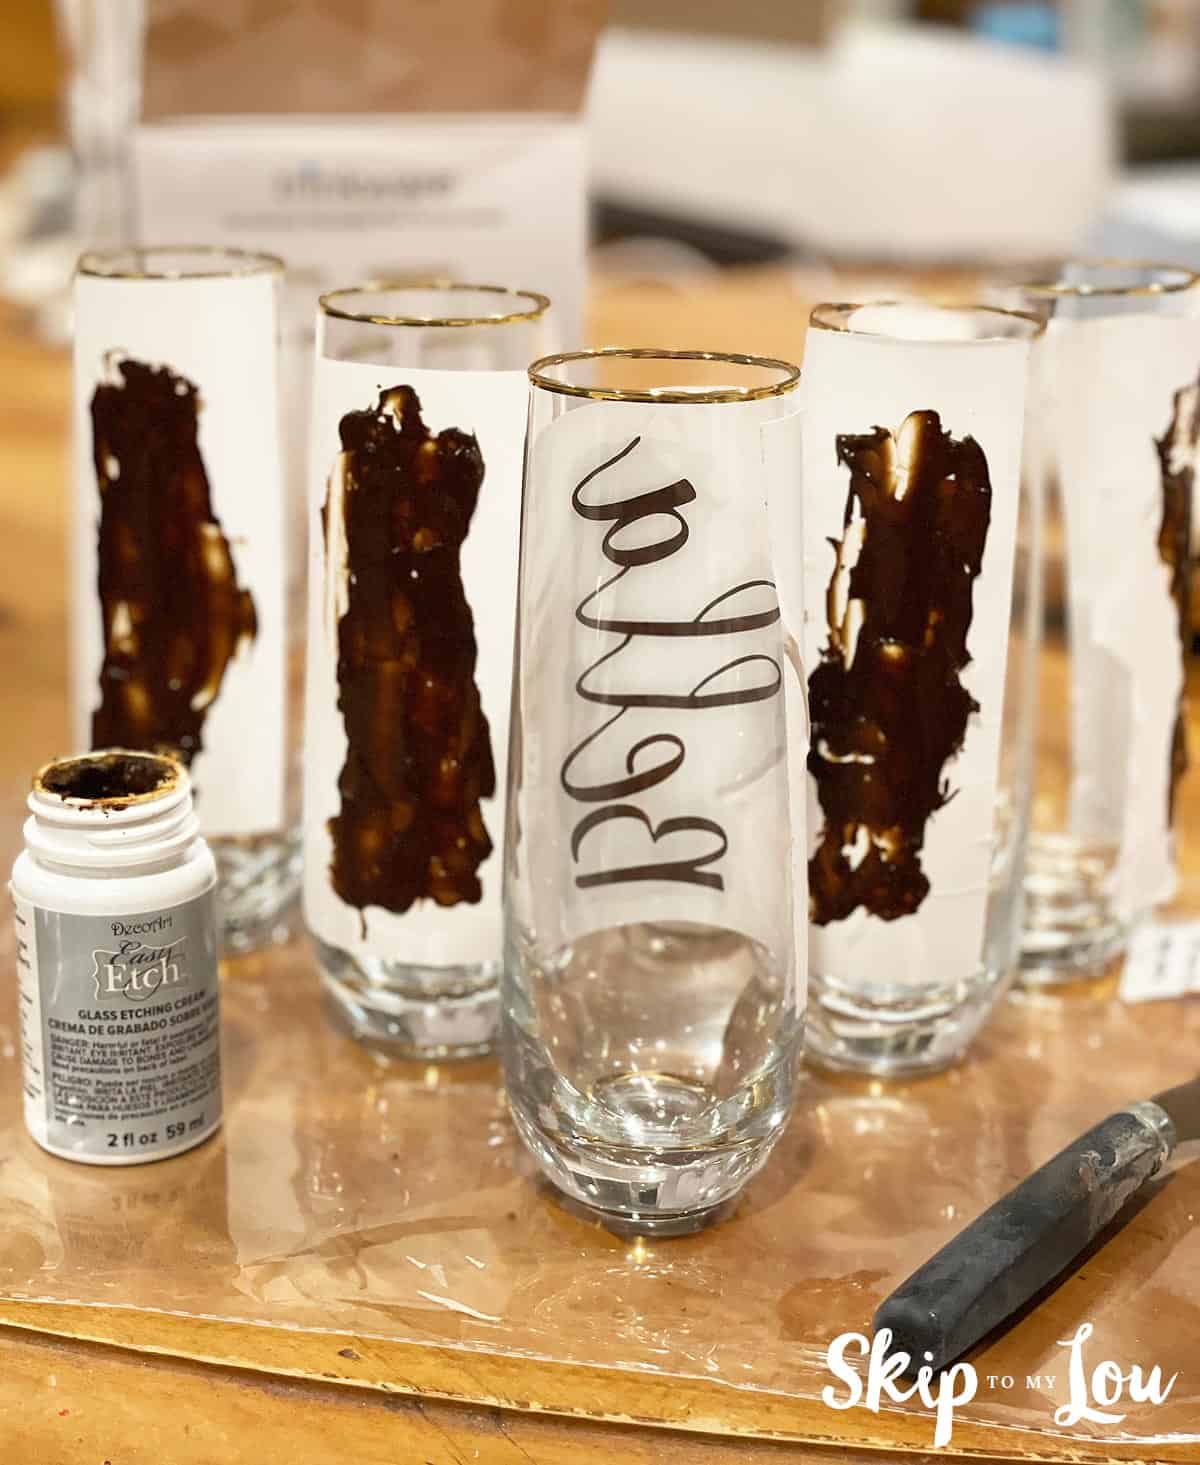
5. Wear gloves for this next step. Apply a thick layer of etching cream with a paintbrush or palette knife as shown below.
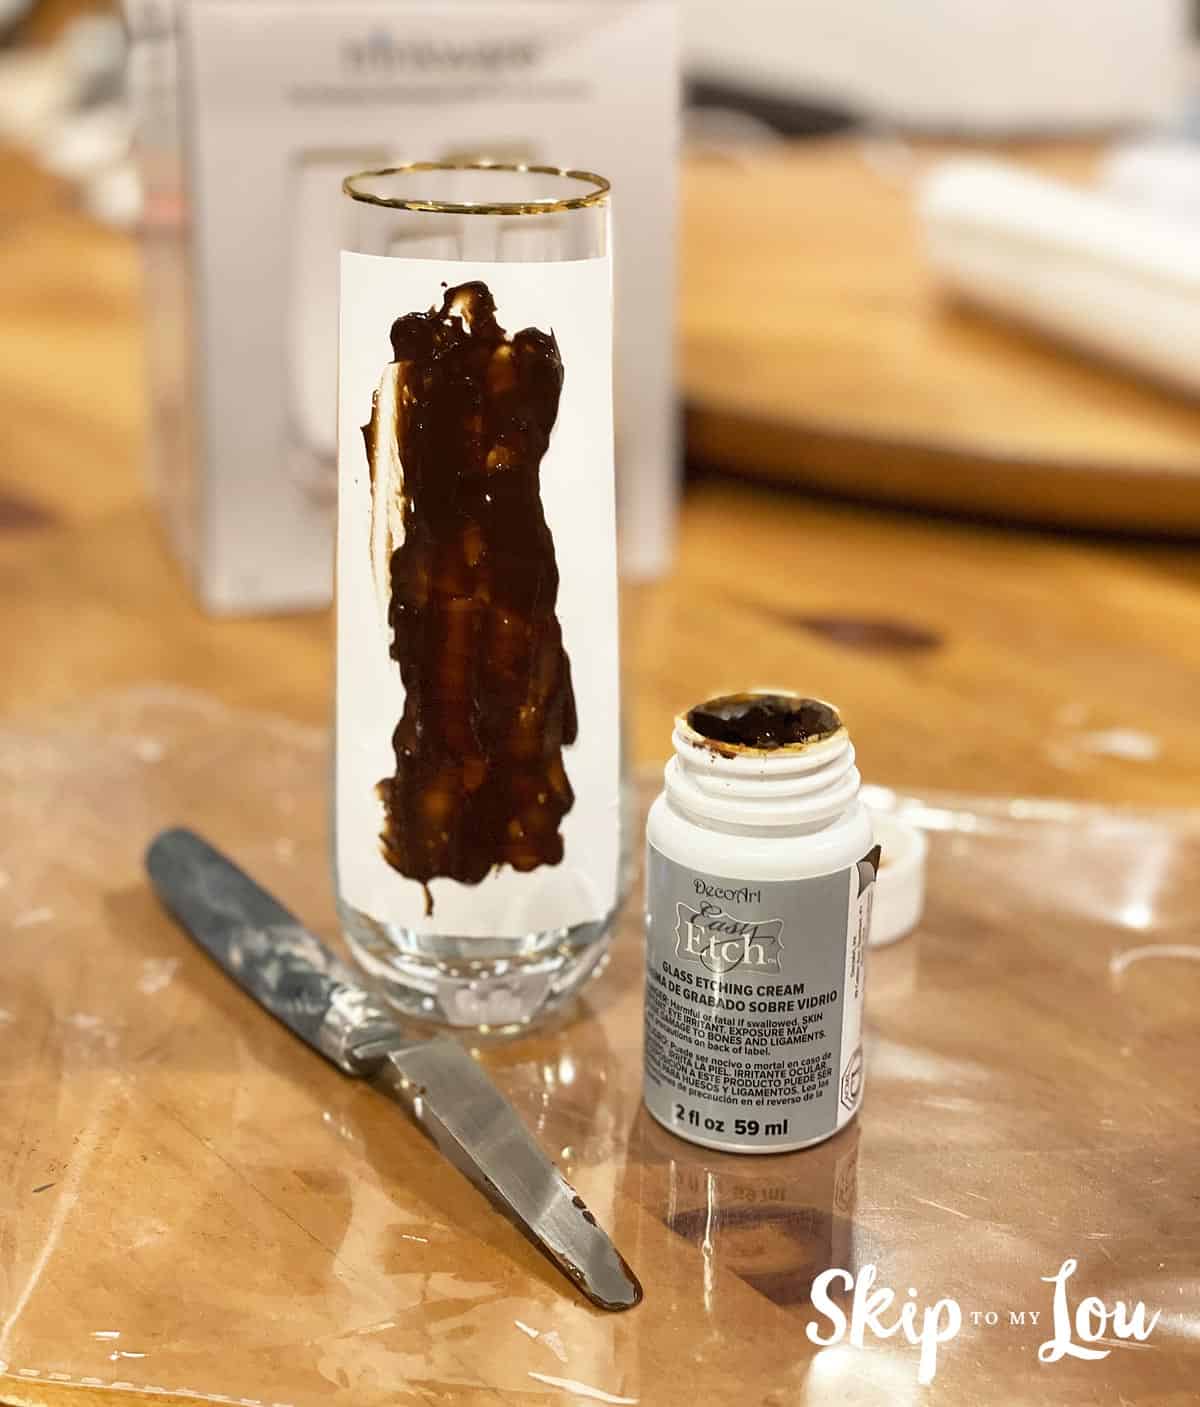
*Notice how the etching cream is only inside the stencil? Take care to quickly remove any stray cream so it will not etch glass outside the stencil.
6. Allow the etching cream to sit on the glass as directed on the etching cream container. When time is up, remove the etching cream with gloved hands. Most creams will have you remove the thick cream and put it back into the container. Yes, it is reusable! The rest of the cream on the glass is removed with warm water.

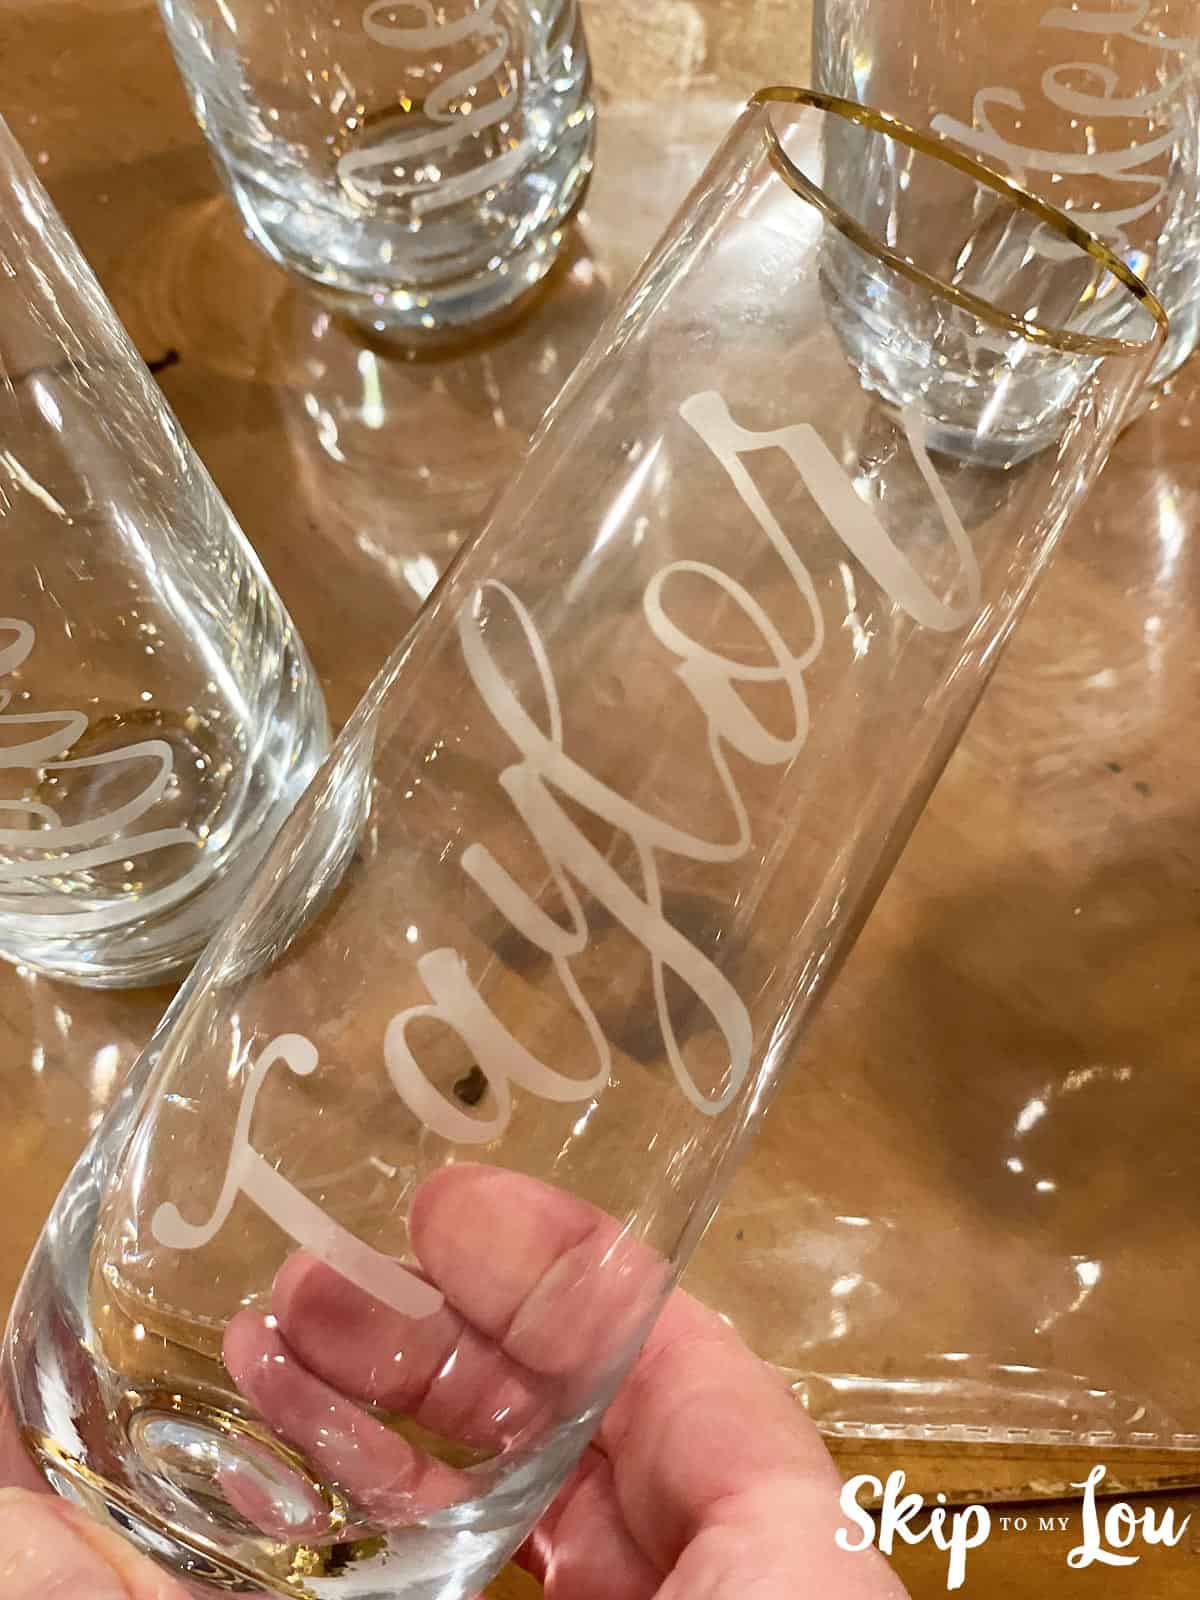
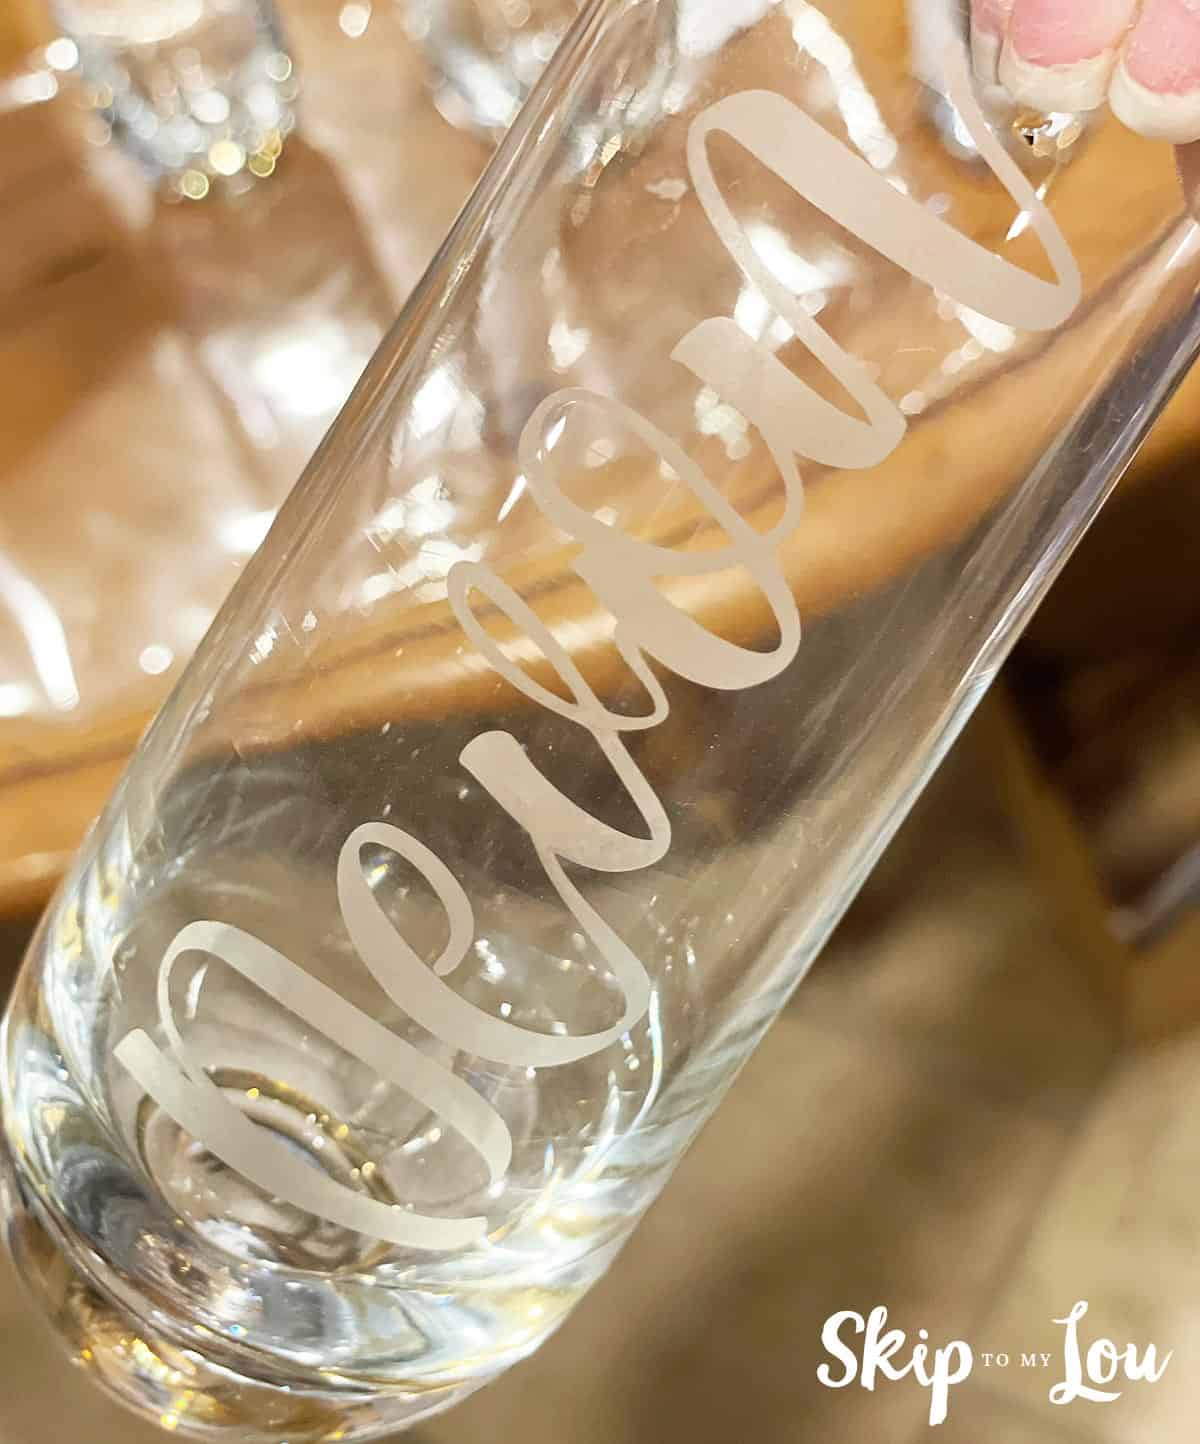
7. Clean your etched glass thoroughly before using. Read the instructions that came with your etching cream to make sure your new etched glass is dishwasher safe. And that’s it, your etched glass is all done!
More Gift Ideas
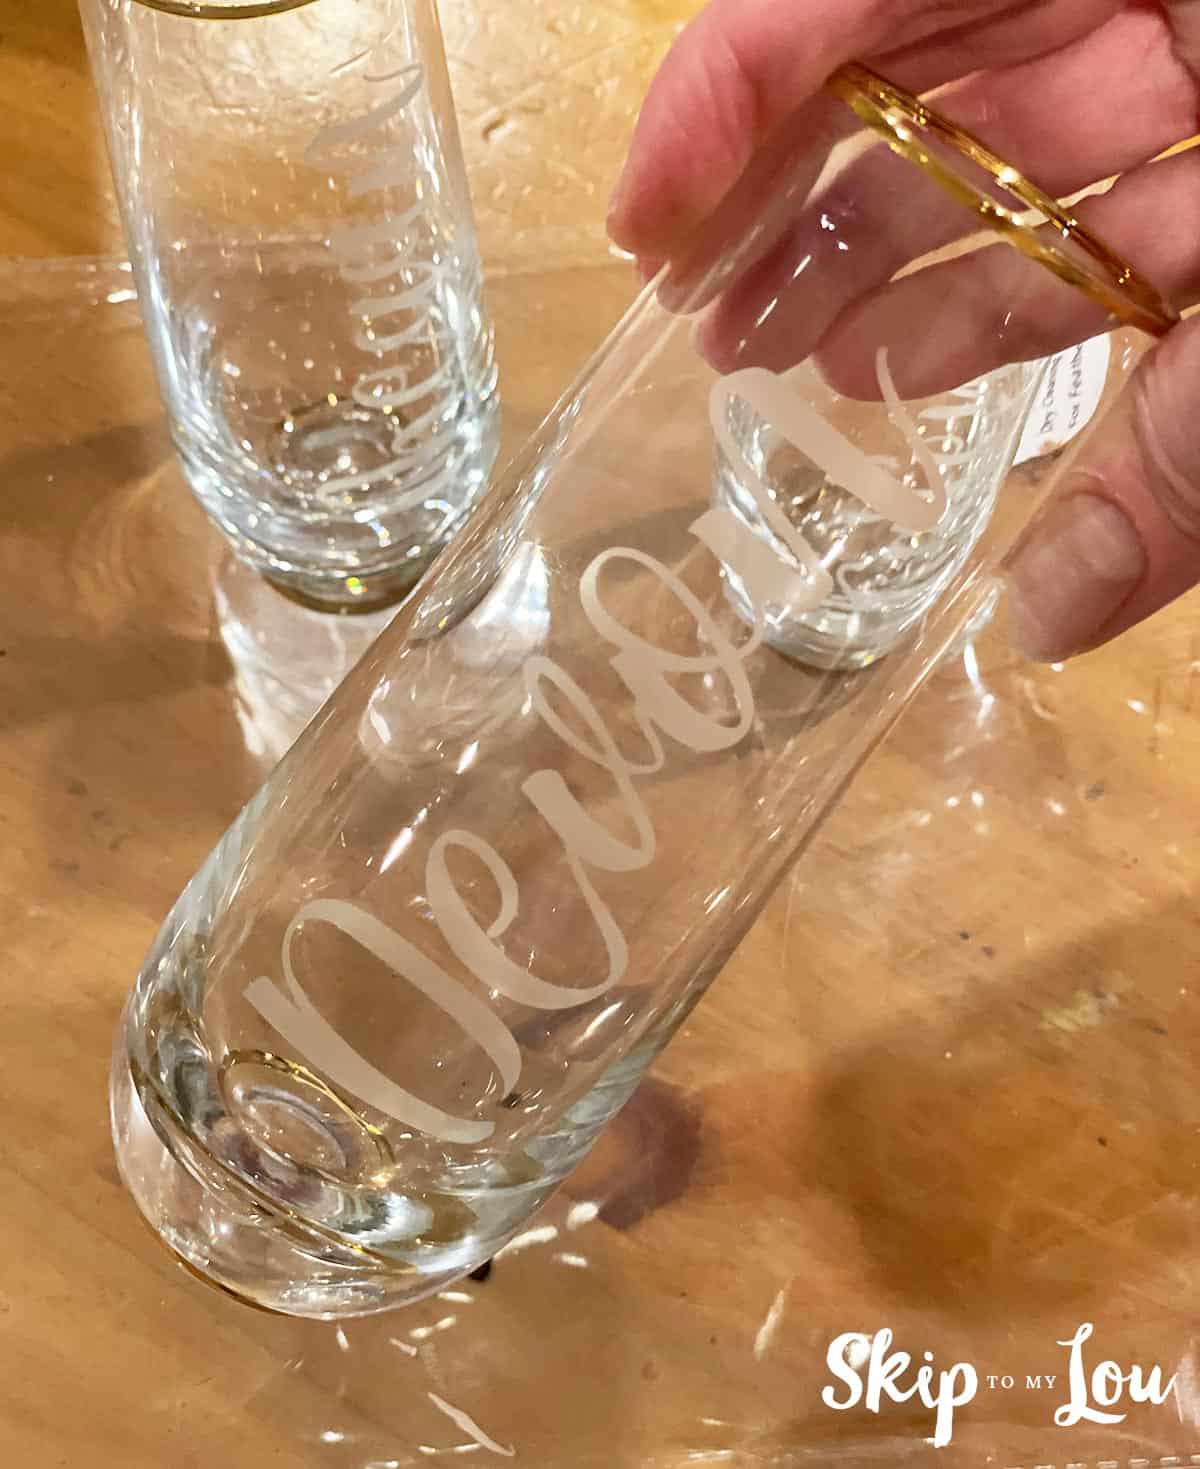
Thank you for stopping by to check out my latest DIY project. These etched glasses will be making their debut at a very special event, and I am so excited about how beautifully they turned out.
Leave me a comment below and let me know how you plan on using your etched glasses! To go along with etched glasses, here are more DIY projects for special occasions.
DIY Tiny Birthday Box includes instructions on how to print and assemble a mini-birthday banner and suggestions on what to include in a Tiny Birthday Box. An etched drinking glass would pair nicely with this!
I would love to keep you fully stocked with creative ideas, yummy recipes, fun crafts, and loads of free printables. Subscribe to Skip to my Lou to get new ideas delivered to your inbox. Follow me on Facebook, Pinterest, Twitter, and Instagram for all my latest updates.


