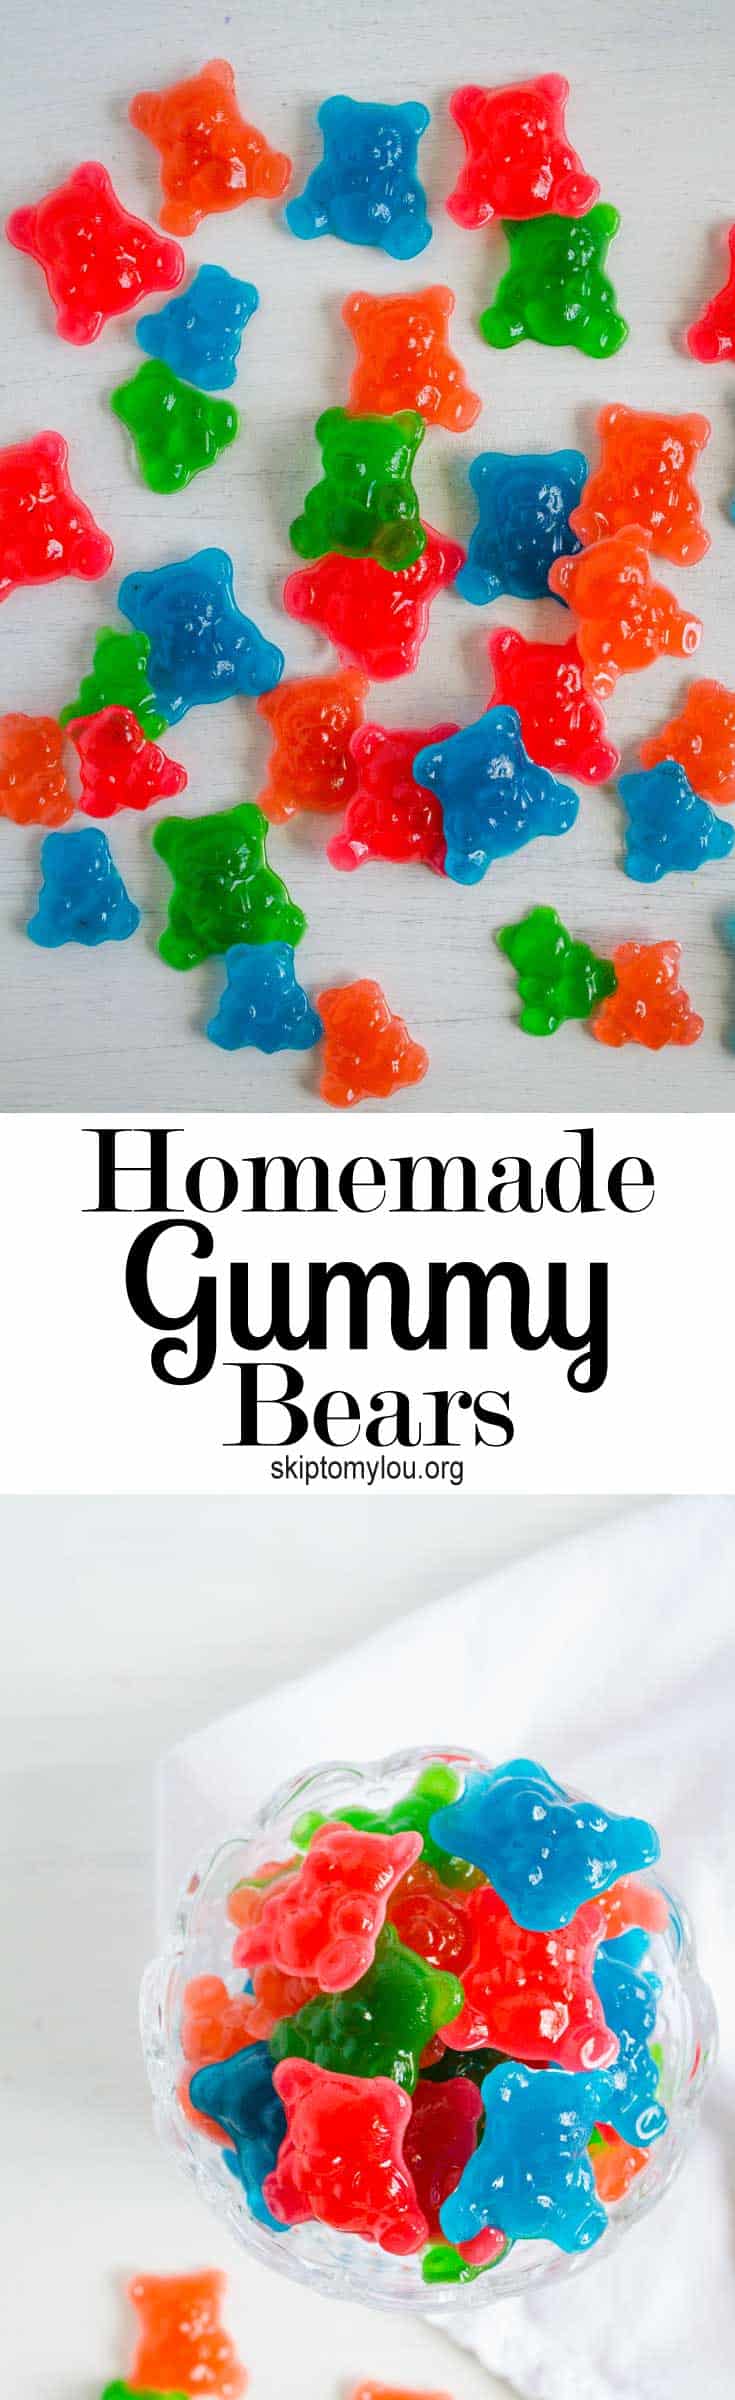
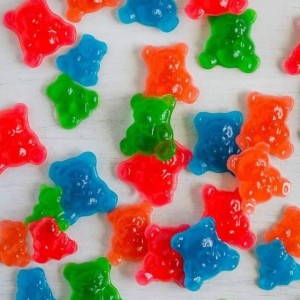
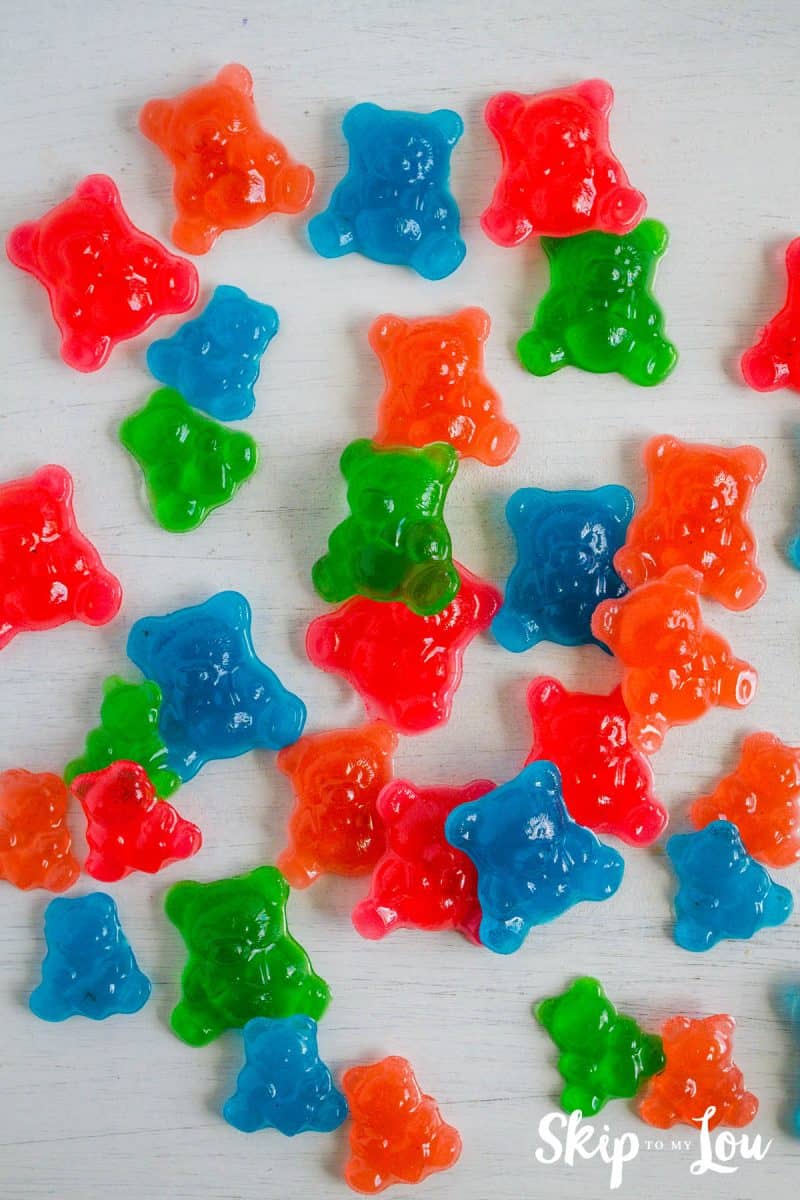
Homemade gummy candy is a fun kitchen project with kids that is surprisingly easy. If you like store-bought gummy candy, you’ll definitely want to learn how to make homemade gummy bears so that you will never be without this fun treat.
.
Thank you for stopping by today. Please check out more delicious recipes, comment, and let me know how your family liked this one!
If you need some projects that your family will enjoy, check out these science activities for kids. They are a great way to mix fun with learning!
When my boys head back to school Bella and I are always looking for fun projects! Yesterday, we decided that learning how to make gummy bears with jello would be a fun project with a sweet reward.
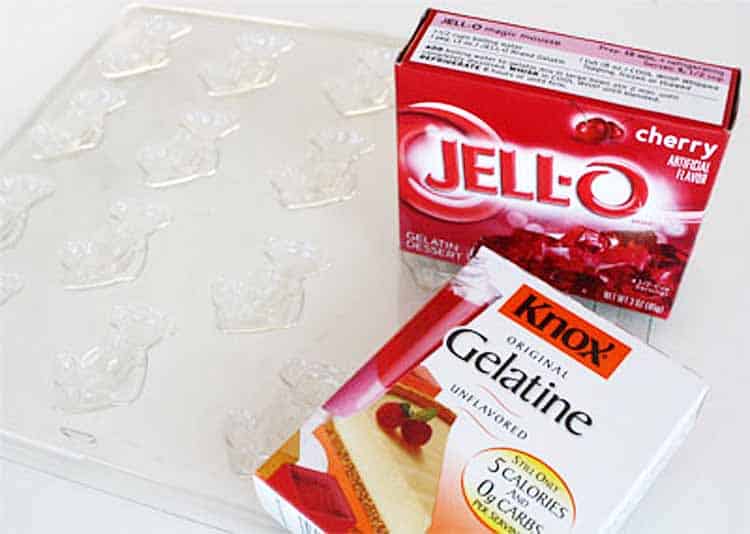
Supplies for Making Sweets at Home
It only takes a few ingredients to learn how to make gummies at home. Making candy with gelatin is easy and by using Jello you can pick your favorite flavors.
- 1 -3 oz box of flavored gelatin
- 2 – 1/4 oz packages of unflavored gelatin
- water
- candy molds (we used two candy gummy bear molds)
- droppers (optional, however it is an easy and fun way for kids to fill the molds)
Watch How to Make Gummy Bears
Gummy Candy Recipe
With a measuring cup, place 1/3 cup of water in a small sauce pan. Sprinkle the Jello and unflavored gelatin over the water. Let sit for 5-10 minutes. (If you like chewier gummi candy add in another packet of unflavored gelatin.)
Place saucepan over medium-low heat and stir until gelatin is dissolved about 2-5 minutes. When the mixture is liquid and all gelatin has dissolved, remove from heat. Let cool a minute and then pour into a container that is easy to pour from. I use a small ceramic creamer pitcher.
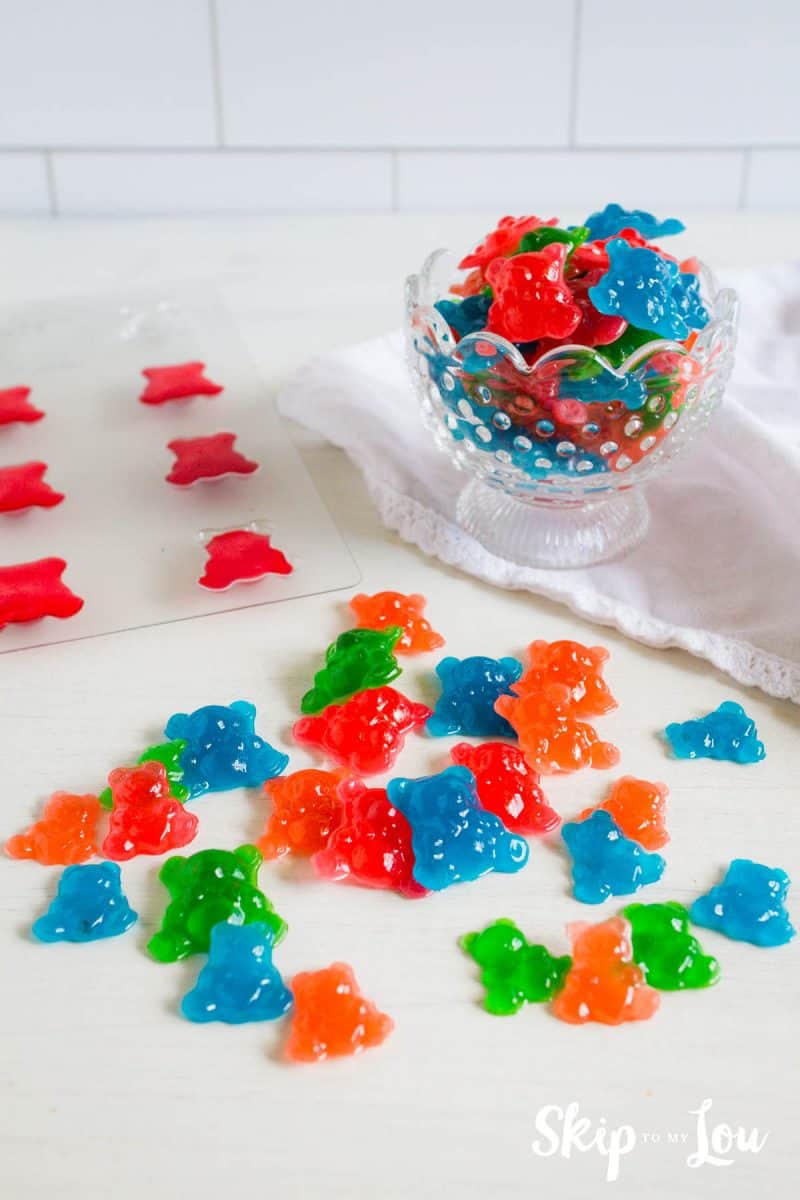
Fill molds with the gummy mixture. If you save the inside of the advent calendar for projects like do, it works perfectly! The sheet of star molds worked a bit better than the bears because they are a bit deeper. However, I must say we were just needing an activity so our standards were pretty low— we thought they all turned out great!
Allow to cool completely, about 20 minutes. They may be placed in a refrigerator for about 10 minutes if the kids are eager to eat these DIY gummy bears. Once cooled to room temperature, the backs can be lightly dusted with corn starch, if desired.
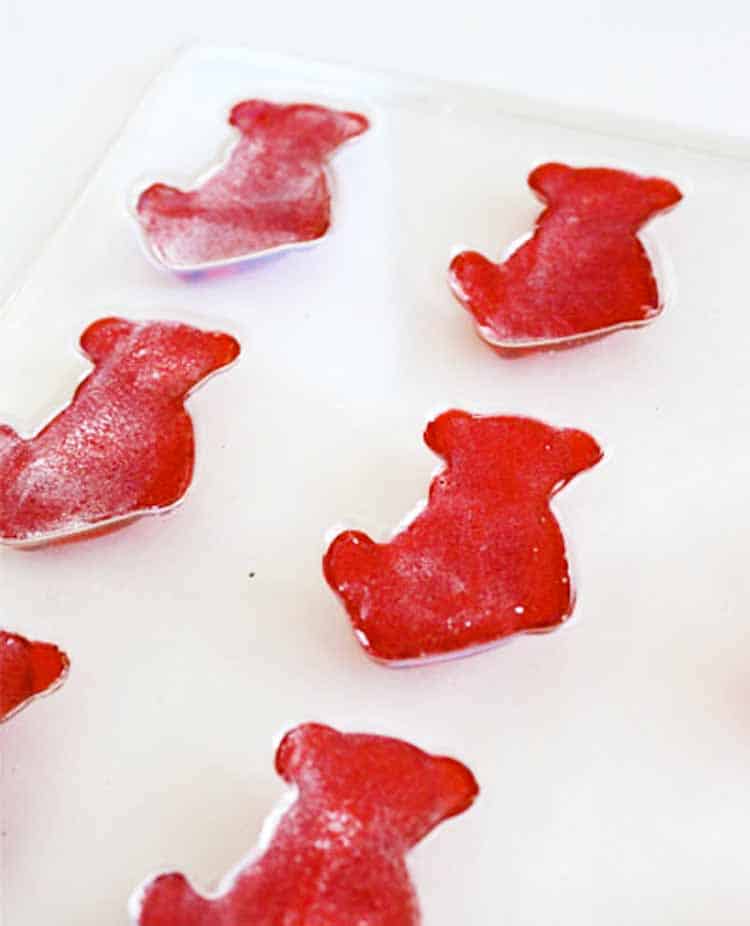
Peel the gummi candy out of the molds. Don’t be shy, you won’t hurt them when peeling them from the molds. There is no need to oil the molds!

Enjoy! I hope you’ll love this fun gummy recipe with jello!
Gummy Bear History
Did you know gummy bears were invented in 1920 by German candymaker 1920, Hans Riegel Sr. He had established a new candy company called Haribo. The name is made up of his name and hometown of Bonn (Hans Riegel Bonn).
What are Gummies Made of?
This homemade gummy bears recipe is naturally gluten-free because it is made with Jello and plain gelatin. There is no gluten in gelatin because gelatin is a collagen protein. However, gelatin is made from animals so this recipe is not vegan or plant based.
Homemade Gummy Bears Recipe
Gummy Candy Recipe
Equipment
- plastic or silcone candy molds
Ingredients
- 1 3 oz box of flavored gelatin
- 2 1/4 oz packages of unflavored gelatin
- 1/3 cup water
Instructions
- Place 1/3 cup of water in a small saucepan.
- Sprinkle the Jello and unflavored gelatin over the water. Let sit for 5 – 10 minutes. If you like chewier gummi candy add in another packet of unflavored gelatin.
- Place saucepan over medium heat and stir until gelatin is dissolved about 2-5 minutes. When the mixture is liquid and all gelatin has dissolved, remove from heat.
- Let mixture cool a minute and then pour into a container that is easy to pour from.
- Fill molds. There is no need to oil the molds!
- Allow to cool completely, about 20 minutes. They may be placed in a refrigerator for about 10 minutes if the kids are eager to eat these DIY gummy bears.
- Once cooled to room temperature, the backs can be lightly dusted with corn starch, if desired.
- Peel the gummi candy out of the molds. Don’t be shy, you won’t hurt them when peeling them from the molds.
RELATED: Make homemade stickers with the unused unflavored gelatin packets.
Notes: My son felt the blue ones weren’t flavorful enough, however, he liked the strawberry. Next time we will try to adjust the gummy bears recipe to 2 boxes of Jello, 3 packages of unflavored gelatin, and 1/2 cup of cold water to boost the flavors.
We are on the lookout for gummy worm silicone molds as the kids decided we need a couple of gummy options.! And, we also want to try sugar-free gelatin next time too. A lot of experimenting in our future. Now you know how to make gummy candy with jello! I hope you have as much fun as we did. Don’t forget you can make adjustments for your taste.
I would love to keep you fully stocked with creative ideas, yummy recipes, fun crafts, and loads of free printables. Subscribe to Skip to my Lou to get new ideas delivered to your inbox. Follow me on Facebook, Pinterest, Twitter, and Instagram for all my latest updates.
Thanks for stopping in! I love the idea for worms too! So fun!
Wooo! I tried this out tonight and the results were great. I’m not sure there’ll be any left in the morning. I used straws cut lengthwise as molds for worms. Thank you so much for this wonderful recipe!
Kathi, I kept mine in a Ziploc bag on the counter and they did just fine.
Will these need to be kept in the fridge or will they melt like jello if kept on the counter? Thanks, 🙂
I just tried this recipe, adding the extra packet of unflavored gelatin, and they are GREAT!!! I used strawberry banana jello, and they’re yummy!! Can’t wait to make more with different flavors!!
It’s critical that you consult with a doctor
that you know and trust. To work effectively, you will need to place granules
on the screen over a box to catch moisture. You must be careful
while removing the brick.
YIKES Christina, I don’t remember them being sour at all, in fact unflavored gelatin isn’t sour so I wonder what is causing this. Ideas anyone?
🙁 I tried making these twice today, first time I used less unflavored gelatin and they turned out very sour, the kid wouldn’t even eat them. Now I am trying what the other commenter mentioned about 1 pack of jello and 3 unflavored. I felt like I had to add sugar and more water and they still are sour. Tomorrow I will head to get more supplies and try it again. My son’s 1st birthday is going to be all gummy bears because his nick name is Gummy Bear.
Awww Thanks Tina!
I can’t wait to make these for my grandson (and his mom, aunt and uncle, etc…lol).! Of course, I’ll have to make a couple of “test batches” first to see how they taste, LOL!
I love your website – I’m getting ready to make a Halloween Trick or Treat bag for my 5 yr. old grandson using your tutorial for the simple reversable tote bag (with my brand new and very first sewing machine!). I want to send the Gummi Candy with the Trick or Treat bag to my grandson for a surprise Halloween gift.
I’m teaching myself how to sew and your tutorials are so easy to follow – THANK YOU!! You are very creative, so please keep up the good work!
We just made these gummies today. We put them in heart molds. They were delicious and beautiful! Thank you so much for the recipe!
We just made these, one pan with strawberry, the other with lime jello. Both we very flavorful!! Though we like an even softer gummy, so next time i will cut the plain gelatine amount in half. Otherwise they set in the freezer in 10 minutes and peeled nicely from the molds.
Hey I am so grateful I found your weblog, I really found you by error, while
I was browsing on Google for something else, Anyhow I
am here now and would just like to say cheers for a fantastic
post and a all round exciting blog (I also love the theme/design), I
don_t have time to read it all at the minute but I have
book-marked it and also included your RSS feeds, so when I have time
I will be back to read a lot more, Please do keep
up the great jo.
Hi
I like the valentines cake