This easy hot pad sewing pattern and tutorial can be whipped up in just mintues. In 5 simple steps, you can make a great diy hot pad gift or something pretty for your own kitchen. This homemade hot pad is a great scrap buster or only needs 2 fat quarters and is a wonderful beginner sewing project.
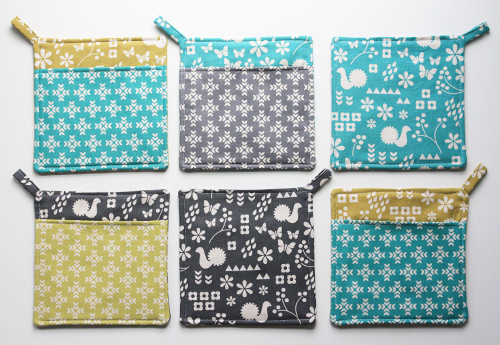
I love sewing hot pads in beautiful fabrics and you can also make a matching apron and child’s chef hat to complete the gift. Homemade gifts are certainly treasured!
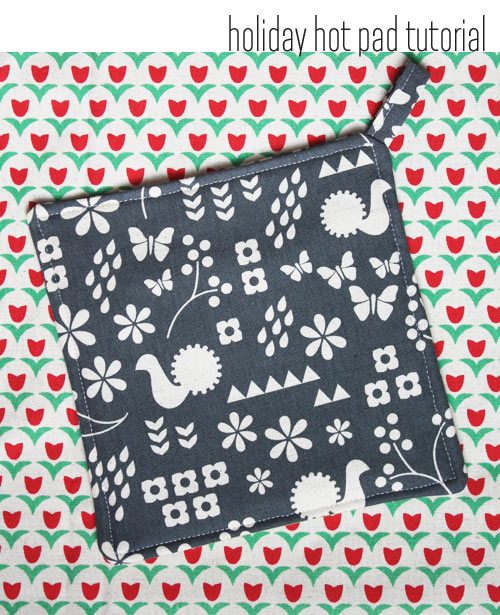
When I’m not running around feeling stressed, I love baking for the holidays. And I think it’s perfect to pair a gift for the kitchen with a recipe or homemade goodies. So today I’ll tell you how I make this quick and easy diy hotpad, perfect for simple hostess, teacher or family gifts.
The heat resistant hot pad features a pocket in the back to slip your hand into when grabbing burned cakes from the oven! And there’s a hook to hang it up and keep it from catching on fire!
How to Make a Hot Pad
Supplies (for one hot pad)
- 2 fat quarters (main and contrasting pocket fabric) Make this a scrap busting project by sewing fabric scraps together to make 8 1/2 squares.
- 1/2 yard batting
- matching thread
- scissors
- sewing machine
- main fabric 8 1/2″ x 8 1/2″, cut 2
- main fabric 5″ x 2″
- contrasting fabric 8 1/2″ x 13″
- 8 1/2″ x 8 1/2″, cut 2
- 6 1/2″ x 8 1/2″
With the 5″ x 2″ piece of fabric, fold and press each long side 1/2″ towards the wrong side of the fabric. Fold the piece in half lengthwise and press again. Topstitch along these folds, 1/8″ from the edge. Fold this piece in half to make a loop, then baste it to the corner of the front 8 1/2″ square piece (on the right side of the fabric). The loop should be placed at a 45-degree angle with the raw edges of the loop in the corner.
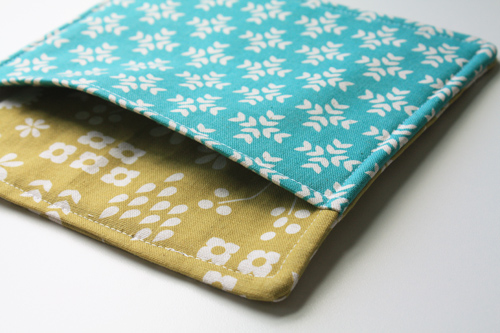
Step 3. Make the pocket.
Fold the 8 1/2″ x 13″ piece of fabric in half along the width, wrong sides together, and press at the fold. Insert the smaller batting piece centered in between the layers. Topstitch along the folded edge.
Step 4. Put it together.
Stack your fabric pieces in the following order: 8 1/2″ batting, front piece with loop (right side of the fabric facing up), folded pocket piece with raw edges aligned, and finally the other 8 1/2″ piece with the right side of the fabric down. Pin and sew around the edges with a 1/4″ seam allowance, leaving a 3″-4″ opening at the top for turning in the next step.
Step 5. Trim and finish.
Clip the corners and trim any excess fabric and batting. Turn the hot pad right sides out, by pulling it through the opening. Push out the corners. Pin the remaining opening closed and topstitch around the entire perimeter, just over a 1/8″ from the edge.
Look at that, now you know how to make homemade hot pads and they are beautiful! Such a stylish way to grab those hot pans.
Ellen is a blogger at The Long Thread, writer of 1, 2, 3 Sew and 1, 2, 3 Quilt (affiliate links) from Chronicle Books, and a fabric designer for the Japanese company Kokka.

More Hot Pads
- If you prefer oven mitts here is a quick and easy oven mitt pattern. I have included a free printable template and share a handy trick!
- Quilted Hot Pad
- Turn an oven mitt into a fun teacher gift.
I would love to keep you fully stocked with creative ideas, yummy recipes, fun crafts, and loads of free printables. Subscribe to Skip to my Lou to get new ideas delivered to your inbox. Follow me on Facebook, Pinterest, Twitter, and Instagram for all my latest updates.


These are so cute and would make awesome gifts! I love the patterns you chose!
Paige
I only see your instructions stating ONCE to use the 8/1/2 inch batting as you stack….or do you use both at the same time when stacking?????thanks for pattern think they will make nice “neighbor” gifts at the holidays stuffed with goodies…..
Love these! These will make great gifts!
Now this looks like a project I could do-thanks for sharing!
This is a great idea! I was looking for a way to contact you but didn’t see an e-mail link or address. Did I overlook it? Thanks.
A super project!
Thanks – these will be great little gifts.