My favorite kind of crafts are the easy and cute kind! The crafts where I already have the supplies on hand and add character and purpose to my home. I’m Amy from My Name Is Snickerdoodle and I am thrilled to share something crafty here at Skip To My Lou!
How adorable is it to organize with fabric covered cans?! Can you guess what the base is? Basic tin cans from your pantry! I’ve seen cute paper covered versions before, but never fabric covered ones. Paper is great, but I find that fabric is actually easier to use when trying to wrap it around something curved.
Once I gathered my materials it literally took me minutes to make each one. Another favorite aspect of my kind of crafting!
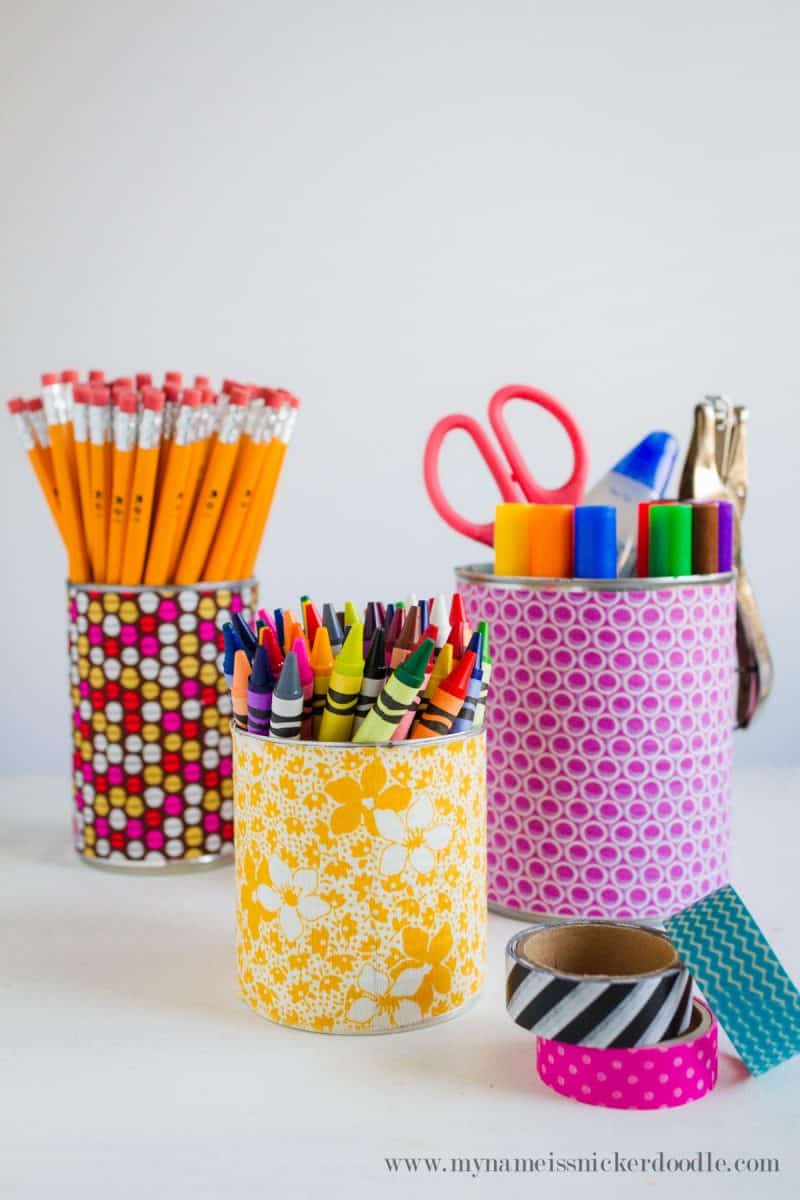
Fabric covered cans are super useful when trying to organize in your office, bathroom or bedroom! I could even some of these on my kitchen counter. How perfect would they be for a fun teacher’s gift…school is starting soon if it hasn’t already!

Fabric Covered Cans Supplies
- Tin cans
- Cotton Fabric
- Pen
- Sharp Scissors
- Mod Podge
- Foam Brush
How to make fabric covered Cans
Using a safe edge can opener, remove one lid from a tin, empty contents and wash out with soap and warm water. Dry completely.
Lay out fabric, wrong side up, and measure the width of the can onto the fabric. Lightly mark it with a pen. For standard 14 oz cans the width is 4 ” and standard 28 oz cans are 4 1/4″.
Use a ruler to mark a straight line of the entire width and long enough that it will cover the entire can. Skip this step and the next if you are comfortable using a rotary cutter and mat to measure and cut.
Cut along the pen line with scissors.
Using a foam brush to paint a little mod podge onto the can. I like to work in 2″ sections along the width of the can.
Lay the edge of the fabric over the painted on mod podge and center onto the can. Lightly press to make sure it sticks. Too much mod podge will make it slide around so make sure to use it in moderation.
Keep working around the can until you’ve reached the first edge. Over lap it a little. Trim off any excess.
Let it dry for 10 minutes.
If you plan to use these fabric covered cans in a bathroom or kitchen, I would add a thin layer of the top of the entire fabric to seal it in an prevent stains.
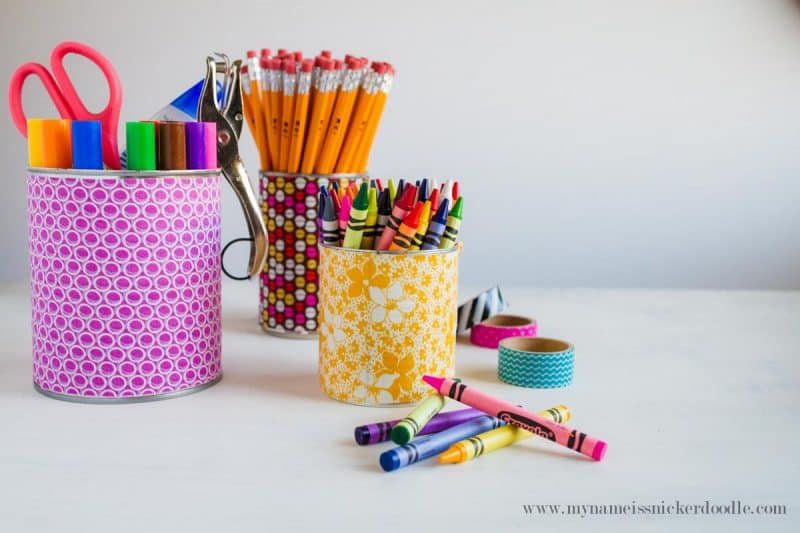
Any cotton fabric you have on hand will work, but it’s a little more fun to find something that coordinates or even matches the room you are trying to use them in. I thought the above went really well together. Don’t be afraid to mix patterns together!
Now you are ready to organize!
I have three little boys who thought these were fun so I plan on making more with boy friendly fabrics. Can you see all the rocks and legos they will put in these? How fun!
Whatever you use them for, just make sure you have fun with it!
Make sure to check out my tutorial for my kid friendly CHORE CHART and for two of my favorite recipes NO BAKE CHEESECAKE and $25,000 COOKIES!


Hey! I’m Amy the creator of My Name Is Snickerdoodle! It’s a sweet little corner of the internet where I love to share all my recipes, crafts, and adventures in being a mom of three little boys! My awesome husband helps out on my site (more than he cares to admit!) and I couldn’t do all of this without him. I pretend that I am super organized, love to bake cookies whenever I think of chocolate (frequently), and dream of a day where my house will totally stay clean for longer than 3 1/2 minutes.
Follow me here…
Facebook | Instagram | Pinterest